| | |
How To ... Fit a Car Stereo
I recently fitted a new stereo to Bessie our convertible - the old mono AM radio with no aerial just wasn't doing the job! So, I went and bought a flash new CD/tuner from a dodgy-looking guy in a white van at the local car-boot sale. Then I bought and a set of 5" flush-mount speakers from the local car accessories shop. I ended up with a JVC single CD head unit, 4x35 watts per channel, and a pair of Kenwood 3-way 150w speakers. Not bad for £125 all inclusive.
Finding a location for the speakers in your Minor is no problem. If you have box speakers then your options are either on the rear parcel shelf facing forward (if you have a saloon and the speakers are narrow enough) or slung underneath the dashboard where they block access to the parcel shelf. Flush-mount speakers can go in the doors, the base of the rear seat or in the footwell/parcel shelf side-panels. For a quick & easy and tidy installation I prefer to use 5" flush-mount speakers fitted into the side-panels at either end of the parcel shelf.
Although the Minor doesn't have a dedicated place in the dashboard for a stereo it is nevertheless not lacking in locations where a head unit can be fitted. Under the dashboard, set into the glovebox door or in a pod under the parcel shelf for instance, but my favourite is hidden away inside the passenger glovebox.
Choosing Speakers
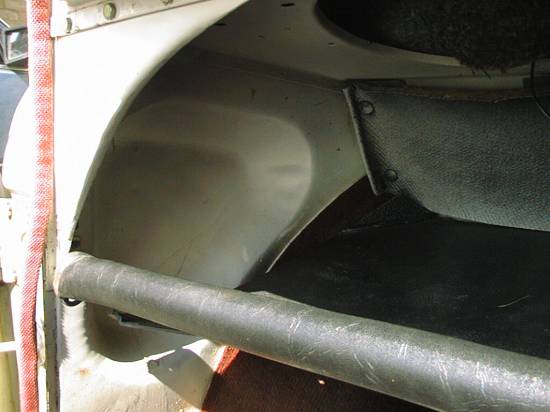
The recess behind the side panels could have been designed for speakers, although I somehow doubt that Alec Issigonis' design skills went quite as far as predicting the future of in-car entertainment. The recess is deep enough to take most speaker cones and is wide enough for very respectable speaker diameters. A 5" round speaker is ideal, and although I haven't tried it myself, you should be able to get up to perhaps up to a 7" speaker in there or even a 6"x9", providing the cone depth is no more than about 45-50mm.
James Hallet wrote in to tell me that he tried several different sizes of speaker, here's what he had to say."I measured the depth of the space on my 1968 Traveller and find it is 1.75" or about 45mm, and if you added to that the thickness of scuttle panel, this bings the depth up to about 48mm. The Kenwood speakers in the article are apparently 1.75" deep (from specs on their web site), explaining why they fit so nicely. I started off trying to fit 6"x9" speakers which were 2.5" deep, then tried 5"x7" at 2.3" deep - neither would fit, beacause of the depth, but ALSO because the wider speakers push the back of the magnet up too high where it hits the beveled top edge of the recess. I have opted for 5.25" speakers, 2" deep and will make up the difference by either mounting .25" plywood behind the scuttle panels or by using an adapter ring to bring the speaker out on the scuttle panel. Pheww! In summary, a shallow 5.25" speaker is probably all the parcel shelf scuttles can handle, although a very shallow 6" just might work as well."
Experience counts! Personally, I wouldn't bother with anything smaller than a 5" speaker since due to the less than optimum location there will be some loss of sound quality - we're talking simple installation here - no speaker pods allowed!.
Fitting SpeakersStep 1Remove the side panels. If you have a parcel shelf, don't remove the entire thing, it's a pig to get back in! You only need to remove the support bolt from each end and the side panel can be slid out. Cars without parcel shelves may have other methods of attachment but in any case it should be a simple matter to remove the panel.
Step 2Mark onto the side panels where the speaker is going to go with a pencil or ballpoint pen. I used a template supplied with the speakers to get everything lined up in the right place. With a 5" speaker you will need to leave about 30mm of panel from the top edge and about 50mm of panel from the parcel shelf bolt hole. This is to ensure that the speaker cone lines up with the recess behind and allows enough space for the parcel shelf bracket. If you don't have a template then simply make the hole the same size as the widest part of the speaker cone leaving enough panel for the screw holes.
Step 3The side panels are made of thick card and can be cut with a builders 'Stanley' knife but for accuracy I prefer to use a saw of some sort. I used a modellers knife to start the cut and then finished off with an old hacksaw blade.
Step 4Fit the speaker into the hole and line it up as required. Mark the location of the mounting holes and remove the speaker. Drill holes for the mounting screws. I used a wood drill bit as a twist drill and made the holes by hand rather than use a power drill. Refit the speaker to the hole and screw it into place. You may have been provided with self tapping screws and gripping washers - if not, screw-head bolts and nuts will do. Connect speaker cables.
Step 5Refit the side-panel, complete with speaker, again taking care not to crease the panel. This may require a bit more fiddling to get past the parcel shelf. Re-attach the parcel shelf. Make sure that the speaker cables are routed out from the back edge of the panel so they can be routed up behind the dashboard. Run the cables from the driver's side up above the horizontal panel under the dashboard and then across to the passenger side going behind the speedometer. For simplicity's sake I simply poked the speaker cables down into the glovebox through the slit in the top of the 'box.
Fitting the StereoStep 1Disconnect the battery. Run a power wire (it should be red but I only had a brown one...) from a spare connector on the fuse box (from the side opposite to the cable coming from the battery, this ensures the stereo is protected by a fuse) through a convenient hole in the bulkhead. Run the wire in behind the dashboard and into the glovebox as per the speaker cables.
Step 2The stereo I'm fitting earths itself through the casing of the stereo so no earth wire is required since the brackets I'm using bolt to both the stereo casing and the body of the car (via the glovebox door hinges). When the stereo does require an external earth strap then I usually end up using one of the screws underneath the front edge of the dashboard (used for the glovebox door hinges) and run the wire through one of the holes in the flange. Run the earth wire to the glovebox as per the others.
Step 3
If you want to listen to the radio then you'll need a aerial. There are several options to choose from - which one you choose depends on your own preference and whether you're willing to drill holes in your car. Roof/gutter-mounted aerials usually clamp on to the guttering but leave the wiring exposed and tend to look untidy. Guard-mounted aerials require drilling a hole but do look a lot tidier. If you've got the headlining of the car out already then a roof-mounted stubby aerial can look very smart. Alternatively you could opt for a wire coat hanger - bend the hook straight, poke it into the aerial lead and tape it in place under the dashboard. It's cheap and it works a treat!
Step 4Most car stereos have pre-tapped screw holes in the side of the casing to accept mounting screws. I found some L-shaped mounting brackets, sold in pairs, at the same store I bought the speakers from which I could screw to the side of the stereo. For this installation I took the quick and easy route of using a pair of brackets on either side and simply screwing them in place using the existing glovebox door hinge screws. In the past I have made up wooden face plates for the stereo to sit in which follow the shape of the inside of the glovebox. Set back by about 2", the faceplate provides both support and extra security. In this case the bracketss allow the position of the stereo in the glovebox to be adjusted both side-to-side and front to back - but I admit that it's not pretty.
Step 5So, with all the wires routed into the glovebox and the stereo mounting brackets set up, connect the wires to the appropriate connections on the stereo. Double-check that the power wire is not exposed - you don't want a fry-up under the dashboard! Screw/bolt the stereo in place and reconnect the battery. All going well you should now have a fully functioning car stereo ready to blast the eardrums of your passengers. :)
| |