
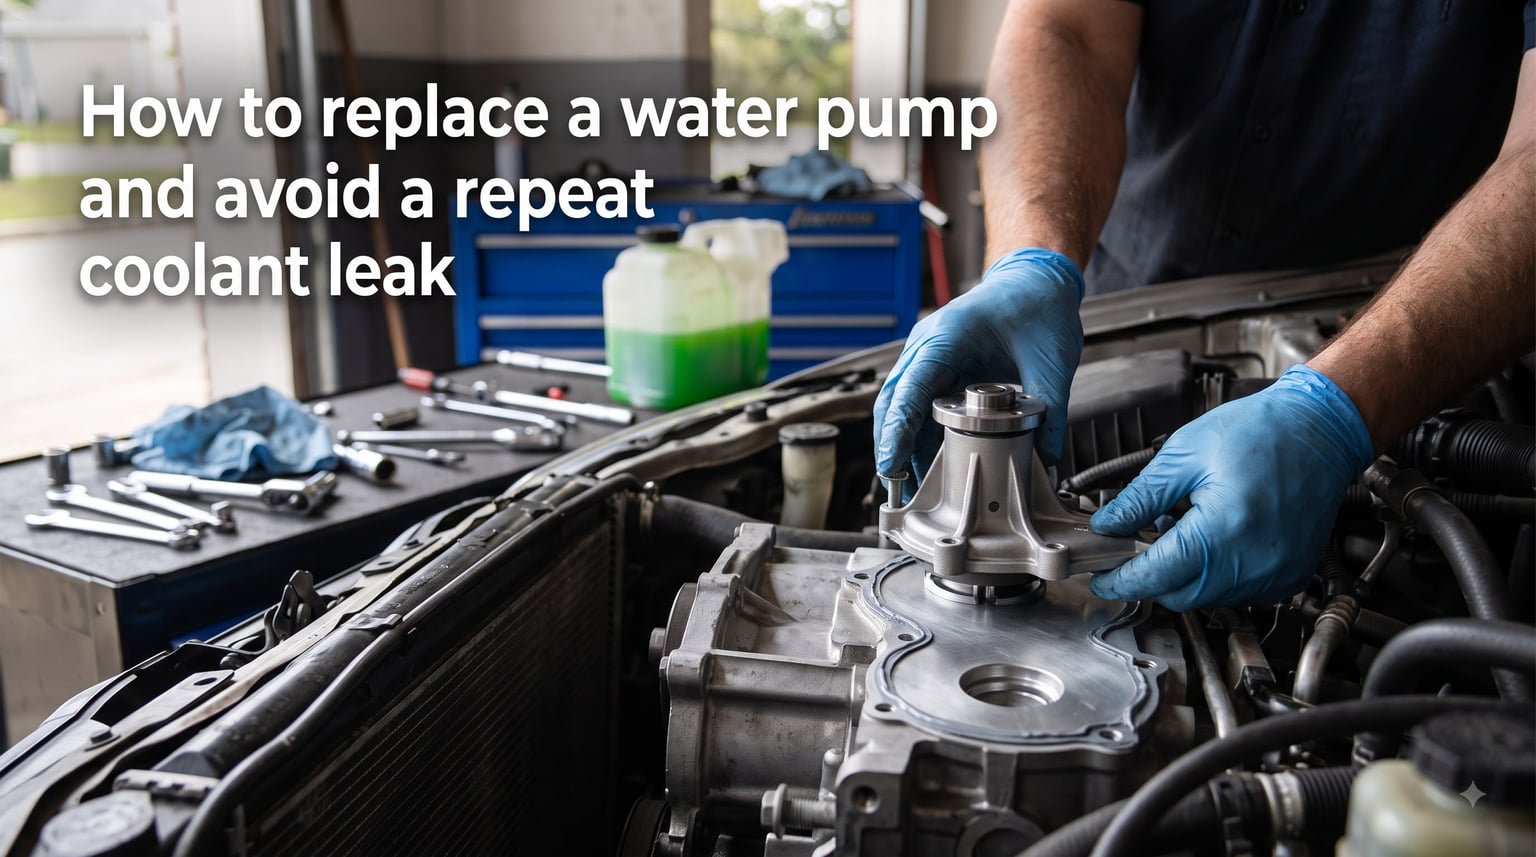
I have replaced a lot of water pumps over the years, and the single most common thing I hear from frustrated DIYers is this: “I just replaced the pump, so why is it leaking coolant again?” If that sounds familiar, the problem is rarely the new pump. It is almost always something that happened before, during, or right after the install. The good news is that every one of those causes is fixable once you know what to look for.
This guide walks you through how to replace a water pump and avoid a repeat coolant leak from start to finish. I will cover the step-by-step process, but more importantly, I will explain the small mistakes that turn a one-hour fix into a three-month headache. Whether you are doing this in your driveway or just trying to understand what your mechanic should be doing, you are in the right place.
Table of Contents
What Does a Water Pump Do and Why Do Coolant Leaks Return After Replacement?
A water pump is the heart of your cooling system. It uses a small impeller, usually spun by the serpentine belt or timing belt, to push coolant through the engine block, around the cylinders, and into the radiator. Coolant absorbs heat as it flows, releases that heat through the radiator, and returns to do it again. Without a working pump, coolant cannot move, and your engine will overheat in minutes.
Most water pumps fail in one of three ways: the mechanical seal wears out and lets coolant escape, the bearing seizes and stops the impeller, or the housing corrodes and cracks. When you replace the pump, you are swapping out all three of those components at once, which is why the repair feels so comprehensive.
So why do coolant leaks return after replacement? In my experience, repeat leaks come from five specific causes:
Leftover gasket material or debris on the mounting surface that prevents a clean seal.
Too much or wrong type of sealant that squeezes into the cooling passages and either blocks flow or breaks down.
Dry rotation of the new pump before the system is filled, which destroys the mechanical seal within seconds.
Trapped air pockets after refilling that create hot spots and stress the new seal.
Wrong coolant mixture or contaminated coolant that attacks the new seals and metal components.
Every one of those causes is covered in detail below. If you take the time to handle them correctly, a fresh water pump should last 60,000 to 100,000 miles without a single drip.
How Do You Know Your Water Pump Is Failing?
Before you tear into a multi-hour job, confirm the pump is actually the source of your leak. A lot of cooling system problems look like a water pump but live somewhere else entirely. Here are the most reliable signs the pump itself is at fault.
The classic symptom is coolant pooling under the front of the engine, usually near the crankshaft pulley. The pump sits low on the engine block, so gravity carries any leak straight down. You may also notice a sweet, syrup-like smell from the coolant dripping onto hot components.
Look for the weep hole. Every modern water pump has a tiny drain hole on the underside of the housing. Its job is to let you know the mechanical seal is failing before the leak gets serious. A dry weep hole after 80,000 miles means the seal is holding. A wet or crusty weep hole means the pump is on borrowed time.
Other signs include a whining or grinding noise that rises with engine RPM (failing bearing), steam from the front of the engine, an overheating gauge, or white exhaust smoke if coolant is being burned. If you see any of these alongside a coolant loss, the pump is almost always the culprit.
What Tools and Parts Do You Need to Replace a Water Pump?
Gathering everything before you start saves you from a 30-minute trip to the parts store halfway through. Here is what I keep on hand for this job.
Tools:
Socket and ratchet set (metric and SAE)
Torque wrench (essential for proper bolt tension)
Plastic gasket scraper or razor scraper
Drain pan (at least 5-gallon capacity)
Coolant-resistant shop rags
Screwdrivers, both flathead and Phillips
Funnel and clean container for old coolant
Breaker bar for stubborn bolts
Pliers and channel locks
Safety glasses and nitrile gloves
Parts and supplies:
New water pump matched to your exact engine
New gasket (usually included with the pump)
New O-ring if your model uses one
RTV sealant if required (check your pump instructions)
Manufacturer-specified coolant (type matters, more on this below)
Distilled water for mixing
Fresh serpentine belt or timing belt if due
New thermostat (highly recommended)
New hose clamps if any are rusty
A torque wrench is not optional. Over-tightening the pump bolts cracks the housing. Under-tightening causes a leak path. You need exact numbers from your service manual.
How to Properly Prepare the Cooling System Before Removal?
Most repeat leaks start before the new pump ever goes on. The cooling system prep stage is where you prevent contaminated coolant, trapped air, and old gasket material from sabotaging your fresh install.
Step A: Let the engine cool completely. Never open a hot cooling system. The cap is pressurized and the coolant is well above boiling. Wait at least two hours after driving, or work first thing in the morning.
Step B: Drain the coolant properly. Place your drain pan under the radiator drain petcock. Open it slowly and let the coolant flow. On engines without a petcock, disconnect the lower radiator hose. Many vehicles have a specific drain plug on the block itself, often on the side of the engine near the freeze plugs.
Capture every drop. Old coolant is toxic and must be disposed of properly at a service center or recycling facility. Pouring it down the drain is illegal in most areas and harmful to pets.
Step C: Flush if needed. If your coolant is rusty, has floating particles, or has been in the system longer than the manufacturer recommends, flush it. A clean system protects your new pump’s mechanical seal from debris that would otherwise grind against it.
To flush, fill the system with distilled water, run the engine with the heater on full blast for ten minutes, then drain. Repeat until the water runs clear. I usually do three cycles for a system that has been neglected.
Step D: Inspect related parts now. While the system is empty, take ten minutes to look at the hoses, clamps, thermostat housing, and radiator. If anything is marginal, replace it now. Doing this job with a fresh pump and a leaky old hose just invites another coolant leak somewhere else.
How to Replace a Water Pump: Step-by-Step Process
Now we get to the actual replacement. Take your time, follow the sequence, and resist the urge to rush.
Step 1: Disconnect the battery. Always start by removing the negative battery cable. This prevents accidental fans, sparks near spilled coolant, and electrical gremlins if you bump a sensor.
Step 2: Remove obstructions. Depending on your engine, you may need to move the air intake, fan shroud, drive belt, or even the radiator itself. On engines with the water pump driven by the timing belt, you are looking at a major job that requires retiming the engine. Confirm whether your pump is belt-driven before starting.
Step 3: Remove the serpentine or accessory belt. Use the tensioner pulley to release tension, then slide the belt off. Take a photo of the belt routing if you don’t have a diagram. The serpentine belt wraps around a lot of pulleys and reinstalling it wrong is frustrating.
Step 4: Remove any hoses connected to the pump. Label them with tape if they aren’t obvious. Coolant hoses can look identical but route very differently.
Step 5: Unbolt the water pump. Most pumps have three to five bolts. Loosen them in a star pattern, the opposite of how you will torque them down. Some pumps have hidden bolts behind covers or shields.
Step 6: Remove the old pump and gasket. Gently pry the pump away from the engine block. If it resists, do not hammer on it. Light taps with a rubber mallet or a careful pry bar usually free it.
Step 7: Clean the mounting surface. This is the single most important step for preventing a repeat leak. Every trace of old gasket material, RTV, corrosion, or oil must come off. Use a plastic gasket scraper first, then follow up with a razor scraper held almost flat against the surface. A clean surface looks like polished metal when you are done.
Step 8: Inspect the new pump. Open the box and check that the gasket, O-ring, and any included hardware match your engine. Spin the impeller by hand. It should turn smoothly without grinding. If the pump arrived dry, you will prime it in the next major section.
Step 9: Install the gasket and pump. Position the gasket dry against the block unless your pump instructions specifically call for sealant. Set the pump on top and hand-thread all the bolts before tightening anything.
Step 10: Torque the bolts in stages. Look up the exact torque spec for your engine. Tighten the bolts in a star or crisscross pattern to evenly distribute pressure. Stop at one-third of the final torque, then two-thirds, then the full value. This prevents warping the housing.
Step 11: Reconnect hoses and reinstall the belt. Make sure hose clamps are seated fully. Spin the tensioner and route the belt correctly using your photo or diagram.
Step 12: Reinstall anything you removed. Reverse your teardown. Double-check that no tools, rags, or fasteners are left in the engine bay.
How Should You Apply Gasket Sealant for a Leak-Free Install?
Sealant is one of the most misunderstood parts of this job. Used wrong, it causes leaks. Used right, it prevents them.
First, check whether your new pump came with a rubber or composite gasket. Most modern pumps use a dry gasket that does not require any additional sealant. Adding RTV on top of a dry gasket can actually cause a leak because the RTV squeezes out and breaks down in the coolant.
If your pump uses an O-ring instead of a flat gasket, a thin film of clean coolant or a dedicated O-ring lubricant is all you need. Never use RTV on an O-ring. The sealant can squeeze past the seal and create the exact problem you are trying to prevent.
For pumps that genuinely require sealant, apply a thin, continuous bead about 1/8 inch thick around the bolt holes. The bead should sit inside the bolt holes, not across them. Keep the bead a few millimeters inside the gasket edge so it does not squeeze into the cooling passages.
Let the sealant skin over for the time recommended on the tube before installation. Most RTV products need five to ten minutes. Skipping this step means wet sealant gets pushed into the cooling system where it can break off and clog the heater core.
Torque matters more than sealant choice. Even a perfect bead will leak if the bolts are unevenly tightened. Always follow the manufacturer’s torque sequence, not just the torque value.
How to Avoid Dry Rotation Damage That Ruins New Water Pumps?
This is the single biggest reason brand-new water pumps leak within a few hundred miles. Dry rotation means spinning the pump without coolant circulating through it. Even 30 seconds of dry rotation can destroy the mechanical seal, and you will not know it until the coolant is back in and the engine is running.
The mechanical seal relies on coolant to lubricate the faces between the rotating and stationary components. Without that liquid barrier, the seal faces grind against each other, creating micro-scratches that turn into a leak path the moment the system is pressurized.
How does dry rotation happen? The two most common scenarios are:
Cranking the engine briefly to “make sure everything works” before refilling coolant.
Running the engine after refill but before the pump has had time to draw coolant through it.
To prevent dry rotation, follow this sequence every single time:
Fill the system before you crank the engine. Do not start the car with the cooling system empty.
Turn the pump by hand. Many water pumps have a hex or notch on the front pulley. Rotate it manually five to ten full turns before starting the engine. This primes the seal with coolant.
Crank without starting. If you want to verify the belt is routed correctly, turn the key to “on” without engaging the starter. Listen for the fuel pump prime.
Run the engine immediately after refill. Once you start the engine, let it idle for several minutes. Do not rev it. Coolant needs time to circulate.
I have heard people argue that dry rotation is a myth. It is not. Anyone who has rebuilt engines has seen the evidence: scored seal faces, premature wear, and a leak that appears within weeks. Take the extra five minutes to prime the pump.
How to Refill Coolant and Bleed Air From the System
Air trapped in the cooling system is the second most common cause of repeat problems. Air pockets create hot spots that warp components, prevent coolant from reaching the heater core, and make the temperature gauge bounce around. Bleeding the system is not optional.
Use the correct coolant. This is critical. Modern engines use one of several coolant chemistries: traditional green IAT, OAT orange/red, HOAT yellow, or specific formulas like Dex-Cool. Mixing incompatible coolants creates gel that clogs the system and attacks seals. Check your owner’s manual or the manufacturer specification for your engine.
Mix with distilled water. Tap water contains minerals that leave deposits on hot engine surfaces and inside the radiator. Distilled water is cheap insurance. The standard mix is 50/50 coolant to distilled water, which gives you freeze protection to about -34F.
Fill slowly and watch for bubbles. Pour coolant into the radiator or expansion tank slowly. If you see air bubbles coming up, keep filling until they stop. This is called burping the system.
Open the bleeder valves. Many engines have small bleeder screws on the thermostat housing or coolant rail. Open them while filling until coolant flows out without bubbles, then close them. Check your service manual for bleed valve locations.
Set the heater to maximum. With the engine off, turn the cabin heater to the highest temperature setting and the fan to high. This opens the heater core valve and lets coolant flow through the entire system during the initial fill.
Run the engine and monitor. Start the engine and let it idle. Watch the temperature gauge carefully. Top off the reservoir as the level drops while air escapes. Squeeze the upper radiator hose gently a few times to help dislodge trapped air. Once the thermostat opens (you will see the upper hose get hot), the coolant level should stabilize.
Recheck the next day. After the engine has fully cooled overnight, check the coolant level again. Air pockets can work their way out hours later, so the level may drop. Top it off to the full mark.
How to Verify a Leak-Free Water Pump Installation?
The job is not done when the engine starts. You need to verify the install is actually leak-free under real conditions.
After the initial idle, let the engine run for at least 15 minutes. Watch the temperature gauge for normal operating range, usually between 195 and 210F for most engines. Then shut it off and let it cool.
Visually inspect the entire pump area with a flashlight. Look for drips on the housing, fresh coolant on the block, or signs of seepage around the gasket edge. A small amount of residual coolant from the install is normal. Anything actively dripping is not.
Take the car for a real drive. Idling does not create the same pressures and vibrations as driving. A 20-minute drive that includes highway speeds and some hills will shake loose any weak seals. After the drive, let the car sit for an hour and check the ground beneath it. Dry ground means a successful install.
If your budget allows, a cooling system pressure tester is worth renting or buying. It pressurizes the system to 15 psi without starting the engine. Any leak will show up in seconds without the risk of overheating.
Troubleshooting: Why Is Coolant Still Leaking After Replacement?
If you have a fresh install and coolant is still leaking, do not panic. The leak source tells you what to fix next.
Weep hole seepage: A small amount of moisture at the weep hole is normal during the first 100 miles as the new seal seats. Persistent wetness after that points to a damaged mechanical seal, often from dry rotation during install.
Gasket edge leak: If coolant is coming from around the gasket perimeter, the mounting surface was not clean enough, or the bolts are under-torqued. Re-torque the bolts to spec first. If that does not stop it, the pump has to come back off for another surface cleaning.
Hose connection leak: Coolant at the hose connections usually means a clamp is not seated or a hose is cracked. Replace the clamp and check the hose for softness or bulging.
Thermostat housing leak: Many DIYers replace the pump but overlook the thermostat housing gasket, which uses the same coolant. A leak at the thermostat means that gasket needs replacement too.
Overheating with no visible leak: If the engine is overheating but you cannot find a leak, the most likely culprit is trapped air. Re-burp the system. Other possibilities include a stuck thermostat, a clogged radiator, or a failed water pump from a defective part or dry rotation damage.
Coolant in the oil: Milky brown oil on the dipstick means coolant is getting into the lubrication system. This is serious and usually indicates a head gasket problem, not the water pump. Stop driving the car and have it diagnosed professionally.
Prevention Checklist: How to Make Your New Water Pump Last?
A few habits will extend the life of your new pump well beyond the warranty period.
Change your coolant on schedule. Most manufacturers recommend a coolant flush every 30,000 to 60,000 miles depending on the type. Old coolant loses its corrosion inhibitors and starts attacking seals and metal. I mark my service intervals on the calendar so I never miss them.
Use distilled water, always. Even when topping off a small amount, distilled water prevents mineral deposits. Tap water adds scale that slowly wears the seal and heater core.
Inspect the timing belt during pump replacement. If your pump is timing-belt driven, replace the belt, tensioner, and water pump together. The labor is almost identical, and skipping the belt invites a much more expensive repair later.
Replace the thermostat at the same time. Coolant flow and pump life are linked. A stuck or weak thermostat forces the pump to work harder and creates uneven cooling that stresses the seal. The thermostat costs almost nothing compared to a second pump job.
Keep an eye on the weep hole. Every oil change, take five seconds to look under the car at the weep hole. Catching seal failure early turns a big job into a small one.
Address small leaks immediately. A drip today is a tow truck next month. Coolant loss never fixes itself.
FAQs
Is it normal for coolant to leak after water pump replacement?
A small amount of seepage at the weep hole during the first 100 miles is normal as the mechanical seal seats. Active dripping, gasket-edge leaks, or coolant pooling under the car are not normal and indicate an installation issue, dry rotation damage, or a defective part.
What are common mistakes in water pump replacement?
The most common mistakes are failing to fully clean the mounting surface, using too much RTV sealant, dry rotating the pump before filling the system, not bleeding trapped air after refill, mixing incompatible coolant types, using tap water instead of distilled, and over- or under-torquing the bolts. Each of these can cause a repeat coolant leak within weeks or months.
Can a water pump go bad without leaking coolant?
Yes. A water pump can fail mechanically without leaking. A seized bearing stops the impeller, which prevents coolant circulation and causes immediate overheating. Worn bearings also create a whining or grinding noise that rises with engine RPM. A failed pump with no leak is just as dangerous as a leaking one.
Will a new water pump fix a coolant leak?
Only if the original pump was the actual source of the leak. Coolant leaks can also come from hoses, the radiator, the thermostat housing, the heater core, or a head gasket. Diagnose the source before replacing parts, or you will replace the pump and still see coolant loss.
How do you stop a water pump from leaking coolant?
If the leak is at the weep hole, the mechanical seal has failed and the pump needs replacement. If the leak is at the gasket edge, remove the pump, fully clean the mounting surface, install a fresh gasket with correct torque, and refill with the manufacturer-specified coolant mixture. Temporary sealants are not a reliable long-term fix.
How long will a water pump last once it starts leaking?
A leaking water pump can last days, weeks, or months depending on the severity. A slow weep hole leak may go months without causing overheating. A gasket failure can dump coolant quickly and overheat the engine within minutes. Any active leak should be addressed immediately because overheating can cause catastrophic engine damage.
Should I use RTV sealant on a new water pump gasket?
Usually no. Most modern water pumps use dry rubber or composite gaskets that do not require additional sealant. Adding RTV can squeeze into the cooling passages, break down in coolant, and cause leaks rather than prevent them. Use RTV only if the pump manufacturer specifically calls for it, and apply a thin bead inside the bolt holes only.
Final Thoughts on How to Replace a Water Pump Without a Repeat Coolant Leak
Learning how to replace a water pump and avoid a repeat coolant leak is really about mastering the details. The pump itself is straightforward: remove the old one, clean the surface, install the new one with proper torque, fill the system, and bleed the air. The trouble starts in the small steps that get rushed.
Clean the mounting surface until it shines. Use the right coolant at the right mix ratio. Hand-prime the pump before you crank the engine. Bleed every air pocket out of the system. Inspect related parts while you have the system apart. Do all of that, and your next water pump replacement will likely be 80,000 miles from now, not 8,000.
If you are not confident in your torque wrench technique or your ability to bleed the cooling system completely, this is one of those jobs where a professional’s hourly rate pays for itself in peace of mind. But if you take your time and follow the steps above, there is no reason a careful DIYer cannot get this right the first time.