
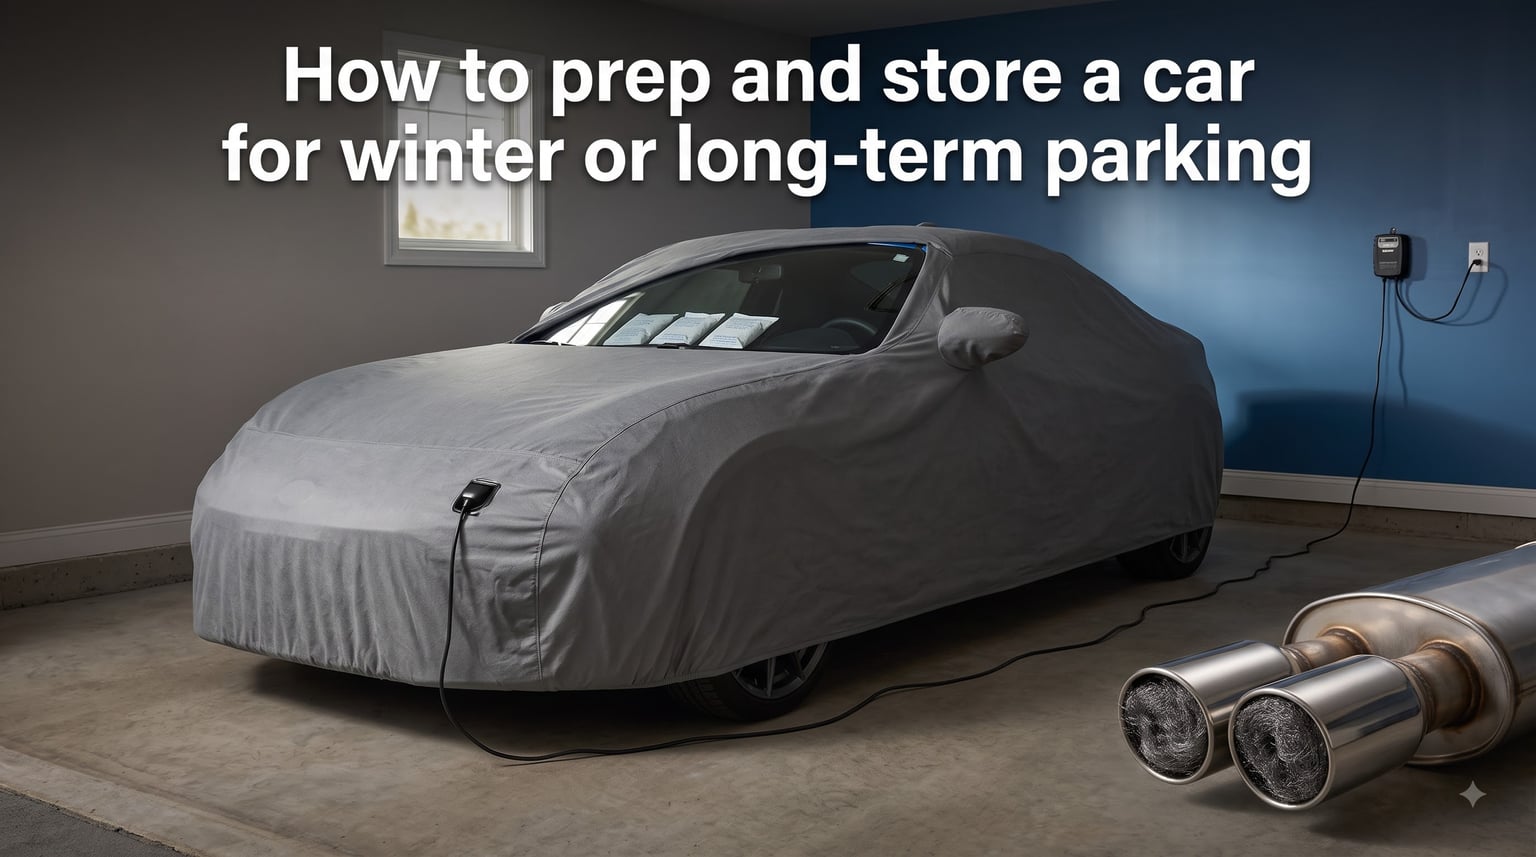
Every fall, I watch too many car owners park their vehicles for winter without any preparation. Then in spring, they deal with dead batteries, flat-spotted tires, mice nesting in air filters, and fuel that has turned into varnish. The good news is that learning how to prep and store a car for winter or long-term parking takes about an afternoon of work, and it can save you hundreds in repairs.
Whether you are storing a classic car, a sports car, a motorcycle, or just a second vehicle that sits unused for months, the same principles apply. A car left sitting is not the same as a car at rest. Without preparation, moisture, stale fuel, and rodents do real damage over 3 to 6 months of inactivity.
Our team has stored everything from air-cooled Porsches to daily drivers through harsh New England winters. This guide walks through every step we take, plus the mistakes we made early on so you do not have to repeat them. By the end, you will know exactly what to do before, during, and after long-term car parking.
Table of Contents
How to Prep and Store a Car for Winter: Step-by-Step Guide?
The process breaks down into nine preparation steps, then a few extras covering storage location, documentation, and how to bring the car back to life. Work through them in order, because each step builds on the last.
Step 1: Wash and Wax the Exterior
Start with a thorough wash before the car goes anywhere near storage. Road salt, bird droppings, tree sap, and bug splatter left on paint for months will etch into the clear coat. What takes five minutes to wash off in October becomes a permanent stain by April.
After washing, apply a coat of wax or sealant. This adds a protective barrier against moisture and dust during the storage period. Pay extra attention to the wheel wells and undercarriage, where salt and grime accumulate and cause hidden rust.
If your car has chrome trim or bumpers, polish those too. Chrome pits easily when moisture sits on it for months. A thin coat of wax on chrome goes a long way toward keeping it clean.
Step 2: Clean the Interior Thoroughly
Crumbs, wrappers, and spilled drinks are magnets for mice and insects. Vacuum every surface, including under the seats and in the trunk. Remove anything organic, including old french fries hiding in seat crevices.
Wipe down hard surfaces with a mild cleaner, and treat leather with a conditioner so it does not dry out and crack in dry winter air. Leave the windows cracked about half an inch to allow air circulation, unless your storage area has high humidity.
Place a few desiccant packs or moisture absorbers inside the cabin. These pull humidity out of the air and prevent mold, mildew, and that musty smell nobody wants in spring.
Step 3: Prepare the Fuel System
This is the step most people skip, and it causes the most expensive damage. Fill the gas tank completely full before storage. A full tank leaves no room for condensation to form inside, which is how water gets into your fuel system during temperature swings.
Add a quality fuel stabilizer right after filling up, then drive the car for about 10 minutes so the treated fuel reaches the entire system. Stabilizer keeps gasoline from oxidizing and turning into a gummy substance that clogs injectors and carburetors.
Without stabilizer, gasoline starts breaking down in about 30 days. With stabilizer added correctly, fuel can last 12 months or more. For storage longer than a year, consider ethanol-free fuel, which stores even better.
Step 4: Check and Top Off All Fluids
Old oil contains acids and contaminants that eat away at engine bearings over time. If you are within 1,000 miles of an oil change, do it before storage. Fresh oil protects internal engine parts during months of inactivity.
Check and top off the coolant to ensure it has the right freeze protection for your climate. Test the concentration with a hydrometer if you are unsure. Coolant that is too diluted can freeze and crack the engine block.
Brake fluid absorbs moisture over time, and a car sitting unused lets that moisture settle. If your brake fluid is over two years old, consider bleeding the system. Top off the brake fluid reservoir and transmission fluid to the full mark.
Step 5: Protect Your Tires From Flat-Spotting
When a car sits in one position for months, the tires develop flat spots where they contact the ground. Modern tires are better than older ones, but anything parked for more than three months risks permanent damage.
Inflate tires to the maximum pressure listed on the sidewall before storage. This reduces the contact patch and lowers the chance of flat-spotting. Just remember to reset the pressure before driving in spring.
For storage over three months, the best approach is to get the weight off the tires entirely. Jack stands placed at the proper lift points take the load off suspension components too. Some owners park on squares of two-inch foam board insulation, which cushions the tires from cold concrete.
One important note: do not set the parking brake during storage. Brake pads can seize to the rotors, or the parking brake cable can rust and stick in the engaged position. Use wheel chocks instead.
Step 6: Manage the Battery
A car battery left connected will slowly discharge over weeks. Worse, a discharged battery can freeze and crack in cold weather, because the electrolyte solution inside turns to water when the charge drops.
You have three options, and the right one depends on your car. The first is a battery tender, also called a maintainer. This device keeps the battery at full charge without overcharging. Plug it into a wall outlet and connect it to the battery terminals.
The second option is disconnecting the negative battery cable. This stops parasitic drain from the car’s electronics. It is the simplest approach for older vehicles without engine computers.
The third option is removing the battery entirely and storing it inside on a shelf, ideally on a tender. This is the best choice if your storage area gets extremely cold.
Modern Cars: Do Not Just Disconnect the Battery
Here is a critical warning our team learned the hard way. On cars built after roughly 2000, disconnecting the battery can cause real problems. Engine computers, radio presets, security systems, and adaptive learning data all reset when power is lost. Some cars need a factory scan tool to relearn idle and transmission parameters after a full power loss.
For modern vehicles, use a battery tender instead of disconnecting. If you must disconnect, check your owner’s manual first to see if there are specific procedures or warnings.
Step 7: Keep Rodents and Critters Out
Mice love warm engine bays, and they will chew through wiring harnesses with shocking speed. A single mouse can cause thousands in electrical damage in one weekend. Rodent prevention is not optional when storing a car for winter.
Stuff steel wool into the exhaust pipe and intake openings. Mice cannot chew through it, and it costs almost nothing. Just remember to remove it before starting the engine in spring.
Place dryer sheets throughout the engine bay and interior. The strong scent repels mice, and it is a friendlier alternative to mothballs. Many classic car owners swear by this trick from years of use.
For outdoor storage, scatter granular animal repellent around the perimeter of where the car is parked. Set traps nearby as an early warning system. If you catch mice early, you can act before they get inside the vehicle.
Step 8: Cover the Car Properly
A car cover keeps dust and debris off your freshly cleaned paint, but the wrong cover causes more harm than good. Never use a plastic tarp or a non-breathable cover. Plastic traps moisture against the paint surface, which leads to surface rust and bubbling clear coat.
Use a breathable fabric car cover designed for indoor or outdoor use, depending on where the car will sit. Look for covers made from materials like cotton, flannel, or multi-layer synthetic fabrics that allow air circulation while blocking dust.
For indoor storage, a soft cotton cover is plenty. For outdoor storage, you need a waterproof but breathable cover with tie-downs to handle wind. Add a layer of padding over mirrors and sharp body lines if you want to prevent friction marks.
Step 9: Choose the Right Storage Location
Where you park the car matters as much as how you prepare it. A climate-controlled indoor garage is ideal, but most of us do not have that option. A standard attached or detached garage still offers major protection over outdoor parking.
For unheated garages, temperature swings cause condensation. Good ventilation and desiccant packs help manage humidity. If the floor sweats moisture, park the car on a tarp or rubber mat to create a barrier between the tires and wet concrete.
Outdoor Storage: What to Know
Not everyone has garage access. If you must store a car outdoors, the risks increase significantly. Use a high-quality outdoor car cover with tie-down straps, and check it after every major storm.
Park on a tarp or plastic sheet to keep ground moisture away from the undercarriage. Avoid parking under trees, where sap, branches, and animal droppings cause damage. Remove the battery entirely and store it indoors, because outdoor temperature swings will kill it fast.
Be realistic about outdoor storage limits. A car stored outdoors through a harsh winter will age noticeably more than the same car stored indoors, even with full preparation.
Step 10: Handle Insurance and Documentation
Call your insurance company before storing the vehicle. Some providers offer reduced rates for cars that are not being driven. Ask about comprehensive-only coverage if your state allows it.
Take dated photos of the car from every angle before storage. This documents the condition in case of theft, fire, or storm damage during the storage period. Write down the mileage and keep a record of all maintenance performed before storage.
Some insurance companies may ask if the vehicle is stored at a different address or if it will be parked off public roads. Being upfront prevents claim issues later.
Step 11: Taking the Car Out of Storage
Spring arrives and you are ready to drive. Do not just turn the key and hit the road. A few checks prevent costly mistakes after months of sitting.
Remove the steel wool from the exhaust and intake. Check tire pressure and reset it to the normal recommended PSI if you over-inflated for storage. Inspect the battery and reconnect it if it was removed.
Check all fluid levels before starting the engine. Look for any signs of leaks that developed during storage. Inspect belts and hoses for cracks, because rubber dries out when sitting.
When you start the engine, let it idle for a few minutes without revving it. Oil has drained to the oil pan over months, and the engine needs time to circulate lubricant before taking on load. Drive gently for the first 20 miles.
Check the brakes before relying on them. Brake rotors develop surface rust quickly, and the first few stops may feel rough until the pads clean the rotor faces. Test the brakes at low speed first.
Myth Busting: Should You Start the Car Every Week?
This is the most common question we see on forums, and the answer surprises most people. No, you should not start a stored car periodically. Starting the engine once a week or once a month during storage does more harm than good.
When a cold engine starts, it produces condensation inside the crankcase and exhaust system. If the car only runs for a few minutes, that moisture never fully burns off. Over time, it accumulates and mixes with oil, leading to internal corrosion.
The exhaust system is even more vulnerable. A cold start produces water vapor that sits in the muffler and catalytic converter. Short runs never heat the exhaust enough to evaporate it, so the moisture causes rust from the inside out.
If you want to keep the battery charged, use a tender. If you want to keep the engine lubricated, the fresh oil you put in before storage handles that. Leave the car alone until you are ready to drive it properly.
Battery Tender vs Trickle Charger vs Disconnect: Which Is Best?
These three terms get used interchangeably, but they are different tools with different purposes for car storage.
A battery tender, also called a battery maintainer, is the best choice for long-term storage. It monitors the battery’s charge level and only delivers current when needed. Once the battery reaches full charge, it switches to a maintenance mode. This prevents overcharging and works safely for months of continuous use.
A trickle charger delivers a constant low current regardless of battery state. Leaving one connected for months can overcharge the battery and shorten its life. Trickle chargers are fine for short-term use but not ideal for winter storage.
Disconnecting the battery is the zero-cost option, but it only works well on older vehicles without engine computers. On modern cars, you risk losing computer memory and triggering warning lights.
Our recommendation: for any car built after 2000, use a battery tender. For older cars, disconnecting the negative terminal is acceptable if you do not have a tender available.
Electric Vehicle Storage: Different Rules Apply
If you are storing an EV or plug-in hybrid, the battery management process is completely different from a gas car. Check the owner’s manual for specific guidance, because manufacturers have specific storage recommendations.
Most EV manufacturers recommend storing the battery at around 50 percent charge, not fully charged or fully depleted. Lithium-ion batteries degrade faster at extreme charge levels, so a middle charge is healthiest for long periods.
Keep the EV plugged in if your storage location has power. The car’s thermal management system will keep the battery at a safe temperature. If you cannot plug it in, store it in a location that stays above freezing.
EVs do not need fuel stabilizer, oil changes, or exhaust protection. But they still benefit from tire care, rodent prevention, and a clean cabin before storage.
How Long Can a Car Sit Unused in Winter?
With proper preparation following the steps above, a car can safely sit unused for 6 to 12 months. Without preparation, problems start appearing within 30 days. The battery begins to drain, fuel starts oxidizing, and tires begin developing flat spots.
For storage beyond one year, additional steps are needed. Drain the fuel system entirely rather than using stabilizer. Remove all fluids and replace them with fresh versions before restarting. Consider professional storage services if you are dealing with a valuable classic car.
The key takeaway is that preparation quality matters more than storage duration. A car prepped properly for 6 months will be in better shape than a neglected car stored for 3 months.
FAQs
How long can a car sit unused in winter?
With proper preparation including fuel stabilizer, a battery tender, and tire protection, a car can sit unused for 6 to 12 months without issues. Without preparation, battery drain and fuel degradation start within 30 days.
Should you disconnect the battery when storing a car for the winter?
For older cars without engine computers, disconnecting the negative terminal is fine. For modern cars built after 2000, use a battery tender instead of disconnecting, because power loss can reset engine computers, security systems, and adaptive settings.
What to do before storing a car for winter?
Fill the gas tank and add fuel stabilizer, change the oil if it is due, inflate tires to maximum sidewall pressure, clean the interior and exterior, connect a battery tender, and place steel wool in the exhaust to block rodents.
Should I start my stored car once a week during winter?
No. Periodic short starts cause condensation buildup in the oil and exhaust system, which leads to internal corrosion and rust. Leave the car alone and rely on a battery tender to maintain charge.
What is the $3000 rule for cars?
The $3000 rule is a general guideline suggesting that if a repair costs more than $3000 or the car is worth less than $3000, it may be time to consider replacing the vehicle rather than repairing it. It is not directly related to winter storage.
Is it okay to use a plastic tarp as a car cover for storage?
No. Plastic tarps trap moisture against the paint surface, which causes rust, clear coat damage, and mold. Always use a breathable fabric car cover designed for indoor or outdoor use.
Do I need to set the parking brake when storing a car?
No. Setting the parking brake during long-term storage can cause the brake pads to seize to the rotors or the cable to rust in the engaged position. Use wheel chocks instead to prevent rolling.
Conclusion
Knowing how to prep and store a car for winter or long-term parking comes down to blocking moisture, stabilizing fluids, protecting the battery, and keeping rodents out. Follow the eleven steps in this guide and your vehicle will start right up when warmer weather returns.
The biggest mistakes are skipping fuel stabilizer, leaving the battery to die, and starting the engine periodically. Avoid those three things and you are ahead of most car owners. A single afternoon of preparation protects your investment for the entire off-season.
Grab a notebook, write out the checklist, and tackle each step before the first hard freeze. Your future self in 2026 will thank you when the car fires up cleanly on the first try.