
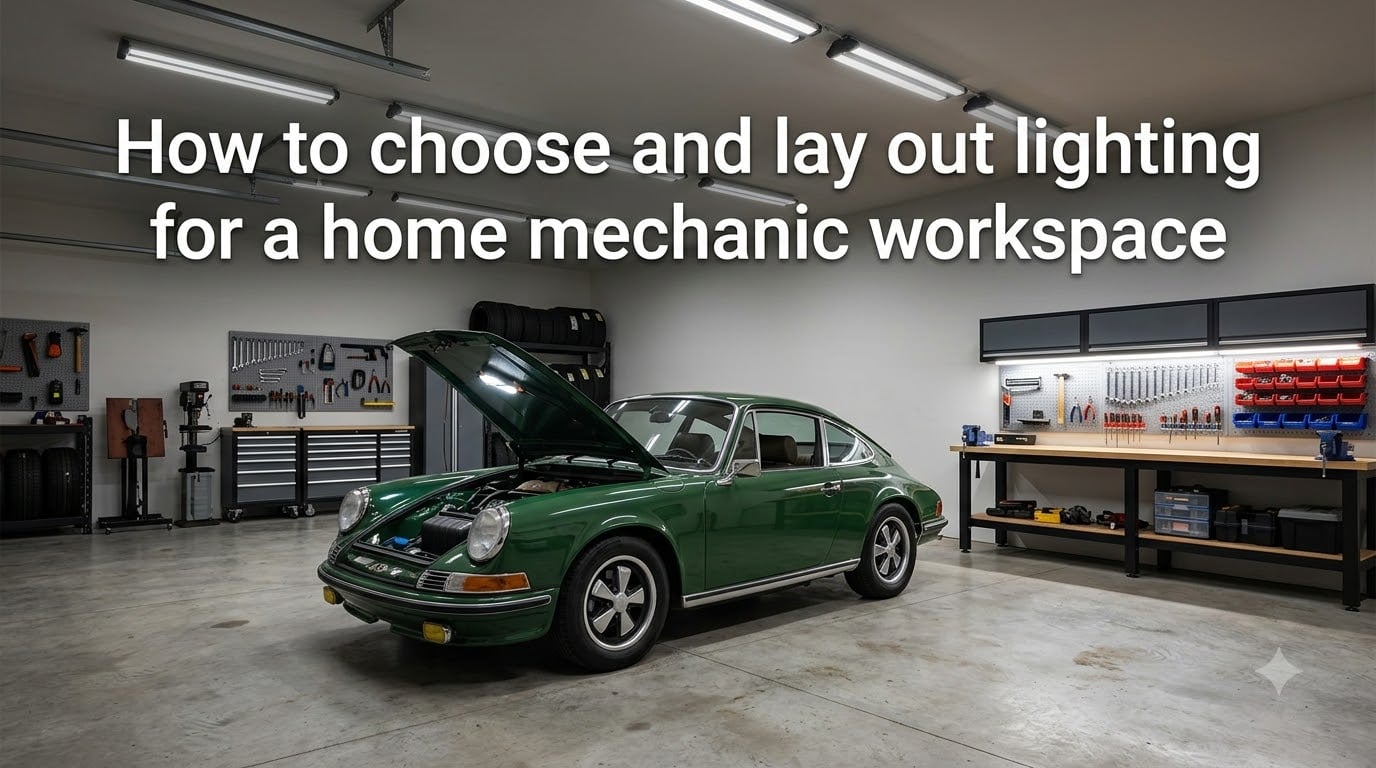
Working on cars in a dim garage is like performing surgery with a flashlight. You miss fasteners, misjudge colors on wires, and strain your eyes after an hour of tight work under the hood. Getting home mechanic workspace lighting right changes everything about the experience.
This guide walks through every decision you need to make: how many lumens you actually need, which color temperature reveals those hard-to-see oil leaks, what fixture types work best over a workbench versus under a car, and how to lay them out for zero shadows. By the end, you will have a complete plan for your garage, whether you are starting from scratch or upgrading from a single bare bulb.
I have spent years wrenching in under-lit garages and over-lit ones, and the difference is night and day. Let me walk you through how to choose and lay out lighting for a home mechanic workspace so you can stop squinting and start working efficiently.
Table of Contents
Understanding Light Output: Lumens and Foot-Candles
Light output is measured in lumens, and this is the single most important number to understand before buying anything. A lumen tells you how much visible light a fixture produces. More lumens means more light, plain and simple.
For a home mechanic workspace, you need more light than a typical garage used for parking. Mechanics deal with small fasteners, dark engine bays, and color-sensitive tasks like reading dipsticks or matching paint. General garage lighting of 50 lumens per square foot is not enough for detail work.
Here are the lumen-per-square-foot targets our team recommends based on real garage testing:
General ambient lighting: 50 to 75 lumens per square foot for walking around, organizing tools, and parking.
Task areas (workbench, lift zone): 200 to 300 lumens per square foot for detailed mechanical work like rebuilding carbs or inspecting brake components.
Detail and inspection areas: 300+ lumens per square foot for paint correction, surface inspection, and precision assembly.
Foot-candles are another way to measure light at the surface level, and one foot-candle equals roughly 10.76 lumens per square foot. You will see both terms in lighting specifications, so it helps to know the conversion. If a fixture says it delivers 50 foot-candles at floor level, that is about 538 lumens reaching each square foot of that surface.
For a standard two-car garage of approximately 400 square feet, aim for at least 20,000 total lumens of overhead light for general work. Add dedicated task lighting on top of that for your bench and engine bay areas.
Color Temperature for Mechanic Work: 4000K vs 5000K vs 6500K
Color temperature, measured in Kelvin (K), describes how warm or cool the light appears. This matters more for mechanics than most people realize because it affects how your eyes perceive colors under that light. The wrong temperature can make clean oil look dirty or make a hairline crack invisible.
Here is a practical breakdown of what each Kelvin range does in a shop setting:
3000K to 3500K (Warm White): Fine for hallways and entryways. Too yellow for mechanical work and distorts true colors.
4000K (Neutral White): A balanced tone that works well for general garage use. Colors look natural, and it is easy on the eyes for long sessions.
5000K (Daylight): The sweet spot for most mechanic shops. It closely matches natural daylight, making it easier to spot leaks, read labels, and identify wire colors accurately.
6000K to 6500K (Cool Daylight): Very bright and crisp. Great for detailing and inspection but can feel harsh for all-day use.
For most home mechanics, 5000K is the best all-around choice. It gives you that daylight feel without the clinical harshness of 6500K. If you do a lot of paint correction or bodywork, consider going up to 6000K for those specific tasks with supplemental task lighting.
CRI, or Color Rendering Index, is the other half of this equation. CRI tells you how accurately a light source renders colors compared to natural sunlight. The scale goes from 0 to 100, and anything below 80 will make colors look washed out or shifted. For mechanic work, look for fixtures with a CRI of 85 or higher. This ensures you can tell the difference between clean and dirty fluids, spot surface imperfections, and match parts correctly.
One more thing worth mentioning: color temperature matters for safety, too. Fluid leaks look different under warm light than daylight. A coolant leak that is easy to spot under 5000K might be invisible under a 3000K bulb.
Types of Lighting for a Home Mechanic Workspace
The fixture you choose determines light distribution, installation difficulty, and long-term operating cost. Here is a breakdown of the main options and where each one fits in a mechanic shop.
LED Shop Lights (Linkable Tube Fixtures)
LED shop lights are the most popular choice for home mechanics, and for good reason. These are typically 4-foot tube fixtures that mount to ceilings or chains and daisy-chain together so you can run a whole row from a single outlet. Each fixture usually outputs 4,000 to 5,000 lumens.
The best part about LED shop lights is instant-on performance. Unlike fluorescent tubes that flicker and stutter in cold weather, LEDs turn on at full brightness no matter the temperature. If your garage drops below 50 degrees in winter, this alone is reason enough to go LED.
High Bay LED Lights
High bay lights are designed for ceilings taller than 12 feet. They use reflectors or lenses to push light downward over a wide area without losing intensity at floor level. If your garage has a vaulted ceiling or you work in a pole-barn style shop, high bay fixtures are the right call.
A single 100-watt high bay fixture can replace four or five standard shop lights in a tall space. They typically output 10,000 to 20,000 lumens each, so you need fewer fixtures overall. Just make sure the beam angle matches your ceiling height.
Wraparound and Vapor Tight Fixtures
Wraparound fixtures have a diffuser lens that spreads light 180 degrees, making them ideal for lower ceilings where you need wide, even coverage. They are a solid choice for single-car garages with 8 to 10 foot ceilings.
Vapor tight fixtures are sealed against dust and moisture. If your garage gets humid, you work near a parts washer, or you want lights that can handle occasional splashes, vapor tight is the way to go. They are also more durable in shop environments where things occasionally get bumped.
Task Lighting
Task lights are the focused, directional lights you position exactly where you need them. For mechanics, this includes under-cabinet LED strips for workbench illumination, magnetic base work lights for under-vehicle work, and gooseneck or articulating lamps for bench detail work.
Do not skip task lighting. Even the best overhead setup will cast shadows from your own body and hands when you lean over an engine bay. A good task light fills those shadows in.
LED vs Fluorescent: Which Wins for a Mechanic Shop?
Fluorescent shop lights used to be the standard, and you still see them in older garages. But LEDs have taken over for several practical reasons:
Energy efficiency: LEDs use roughly half the wattage of fluorescent tubes for the same lumen output.
Cold weather performance: Fluorescents flicker and struggle to start below 50 degrees. LEDs are unaffected by cold.
Lifespan: LED fixtures last 30,000 to 50,000 hours versus 8,000 to 15,000 for fluorescent tubes.
Instant-on: LEDs reach full brightness immediately with no warm-up period.
Durability: LEDs are solid-state with no fragile glass tubes to break if a wrench flies off the bench.
The only advantage fluorescent still has is lower upfront cost per fixture. But when you factor in energy savings and replacement bulb costs over two years, LED wins on total cost of ownership.
The Layered Lighting Approach for Mechanics
The biggest mistake home mechanics make is relying on a single layer of lighting. One row of shop lights in the middle of the ceiling will leave your workbench, your engine bay, and your floor jacks in shadow. The solution is layering.
A layered approach uses three distinct lighting zones working together:
Layer 1: Overhead Ambient Lighting provides the base level of illumination across the entire garage. This is your rows of LED shop lights or high bay fixtures mounted to the ceiling. They give you enough light to walk around safely, find tools, and see what you are doing at a general level.
Layer 2: Task Lighting targets specific work zones where you need high-intensity, shadow-free light. This includes dedicated workbench lights, under-hood LED bars, and portable magnetic work lights you can stick to a frame rail or engine block.
Layer 3: Accent and Fill Lighting fills in the gaps. Under-shelf LED strips illuminate tool storage areas. Motion-sensor lights above entryways and side doors add safety. Low-level floor lighting along walkways helps you navigate without tripping over a creeper at night.
When these three layers work together, you eliminate the shadow problem that plagues most home shops. Your overhead lights handle general visibility, your task lights zero in on the work, and your fill lights catch the corners that would otherwise go dark.
Fixture Placement and Layout Guidelines
Placement is just as important as fixture choice. Even the brightest LED shop light does you no good if it is positioned behind your head while you lean over an engine. Here is how to plan your layout step by step.
Step 1: Measure Your Space
Start by measuring your garage length, width, and ceiling height. A standard single-car garage is roughly 12 by 22 feet (264 square feet). A two-car garage runs about 22 by 24 feet (528 square feet) or 24 by 24 feet (576 square feet). Knowing your square footage tells you how many total lumens you need.
Step 2: Calculate Total Lumens Needed
Multiply your square footage by your target lumens per square foot. For general mechanic work at 75 lumens per square foot, a 400-square-foot garage needs approximately 30,000 lumens of overhead light. For a task zone like a workbench area, add another 4,000 to 6,000 lumens dedicated to that space.
Step 3: Determine Fixture Count and Spacing
Divide your total lumen target by the output of your chosen fixtures. If each LED shop light produces 4,000 lumens, a 30,000-lumen target means you need roughly 8 fixtures. Space them evenly across the ceiling.
For standard 8 to 10 foot ceilings, place fixtures 4 to 6 feet apart. For ceilings between 10 and 14 feet, increase spacing to 6 to 8 feet. For high bay fixtures above 14 feet, follow the manufacturer beam angle chart for spacing recommendations.
Step 4: Position Lights Over Work Zones
This is where mechanic-specific layout differs from general garage lighting. Do not just grid your lights evenly across the ceiling. Instead, concentrate fixtures over the areas where you actually work.
Run a row of shop lights directly over your workbench, spaced 3 to 4 feet apart for intense, even coverage.
Position a row of lights along the center line of where a vehicle will park so light reaches both sides of the engine bay.
Add fixtures above your lift or jack stand area so the underside of the vehicle is illuminated.
Place at least two fixtures at angles to your primary work position so light comes from multiple directions and reduces body-cast shadows.
Step 5: Add Task Lighting at Bench Level
After your overhead layout is set, add dedicated task lights at bench level. Mount an LED light bar under your upper cabinets or shelves directly above the workbench surface. Keep a magnetic or rechargeable work light on hand for under-vehicle and under-hood work. The goal is to always have a light source you can position between your eyes and the work surface.
Layout Example: Two-Car Garage (24×24 feet)
For a 576-square-foot two-car garage used as a mechanic workspace, a proven layout looks like this:
Three rows of 4-foot LED shop lights running front-to-back, with 3 fixtures per row (9 total).
Each row spaced about 6 feet apart across the width of the ceiling.
The center row positioned over the vehicle parking spot.
One additional row of 2 fixtures directly over the workbench.
Under-cabinet LED strip lighting along the full bench length.
Two magnetic LED work lights stored at the bench for under-vehicle use.
This setup delivers roughly 44,000 lumens of overhead light plus dedicated task lighting, which hits the sweet spot for serious home mechanic work.
Shadow Reduction Techniques for Detailed Mechanical Work
Shadows are the enemy of any mechanic. They hide fasteners, obscure fluid colors, and make it impossible to see what you are doing when your hands and body block the overhead light. No amount of raw lumens fixes this if your light is coming from a single direction.
The key principle is cross-lighting. You want light hitting your work area from at least two different angles so when your body blocks one source, the other fills in the shadow. Here is how to achieve that in practice.
For overhead lighting, offset your fixture rows rather than centering them all in one spot. If your workbench runs along the left wall, position one row of lights directly above it and another row 3 to 4 feet to the right. This way, when you stand at the bench, light comes from both overhead and slightly behind you, eliminating the shadow your body casts.
For under-hood work, use a portable LED under-hood light bar that attaches to the hood strut or fender. These rechargeable bars throw 1,000 to 2,000 lumens directly down into the engine bay from above, which is exactly the angle you need. Combined with your overhead lighting, this eliminates the deep shadows that form when the open hood blocks ceiling light.
For under-vehicle work, a magnetic base LED work light is essential. Stick it to the frame rail, control arm, or lift arm so it shines directly at your work area. Keep two or three of these on hand so you can light both sides of whatever you are working on.
For workbench detail work, add an articulating desk lamp or gooseneck light at bench height. This gives you a light source you can position at the same level as your eyes, pointing directly at small components without obstruction.
Common Lighting Mistakes to Avoid
After helping many home mechanics plan their garage lighting, here are the mistakes we see over and over again.
Mistake 1: Under-lighting the space. Two shop lights in a two-car garage is not enough. You will end up working in your own shadow and straining to see details. Budget for at least 6 to 8 overhead fixtures plus task lighting.
Mistake 2: Using the wrong color temperature. Warm white bulbs (2700K to 3000K) make a garage feel cozy but they distort the colors of fluids, wires, and surfaces. Stick with 5000K for mechanic work.
Mistake 3: Ignoring CRI. A high-lumen fixture with a CRI of 70 will still make it hard to distinguish colors. Look for CRI 85 or above for accurate color rendering.
Mistake 4: Placing all lights in one row. A single row of shop lights down the center of the ceiling guarantees shadows on anything against the walls. Spread your fixtures across the full width.
Mistake 5: Forgetting task lighting. Overhead light alone cannot handle detail work. Every workbench needs a dedicated light source within arm’s reach.
Mistake 6: Skipping dimmers. Full brightness is great for wrenching, but blinding when you are just grabbing a tool at 10 PM. Dimmable LED drivers let you dial it back for ambient use.
FAQs
What is the best lighting for a mechanic shop?
The best lighting for a mechanic shop is a layered system combining overhead LED shop lights at 5000K color temperature with dedicated task lighting for workbench and under-hood areas. Aim for 75 to 100 lumens per square foot of overhead light plus 200 to 300 lumens per square foot over task zones. Choose fixtures with a CRI of 85 or higher for accurate color rendering.
Is 4000K or 5000K better for workshop?
5000K is better for a mechanic workshop because it closely matches natural daylight, making it easier to spot fluid leaks, read labels, and identify wire colors accurately. 4000K is acceptable for general garage use and feels slightly warmer, but 5000K gives you the most accurate color representation for detailed mechanical and automotive work.
What is the best lighting for a workspace?
The best workspace lighting uses a layered approach: overhead ambient lights for general visibility, focused task lights positioned directly over work zones, and fill lighting for corners and storage areas. For a mechanic workspace specifically, use 5000K LED fixtures with CRI 85 or higher, spaced 4 to 6 feet apart on 8 to 10 foot ceilings.
What is the best lighting for a garage workshop?
The best lighting for a garage workshop is LED shop lights or high bay fixtures (depending on ceiling height) producing at least 4,000 lumens each, spaced evenly across the ceiling. A two-car garage needs roughly 8 to 10 fixtures totaling 30,000 to 40,000 lumens. Add under-cabinet LED strips for workbench areas and portable magnetic work lights for under-vehicle tasks.
Conclusion
Planning home mechanic workspace lighting comes down to getting three things right: enough lumens for the job, the correct 5000K color temperature with high CRI, and a layered layout that eliminates shadows at every work zone. Start with your total lumen calculation, choose LED shop lights or high bay fixtures based on your ceiling height, then layer in task lighting exactly where you need it most.
Once you learn how to choose and lay out lighting for a home mechanic workspace, you will wonder how you ever wrenched in the dark. Measure your space, run the numbers, and build your layout one layer at a time.