
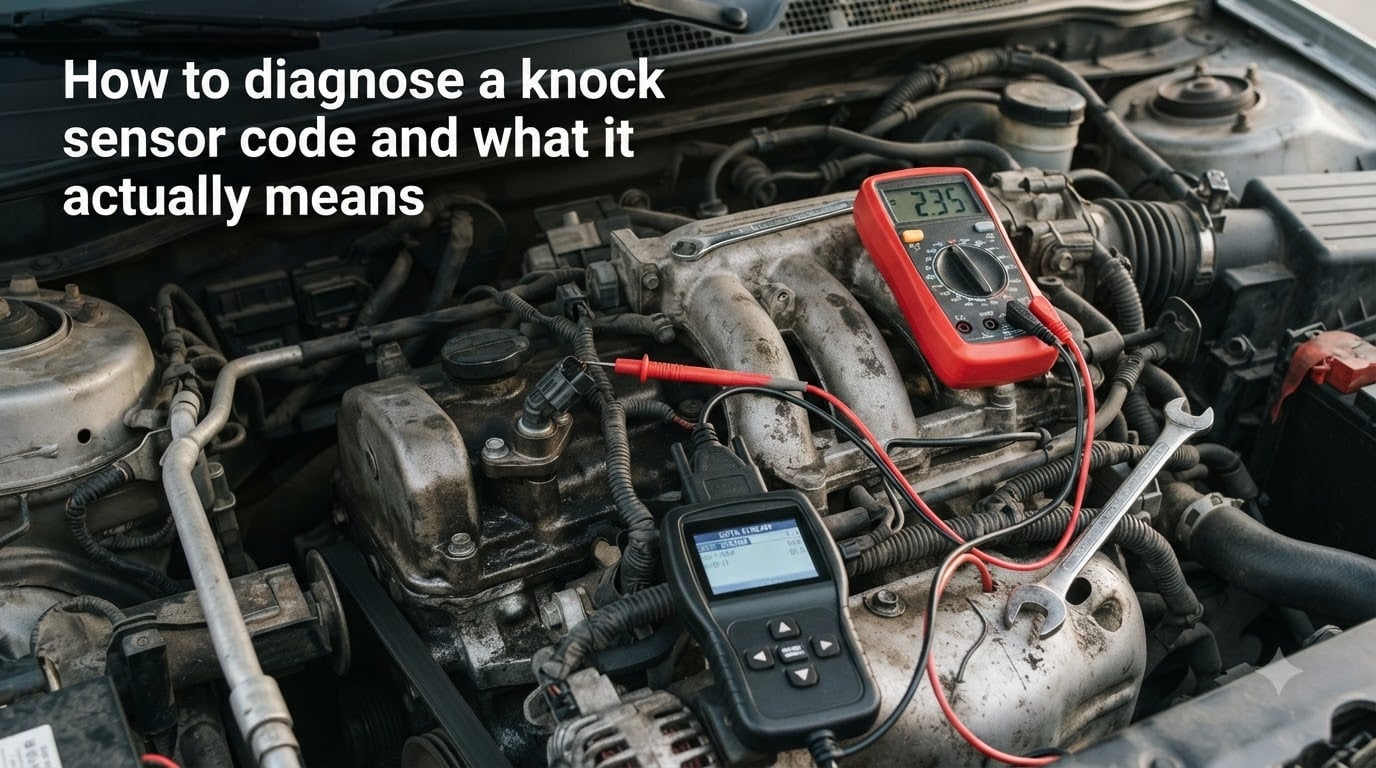
When the check engine light pops up and the code reader shows P0325, the first thing many drivers assume is the worst: the engine is about to destroy itself. In reality, the story is more nuanced, and understanding how to diagnose a knock sensor code properly can save you hundreds of dollars in unnecessary repairs.
A knock sensor code can mean one of three things: your engine genuinely has a detonation problem, the sensor itself is dead, or the wiring harness feeding it has failed. I have seen cases where a simple corroded connector tricked the ECU into thinking the engine was tearing itself apart.
In this guide, I will walk through what each knock sensor code actually means, the symptoms to watch for, and three practical diagnostic methods you can use at home with a multimeter, an oscilloscope, or an OBD-II scan tool. I will also cover the difference between real engine knock and a false sensor reading, why some codes refuse to clear after a sensor swap, and when you should stop diagnosing and start replacing parts.
Table of Contents
What a Knock Sensor Code Actually Means?
A knock sensor code means the engine control unit has detected something wrong with the knock detection system. That is not the same as saying the engine is knocking. The ECU relies on the knock sensor as a listening device bolted to the engine block.
Inside each knock sensor sits a piezoelectric crystal. When the engine runs, normal combustion creates vibration. That vibration presses against the crystal, generating a small voltage signal. The ECU reads that signal in real time and uses it to adjust ignition timing.
When everything works, the ECU hears the early signs of detonation and retards timing to protect the engine. When the signal disappears, spikes outside the expected range, or reads zero resistance, the ECU sets a code and switches to a conservative timing map. That safety map is why you feel sluggish acceleration and poor fuel economy even though the engine is not damaged.
So when people ask what the code actually means, the honest answer is: the ECU lost confidence in its ability to hear knock. Whether that is because of real detonation, a dead sensor, or a broken wire is what diagnosis is for.
Understanding the Common Knock Sensor Codes (P0325, P0326, P0327, P0328)
Not all knock sensor codes mean the same thing. Each code points to a specific type of circuit fault, and understanding the difference narrows your diagnosis immediately.
P0325 – Knock Sensor 1 Circuit (Bank 1): This is the most common code. It means the ECU has detected a general circuit malfunction. The signal from the sensor is either absent, shorted, or reading outside the expected range. Most of the time this points to a broken wire, corroded connector, or a completely dead sensor.
P0326 – Knock Sensor 1 Circuit Range/Performance (Bank 1): The circuit is technically intact, but the signal does not match what the ECU expects. The sensor might be sending a weak or erratic voltage. This code often means the sensor is degrading rather than completely failed, though a loose mounting bolt can also trigger it.
P0327 – Knock Sensor 1 Circuit Low Input (Bank 1): The voltage signal is too low. The ECU sees close to zero volts, which usually means a short to ground in the wiring or the sensor itself has failed internally. On some Nissan and GM trucks, this code is notorious for appearing because of a deteriorated wiring harness near the intake manifold.
P0328 – Knock Sensor 1 Circuit High Input (Bank 1): The voltage is too high. This typically means a short to voltage in the wiring harness or a sensor that is outputting a signal even when the engine is off. A shorted reference wire can cause this.
For V6 and V8 engines, you may also see codes P0330, P0331, P0332, and P0333. These are the Bank 2 equivalents of the P0325-P0328 series. Bank 1 is the side of the engine containing cylinder number one. Bank 2 is the opposite side.
Symptoms of a Faulty Knock Sensor
The symptoms of a bad knock sensor overlap with many other engine problems, which is why scanning the codes matters. That said, here are the signs I see most often in the shop.
The check engine light is the first and most obvious symptom. You will not get a knock sensor code without it illuminating. The code may appear alone or alongside misfire codes or fuel trim codes.
Reduced power and sluggish acceleration follow because the ECU defaults to a conservative timing map. The engine pulls timing to protect itself, and you feel it as a loss of low-end torque.
Poor fuel economy is common. With retarded timing, the engine burns more fuel to produce the same power. Many drivers report a 2-4 mpg drop after a knock sensor code appears.
You may also hear a metallic pinging sound under load, especially when accelerating uphill or under hard throttle. That sound, called detonation or spark knock, is the actual combustion event the sensor is designed to detect.
In some cases the vehicle enters limp mode. The ECU restricts engine speed and vehicle speed to prevent damage. This is more common on newer vehicles with stricter emissions calibration.
How to Diagnose a Knock Sensor Code Step by Step?
Diagnosing a knock sensor code requires a systematic approach. Skipping steps leads to throwing parts at the problem, which is exactly what I want you to avoid.
Step 1: Scan and record all codes. Use an OBD-II scanner to pull every stored code, not just the first one. Write down the code numbers, freeze-frame data, and whether each code is active or pending. Other codes can give important context.
Step 2: Clear the codes and recheck. Erase all codes, drive the vehicle for a full warm-up cycle under varying load, then rescan. If the knock sensor code returns, you have a confirmed active fault. If it does not, it may have been a one-time anomaly.
Step 3: Inspect the wiring harness visually. Locate the knock sensor on the engine block or intake manifold. Trace the wiring from the sensor to the ECU harness connector. Look for melted insulation, cracked connectors, oil-soaked wires, and corrosion at the terminals.
Step 4: Test the sensor electrically. Use one of the three methods below: multimeter resistance test, oscilloscope waveform test, or scan-tool live data analysis. Each method gives different information.
Step 5: Test the wiring between the sensor and ECU. Even if the sensor tests fine, a broken wire can still cause the code. Perform a continuity test on each wire in the harness. Check for shorts to ground and shorts to voltage.
Step 6: Verify with a known-good sensor. If everything else checks out, swap in a new sensor or test with a known-good unit. Clear the code, drive, and rescan. If the code clears, the old sensor was the problem.
Step 7: Address the root cause before replacing. If the sensor was detecting real knock, replacing it will not fix anything. Investigate fuel quality, lean air-fuel ratio, carbon buildup, and overheating conditions before calling the job done.
Method 1: Test the Knock Sensor with a Multimeter
The multimeter test is the simplest method and requires only a basic digital multimeter. It checks whether the sensor is electrically intact but cannot tell you if the sensor is producing a usable signal.
Step 1: Disconnect the knock sensor electrical connector at the sensor. Set your multimeter to the ohms (resistance) setting.
Step 2: Place one probe on the sensor signal terminal and the other on the sensor ground or body. Read the resistance value.
Step 3: A typical knock sensor reads somewhere in the range of roughly 0.5 to 5 megaohms, though exact values vary by manufacturer. Many two-wire sensors show around 0.5 ohm across the terminals for the signal path. If you read infinite resistance (open circuit), the sensor is dead.
Step 4: Tap the engine block lightly near the sensor with a small wrench while watching the meter. If the sensor is functioning, you may see a brief resistance fluctuation. No change at all confirms internal failure.
Step 5: Check for a short to ground. Place one probe on the sensor terminal and the other on the engine block. If you see continuity, the sensor is internally shorted.
This method catches dead sensors but misses performance degradation. For that, you need an oscilloscope.
Method 2: Test the Knock Sensor with an Oscilloscope
An oscilloscope is the most accurate way to test a knock sensor because it shows the actual voltage waveform the sensor produces in real time. This method is what professional technicians use.
Step 1: Connect the scope probe to the knock sensor signal wire and the ground clip to a clean engine ground. Leave the sensor connected to its harness during testing.
Step 2: Start the engine and let it idle. Set the scope to the appropriate voltage and time scale. Most knock sensors produce an AC voltage signal in the 5 to 15 kHz frequency range during detonation.
Step 3: Observe the waveform at idle. You should see a relatively flat, low-amplitude signal with occasional noise spikes. A completely flat line means the sensor is dead or the wire is broken.
Step 4: Tap the engine block near the sensor with a wrench. The scope should show a sharp voltage spike. No spike confirms the sensor is not generating a signal.
Step 5: If you have a way to induce controlled knock (some scan tools can command timing advance for testing), watch for the signal amplitude to increase. The ECU should respond by retarding timing.
A healthy knock sensor produces a distinct waveform pattern when subjected to vibration. A damaged sensor either produces nothing or a distorted, low-amplitude signal that does not respond to mechanical input.
Method 3: Diagnose Using an OBD-II Scan Tool
A good OBD-II scan tool with live data capability can tell you a lot about what the ECU is seeing. This method does not test the sensor directly but reveals how the ECU is interpreting its signal.
Step 1: Connect the scan tool and pull all stored codes. Note the freeze-frame data, which captures engine conditions at the moment the code was set. Look at engine speed, coolant temperature, and fuel trim values.
Step 2: Access the live data stream and look for the knock sensor parameter. Depending on the vehicle, this may show as a voltage value, a knock retard angle, or a yes/no knock flag.
Step 3: Monitor the knock sensor voltage while the engine idles. A healthy sensor typically shows a baseline voltage around 2.5 volts on a five-volt reference system. A reading of 0 volts or 5 volts indicates a circuit fault.
Step 4: Watch the knock retard parameter while driving under load. If the ECU is actively retarding timing, it believes knock is occurring. If the timing stays retarded even after the load is removed, the sensor may be stuck reporting false knock.
Step 5: Check for related codes that might explain the knock. Lean fuel trim codes, misfire codes, and coolant temperature codes can all cause or accompany knock sensor codes. Address those first if present.
Some scan tools can perform an active test that commands the ECU to simulate knock input. If the ECU responds correctly to the simulated signal but not the real sensor, the problem is the sensor or its wiring.
Knock Sensor Code With No Actual Knock: False Triggers Explained
One of the most confusing scenarios is getting a knock sensor code when the engine sounds perfectly fine. I hear this question constantly on mechanic forums, and the answer surprises most people.
The knock sensor detects vibration across a broad frequency range, not just the specific frequency of detonation. That means other vibrations can fool it. A loose exhaust heat shield, worn engine mounts, a failing accessory bearing, or even a loose torque converter bolt can generate vibrations that the sensor interprets as knock.
Wiring issues are another major cause of false codes. The knock sensor generates a tiny voltage signal, often measured in millivolts. Any electrical interference from nearby ignition coils, fuel injectors, or alternator wiring can corrupt that signal. On older vehicles, the shielding inside the sensor wiring harness degrades, allowing noise to bleed into the signal wire.
Some vehicles have well-documented false trigger issues. GM trucks with the 4.8L, 5.3L, and 6.0L engines are notorious for persistent knock sensor codes caused by deteriorated wire harness insulation under the intake manifold. Moisture collects in the valley and corrodes the harness over time.
On forums, Honda Element owners frequently report a knock sensor code appearing around 150,000 miles. One owner shared that their code showed up at 155,000 miles, they replaced the sensor, and the code cleared after about 250 miles of driving. The sensor was genuinely degraded, not detecting real knock.
If you have no audible knock but the code keeps returning after clearing, focus your diagnosis on the wiring harness and connector before buying a new sensor.
Engine Knock vs Bad Sensor: How to Tell the Difference
Telling the difference between actual engine knock and a sensor failure is critical because the fixes are completely different. Here is how I approach it.
Real detonation produces a distinct metallic pinging sound, especially under load. It sounds like shaking a tin can with marbles inside. If you hear that sound, the engine is actually knocking and the sensor is doing its job by reporting it.
A bad sensor produces no sound at all. The engine runs quietly, but the ECU has lost its knock detection capability and defaults to safe mode. You will feel sluggish performance and see the check engine light, but no audible knock.
One practical test: fill up with a higher octane fuel. If the engine is actually knocking, higher octane should reduce or eliminate it. If the code persists even with premium fuel, the problem is likely the sensor or wiring, not real detonation.
Check the freeze-frame data from the code. If the code was set at high engine load and high RPM, real knock is more likely. If it was set at idle or during startup, a sensor or circuit fault is more probable.
Rod knock is a completely different issue that people sometimes confuse with a knock sensor code. Rod knock is a deep, heavy knocking from the bottom end of the engine caused by worn connecting rod bearings. It gets louder with RPM and never goes away. The knock sensor may or may not detect it, and a knock sensor code is not a diagnosis for rod knock.
What Happens If You Ignore a Knock Sensor Code
Ignoring a knock sensor code is a gamble that depends on why the code appeared in the first place. If the sensor is simply dead and the engine is healthy, the ECU runs on its safe timing map and you suffer poor performance and fuel economy.
The real danger comes if the code appeared because the engine is genuinely knocking. Without the sensor functioning, the ECU cannot detect detonation and cannot retard timing to protect the engine. Sustained detonation can crack pistons, bend connecting rods, and blow head gaskets.
Even if the engine is not knocking, running in safe mode long-term has consequences. The conservative timing map increases exhaust gas temperatures, which can accelerate catalytic converter deterioration. You may also fail an emissions test due to elevated readings.
Some vehicles will eventually enter limp mode, restricting speed and RPM to prevent potential damage. At that point the vehicle becomes difficult to drive and the repair can no longer be postponed.
The cost of a knock sensor is modest compared to the cost of a damaged engine. I have seen drivers ignore P0325 for months only to face a much larger repair bill when a related issue, like a lean condition or coolant leak, went undetected because the sensor system was offline.
When to Replace the Sensor vs Investigate Further
Not every knock sensor code means the sensor needs replacement. Knowing when to stop diagnosing and when to install a new part saves money and prevents repeat failures.
Replace the sensor if your multimeter test shows an open circuit or a short, if the oscilloscope shows a flat or distorted waveform, and if the wiring harness checks out with good continuity and no shorts. In that scenario the sensor is confirmed bad and a new one will fix the code.
Investigate further if the sensor tests fine but the code persists. Check the wiring harness between the sensor connector and the ECU for breaks, shorts, and corrosion. On GM trucks, pull the intake manifold and inspect the sub-harness that runs through the engine valley. On Nissans, check the harness where it passes near the exhaust manifold.
If you have already replaced the sensor and the code still returns, stop buying sensors. The problem is almost certainly in the wiring. Multiple forum users report having to replace both the sensor and the wiring harness sub-assembly to clear persistent codes, especially on GM and Nissan vehicles.
If the code appeared alongside lean fuel trim codes or misfire codes, address those first. A lean air-fuel mixture causes real detonation, and the knock sensor is correctly reporting it. Replacing a working sensor will not fix a vacuum leak, a failing fuel pump, or dirty fuel injectors.
On high-mileage vehicles, a P0325 code that appears alongside other issues can signal deeper engine wear. Carbon buildup on piston crowns raises compression and increases the likelihood of detonation. A compression test or borescope inspection can reveal whether carbon cleaning or a more involved engine service is needed.
FAQs
What throws a knock sensor code?
A knock sensor code is triggered by a faulty sensor, damaged wiring or connector, actual engine detonation, or electrical interference that corrupts the sensor signal. Common causes include corroded harness connectors, melted wire insulation, a degraded piezoelectric crystal inside the sensor, lean air-fuel mixtures, and on some vehicles like GM trucks, moisture damage to the sub-harness under the intake manifold.
Does P0332 always mean the knock sensor is bad?
No. P0332 is the low-input code for the Bank 2 knock sensor, meaning the ECU is reading abnormally low voltage. While a dead sensor is one cause, the same code can result from a shorted wire, a corroded connector, or a damaged harness. Always test the sensor and wiring before replacing parts, especially on GM trucks and Nissans where harness deterioration is the more common culprit.
How do you diagnose a bad knock sensor?
Start by scanning all codes and clearing them to confirm the fault is active. Then visually inspect the wiring harness for damage. Test the sensor with a multimeter for resistance and shorts. Follow with an oscilloscope test to check the live waveform. Finally, use an OBD-II scan tool with live data to see how the ECU interprets the sensor signal. If the sensor and wiring both test fine, investigate for real engine knock or related issues like lean fuel conditions.
What happens if I ignore the P0325 code?
Ignoring P0325 risks engine damage if the cause is real detonation rather than a sensor fault. The ECU defaults to a safe timing map, which reduces power and fuel economy. Long-term driving in safe mode raises exhaust temperatures and can damage the catalytic converter. If the engine is actually knocking and the sensor system is offline, sustained detonation can crack pistons and damage connecting rods. Some vehicles will eventually enter limp mode, restricting speed until the problem is fixed.
Can I drive with a knock sensor code?
You can typically drive short distances with a knock sensor code, but it is not recommended for extended periods. The engine runs on a conservative timing map that reduces performance and fuel economy. More importantly, if the code is caused by real detonation, driving without functional knock detection can cause serious engine damage. Have the code diagnosed as soon as possible to determine whether it is a sensor issue or an actual engine problem.
Why does my knock sensor code come back after replacing the sensor?
A knock sensor code that returns after sensor replacement almost always points to a wiring harness problem rather than the sensor itself. The harness connector, signal wire, or ground path may be corroded, broken, or shorted. On GM trucks, the sub-harness under the intake manifold is a known failure point. On Nissans and Hondas, wiring near heat sources degrades over time. Test the harness for continuity and shorts before installing another sensor.
Wrapping Up
Learning how to diagnose a knock sensor code properly means understanding that the code is a signal about a signal. The ECU lost its ability to hear what is happening inside the engine, and your job is to figure out whether that is because the listener is broken, the wire to the listener is cut, or the engine genuinely has something to say.
Start with a code scan and a visual inspection of the wiring. Test the sensor with a multimeter for basic integrity. If you have access to an oscilloscope, use it to verify the live waveform. Cross-reference everything with scan-tool live data to see how the ECU is interpreting the signal.
Remember that a knock sensor code does not automatically mean the sensor is bad. Wiring harness failures cause a large percentage of persistent codes, especially on GM trucks, Nissans, and high-mileage vehicles of any brand. If you replaced the sensor and the code came right back, stop buying sensors and start testing wires.
And if the engine is genuinely knocking, replacing the sensor will only confirm what it already knows. Address the root cause, whether that is fuel quality, a lean condition, carbon buildup, or a cooling system problem. The knock sensor is a messenger. Make sure you are reading the message correctly before you shoot the messenger.