
I still remember the first time I tried to change a motorcycle tire in my garage. I had the bike on a stand, my hands were greasy, and I figured I could muscle the tire off the rim in about ten minutes. Forty-five minutes later, my arms were shot and the bead had not moved a millimeter. That day taught me that breaking a stubborn tire bead is less about strength and more about using the right method, in the right order, with a little patience.
This guide covers how to break a stubborn tire bead off the rim at home using tools most people already own. I have tested each method on cars, trucks, and motorcycles over the past several years. Some work great on steel wheels, others are better for alloy wheels, and a couple work for situations where you do not have a tire machine anywhere nearby.
By the end, you will know five proven DIY methods, the safety steps you absolutely cannot skip, and how to handle the worst-case bead that feels like it has been welded to the rim.
Table of Contents
Safety First: What You Need Before You Start?
Before you lift a single tool, I want to walk you through the safety basics. Skipping these is how people end up in the ER with broken fingers or damaged rims. The tire bead area holds more energy than most beginners realize.
Always remove the valve core first. A pressurized tire with the bead still sealed acts like a sealed pressure vessel. If you crack the bead while it is still inflated, the tire can explode with enough force to injure you. I have heard mechanics describe the sound as similar to a gunshot. Take two minutes and unscrew that valve core before you do anything else.
Wear eye protection. Even with the valve core out, rust flakes, dirt, and tiny metal shards can fly off when you break the bead. Safety glasses cost under five dollars. A trip to urgent care costs much more.
Work on a flat, solid surface. Concrete is ideal. Grass or dirt absorbs the force you are trying to apply and makes your jack unstable. Never try to break a bead with the wheel still on the vehicle unless you are using the vehicle weight method I describe later.
Keep bystanders and kids away. The forces involved are enough to launch small objects several feet. I clear a ten-foot radius before I start cranking on a jack.
Inspect the rim before you begin. If the rim is badly cracked, corroded through, or bent, stop. A damaged rim under jack pressure can fail suddenly. This is one of the cases where the right move is to call a professional rather than push your luck.
Tools You Will Need to Break a Tire Bead at Home
The good news is that you do not need a professional tire machine to get the job done. Here is the basic kit that covers every method in this guide.
Vehicle jack (scissor jack, bottle jack, or hydraulic floor jack)
Receiver hitch or a thick steel block (2×4 wood block as a buffer)
C-clamp or large bar clamp (8 inch minimum, larger is better)
Flat pry bar or large screwdriver
Valve core removal tool (or small pliers in a pinch)
Soapy water or spray lubricant (WD-40 works)
Heavy work gloves
Safety glasses
For the bench vise method I describe later, you will need access to a bench vise rated for the size of the wheel you are working on. Most home workshop vises handle up to a 17-inch rim without trouble.
Step 1: Remove the Valve Core First
This step is so important that I treat it as its own section. Every forum thread I have read about exploded rims, snapped bead breakers, or injured mechanics comes back to the same issue. People skip the valve core.
Take your valve core removal tool, insert it into the valve stem, and unscrew counterclockwise. You will hear a soft hiss as the remaining air leaves the tire. The valve core is a small brass piece. Put it in your pocket so you do not lose it.
For motorcycle tires and very small tires, a pair of needle-nose pliers works in place of a dedicated tool. For Schrader valves on car and truck tires, the dedicated tool is faster and easier. If your tire has a metal-clamped valve stem, grip the stem with pliers while you unscrew the core to avoid twisting the stem itself.
Once the core is out, press the valve stem down briefly to confirm the tire is fully deflated. I always do this twice because a partially inflated tire can still build up pressure inside the tire cavity when you start working the bead.
How to Break a Tire Bead Using a Jack and Receiver Hitch
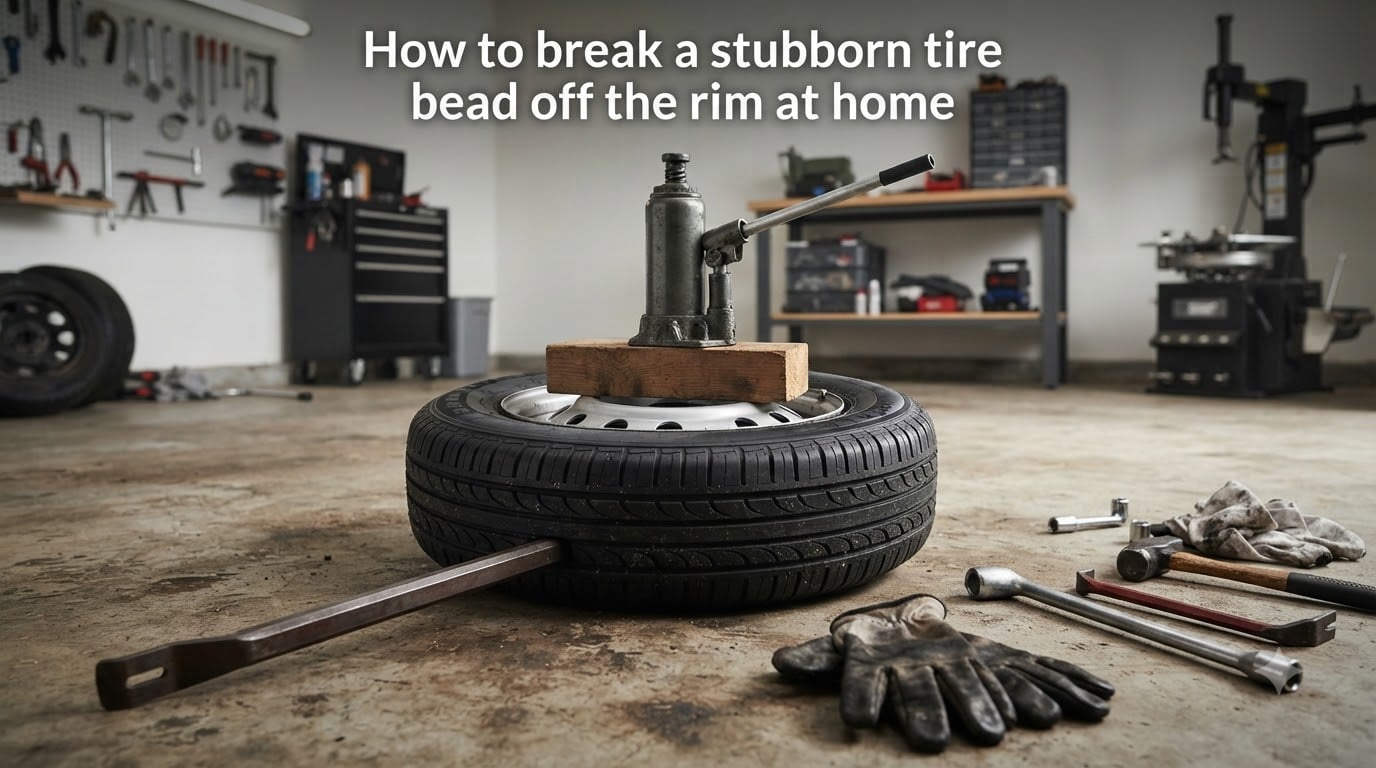
This is my go-to method when I am working on car or truck tires. The combination of a heavy jack and a steel receiver hitch generates tremendous focused force in a small area. It is exactly what professional bead breakers do in concept, just scaled down to tools you probably already own.
Step 1. Lay the tire flat on the ground with the outer sidewall facing up. The sidewall facing up is the side you will be working first.
Step 2. Place a thick piece of wood (a 4×4 block or even a section of 2×6) across the tire. The wood protects the sidewall from direct metal contact and prevents the jack saddle from slipping off.
Step 3. Position your vehicle jack on top of the wood block, with the jack saddle pointing down toward the tire. Make sure the jack is centered over the bead area you want to break.
Step 4. Slide a receiver hitch (or a heavy steel bar) under the jack. The hitch acts as a base that lifts only one side of the tire when you pump the jack.
Step 5. Pump the jack slowly. As the jack pushes down on the tire and the hitch holds the opposite side steady, pressure concentrates along the bead. You will hear a loud pop when the bead breaks free from the rim.
Step 6. Flip the tire over and repeat on the opposite side. Most tires require breaking both beads before you can remove the tire from the rim.
This method works well on steel wheels and thicker alloy wheels. For low profile tires on delicate alloy rims, I switch to the C-clamp method instead because it is more controlled.
How to Break a Tire Bead with a C-Clamp or Bar Clamp
When I need precision and I want to avoid scratching an alloy rim, the C-clamp method is my second choice. A large bar clamp or woodworking C-clamp concentrates force on a very small area of the bead, which is often all you need.
Step 1. Lay the tire flat with the sidewall up.
Step 2. Position the C-clamp so the fixed jaw sits on the rim edge and the screw jaw presses against the tire sidewall, right at the bead area.
Step 3. Place small wood blocks under each clamp jaw. The blocks spread the force and protect both the rim finish and the rubber from getting chewed up.
Step 4. Tighten the clamp slowly until you hear or feel the bead pop loose. Work your way around the tire, repositioning the clamp every 4 to 6 inches, until the entire bead is unseated.
Step 5. Repeat on the opposite side of the tire.
The drawback of this method is that it takes longer than the jack method. The benefit is that you are far less likely to bend or scratch a rim. I use this on any alloy wheel that I plan to keep on the vehicle after the tire change.
How to Break a Tire Bead with a Handyman Jack
If you have ever done any trailer hitch work or pulled a post out of the ground, you probably own a handyman jack. These little jacks pump out an enormous amount of force for their size, which makes them perfect for breaking tire beads.
Step 1. Place the tire on a flat surface with the sidewall facing up.
Step 2. Set the handyman jack so the lifting pad presses against the tire sidewall at the bead location.
Step 3. Position a sturdy block of wood or a steel plate under the base of the jack to keep it stable as you pump.
Step 4. Pump the jack handle. As the pad pushes down on the tire, the bead is forced away from the rim flange.
Step 5. Once you hear the pop, walk the jack around the tire in small increments and repeat until the bead is fully unseated.
Handyman jacks run anywhere from 1.5 tons to 4 tons of capacity. That is more than enough for most passenger and light truck tires. For tractor or heavy truck tires, you will need a much larger jack.
How to Break a Tire Bead Without Tools Using Vehicle Weight
This is the no-tools method that comes up most often in forum threads. I will be honest: I do not love it because it is harder to control and easier to damage a rim. But when you are stuck on a back road with no tools, it can save a trip.
Step 1. Place the tire flat on the ground, ideally on dirt or grass to soften the impact. Concrete works too but is harder on the rim.
Step 2. Lay a wide wooden board (a 2×10 or 2×12 works well) across the tire. The board spreads the force from the vehicle above across the tire.
Step 3. Slowly drive another vehicle onto the board. The combined weight of the second vehicle presses down on the tire, forcing the bead outward against the rim edge.
Step 4. Once you hear the bead pop, back the vehicle off and flip the tire to repeat on the other side.
This method works best on tires with wide, stiff sidewalls. Low profile tires often need multiple attempts because the sidewalls flex too much to push the bead outward effectively. The other thing to watch is rim damage. If the rim is aluminum alloy, you may end up with bent edges that need to be straightened by a shop before the new tire can seal.
How to Break a Tire Bead Using a Bench Vise
This method came straight from the r/motorcycles community, and after testing it on a stubborn motorcycle tire last spring, I am a believer. It is hands-down the cleanest way to break a bead on a smaller wheel.
Step 1. Remove the wheel from the vehicle if you have not already.
Step 2. Open your bench vise wide enough to fit the wheel between the jaws, with the tire sidewall resting on one jaw and the opposite sidewall resting on the other.
Step 3. Crank the vise closed slowly. As the jaws close, the tire compresses and the bead pops away from the rim.
Step 4. If the bead does not pop immediately, rotate the wheel slightly and crank again. The combination of pressure and a small twist is what finally gets the bead to release.
Step 5. Loosen the vise, flip the wheel, and repeat on the opposite side.
This method is fast, controlled, and leaves both your rim and the tire undamaged. It only works on wheels small enough to fit in your vise, which makes it ideal for motorcycles, ATVs, lawn tractors, and small trailer wheels.
Tips for Extremely Stubborn, Corroded, or Rusted Beads
Sometimes the bead just will not give, even when you are using plenty of force. When this happens, the cause is almost always corrosion between the rubber and the metal rim. Here is what I do in that situation.
Soak the bead with penetrating oil. Spray WD-40, PB Blaster, or a dedicated penetrating oil along the entire circumference of the bead on both sides. Let it sit for at least 15 minutes. I have had beads that broke free easily after a 30-minute soak that refused to budge before.
Use soap and water as a lubricant. A spray bottle filled with soapy water applied around the bead reduces friction between the rubber and the rim. Once the bead starts to move, soapy water lets it slide rather than grab.
Hit it from multiple angles. If one method is not working, try a different one. Sometimes the jack method will not break a bead that the C-clamp method pops in seconds, just because the force is being applied at a different angle.
Try the freeze and heat trick. On metal rims, you can sometimes break the bond by warming the rim with a heat gun while keeping the rubber tire cool. The metal expands slightly faster than the rubber, breaking the seal. Do not use an open flame. You will damage the tire and create a serious fire hazard.
Check for hidden damage. If a bead refuses to break after three different methods, the wheel may be bent or the tire may have a factory defect. Stop and inspect closely before continuing.
Low Profile Tires: Special Considerations
Low profile tires are the toughest beads to break, and they are the ones that cause the most rim damage when people try to muscle through. The sidewalls are shorter and stiffer, which means more force is required and the rim takes the brunt of it.
The first rule with low profile tires is to never use the vehicle weight method unless it is your only option. The flex in a low sidewall transmits too much force directly to the rim flange.
The jack and receiver hitch method works best because it concentrates force in one spot rather than spreading it across the sidewall. Use a wide wood block to spread the jack pressure and protect the sidewall from cuts.
The C-clamp method also works well on low profile tires, but you will need a clamp with at least 6 inches of throat depth to reach the bead properly. Smaller clamps cannot get past the rim flange to make contact with the bead.
If you are breaking a low profile bead on a high-end alloy wheel, I recommend applying heat to the rim with a hair dryer or heat gun on low setting. Warm metal expands slightly and reduces the force needed to break the bead. Keep the heat source moving and never concentrate it in one spot.
When to Stop and Call a Professional?
There is a point where DIY stops making sense. I learned this the hard way after rounding off a rim edge that ended up costing me more than a shop visit would have. Here are the cases where you should hand the wheel over to someone with a real tire machine.
If the rim is bent, cracked, or severely corroded, any method that applies pressure risks making it worse. A tire shop can cut the tire off without putting stress on the rim at all.
If you have tried two different methods and the bead has not moved, the bond may be chemically set rather than just mechanically stuck. A tire shop has both commercial bead breakers and the chemicals to dissolve the bond safely.
If the tire is a run-flat or has a stiff internal structure, the bead may require more force than home tools can safely deliver. Run-flats are designed to stay on the rim at zero pressure, which makes them exceptionally hard to remove by hand.
Finally, if you are working on a tire that still holds air even after removing the valve core, the tire or rim may be damaged internally. Stop immediately and take it to a shop.
Frequently Asked Questions
How do you get the tire bead over the rim when it’s stuck?
The fastest way to get a stuck tire bead over the rim is to apply focused force with a vehicle jack pressed against the sidewall while the rim edge sits on a steel bar or receiver hitch. The concentrated pressure forces the bead outward until it pops free. For stubborn cases, apply penetrating oil around the bead and let it soak for 15 minutes before trying again.
How to break bead on rim with no tools?
Without dedicated tools, you can break a tire bead by driving a second vehicle onto a board placed over the tire. The vehicle weight presses down on the sidewall while the rim edge sits on the ground, forcing the bead outward. This method works best on tires with stiff sidewalls and is less reliable on low profile tires.
What is the best homemade tire bead breaker?
The most effective homemade tire bead breaker is a vehicle jack combined with a steel receiver hitch or a heavy steel bar. Lay the tire flat, place a wood block over the sidewall, position the jack on top, and slide the hitch underneath. When you pump the jack, the focused force breaks the bead in seconds in most cases.
How to get a stubborn tire off the rim?
Start by removing the valve core so the tire is fully deflated. Apply penetrating oil around the bead on both sides and wait 15 minutes. Then use a vehicle jack and receiver hitch to apply focused pressure to one spot on the bead until you hear a pop. Flip the tire and repeat on the other side, then work the tire off the rim with pry bars.
Wrapping Up
Breaking a stubborn tire bead at home is one of those skills that pays for itself the first time you use it. Once you have done it with the jack and receiver hitch method, every other tire job in the future becomes quicker and less intimidating. The trick is to always remove the valve core first, work on a flat surface, and pick the method that matches your wheel type rather than just the one with the most force.
If you remember nothing else from this guide, remember these three rules: deflate completely before applying force, protect the rim with wood blocks, and stop calling a professional the moment you see rim damage or feel the tire resisting every method. With those rules in mind, you can handle almost any stubborn tire bead in your own garage.