
That sickening sound of something scraping along your car door is enough to ruin any afternoon. Whether it came from a rogue shopping cart, a narrow garage wall, or a careless driver in the parking lot, the first question that pops into your head is always the same: how bad is it really?
Learning how to tell if a scratch is in the clear coat or down to primer can save you hundreds of dollars in unnecessary bodywork. A shallow clear coat scratch might buff out in ten minutes with a polishing compound you already own. A deep primer scratch, on the other hand, requires touch-up paint and carries real rust risk if you ignore it.
Our team has spent years testing paint correction techniques on everything from daily commuters to show cars. The diagnostic process we use comes down to two reliable methods that any car owner can perform in their own driveway: the fingernail test and the water test.
In this guide, we will walk you through both tests step by step, explain what each scratch depth level looks and feels like, and give you a clear comparison table so you can identify your scratch in seconds. By the end, you will know exactly what you are dealing with and what to do about it.
We will also cover the warning signs that separate a DIY-friendly clear coat scratch from one that needs professional attention. Let’s start by understanding what sits beneath the surface of your car’s paint.
Table of Contents
Understanding Your Car’s Paint Layer Structure
Your car’s paint is not a single coat of color slapped onto metal. It is a carefully engineered multi-layer system, and each layer serves a specific purpose. Knowing these layers is the foundation for diagnosing any scratch accurately.
Modern automotive paint systems consist of four distinct layers stacked on top of bare metal. From bottom to top, they are: bare metal, primer, base coat (color), and clear coat. Each one protects the layer beneath it, and each scratch depth corresponds to how many of these layers have been breached.
What Is the Clear Coat and Why It Matters
The clear coat is the transparent top layer of your car’s paint system. It is typically only 1.5 to 2.0 mils thick, which is roughly the diameter of a human hair. Despite being thin, it provides all the gloss, UV protection, and chemical resistance your paint needs to survive daily driving.
When a scratch only damages the clear coat, the color underneath remains untouched. This is the best-case scenario because clear coat scratches can often be polished away without adding new paint. The clear coat also acts as the first line of defense against bird droppings, tree sap, and acid rain.
The Role of the Base Coat (Color Layer)
The base coat sits directly beneath the clear coat and contains the actual pigment that gives your car its color. This layer is what you see when you look at your vehicle. If a scratch penetrates the clear coat and reaches the base coat, you will notice a color change or a visible line where the clear coat ends and raw pigment begins.
Base coat scratches are more serious than clear coat scratches but still repairable. On metallic or pearl finishes, the damaged area may look different depending on the viewing angle because the reflective flakes in the pigment have been disturbed.
Why Primer Protects Metal From Rust?
Primer is the gray or off-white preparatory layer applied directly to bare metal at the factory. Its primary job is to bond the paint to the metal surface and provide corrosion resistance. Primer is typically gray, but it can also be white, black, or red depending on the manufacturer and the car’s final color.
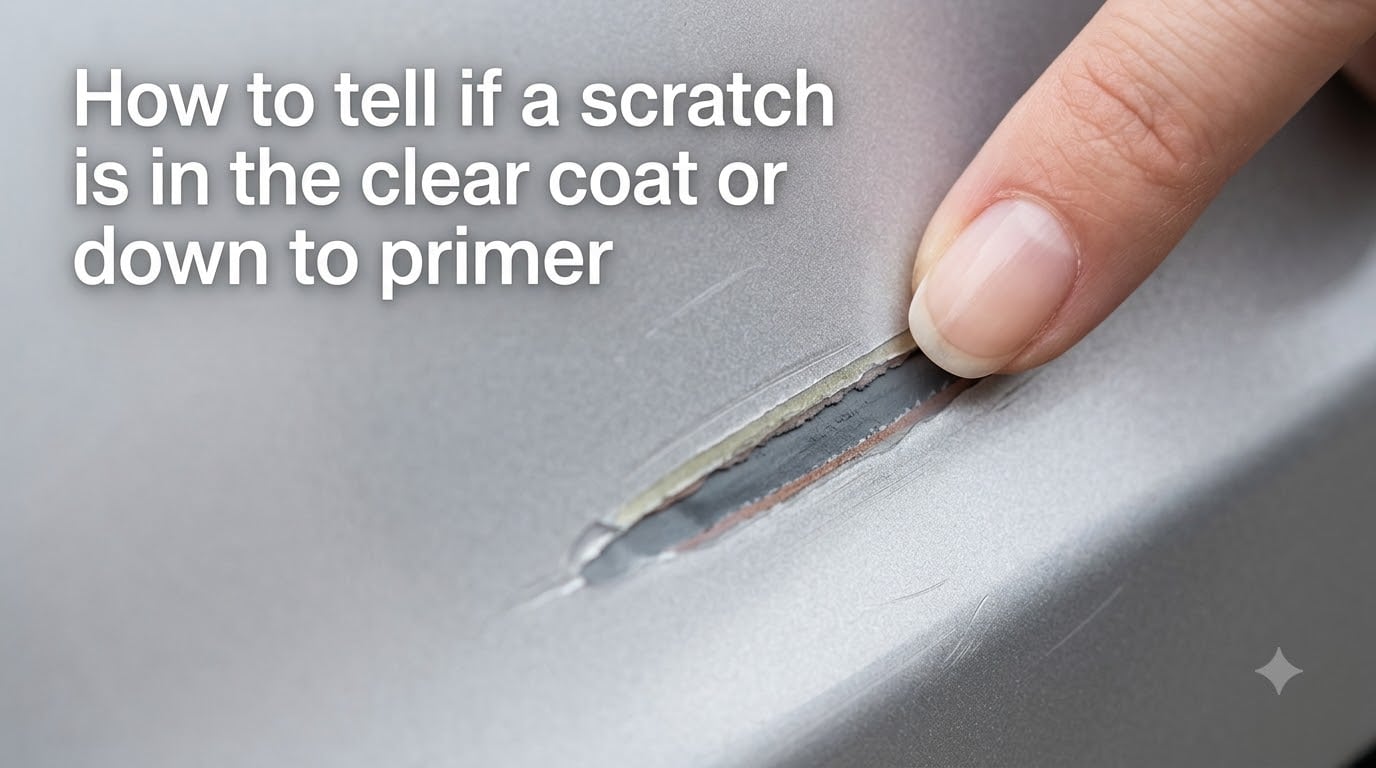
When you see gray or white at the bottom of a scratch, you are looking at exposed primer. This is your warning sign that the scratch has gone through both the clear coat and the base coat. Primer scratches will not rust immediately, but they do indicate that only one thin layer stands between the elements and your bare metal.
The Bare Metal Layer at the Bottom
Beneath all the paint layers is the bare steel or aluminum that makes up your car’s body panels. If a scratch reaches this layer, you will see shiny metal at the bottom of the gouge. This is the most serious type of scratch because bare metal begins oxidizing almost immediately when exposed to moisture and air.
Metal-exposed scratches require prompt attention. Without treatment, they will develop surface rust within days and eventually cause the surrounding paint to bubble and lift. This is the one scratch depth where delaying repair can lead to permanent body panel damage.
The Four Scratch Depth Levels Explained
Scratch depth determines everything: how difficult the repair is, whether you can handle it yourself, and how much risk it poses to your car’s long-term condition. We use a four-level system borrowed from professional auto detailing to classify every scratch we encounter.
Understanding where your scratch falls on this scale is the key to choosing the right repair approach. Each level has distinct visual and tactile characteristics that you can identify without any special tools.
Level 1: Surface Scratches (Clear Coat Only)
Level 1 scratches affect only the uppermost portion of the clear coat. These are the most common type and include swirl marks from improper washing, light scuffs from brushes, and minor clear coat scratches from contact with soft objects.
Visually, a Level 1 scratch appears as a faint white line on dark-colored cars or a barely visible mark on lighter vehicles. When you run your finger across it, you will feel almost nothing. The surface remains smooth because the scratch has not broken through the clear coat’s full thickness.
These scratches are completely safe to remove with a fine-cut polishing compound and a dual-action polisher or even hand application with a microfiber cloth. They carry zero rust risk because the paint layers beneath remain fully intact.
Level 2: Deeper Clear Coat Scratches
Level 2 scratches have cut deeper into the clear coat but have not yet reached the base coat. They are more visible than Level 1 scratches and often catch the fingernail slightly when you run it across the surface. On dark cars, they appear as pronounced white lines that are hard to miss.
The water test is especially useful for Level 2 scratches. When you pour water over them, the scratch may temporarily disappear because the water fills the gap and reflects light the same way intact clear coat does. Once the water evaporates, the scratch becomes visible again.
These scratches are still within the DIY repair zone. A medium-cut compound followed by a fine polish will usually level the clear coat enough to make them disappear. However, you are working closer to the base coat, so aggressive machine polishing should be done carefully to avoid burning through.
Level 3: Primer Scratches (Through to Gray Layer)
Level 3 scratches have broken completely through the clear coat and base coat, exposing the primer layer underneath. You will see a distinct color change at the bottom of the scratch: gray, white, or off-white instead of your car’s body color. The fingernail will catch firmly when dragged across these scratches.
These scratches cannot be polished away because there is no clear coat left to level. The repair requires touch-up paint matched to your car’s color code, applied in thin layers over the exposed primer. While not an immediate rust emergency, Level 3 scratches should be addressed within a few weeks to maintain the integrity of the primer layer.
Forum discussions on r/AutoDetailing consistently confirm that primer scratches catch the fingernail noticeably. If your fingernail hooks into the scratch and stops, you are almost certainly looking at Level 3 damage or deeper.
Level 4: Metal-Exposed Scratches (Rust Risk)
Level 4 is the most serious category. These scratches have penetrated all paint layers and exposed bare metal. You will see shiny silver or dull steel at the bottom of the scratch instead of primer or paint color. The edges of the scratch may feel jagged or raised when you run your finger across them.
This type of scratch demands immediate attention. Bare metal begins oxidizing as soon as it contacts moisture in the air. Within a few days of rain or high humidity, you may see the first orange tinge of surface rust forming. Left untreated, Level 4 scratches lead to bubbling paint and structural corrosion.
Repair involves applying a rust converter or inhibitor first, then primer, then color-matched base coat, then clear coat. Many car owners choose professional bodywork for Level 4 damage because the multi-step process requires skill and controlled conditions to produce invisible results.
How to Tell if a Scratch Is in the Clear Coat or Down to Primer?
The diagnostic process combines three approaches: visual inspection, the fingernail test, and the water test. Used together, these methods will tell you exactly which paint layer your scratch has reached. We recommend performing all three for the most accurate assessment.
Each test provides a different piece of information. Visual inspection reveals color changes and texture differences. The fingernail test measures physical depth. The water test confirms whether the scratch is purely cosmetic or structurally significant. Together, they eliminate guesswork.
Visual Inspection: Color and Texture Cues
Start by examining the scratch in good lighting, preferably natural daylight. Angle your head so light reflects off the surface at different angles. What you see at the bottom of the scratch tells you which layer has been exposed.
A scratch that appears white or lighter than the surrounding paint on a dark car is usually still in the clear coat. The white appearance comes from light scattering off the microscopic edges of the damaged clear coat, not from exposed primer. If the scratch shows gray, off-white, or a completely different color at its base, you are looking at exposed primer or base coat.
Texture matters too. Run your fingertip lightly across the scratch. If the surface feels smooth and the scratch is invisible to the touch, it is superficial. If you feel a ridge or groove, the scratch has cut deeper into the paint system.
The Fingernail Test: Primary Identification Method
The fingernail test is the single most reliable scratch depth check available to any car owner. It requires no tools, costs nothing, and takes about ten seconds to perform. Detailers and body shop technicians use this exact method every day.
The principle is simple: if your fingernail catches on the scratch when you drag it across the surface, the scratch has penetrated deep enough to create a physical ledge. Clear coat-only scratches rarely catch the fingernail because they are too shallow. Primer scratches and metal-exposed scratches almost always catch because they have cut through multiple layers.
There is a middle ground. A scratch that catches your fingernail slightly but not aggressively is likely a deeper clear coat scratch (Level 2). A scratch that stops your fingernail completely is Level 3 or 4. We will cover the exact procedure in the next section.
The Water Test: Secondary Confirmation
The water test provides visual confirmation of scratch depth by exploiting how clear coat and water interact with light. It is especially useful for distinguishing between Level 1 and Level 2 scratches that both appear white on dark paint.
Pour a small stream of water directly over the scratch and watch what happens. If the scratch disappears completely when wet, it is sitting in the clear coat. The water fills the micro-grooves and restores the reflective surface. If the scratch remains visible even when submerged in water, it has gone deeper than the clear coat and is likely into the base coat or primer.
This test works because water and clear coat have similar refractive indices. When water fills a clear coat scratch, light passes through it almost the same way it passes through intact clear coat, making the damage temporarily invisible. Deeper scratches cannot be hidden by water because the missing paint layers cannot be replaced by liquid.
White vs Colored Scratch Appearance
One of the most confusing aspects of scratch identification is the white appearance of clear coat scratches on dark cars. Many owners panic when they see a bright white scratch on their black or dark blue vehicle, assuming the worst. In most cases, that white mark is still just clear coat damage.
The white color comes from microscopic fractures in the clear coat that scatter light in all directions, similar to how crushed glass or ice appears white even though the individual pieces are transparent. The same principle makes clear coat scratches on white or silver cars nearly invisible, which is why dark paint colors always seem to show more damage.
If the scratch shows a different solid color at its base (gray for primer, silver for metal, or a mismatched version of your car’s color for base coat damage), it has gone deeper than the clear coat. The color test combined with the fingernail test gives you a reliable two-factor confirmation.
The Fingernail Test: Step-by-Step Procedure
The fingernail test works by detecting the physical ledge created when a scratch cuts through paint layers. A scratch that only sits in the clear coat produces no ledge because the damage is too shallow. A scratch that reaches the base coat or primer creates a step that your fingernail can feel.
Follow these steps to perform the test correctly. The process takes less than a minute, but doing it wrong can give you misleading results or even add new scratches to your paint.
Step 1: Clean the Area
Wash and dry the scratched area first. Dirt and debris on the surface can create false resistance when you drag your fingernail across the paint. A clean surface ensures you are feeling the actual scratch, not grit or dust sitting on top of it.
Step 2: Position Your Hand Correctly
Use your index finger or thumbnail. Hold your finger at roughly a 45-degree angle to the paint surface. You want the edge of your nail to glide across the scratch, not dig into it.
Step 3: Drag Across, Not Along
Move your fingernail perpendicular to the direction of the scratch, crossing over it in one smooth motion. Dragging your nail along the length of the scratch can deepen the damage and gives you no useful depth information.
Step 4: Read the Result
No catch, smooth glide: Level 1 surface scratch in the clear coat.
Slight catch or mild resistance: Level 2 deeper clear coat scratch.
Firm catch, nail stops: Level 3 primer scratch.
Nail hooks and stops hard, visible groove: Level 4 metal-exposed scratch.
Step 5: Test Several Times
Repeat the test two or three times along different points of the scratch. Scratches are not always uniform in depth. A single scratch may be shallow at one end and deep at the other, so testing multiple spots gives you the full picture.
Important Warning: Never press hard during the fingernail test. Excessive pressure can create additional scratches, especially on soft clear coats. Use the same gentle pressure you would use to check if a sticker is firmly adhered to a surface. If you feel your nail digging in, you are pressing too hard.
The Water Test: A Visual Confirmation Method
The water test confirms scratch depth by observing whether water can temporarily hide the damage. It is a visual method that works best as a second check after you have already performed the fingernail test. Together, the two tests give you high confidence in your diagnosis.
This test shines when dealing with hard-to-read scratches on dark paint where everything looks white and threatening. It is less useful on light-colored cars where scratches are already difficult to see.
Step 1: Choose the Right Conditions
Perform the water test in good lighting, ideally outside on a dry day. You need to clearly see the scratch before and after applying water. A flashlight or work light aimed at an angle can help on overcast days.
Step 2: Note the Scratch’s Appearance Dry
Before adding water, take a mental photo of how the scratch looks. Note its width, color, and visibility. This is your baseline for comparison.
Step 3: Pour Water Over the Scratch
Use a cup or bottle to pour a slow stream of water directly over the scratched area. You want enough water to fully saturate the scratch and the surrounding paint. Do not spray or splash, as this can distort your view.
Step 4: Observe the Result
Watch the scratch while the water sits on the surface. If the scratch vanishes completely and the surface looks uniform, you are dealing with a clear coat scratch. The water has filled the micro-grooves and restored the reflective surface.
If the scratch remains visible through the water or appears as a dark line against the wet surface, it has penetrated beyond the clear coat. Deeper scratches cannot be hidden by water because the missing paint layers represent actual material loss that liquid cannot replace.
Step 5: Watch It Dry
As the water evaporates, a clear coat scratch will reappear. This confirms that the damage was being masked by water’s optical properties, not actually repaired. Deeper scratches will look the same wet or dry because the structural damage is permanent.
Scratch Depth Comparison Table
This comparison table summarizes the key characteristics of each scratch depth level. Use it as a quick reference after performing the fingernail and water tests to confirm your diagnosis.
The table covers visual indicators, tactile feel, water test behavior, repair approach, and rust risk for all four levels. Find the row that matches your scratch’s symptoms to determine your next steps.
| Level | Layer Affected | Visual Appearance | Fingernail Test | Water Test | Rust Risk | Repair Method |
|---|---|---|---|---|---|---|
| 1 | Clear coat (surface) | Faint white line, barely visible | No catch, smooth | Disappears when wet | None | Polishing compound |
| 2 | Clear coat (deep) | Pronounced white mark on dark paint | Slight catch | Mostly disappears | None | Medium-cut compound and polish |
| 3 | Base coat or primer | Color change, gray or white base visible | Firm catch, nail stops | Remains visible | Low (treat within weeks) | Touch-up paint matched to color code |
| 4 | Bare metal exposed | Shiny metal or dull steel visible | Nail hooks into groove | Remains visible | High (rust within days) | Rust inhibitor, primer, paint, clear coat |
If your scratch matches Level 1 or 2, you are in DIY territory and can likely handle the repair yourself. Level 3 requires touch-up paint and patience but is still manageable for most car owners. Level 4 warrants serious consideration of professional bodywork, especially on visible panels.
Repair Options by Scratch Depth
Once you know your scratch depth, choosing the right repair method becomes straightforward. The key principle is matching the repair approach to the damage level. Using an aggressive method on a shallow scratch wastes time and risks burning through your clear coat. Using a gentle method on a deep scratch accomplishes nothing.
Here is a breakdown of what each scratch level requires and whether you should tackle it yourself or seek professional help.
Polishing and Buffing for Clear Coat Scratches
Level 1 and Level 2 scratches respond well to polishing because the damage is confined to the clear coat. The goal is to physically level the surrounding clear coat until it matches the depth of the scratch, effectively erasing the visible groove.
For Level 1 scratches, a fine-cut polishing compound applied with a microfiber cloth by hand is often sufficient. Work in small circular motions with moderate pressure for two to three minutes, then wipe clean and inspect. Repeat if the scratch is still visible.
Level 2 scratches benefit from a dual-action polisher with a medium-cut compound followed by a finishing polish. The machine provides consistent pressure and speed that hand application cannot match. Always use the least aggressive approach first and work your way up only if needed.
Be cautious with machine polishing near edges, ridges, and body panel gaps where the clear coat is thinnest. These areas burn through faster than flat panels and can turn a repairable scratch into a permanent problem.
Touch-Up Paint for Primer Scratches
Level 3 scratches cannot be polished away because the clear coat and base coat are already missing. The repair requires filling the scratch with new paint. Start by cleaning the area thoroughly with isopropyl alcohol to remove wax and contaminants.
Find your car’s paint code, usually located on a sticker in the driver’s door jamb or under the hood. Purchase a touch-up paint kit matched to that code. Apply the base coat in thin layers using the included fine brush or a toothpick for precision. Allow each layer to dry before adding the next.
Once the base coat fills the scratch slightly above the surrounding surface, apply clear coat over the top. After full curing (typically 24 to 48 hours), you can lightly polish the area to blend the repair with the surrounding paint.
Professional Bodywork for Metal-Exposed Scratches
Level 4 scratches involve multiple repair stages that demand precision and controlled conditions. The process starts with treating any surface rust using a rust converter or phosphoric acid solution. Once the metal is clean and stable, primer is applied, followed by color-matched base coat and clear coat.
On flat panels with small scratches, a determined DIYer can achieve acceptable results. On curved panels, areas near body lines, or scratches larger than a quarter, professional bodywork produces dramatically better outcomes. Body shops have spray equipment, dust-controlled environments, and color-matching expertise that garage repairs cannot replicate.
The cost difference is significant. A professional Level 4 repair might run $200 to $600 depending on the panel and scratch size. But compared to the cost of ignoring it (rust repair, panel replacement, full repaint), professional work pays for itself on visible or structural panels.
When DIY Repair Makes Sense vs When to Call a Pro
As a general rule, any scratch you cannot feel with your fingernail is safe to tackle yourself. If the fingernail catches but the scratch is short (under two inches) and on a flat panel, DIY touch-up paint will produce good results.
Call a professional if the scratch catches your fingernail firmly, spans multiple body panels, crosses body lines or curves, or shows visible metal. Also consider professional help if your car is a lease, a high-value vehicle, or if the scratch is on a highly visible area like the hood or front door where imperfect repairs are obvious.
Forum users on r/Autobody consistently recommend getting multiple quotes for Level 4 damage. Prices can vary widely between shops, and some mobile paint repair specialists offer excellent results at lower prices than traditional body shops for smaller scratches.
Common Causes of Car Scratches at Each Depth
Understanding what caused your scratch can help you estimate its depth before you even test it. Different sources of damage tend to create different scratch profiles based on the force and material involved.
Level 1 surface scratches typically come from improper washing techniques. Using dirty sponges, single-bucket washing, or drying with abrasive towels all create fine swirl marks in the clear coat. Automatic car washes with dirty brushes are notorious for adding hundreds of micro-scratches in a single visit.
Level 2 deeper clear coat scratches often result from contact with soft objects at moderate speed. Brushing against bushes while parking, a bicycle handlebar leaning against the door, or a pet leash dragging across the quarter panel can all create scratches that catch the fingernail but do not reach the base coat.
Level 3 and Level 4 scratches come from harder impacts with sharp or rigid objects. Key marks, shopping cart corners, parking lot posts, stone chips on the highway, and contact with metal edges all create deep scratches that penetrate multiple paint layers. If you know your scratch came from a hard, sharp object, expect it to be at least Level 3.
Prevention Tips to Avoid Future Scratches
Once you have repaired your current scratch, the next priority is preventing new ones. A few simple habits dramatically reduce the frequency and severity of paint damage over the life of your vehicle.
Proper Washing Technique
Adopt the two-bucket wash method: one bucket with soapy water and one with clean rinse water. Rinse your wash mitt in the clean bucket after every panel to prevent dirt from being dragged back across the paint. Always use a high-quality microfiber wash mitt, never sponges or brushes with synthetic bristles.
Dry with clean microfiber towels designed for automotive use. Household towels and paper products contain fibers that are too abrasive for clear coat and will create swirl marks over time.
Protective Products and Coatings
Apply a quality paint sealant or ceramic coating every six to twelve months. These products add a sacrificial layer on top of your clear coat that absorbs minor scratches and chemical damage before it reaches the paint.
For high-impact areas like the hood, front bumper, and door edges, consider paint protection film (PPF). This transparent urethane layer self-heals minor scratches with heat and provides physical protection against stone chips and deeper abrasions that no wax or coating can stop.
Parking and Storage Habits
Park away from other vehicles when possible. Most door dings and parking lot scratches happen in crowded lots where adjacent cars are packed tightly. Walking an extra thirty seconds to a quieter spot saves you from unpredictable damage you cannot control.
Use a car cover if you store your vehicle outdoors for extended periods. Choose a soft, breathable cover designed for your specific vehicle to prevent wind movement from rubbing the cover against the paint. Avoid cheap universal covers, which can actually cause scratches through friction.
FAQs
How to tell if a scratch is just clear coat?
Run your fingernail gently across the scratch at a 45-degree angle. If your nail glides smoothly without catching, the scratch is confined to the clear coat. You can confirm by pouring water over it: if the scratch disappears when wet, it is purely a clear coat scratch that can be polished out.
What does a primer scratch look like?
A primer scratch shows a visible color change at its base, typically gray, off-white, or white instead of your car’s body color. The scratch will catch your fingernail firmly when dragged across it. On dark cars, the contrast between the body color and the gray primer makes these scratches easy to identify.
How to tell the depth of a car scratch?
Use three methods together: visual inspection for color changes, the fingernail test for physical depth, and the water test for optical confirmation. If your fingernail does not catch, it is a surface scratch. A slight catch means deeper clear coat damage. A firm catch indicates primer or deeper. Visible metal means the scratch has penetrated all layers.
How deep is too deep of a scratch on a car?
A scratch is too deep for DIY repair when it exposes bare metal. If you see shiny metal at the bottom of the scratch, the damage has penetrated through the clear coat, base coat, and primer. These scratches require rust treatment, primer, paint, and clear coat application to prevent corrosion. Scratches that catch your fingernail firmly but do not show metal can usually be handled with touch-up paint.
My car scratch catches my fingernail. What should I do?
If your fingernail catches on the scratch, it has likely gone through the clear coat. Check the base of the scratch for a color change: gray means primer is exposed, metal means all layers are breached. For primer scratches, use touch-up paint matched to your car’s color code. For metal-exposed scratches, apply a rust inhibitor immediately and consider professional repair. Avoid trying to buff out a scratch that catches your fingernail, as polishing will not restore missing paint layers.
Will clear coat scratches turn into rust?
No, clear coat scratches will not rust because they have not exposed bare metal. The base coat and primer layers beneath the clear coat remain intact and continue protecting the metal. Rust only becomes a risk when a scratch penetrates through all paint layers to expose bare steel or aluminum. However, deep clear coat scratches should still be polished out to restore the protective barrier and prevent the damaged area from accumulating dirt and moisture.
Conclusion: Diagnose Early, Repair Confidently
Knowing how to tell if a scratch is in the clear coat or down to primer gives you control over an otherwise stressful situation. The two-test method, fingernail followed by water, takes less than a minute and tells you exactly what you are dealing with.
If your fingernail glides smoothly and the scratch vanishes under water, you have a clear coat scratch that polishing will resolve. If your nail catches firmly and you see gray or metal at the base, you are looking at primer or deeper damage that requires touch-up paint or professional attention.
The most important takeaway is simple: assess scratches early. A clear coat scratch left untreated can accumulate dirt and moisture that eventually deepen the damage. A primer scratch ignored for months can allow corrosion to take hold beneath the paint. The minute you notice a scratch, run the tests, classify the depth, and take action. Your car’s paint will thank you for it.