
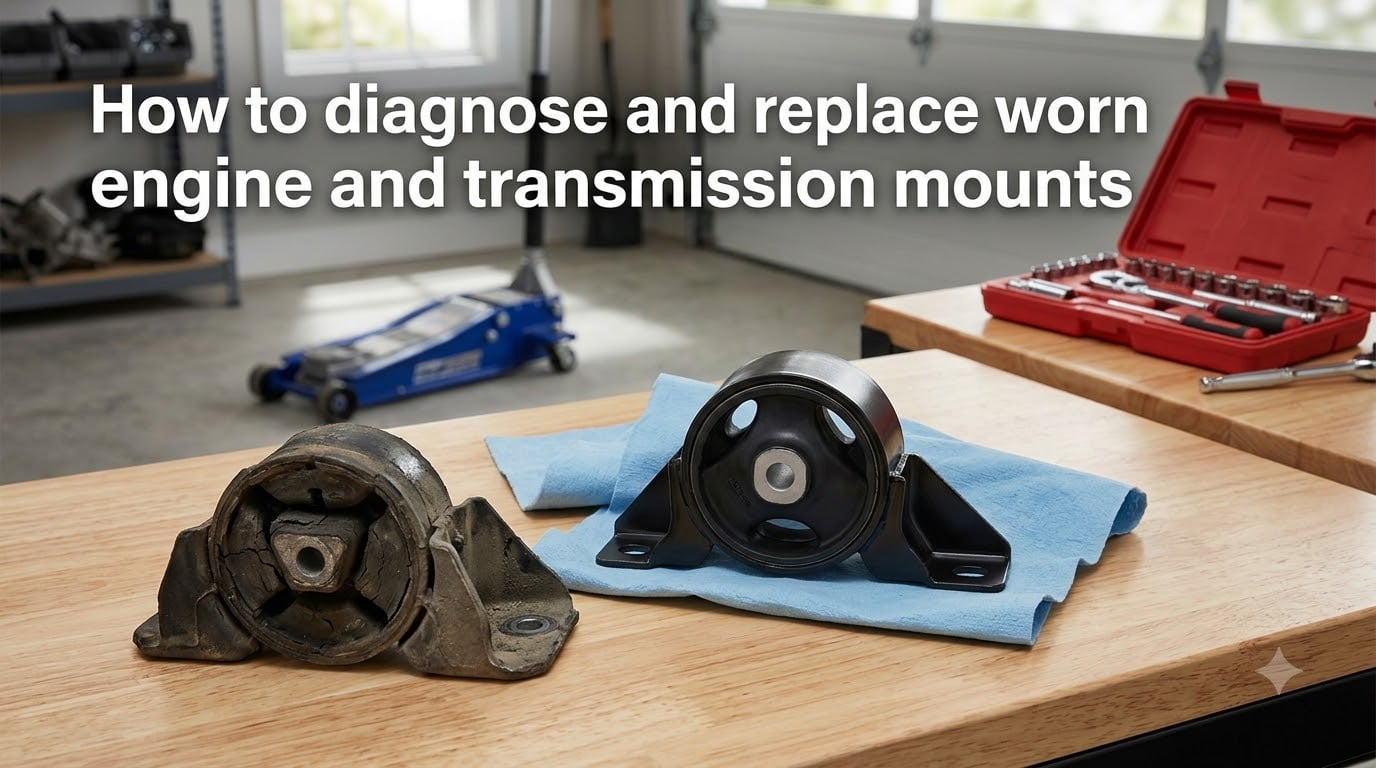
If your car has started shaking harder than usual at idle, or you hear a clunk every time you hit the gas, the culprit might be sitting right under your hood. I’m talking about the engine and transmission mounts. I’ve been around enough garage floors to know this repair is one of the most overlooked yet satisfying fixes a car owner can do.
In this guide, I’ll walk you through how to diagnose and replace worn engine and transmission mounts. You’ll learn what these parts do, the symptoms of failure, how to test them at home without special tools, and exactly how to swap them out. We’ll also cover what this job costs and when it’s better left to a shop.
Table of Contents
What Are Engine and Transmission Mounts?
Engine and transmission mounts are the rubber (or polyurethane) cushions that hold your powertrain to the car’s frame. Their job is simple but critical: support the weight of the engine and transmission while absorbing vibrations before they reach the cabin.
A typical motor mount sandwiches a rubber insulator between two metal plates. One plate bolts to the engine block, the other to the vehicle subframe. The rubber flexes just enough to let the engine torque slightly under acceleration, but stops it from rocking wildly.
There are three main types you will encounter. Solid rubber mounts are the standard fitment on most cars. Polyurethane mounts are stiffer, last longer, and transmit more vibration. Hydraulic or viscous mounts use internal fluid to absorb vibration and are common on luxury vehicles and many modern V6/V8 engines.
Most front-wheel-drive cars have three or four mounts. There’s typically a right mount, a left mount, and a rear “dog bone” mount that controls engine roll. Rear-wheel-drive vehicles often have just two mounts paired with a separate transmission crossmember.
Engine Mount vs Transmission Mount: Key Differences
The two components look similar and live in the same neighborhood under the hood, but they serve slightly different purposes. Engine mounts handle the front of the powertrain, dealing with combustion forces and torque reaction. Transmission mounts sit at the tail end of the transmission, often closer to the firewall.
Because engine mounts deal with more vibration from combustion, they tend to fail first on most vehicles. Transmission mounts usually only fail after years of stress or from oil leaks that degrade the rubber.
A failed engine mount usually announces itself through vibration at idle or clunks during shifts. A bad transmission mount more commonly produces clunks when going from Drive to Reverse, or when braking hard from highway speeds.
Signs of Worn Engine Mounts
Here are the symptoms I look for first when a customer complains about a rough-running car. You might notice one or several of these at once.
Excessive vibration at idle. A healthy motor mount absorbs idle shake. If your steering wheel, seat, or floorboards buzz noticeably when stopped at a light, the rubber has likely collapsed or separated from its metal backing.
Clunk or thump on acceleration. When you press the gas, the engine torques backward. A worn mount lets it slam into its stops, producing a single sharp clunk. The same noise can appear when you lift off the throttle.
Engine lurches during shifts. On automatic cars, a healthy mount keeps the engine steady during gear changes. A broken mount lets the engine rock forward, which you feel as a sideways lurch in the cabin.
Visible engine movement. Pop the hood and have someone shift from Neutral to Drive with their foot on the brake. If the engine visibly twists or lifts more than half an inch, the mount on the opposite side is shot.
Check Engine Light from phantom codes. Severe engine movement can trick the knock sensor into thinking the engine is pinging. I’ve seen multiple P0325 or P0332 codes traced back to nothing more than a torn motor mount.
Signs of Worn Transmission Mounts
Transmission mount failures are subtler, but they have their own signature symptoms worth knowing.
Clunk when shifting between Drive and Reverse. This is the classic tell. The transmission twists slightly during direction changes, and a worn mount lets it bang against its bracket.
Vibration that gets worse under load. If you feel a buzz through the floor only when accelerating uphill or towing, suspect the transmission mount before the engine mounts.
Driveline shudder on acceleration. A sagging transmission can change the angle of your driveshaft, producing a shake that feels like an out-of-balance tire but only happens under power.
Visible oil leak on the mount. Automatic transmission fluid is great at destroying rubber. If you see ATF soaked into the mount, the fluid is the cause and the mount is on its way out.
How to Diagnose Bad Mounts at Home
You do not need a lift or fancy scanner to figure out which mount has failed. These three tests have worked for me for years and only require basic tools.
Test 1: The Drive-Reverse Test
Start the engine and put the transmission in Neutral. Set your parking brake firmly. Stand in front of the car and have a helper press the brake pedal. Shift into Drive for two seconds, then into Reverse for two seconds. Watch the engine.
You are looking for a smooth twist of about half an inch. Any violent rocking, slamming, or lift greater than an inch on one side means the mount on the opposite side is broken.
Test 2: The Brake Hold Test
Park on level ground with the engine running. Press the brake firmly, shift into Drive, and slowly release the brake. If the engine rocks forward with a clunk, the rear mount (or dog bone) is bad.
Test 3: Visual Inspection
Get the car on jack stands safely. Grab each mount and try to twist or pry it. A good mount has firm resistance. If the rubber has separated from the metal, or the mount moves freely, it needs replacement. Look for cracks, fluid contamination, and collapsed rubber.
Use a flashlight and mirror to see mounts hidden behind heat shields. Don’t forget to check the dog bone mount on transverse (front-wheel-drive) engines; it is a frequent failure point.
Step-by-Step Mount Replacement Guide
Replacing a mount is one of the more approachable DIY jobs on most vehicles. Here is the procedure I follow, using the left engine mount as the example. Always grab a vehicle-specific repair manual for exact torque specs.
Step 1: Gather Tools and Parts
You will need a floor jack, jack stands, a socket set (typically metric), a breaker bar, a torque wrench, and wooden blocks. Pick up OEM-quality replacement mounts. Avoid cheap no-name brands; I’ve seen those fail in under 30,000 miles.
Step 2: Safety First
Disconnect the negative battery cable. Make sure the engine is cold. Never work under a vehicle supported only by a jack. Always use jack stands on level ground.
Critical warning: never place a jack under the oil pan. The pan will dent and you could crack it, leading to a catastrophic oil leak. Use a block of wood on the jack saddle to spread the load, or use a specialized engine support bar.
Step 3: Support the Engine
Slide a floor jack with a wood block under the engine oil pan’s reinforced areas, or use an overhead support beam. Raise the engine just enough to take weight off the mount, not enough to lift it fully.
Step 4: Remove the Mount Bolts
Loosen the through-bolt that connects the mount to the engine bracket. Then remove the two or three bolts securing the mount to the frame or subframe. Some mounts have a single stud with a nut.
Step 5: Compare Old and New
Before installing the new mount, hold it next to the old one. Make sure they match in shape, bolt pattern, and height. A mismatched mount can create engine vibration even when brand new.
Step 6: Install the New Mount
Thread the mount-to-frame bolts in by hand first, before lowering the engine. This prevents cross-threading. Lower the jack slowly until the engine weight rests on the new mount.
Step 7: Torque to Spec
Tighten all bolts to the manufacturer’s torque specification. Typical values are 30 to 60 ft-lbs for through-bolts and 40 to 80 ft-lbs for frame bolts. Over-tightening can crack the new mount.
Step 8: Reassemble and Test
Reconnect any ground straps, brackets, or heat shields you removed. Start the engine and re-run the Drive-Reverse test. Engine movement should be back to a smooth half-twist.
For front-wheel-drive cars with a dog bone mount, the procedure is similar but the mount is usually accessed from below, between the engine and subframe. The through-bolt often passes horizontally through the mount body.
DIY vs Professional Service
Whether you should tackle this job yourself depends on the mount location and your experience level.
The lower engine mount on most vehicles is a 30-minute to 1-hour DIY job with basic tools. Side mounts, transmission mounts, and especially upper torque mounts on V-shaped engines often require 3 to 5 hours at a shop due to access issues. I have seen MINI owners quoted $1,300 to $1,400 by dealers for a single upper mount, then complete the same job in 3 hours with a $90 part.
DIY makes sense if you have a safe place to work, basic hand tools, and the vehicle-specific repair data. Professional service makes sense for hidden mounts, when special tools are required to support the engine, or when the engine is heavily optioned (air conditioning compressors, complex intake plumbing) and access is restricted.
Cost Considerations for Mount Replacement
Parts prices vary widely by vehicle. A single aftermarket engine mount runs $20 to $80 for common cars, and $100 to $250 for European models. Hydraulic mounts can exceed $200 each. A typical full set of three mounts for a domestic car costs $80 to $200 in parts.
Labor at independent shops typically runs $300 to $700 for one mount, and $800 to $1,500 for a full set including transmission mount. Dealer labor is usually 30 percent higher.
DIY savings on a single mount replacement can easily reach $400 to $800 once you factor in shop labor rates. The trade-off is your time, which is why many owners replace all mounts at once when one fails.
What Happens If You Ignore Worn Mounts
Driving on bad mounts is possible in the short term, but it is a slow-motion failure that gets expensive. Excessive engine movement can crack exhaust manifolds, snap vacuum lines, and rip CV axle boots. The Check Engine Light from false knock sensor readings may mask other problems.
In severe cases, the engine can shift enough during hard braking to contact the firewall or hood. Steering and handling can feel vague because engine torque is not being properly controlled. On automatic cars, the torque converter cannot do its job if the transmission is rocking freely.
If you must drive briefly with a known bad mount, take it easy on the throttle and avoid hard braking. Get it fixed as soon as possible.
Tips to Extend Mount Life
Mounts are wear items, but you can stretch their life with a few habits. Fix oil and transmission leaks promptly; petroleum fluid destroys rubber quickly. Avoid slamming the transmission into Drive or Reverse. Smooth shifts put less shock into the mounts.
Warm up the engine briefly before driving hard in cold weather. Cold rubber is stiff and brittle, and a hard launch on a freezing morning can tear a mount outright. Finally, address engine misfires quickly. Each firing imbalance pounds the mounts hundreds of times per minute.
FAQs
How do you know if your engine mount is bad or transmission mount?
Engine mount failures usually show up as vibration at idle or clunks during acceleration. Transmission mount failures most commonly produce a clunk when shifting between Drive and Reverse, or vibration that gets worse under load. Both can be confirmed by the Drive-Reverse test.
How expensive is it to replace a transmission mount?
Parts run $50 to $200 for most vehicles, with hydraulic or European models higher. Labor adds $200 to $500 depending on access. Total job cost typically lands between $300 and $900.
Is it a big job to replace engine mounts?
It depends on the mount. Lower engine mounts on most cars take 30 minutes to 1 hour. Side mounts, transmission mounts, and upper torque mounts often require 3 to 5 hours due to limited access and the need to support the engine.
Can I still drive with bad engine mounts?
Short trips are possible, but you should avoid hard acceleration and braking. Continued driving risks damage to exhaust manifolds, vacuum lines, and CV axles, and can throw Check Engine Light codes from phantom knock sensor readings.
How much does it usually cost to replace engine mounts?
A single aftermarket engine mount costs $20 to $80 for most vehicles, $100 to $250 for European models. A full set of three mounts with shop labor typically runs $400 to $1,200. Dealer pricing is usually 30 percent higher than independent shops.
How urgent is an engine mount replacement?
Schedule replacement within a few weeks of diagnosis. A single failed mount often precedes others failing within months, and ignoring the problem risks secondary damage to exhaust and driveline components.
Can I replace an engine mount myself?
Yes, for accessible mounts like lower or dog bone mounts, with basic hand tools and a safe workspace. Hidden mounts on tightly packed engines, and mounts that require special engine support tools, are better left to a shop.
Final Thoughts on Diagnosing and Replacing Engine and Transmission Mounts
Learning how to diagnose and replace worn engine and transmission mounts saves you money and gives you a quieter, smoother car. Start with the Drive-Reverse test if you suspect a problem, then move on to a visual inspection. Accessible mounts are a satisfying DIY project that most home mechanics can finish in an afternoon.
If your vehicle has a hard-to-reach mount or you do not have a safe place to work, an independent shop will usually beat dealer pricing by a wide margin. Either way, fixing worn mounts promptly protects your engine, exhaust, and driveline from much costlier damage down the road.