
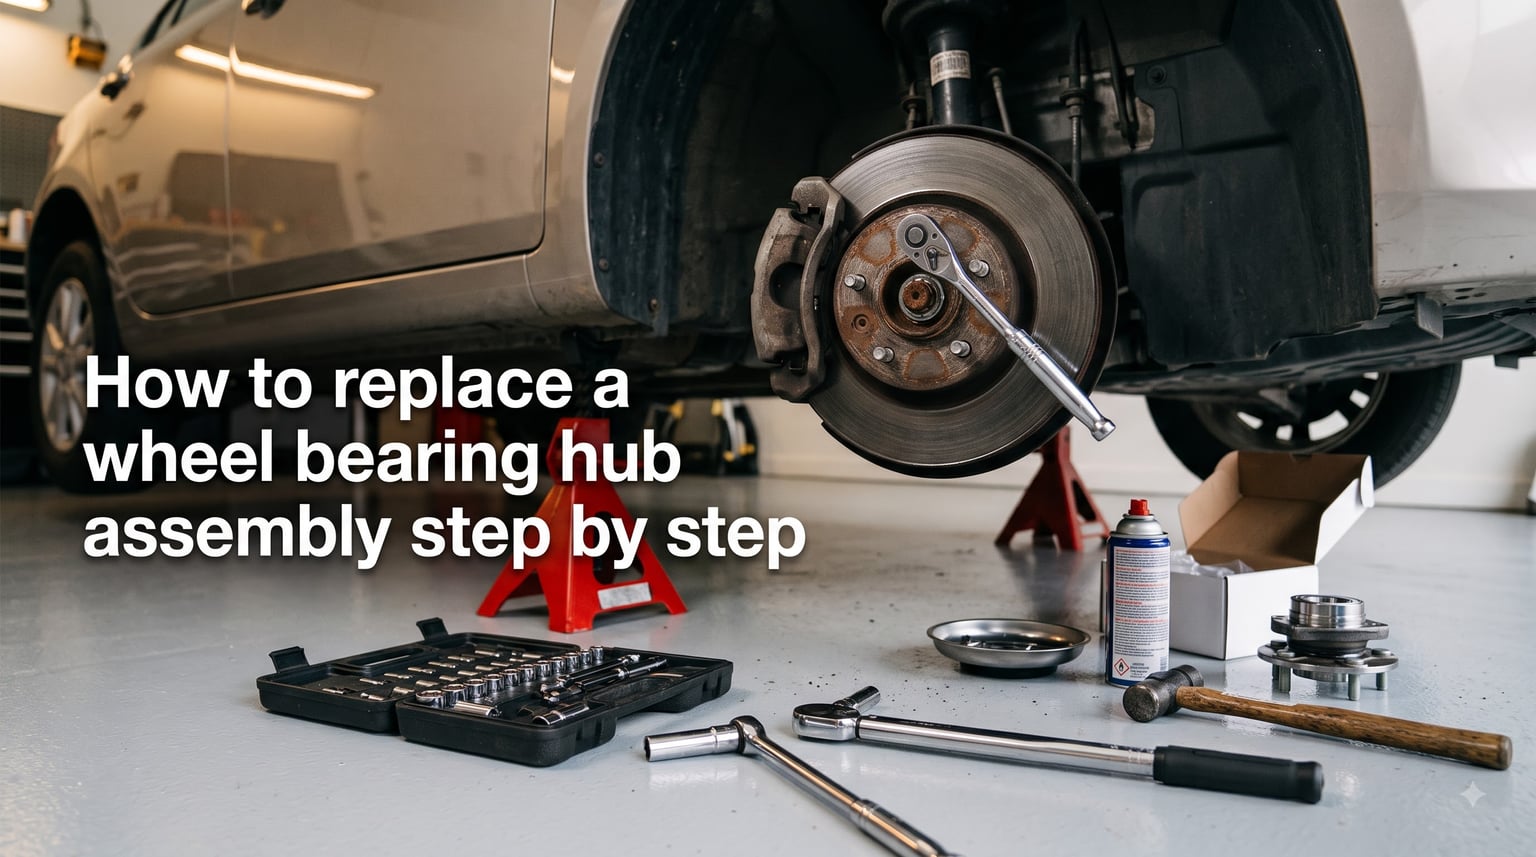
If you are hearing a grinding or humming noise that gets louder with speed, your wheel bearing hub assembly is likely failing. Learning how to replace a wheel bearing hub assembly step by step can save you $300 to $500 in shop labor costs. With the right tools and a methodical approach, this is a job that a dedicated DIYer can complete in a single afternoon.
Our team has broken this process down into clear, sequential steps that cover everything from diagnosis to the final test drive. We have pulled insights from professional mechanics, forum discussions, and manufacturer service manuals to give you the most complete guide available.
You do not need to be a master technician to tackle this repair. What you need is patience, the correct tools, and a willingness to follow each step without skipping ahead. Let us walk through the entire process together.
Table of Contents
Signs Your Wheel Bearing or Hub Assembly Is Failing
Catching a failing wheel bearing early prevents damage to other suspension components and keeps you safe on the road. The symptoms are distinctive once you know what to look for, and ignoring them only makes the eventual repair more expensive.
The most common sign is a growling or humming noise that changes pitch with vehicle speed. Many drivers describe it as sounding like an airplane engine or off-road tires on pavement. The noise typically gets louder when you turn the steering wheel toward the side with the bad bearing because more weight shifts onto that wheel.
Another red flag is a vibration in the steering wheel or through the floorboard. A worn bearing allows the hub to wobble slightly, creating vibrations that you can feel at highway speeds. If you notice uneven tire wear on one wheel, that can also point to a bearing that has excessive play.
If your vehicle has an ABS system, a failing wheel bearing can trigger the ABS warning light on your dashboard. This happens because the wheel speed sensor integrated into the hub assembly stops sending accurate data when the bearing wears out. You might also notice the ABS activating unexpectedly during normal braking.
To confirm which bearing is bad, drive at about 40 mph and gently swerve left and right. If the noise gets louder when swerving right, the left bearing is likely the culprit because weight transfers off it and onto the right side, which is actually the bad one. The reverse applies when swerving left.
Wheel Bearing vs Hub Assembly: Understanding the Difference
Before you start, you need to know which type of setup your vehicle uses. This determines the tools you need and the difficulty of the job. The two main types are pressed-in bearings and bolt-on hub assemblies, and the difference between them is significant.
A bolt-on hub assembly is a self-contained unit where the bearing, hub, and sometimes the ABS wheel speed sensor are all integrated into one piece. You remove a few bolts, pull out the old unit, and bolt in a new one. These are common on many GM, Ford, and Chrysler vehicles, and they are much easier for DIY replacement.
A pressed-in bearing is just the bearing itself, pressed directly into the steering knuckle. Removing and installing this type requires a hydraulic shop press or a specialized bearing puller tool. This design is common on many Honda, Toyota, Subaru, and European vehicles. Pressed bearings are considerably harder to replace yourself.
Many forum users ask whether you can replace just the bearing on a hub assembly. On a bolt-on unit, the answer is no. The bearing is permanently sealed inside the hub, so you must replace the entire assembly. On a pressed-in design, you can replace just the bearing, but you need the right press equipment.
If you have pressed-in bearings and do not own a shop press, some auto parts stores rent bearing press kits. You can also remove the steering knuckle and take it to a machine shop, where they will press out the old bearing and press in the new one for a reasonable fee.
Tools and Materials You Need
Having every tool ready before you start saves you from making emergency trips to the parts store mid-job. Here is the complete list based on what professional mechanics and experienced DIYers recommend.
For lifting and supporting the vehicle, you need a floor jack rated for your vehicle’s weight and a pair of sturdy jack stands. Never work under a vehicle supported only by a hydraulic jack. You also need a wheel chock for the opposite end of the vehicle.
For the axle nut, you need an axle nut socket set. These nuts typically range from 30mm to 36mm depending on your vehicle, so check your specific application before buying. A breaker bar at least 24 inches long gives you the leverage needed to break loose a stubborn axle nut.
For brake components, you need a socket set, a ratchet, and a brake caliper hanger or a bungee cord to support the caliper. Do not let the caliper hang by its brake hose. You will also need a C-clamp or caliper piston compression tool if you plan to service the brakes at the same time.
For the hub assembly itself, you need a torque wrench for reassembly, penetrating oil (like PB Blaster or Kroil), a rubber mallet, and a pry bar. If you are dealing with a pressed-in bearing, you also need a bearing press kit or access to a hydraulic press.
Additional essentials include safety glasses, mechanic’s gloves, a wire brush for cleaning corrosion, and dielectric grease for the ABS sensor connector. If your axle nut uses a cotter pin, have a new one ready because the old one should not be reused.
Safety Precautions Before You Start
Safety comes first on every automotive project, and this job is no exception. Working under a raised vehicle carries real risks that you can eliminate with proper preparation. Take these steps seriously.
Park your vehicle on a flat, solid surface. Concrete is ideal, and asphalt is acceptable. Never jack up a car on dirt, gravel, or an inclined surface. Engage the parking brake and place wheel chocks behind the wheels on the opposite end of the vehicle from where you are working.
Loosen the axle nut while the vehicle is still on the ground and the wheel is supporting the car’s weight. The wheel keeps the hub from spinning, giving you the resistance needed to break the nut free. This is much safer and easier than trying to hold the hub still while the vehicle is lifted.
Disconnect the negative battery terminal before starting work, especially if your vehicle has an ABS system with electrical connections near the hub. This prevents accidental short circuits when you disconnect the wheel speed sensor.
Wear safety glasses whenever you are underneath the vehicle or using a hammer. Rust, dirt, and metal debris fall from the undercarriage constantly during this job. Protect your eyes throughout the entire process.
How to Replace a Wheel Bearing Hub Assembly Step by Step: Removal
This is the heart of the guide. Follow each step in order, and do not rush through any of them. The removal process for a bolt-on hub assembly typically takes 60 to 90 minutes for a first-timer.
Step 1: Loosen the axle nut. Before jacking up the vehicle, remove the center cap from the wheel and use your breaker bar and axle nut socket to crack loose the axle nut. You may need a cheater pipe on the breaker bar for extra leverage. Only loosen it about a quarter turn at this stage, while the wheel is still on the ground. Some axle nuts are staked into a groove on the axle. If yours is staked, use a punch and hammer to un-stake it first.
Step 2: Lift and support the vehicle. Jack up the vehicle at the manufacturer’s recommended lift point. Place jack stands under the frame or designated support points, then slowly lower the vehicle onto the stands. Give the vehicle a firm shake to confirm it is stable before getting underneath it.
Step 3: Remove the wheel. Remove the lug nuts and pull the wheel off the hub. Set the wheel aside. If you removed the center cap earlier, set it somewhere safe.
Step 4: Remove the brake caliper and rotor. Use your socket set to remove the caliper mounting bolts. Slide the caliper off the rotor and hang it from the suspension spring using a caliper hanger or bungee cord. Do not let it dangle by the brake hose. Then pull the brake rotor straight off the lug studs. If the rotor is rusted to the hub, tap it gently with a rubber mallet around the edges to break it free.
Step 5: Disconnect the ABS sensor. Locate the ABS wheel speed sensor connector, usually mounted on the back of the hub assembly or the steering knuckle. Squeeze the locking tab and pull the connector apart. Route the sensor wire out of the way so it does not get snagged during hub removal.
Step 6: Remove the axle nut completely. Now that the vehicle is supported and the brake components are out of the way, remove the axle nut the rest of the way. If you are having trouble, a friend can hold a pry bar inserted through the wheel studs to prevent the hub from spinning while you turn the nut.
Step 7: Remove the hub mounting bolts. On most bolt-on hub assemblies, there are three or four mounting bolts accessible from the back of the steering knuckle. Soak them with penetrating oil and let it sit for 10 to 15 minutes. Remove the bolts with your socket and ratchet. A universal joint socket may help reach bolts at awkward angles.
Step 8: Separate the hub from the steering knuckle. The hub assembly may be seized in place by corrosion. Tap around the flange with a rubber mallet to break it loose. If it refuses to move, use a hub puller tool or a three-jaw puller to press it out. Never use an air chisel or heat from a torch, as this can damage the steering knuckle.
Step 9: Clean the mounting surface. Use a wire brush to clean rust and debris from the steering knuckle where the hub seats. The surface must be clean and smooth for the new hub to sit flush. Apply a thin film of anti-seize to the mounting bore to make future removal easier.
How to Replace a Wheel Bearing Hub Assembly Step by Step?
Installing the new hub assembly is more straightforward than removal, but precision matters. Every fastener must be torqued to specification for the bearing to operate correctly and safely.
Step 1: Position the new hub assembly. Align the new hub with the bolt holes on the steering knuckle. Make sure the ABS sensor, if integrated, is positioned correctly and that the wiring connector faces the right direction for easy connection. Slide the hub into the steering knuckle until it seats flush.
Step 2: Install the mounting bolts. Thread all mounting bolts in by hand first to avoid cross-threading. Once all bolts are started, tighten them in a star or crisscross pattern to distribute clamping force evenly. Use your torque wrench to tighten them to the manufacturer’s specified torque, typically between 50 and 80 lb-ft depending on the vehicle.
Step 3: Reconnect the ABS sensor. Plug the ABS wheel speed sensor connector back in until the locking tab clicks. Apply a small amount of dielectric grease to the connector to prevent moisture intrusion and corrosion. This simple step prevents ABS issues down the road.
Step 4: Reinstall the axle nut. Thread the axle nut onto the axle by hand. Tighten it partially with your socket and ratchet for now. You will do the final torque after the wheel is back on and the vehicle is on the ground.
Step 5: Reinstall the brake rotor and caliper. Slide the brake rotor back over the lug studs. Then remount the brake caliper over the rotor and reinstall the caliper mounting bolts. Torque the caliper bolts to the specified torque for your vehicle, which is usually between 25 and 45 lb-ft.
Step 6: Reinstall the wheel. Put the wheel back on the hub and thread the lug nuts on by hand. Snug them in a star pattern. Lower the vehicle off the jack stands until the tires are touching the ground, then torque the lug nuts to the specified value in a star pattern.
Step 7: Final torque the axle nut. Now that the vehicle’s weight is on the wheels, perform the final torque on the axle nut. This is critical for bearing life. Use your torque wrench to tighten to the manufacturer’s specification, which typically ranges from 150 to 250 lb-ft. If the specification calls for a cotter pin, align the nut to the nearest hole and install a new cotter pin.
Torque Specifications and Final Checks
Torque is not a suggestion. Every mechanic we spoke with emphasized that improper torque is the leading cause of premature wheel bearing failure. Either the axle nut is too loose, allowing play, or too tight, preloading the bearing and causing it to overheat.
Always look up the exact torque specification for your vehicle. You can find it in the service manual, from the parts manufacturer, or through online torque specification databases. Generic torque values will get you close, but precision is what prevents a comeback repair.
The axle nut torque procedure varies by vehicle. Some manufacturers specify tightening to a high torque value, then loosening and retightening to a final value to seat the bearing properly. Others specify torque plus an angle. Follow the procedure exactly as written, not approximately.
After final torque, install a new cotter pin if your design uses one. Never reuse the old cotter pin, as metal fatigue can cause it to fail and allow the nut to back off. Bend the cotter pin legs properly to secure it.
Verify that the ABS connector is fully seated and the wiring is routed away from moving parts and heat sources. A pinched or burned ABS wire will trigger a warning light immediately after you finish the job.
Common Mistakes to Avoid
Even experienced DIYers make errors on this job. These are the most frequent mistakes reported across automotive forums and by professional mechanics. Avoiding them saves you time, money, and frustration.
1. Using an impact wrench on the axle nut. This over-tightens or damages the bearing before it ever hits the road. Always use a torque wrench for the final tightening. MOOG, a major bearing manufacturer, specifically warns against this practice.
2. Damaging the ABS sensor wire during removal. The wire is fragile and routed close to the hub. Gently disconnect it and move it aside before pulling the hub. A broken sensor wire means you need a whole new hub assembly.
3. Skipping penetrating oil on rusted bolts. Forum users consistently report that soaking mounting bolts the night before makes the difference between a clean removal and rounded-off bolt heads. Be generous with the penetrating oil.
4. Reusing the old axle nut or cotter pin. These are single-use fasteners designed for one installation. Reusing them risks the nut backing off while driving, which can lead to catastrophic wheel failure.
5. Failing to clean the steering knuckle mounting surface. Rust and debris trapped between the hub and knuckle cause the hub to sit at a slight angle, which destroys the new bearing within a few thousand miles. Always wire brush the surface clean.
6. Not having the correct axle nut socket size. Axle nuts range from 30mm to 36mm and larger. Starting the job without the right socket means an interrupted trip to the parts store. Check your specifications beforehand.
Test Drive Procedure
The test drive confirms your repair was successful. Start the vehicle and drive slowly through your neighborhood at 25 to 30 mph. Listen carefully for any unusual noises and pay attention to how the steering feels.
If everything sounds good, gradually increase your speed to 45 mph, then highway speed. Listen for the humming or grinding noise that led you to do this repair in the first place. It should be completely gone.
Test the brakes at various speeds to confirm proper function. Also check the dashboard for any ABS or traction control warning lights. If a light appears, the ABS sensor connection may be loose or damaged, and you should inspect it immediately.
After the test drive, recheck the axle nut torque. Some bearings settle slightly after initial use, and the nut may need a minor retorque. This is a good practice during the first 50 miles of driving.
Tips to Extend Wheel Bearing Life
A few habits can add tens of thousands of miles to your wheel bearing’s service life. Avoid driving through deep water at speed, as water intrusion is a leading cause of premature bearing failure. The seals are designed for rain, not for submersion.
Do not overload your vehicle beyond its rated capacity. Excess weight puts additional stress on all bearings, accelerating wear. This is especially relevant for trucks and SUVs used for towing.
When choosing replacement parts, OEM parts generally provide the best reliability and ABS sensor compatibility. If you go aftermarket, SKF and Timken are consistently recommended by professional mechanics across multiple forums as quality alternatives. Cheaper no-name hubs often fail within a year.
If you live in an area where roads are salted during winter, consider spraying the hub area with fluid film or a similar corrosion inhibitor once a year. This slows the rust that eventually seizes hubs into the steering knuckle and makes future replacement much easier.
Finally, replace bearings in pairs if your vehicle has high mileage. If one side has failed, the other is likely close behind. Doing both at the same time saves you from repeating the entire process in a few months.
FAQs
How many hours does it take to replace a hub assembly?
Replacing a bolt-on hub assembly typically takes 1 to 2 hours for a DIYer and about 1 hour for a professional mechanic. Pressed-in bearings take longer, averaging 3 to 4 hours for a DIYer because they require removing the steering knuckle and using a press.
What are common mistakes when removing a wheel hub?
The most common mistakes are using an impact wrench on the axle nut, damaging the ABS sensor wire during removal, skipping penetrating oil on rusted bolts, reusing old cotter pins, and failing to clean the steering knuckle mounting surface before installing the new hub.
Do I need an alignment after replacing hubs?
In most cases, no. Replacing a bolt-on hub assembly does not change suspension geometry, so an alignment is not required. However, if you removed the steering knuckle or loosened any suspension arms during the process, an alignment is recommended.
Can you replace just the bearing on the hub assembly?
On a bolt-on hub assembly, no. The bearing is permanently sealed inside the unit, so you must replace the entire assembly. On a pressed-in bearing design, you can replace just the bearing, but you need a hydraulic press or bearing puller tool to do so.
How do I know if my wheel bearing needs replacing?
Common symptoms include a humming or grinding noise that gets louder with speed, vibration in the steering wheel or floorboard, an illuminated ABS warning light, and uneven tire wear on the affected wheel. You can confirm which side is bad by swerving gently at 40 mph and noting which direction makes the noise louder.
Can I drive with a bad wheel bearing?
You can drive short distances at low speeds to get to a repair location, but it is not safe for regular driving. A severely worn bearing can seize, causing the wheel to lock up while driving. Have it replaced as soon as possible to avoid a dangerous situation.
How much does it cost to replace a wheel bearing?
A shop typically charges $300 to $500 per wheel including labor and parts. Doing it yourself costs $50 to $150 for the hub assembly plus any tools you need to buy. The labor is where you save the most by doing it yourself.
Wrapping Up
Knowing how to replace a wheel bearing hub assembly step by step gives you a valuable skill that saves hundreds of dollars on every repair. The process is straightforward when you take it one step at a time, use the right tools, and torque everything to specification.
Remember the key points: diagnose correctly before starting, never use an impact wrench on the axle nut, clean the mounting surface thoroughly, and always torque to the manufacturer’s specification. These habits separate a repair that lasts 100,000 miles from one that fails in 5,000.
If this is your first time tackling this job, give yourself a full day with no time pressure. The confidence you build from completing this repair carries over to every future automotive project. Grab your tools, follow the steps, and enjoy the satisfaction of a quiet, smooth-riding vehicle when you are done.