
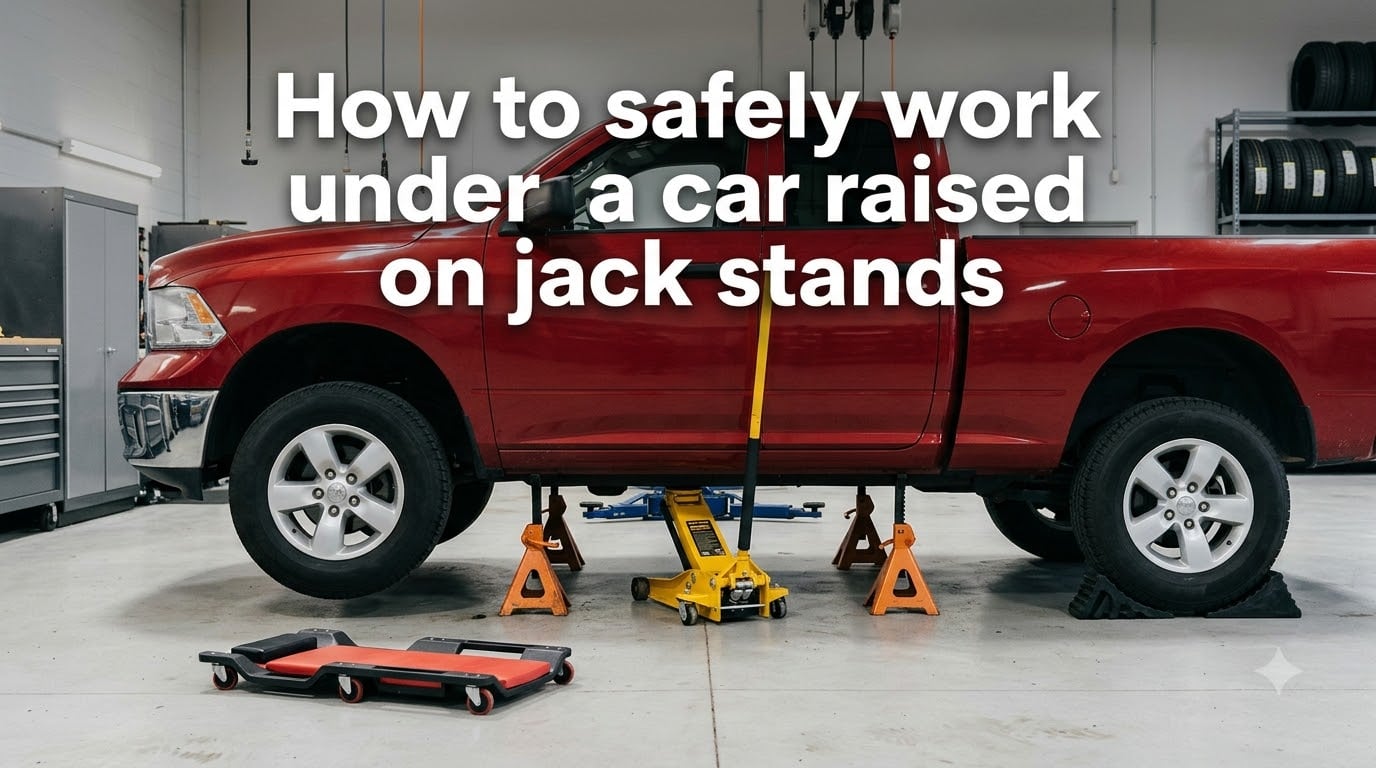
Every year, home mechanics are injured or killed because a vehicle fell off its support while they were underneath. I take this seriously, and so should you. Learning how to safely work under a car raised on jack stands is the single most important skill for any DIY mechanic, and it comes down to using the right equipment, placing it correctly, and building redundant safety margins into every lift.
A hydraulic jack is a lifting tool, not a holding tool. Its sole job is to raise the vehicle so you can position jack stands underneath. Once the car is at the right height, the stands take over completely. Skip that handoff and you are trusting your life to a seal that can fail without warning.
In this guide, I will walk you through every step of the process from choosing the right gear to verifying stability before you slide underneath. I have spent years under cars doing oil changes, brake jobs, suspension swaps, and exhaust work, and the routine below is the one I trust every single time.
Table of Contents
Key Safety Rules Before You Start
Before you even touch a jack, lock these rules into your head. They are non-negotiable, and every one of them exists because someone got hurt ignoring it.
Never get under a car supported only by a hydraulic jack. Hydraulic seals can and do fail. A floor jack can slowly bleed pressure and drop the vehicle. Always use jack stands rated for the weight of your car.
Never trust a scissor jack to hold a car while you work under it. The scissor jack that came with your vehicle is an emergency roadside tool designed for quick tire swaps. It is narrow, unstable, and not meant to support the car for extended periods.
Always work on a level, solid surface. Concrete is ideal. Asphalt is acceptable in cooler weather but can soften on hot days. Grass, gravel, dirt, and wet surfaces are off limits because jack stands can sink or shift under load.
Always engage the parking brake and chock the wheels. A car on jack stands can still roll. The parking brake locks the rear wheels, and chocks on the opposite end prevent any forward or backward movement.
Let the car cool down before working underneath. Exhaust components, catalytic converters, and oil pans can reach several hundred degrees. Touching the wrong component on a hot car causes serious burns. Give the vehicle at least 30 minutes after driving, or longer if you were running it hard.
Have someone nearby when possible. If something goes wrong and you are pinned under a car, you need someone who can call for help or operate the jack. Working alone is sometimes unavoidable, but it is never the safest option.
Equipment You Need to Work Under a Car Safely
Having the right equipment is not about spending a fortune. It is about making sure every piece of gear is rated for the job and in good working condition.
Hydraulic Floor Jack
A hydraulic floor jack is the primary lifting tool. Look for one with a capacity that exceeds your vehicle’s gross weight by a comfortable margin. A 2-ton jack is fine for a compact sedan, but a 3-ton or 3.5-ton jack gives you headroom for trucks and SUVs. The jack should roll smoothly, pump without leaking, and hold pressure when the release valve is closed.
Bottle jacks are an alternative for vehicles with high ground clearance, but their narrow base makes them less stable than a floor jack. Scissor jacks should be reserved for roadside emergencies only.
Jack Stands
This is the equipment that keeps you alive. Jack stands come with a weight rating per pair, and that rating must exceed the load they will actually bear. For a 4,000-pound car on two stands at one end, each stand needs to support roughly 1,500 to 2,000 pounds. A pair of 3-ton stands gives you a wide safety margin.
Many experienced mechanics recommend 6-ton jack stands even for lighter vehicles. The heavier rating means thicker steel, wider bases, and more stable construction. Overkill is better than underkill when the penalty for failure is a crushed chest.
Check your stands for the locking mechanism. Ratchet-style stands have teeth that engage as you raise the support column. Pin-style stands use a steel pin through drilled holes. Both work, but verify the lock is fully engaged and that no teeth are stripped or worn.
Wheel Chocks
Wheel chocks are wedges placed against the tires to prevent rolling. Rubber chocks grip well on concrete, while polyurethane chocks are durable and weather-resistant. Wood blocks work in a pinch but are less reliable.
Place chocks on both sides of the wheels at the opposite end from where you are lifting. If you are jacking the front, chock both rear wheels front and back. If you are jacking the rear, chock both front wheels.
Protective Gear
Wear safety glasses to protect your eyes from dripping fluids and debris. Mechanic gloves guard against cuts from sharp edges under the car. A shop creeper saves your back and makes it easier to slide in and out without bumping the stands.
How to Safely Work Under a Car Raised on Jack Stands: Step-by-Step
Follow these steps in order every time. Rushing or skipping a step is how accidents happen.
Step 1: Park on level, solid ground. Find a flat concrete surface. Turn off the engine, put the car in park (or first gear for a manual), and engage the parking brake firmly. Verify the car is not on any kind of slope, even a slight one.
Step 2: Chock the wheels at the opposite end. If you are lifting the front of the car, place chocks in front of and behind both rear wheels. If lifting the rear, chock both front wheels. The chocks should sit snugly against the tire contact patch.
Step 3: Locate the proper jacking points. Consult your owner’s manual for the factory-recommended lift points. These are typically reinforced areas on the frame rails, subframe, or designated pinch weld locations. Lifting from the wrong spot can dent the floor pan or bend structural components.
Step 4: Position the floor jack and raise the vehicle. Slide the jack under the lift point, making sure the saddle is centered and making full contact. Pump the handle steadily until the vehicle is high enough to place your jack stands underneath. Raise it smoothly and stop if you hear any creaking or metal stress.
Step 5: Position the jack stands. Place the stands under a reinforced support point, not just any flat surface under the car. Good locations include frame rails, subframe mounting points, and the rear axle housing. Make sure both stands are at the same height so the car sits level.
Step 6: Slowly lower the car onto the stands. Carefully release the jack’s pressure valve to lower the vehicle onto the stands. Do this slowly so the car settles gently onto each stand rather than dropping. Watch the stands to confirm they are bearing the load squarely and not shifting.
Step 7: Verify stability before going under. This step is critical. Push down hard on the fender or bumper and give the car a firm shake. The car should be rock solid on the stands with no wobbling, rocking, or creaking. If anything moves or sounds wrong, jack the car back up and reposition the stands.
Step 8: Leave the jack in place as a backup. This is called double-jacking, and it is one of the smartest habits you can develop. After the car is resting on the stands, raise the jack saddle back up until it just touches the jacking point. Do not let it bear weight. It is there as a secondary catch in case a stand fails.
Step 9: Add secondary catch methods. For extra peace of mind, place a spare wheel, a thick block of hardwood, or jack-crib ramps under the frame near each stand. If a stand collapses, the car drops a fraction of an inch onto the backup instead of onto you.
Step 10: Slide under and do your work. Only after all the above checks pass should you get under the car. Use a creeper to move in and out smoothly without bumping the stands. Keep your tools organized so you do not need to wriggle out and back in repeatedly.
Understanding Jack Points and Pinch Welds
Placing your jack and stands at the right locations is just as important as using the right equipment. The underside of a car is not uniformly strong, and lifting from the wrong spot can cause serious damage.
Pinch welds are the reinforced seams where the floor pan meets the rocker panel, running along the side of the car under the doors. Most modern vehicles have designated notches in the pinch weld specifically for jack placement. These are the most common factory jacking points for floor jacks.
Frame rails are the boxed steel or stamped members running front to rear under the vehicle. They are engineered to carry load and are excellent spots for jack stands. Look for flat, reinforced areas on the rail, not curved or thin sections.
Subframe mounting points are where the engine or front suspension subframe bolts to the body. These are strong, stable locations for both jacking and stand placement, especially on unibody vehicles that do not have traditional full frame rails.
Rear axle housings on rear-wheel-drive vehicles are solid points for jack stands. The differential housing is also a valid jacking point for raising the entire rear of the car at once.
Avoid placing stands on floor pans, exhaust components, suspension control arms, brake lines, or any sheet metal that is not reinforced. These areas can buckle under the vehicle’s weight, causing the stand to punch through and the car to fall.
If you cannot find a clear jacking point, check your owner’s manual. Many manufacturers include a diagram showing exactly where to lift the vehicle. When in doubt, search for a jack point diagram for your specific make, model, and year.
The Double-Jacking Technique: Your Backup Safety Net
Double-jacking is the practice of leaving your hydraulic floor jack in position under the car even after the vehicle is fully supported by jack stands. The jack does not bear the weight of the car. It sits just below the jacking point as a failsafe.
This technique is widely discussed in mechanic forums but rarely covered in official guides, and that is a shame. It is one of the simplest and most effective safety habits you can build into your routine.
Here is how I do it. After lowering the car onto the stands and confirming stability, I raise the jack saddle until it is about a quarter inch below the jacking point. The stands hold the car. The jack just sits there. If a stand were to slip or collapse, the car would drop that quarter inch and rest on the jack instead of on me.
Some mechanics go further and stack a spare tire or a set of hardwood wheel cribs directly under the frame. This creates a third layer of protection. It sounds paranoid, but anyone who has felt a car shift while they were underneath will tell you the extra thirty seconds are worth it.
Double-jacking works best when you are lifting one end of the car. If you are using four stands and have the entire vehicle in the air, position the jack at the heaviest end, typically the front where the engine sits. You can also use a second jack if you have one.
Common Mistakes That Get People Hurt
Most jack stand accidents are preventable. They happen because someone cut a corner or skipped a step they thought was unnecessary. Here are the mistakes I see over and over.
Using cheap, imported jack stands with no safety margin. Budget stands may have a printed rating, but the steel quality and weld integrity are often questionable. Buy stands from reputable brands and choose a rating well above what you think you need. A pair of 6-ton stands costs only slightly more than 2-ton stands and offers dramatically better construction.
Working on soft or uneven ground. Grass, gravel, and dirt allow stands to sink under load, especially if the ground is damp. Warm asphalt can also soften and let a stand’s base push down unevenly. If you have no choice but to work on a soft surface, place a thick steel plate or a large piece of plywood under each stand to distribute the load.
Forgetting to chock the wheels. A car on jack stands can still roll if the wheels on the ground are free to move. This is especially dangerous on any kind of slope, even one too slight to notice by eye. Always chock both sides of the wheels at the opposite end from your lift.
Placing stands on the wrong part of the car. Stands on floor pans, control arms, or exhaust piping can punch through or slip off. Always use reinforced structural points like frame rails, pinch welds, and subframe connections.
Not verifying stability before crawling under. Lowering the car onto the stands is not the last step. You must shake the car firmly to confirm it is solid. If it wobbles, rocks, or makes noise, jack it back up and fix the problem.
Rushing the job. Fatigue, cold weather, and time pressure cause people to skip checks. Every shortcut you take is a gamble with your life. Take the extra two minutes.
Surface Matters: Concrete vs Asphalt vs Gravel
The ground under your jack stands matters as much as the stands themselves. Hard, level surfaces keep the bases flat and stable. Soft surfaces let them tilt, sink, or slide.
Concrete is the gold standard. A poured garage floor or driveway gives jack stands a flat, unyielding surface that will not shift under load. This is what you should aim for whenever possible.
Asphalt works in moderate temperatures but can soften on hot summer days. A stand that is solid in the morning can slowly sink into warm asphalt by afternoon. If you must work on asphalt in hot weather, place a steel plate or thick plywood scrap under each stand base.
Gravel and dirt are unpredictable. Small stones can shift under load, and damp earth compresses unevenly. If you absolutely have to work on gravel, clear a flat area down to solid ground and use a wide steel plate or thick board under each stand to spread the weight.
Grass should be avoided entirely. The soil beneath compresses unpredictably, and moisture makes it worse. If you have no other option, lay down a thick sheet of plywood and place the stands on top of it.
FAQs
Is it safe to work under a car on jack stands?
Yes, it is safe to work under a car on jack stands if you follow proper procedures. Use stands rated well above your vehicle’s weight, place them at reinforced jacking points on level ground, chock the wheels, engage the parking brake, and shake the car to verify stability before crawling underneath. The danger comes from cutting corners, not from the stands themselves.
How many jack stands do I need to safely work under a car?
You need at least two jack stands for most jobs, placed at the same end of the vehicle. For work that requires the entire car to be raised, use four stands. Always use stands in pairs and never support one end with a single stand.
Where do I put jack stands under a car?
Place jack stands under reinforced structural points such as frame rails, subframe mounting locations, pinch weld seams, and rear axle housings. Consult your owner’s manual for factory-recommended support points. Never place stands on floor pans, exhaust components, control arms, or thin sheet metal.
Can I leave my car up on jack stands overnight?
It is not recommended to leave a car on jack stands for extended periods if you are not actively working on it. Stands can settle over time, especially on asphalt or in temperature changes. If you must leave the car elevated, use four stands, double-check each lock is engaged, and keep the area clear of people and pets.
Should I leave the jack in place as a backup?
Yes. Leaving the hydraulic floor jack in position just below the jacking point after the car is on the stands provides a secondary support if a stand fails. This technique, called double-jacking, is one of the most effective safety habits for any home mechanic.
Conclusion
Knowing how to safely work under a car raised on jack stands comes down to respecting the weight above you and building redundancy into every step. Use quality stands rated well beyond your vehicle’s weight, place them at proper jacking points on solid level ground, chock the wheels, verify stability with a firm shake, and leave your jack as a backup. Follow the ten-step routine above every time, and you will be able to tackle maintenance with confidence rather than fear.