
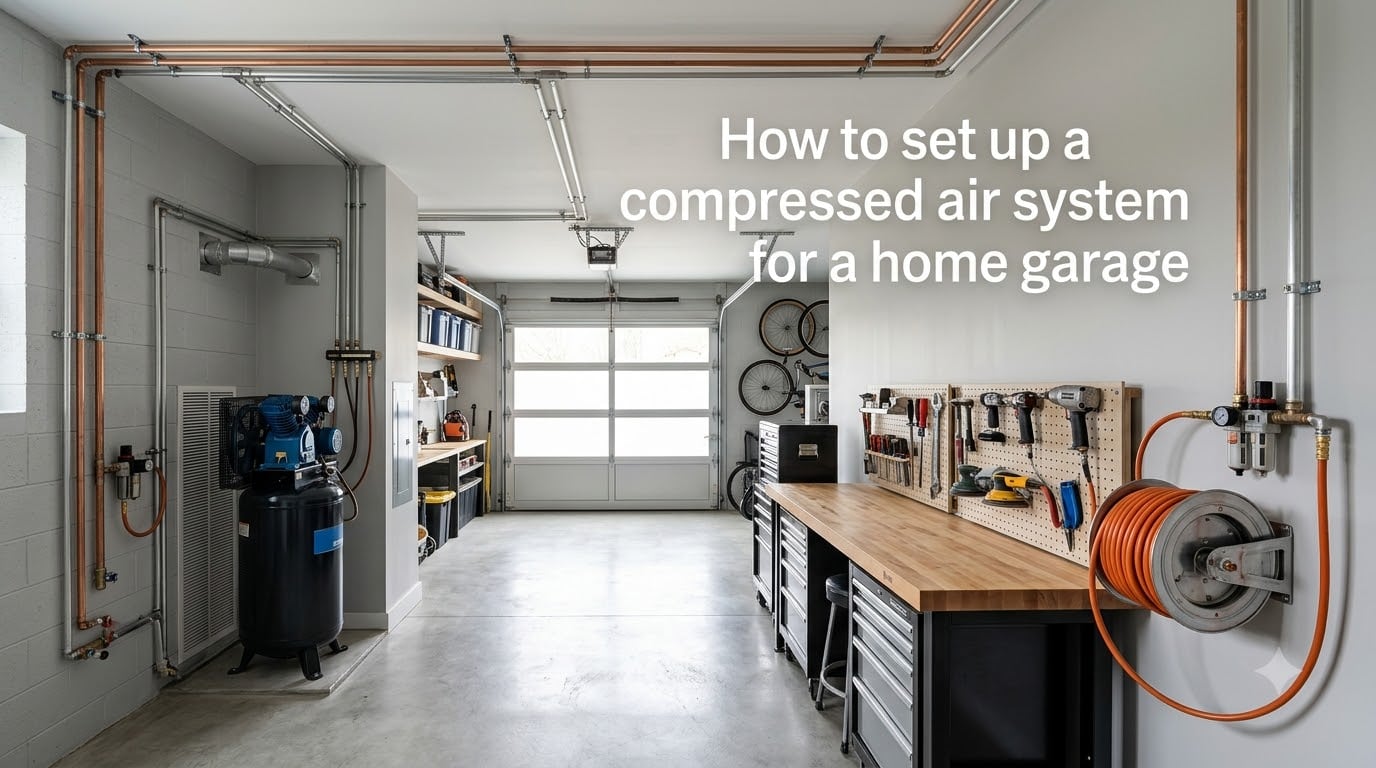
I learned the hard way that a portable compressor in the middle of a two-car garage is a tripping hazard, a noise nightmare, and a constant reminder that I needed a real system. After running a 50-foot hose over my wife’s parking spot for two years, I finally planned and installed a permanent compressed air system. Now I want to share exactly what I did, what I would do differently, and how you can skip the mistakes that cost me time and money.
This guide on how to set up a compressed air system for a home garage walks through every decision I made: sizing the compressor, choosing pipe material, routing air lines, managing moisture, and wiring the electrical. Whether you’re running an impact wrench for tire rotations or a blast cabinet for restoration work, the same seven-step framework applies.
Table of Contents
Why a Permanent Compressed Air System Beats a Portable Compressor?
A permanent system delivers clean, dry air at consistent pressure to outlets mounted wherever you actually work. You stop tripping over hoses, you stop dragging a hot, noisy compressor around, and you stop waiting for a 6-gallon pancake tank to recover between trigger pulls on the impact gun.
Our team has helped dozens of garage owners build out shop air, and the difference is night and day. One user on Garage Journal ran 100 feet of pipe from a basement compressor to a garage-mounted tank and reported never wanting to go back to portable. Another Reddit user spent $180 on a Harbor Freight compressor and basic hoses as a starter system and was thrilled with the upgrade over nothing.
The real benefits of a permanent installation:
Consistent pressure and CFM at every outlet
No hoses running across the floor
Cleaner air through point-of-use filtration
Quieter operation with the compressor located away from work areas
Higher property value if you ever sell the house
Step 1: Choose the Right Air Compressor for Your Home Garage
Sizing the compressor is the single most important decision in this whole project. Get it wrong and you will either spend too much or constantly cycle the motor trying to keep up with your tools.
Three numbers matter: tank size (gallons), CFM output (cubic feet per minute), and duty cycle (percentage). For most two-car garages with one or two people working at a time, a 60 to 80-gallon tank delivering 14 to 18 CFM at 90 PSI is the sweet spot. That covers impact wrenches, die grinders, paint guns, and even small blast cabinets without the compressor running continuously.
Duty cycle tells you how long the compressor can run in a 10-minute window. Look for at least 50% duty cycle for occasional use, and 75% or higher if you plan to run the blast cabinet or spray gun for long sessions. Reciprocating compressors (the piston type) are the most common and affordable. Scroll compressors run quieter and last longer but cost more up front.
Tank Size, CFM, and Duty Cycle Explained
Tank size stores air so the motor does not have to run every time you pull the trigger. CFM is the rate at which the compressor can deliver air. Duty cycle is how hard the motor can work before it overheats.
Here is a quick reference for CFM requirements of common garage tools:
1/2 inch impact wrench: 4 to 6 CFM
Die grinder: 4 to 7 CFM
HVLP paint gun: 5 to 10 CFM
Blast cabinet (small): 7 to 12 CFM
Tire inflator: 2 to 4 CFM
Air ratchet: 3 to 5 CFM
Nail gun (framing): 4 to 6 CFM
Add up the CFM of the tools you might run at the same time, then pick a compressor that delivers at least 1.5 times that number. The extra headroom prevents the motor from short-cycling every 30 seconds.
Reciprocating vs Scroll Compressors
Reciprocating compressors use pistons and are less expensive, easier to service, and available everywhere. They run louder, vibrate more, and need oil changes. Scroll compressors use two spiral-shaped scrolls to compress air, run quieter, last longer, and are often oil-free. For most home garages, a quality reciprocating unit from a brand like Ingersoll Rand, Quincy, or Campbell Hausfeld hits the right balance of cost and performance.
Step 2: Plan Your Air Line Layout and Routing
Before you buy a single fitting, sketch your garage on graph paper. Mark the compressor location, the workbench, the lift if you have one, the blast cabinet, and any other places you might want air. Then run a line on the sketch that connects them all in a loop or branch pattern.
The ideal compressor location is a corner with good ventilation, access to electrical, and as far from your workbench as practical. Many users put the compressor in a separate enclosed space or closet with a vent to the outside. This keeps noise and heat away from where you spend your time. One Garage Journal user put his compressor and blast cabinet in their own little room and called it the single best decision in his build.
For the actual pipe routing, drop the main line from the ceiling along the back wall, then run branches down to outlets at workbench height. Keep horizontal runs slightly sloped (about 1 inch per 10 feet) toward a drain point. Avoid running lines near electrical panels, hot pipes, or anywhere they could be hit by a car door.
Recommended Number and Location of Outlets
For a two-car garage, four to six outlets is plenty. Place one near each car lift point, one at the workbench, one near the blast cabinet, and one near the paint area if you have one. Each outlet should have a shut-off valve so you can work on one section of the system without bleeding down the whole tank.
Step 3: Select the Right Piping Material
Your piping choice affects installation cost, noise, durability, and safety. The three common options are copper, aluminum, and steel. Each has its place.
Copper Pipe (The Traditional Choice)
Type L copper is the classic garage shop air material. It handles up to 200 PSI easily, is corrosion-resistant, and can be soldered or pressed with fittings. Most older professional shops used 3/4 inch copper for the main loop and 1/2 inch drops to outlets. The downside is cost (copper is expensive), and soldering requires skill and a torch permit in some areas.
Aluminum (Flexible Kits Like RapidAir)
RapidAir and similar aluminum piping kits have become hugely popular in home garages. The tubing comes in rolls, gets cut with a hacksaw, and connects with simple push-to-fit or compression fittings. No torch, no solder, no threading required. Users on Reddit consistently call these kits inexpensive and easy to install, and the ability to disassemble and re-route is a huge plus.
Why You Must NEVER Use PVC Pipe
This is the safety warning we cannot emphasize enough. PVC pipe is for drain, waste, and vent applications. It is not rated for compressed air. When PVC fails under pressure, it does not just crack. It shatters into sharp fragments that can cause serious injury or death. We have seen forum posts where people used PVC because it was cheap, and the consequences can be catastrophic. Use copper, aluminum, or black iron/steel. Never PVC, never CPVC, never PEX for compressed air.
Step 4: Install Water Management and Drainage
Water is the enemy of every pneumatic tool and every paint finish. Compressed air contains moisture because compression heats the air, then condensation forms as it cools in the tank and pipes. Without proper water management, you will spray water into your blast cabinet, ruin paint finishes, and rust out your impact wrenches.
The fix has three parts: drain the tank regularly, slope the pipes so water runs to a collection point, and install a water trap at each outlet.
Slope Your Lines
Run horizontal pipe with a 1-inch drop per 10 feet toward a designated low point. At that low point, install a drain valve or an automatic electric drain like the ones from Quincy or Wilkerson. The drops from the ceiling to the outlets should form a U-shape (called a drop leg) so water collects at the bottom of the loop instead of running into the tool.
Install Water Traps at Outlets
Even with sloped lines, every outlet should have an inline water trap or a filter-regulator combination. These bowl-style filters collect condensate and can be drained manually with a petcock or automatically with a float mechanism. Replace the filter element annually or when you notice pressure drop at the outlet.
Step 5: Add Filtration and Regulation at Point of Use
Compression adds heat, water vapor, and sometimes oil aerosols to the air. By the time air reaches your paint gun or blast cabinet, it needs to be clean, dry, and at the right pressure. That is what point-of-use treatment does.
The standard setup is an FRL, which stands for Filter-Regulator-Lubricator. The filter removes water and debris. The regulator sets the exact pressure your tool needs (most paint guns want 30 to 40 PSI at the gun, not 90 PSI at the tank). The lubricator adds a fine mist of oil for tools that need it, like air motors in impacts and ratchets. Many newer tools are oil-free and do not need the lubricator, so you can skip that leg for simplicity.
For paint and blast cabinet duty, add a desiccant or refrigerated air dryer between the tank and the filter. Desiccant dryers use beads that absorb moisture and can bring the dew point down to minus 40 degrees F. That level of dryness makes a visible difference in paint finishes, especially with clear coats and metallics.
Step 6: Wire the Electrical and Run the System
Most home garage compressors in the 60 to 80-gallon range run on 240-volt single-phase power. Smaller units (under 30 gallons) can run on 120-volt standard household circuits, but they will struggle to keep up with serious tools.
If you are running 240 volts, you need a dedicated circuit with the correct breaker size (typically 30 amp or 40 amp depending on the motor) and a NEMA 6-30 or 14-30 outlet. Many older garages do not have this and you will need an electrician to run a new circuit. Budget $200 to $500 for this part if your panel has space.
Run the system at low demand first to check for leaks. Mix a solution of dish soap and water, brush it on every fitting, and look for bubbles. Fix any leaks before you close up walls or hang tools over the pipe. A small leak at 90 PSI costs you compressor run time and electricity every single day.
Step 7: Maintain Your Compressed Air System
Once everything is installed, a few minutes of regular maintenance keeps the system running like new for decades. The schedule is simple.
Daily: drain the tank if your unit does not have an automatic drain. Check the oil level on oil-lubricated compressors.
Weekly: check outlet filters and drain water bowls. Listen for any new air leaks at fittings.
Monthly: inspect the intake filter on the compressor and clean or replace it. Check belt tension on belt-drive units.
Annually: change the compressor oil if applicable, replace the desiccant in air dryers, and inspect all pipe hangers and fittings for corrosion.
Cost Breakdown by Budget Level
One of the most common questions in garage forums is what this whole project costs. Here is a realistic breakdown for three budget levels. Prices vary by region and brand, so treat these as ballpark figures based on what users actually reported in their builds.
Under $500: Basic Starter System
You can get a functional compressed air setup for a one-car garage for under $500. Expect a 30 to 60-gallon reciprocating compressor (sometimes on sale at Harbor Freight or Northern Tool), 50 feet of rubber air hose, a hose reel, basic filter and regulator, and a few clamps and fittings. This tier is for occasional tool use and tire inflation, not for running a blast cabinet every weekend.
$500 to $1,500: Solid Hobby Shop System
This is the sweet spot for serious hobbyists and home mechanics. You get a 60 to 80-gallon reciprocating compressor from a known brand, 100 feet of RapidAir aluminum piping with fittings and outlets, FRL units at each outlet, an automatic tank drain, and a basic desiccant dryer. Installation is a weekend project if you are comfortable with basic plumbing and electrical.
$1,500 and Up: Pro-Grade Restoration Shop
At this level, you are looking at a 80 to 120-gallon compressor (sometimes a scroll unit for quiet operation), a full aluminum or copper piping loop with six or more outlets, refrigerated air dryer, multiple FRL stations, hose reels, blast cabinet, and dedicated electrical work by a licensed electrician. This is what you need if you run a paint gun for hours at a time or run the blast cabinet weekly.
Common Mistakes to Avoid When Setting Up Garage Compressed Air
Our team has seen the same handful of mistakes over and over. Avoiding these will save you frustration and money.
First, do not underestimate your CFM needs. Adding up the tools you might use today will undercount what you will want tomorrow. Always size up.
Second, do not skip the water traps. Water in air lines causes more tool damage and paint failures than anything else in this whole project. Install traps and drains.
Third, do not use PVC or plastic pipe of any kind for compressed air. The safety risk is not worth saving a few dollars.
Fourth, do not skip planning for future expansion. Adding an outlet or two now is cheap. Re-plumbing the whole garage later is not.
Fifth, do not forget about ventilation. A compressor pulls in air and generates heat. In a closed garage, that heat and any exhaust fumes build up. Make sure the compressor area has fresh air flow and, for gas-driven compressors, a vent to the outside.
Finally, do not run your compressor on an extension cord or shared circuit. Motor startup draws several times the running amps and will trip breakers or damage wiring. Run a dedicated circuit sized for your compressor.
FAQs
What size air compressor do I need for a home garage?
For most two-car home garages, a 60 to 80-gallon tank delivering 14 to 18 CFM at 90 PSI is the sweet spot. That covers impact wrenches, paint guns, die grinders, and small blast cabinets without the motor constantly cycling.
Can you use an air compressor in a closed garage?
Yes, but you need ventilation. Compressors generate heat and pull air from the room. Make sure the compressor area has fresh air intake and, for gas-driven units, an exhaust vent to the outside. Many owners put the compressor in a corner closet with a louvered door or a small exhaust fan.
Can I use PVC pipe for compressed air lines?
No. PVC pipe is for drain, waste, and vent applications only. It is not rated for pressurized air and can shatter violently if it fails, causing serious injury. Use Type L copper, aluminum flex tubing like RapidAir, or black iron/steel pipe for compressed air systems.
How do I prevent water in my air lines?
Slope horizontal pipe runs 1 inch per 10 feet toward a drain point, install a drop leg (U-shape) at each outlet, add water traps and FRL units at point of use, drain the tank daily or install an automatic drain valve, and consider a desiccant or refrigerated air dryer for paint and blast cabinet duty.
How far can I run air lines from my compressor?
Practical runs of up to 200 feet are common in home garage setups. The key is to use at least 3/4 inch pipe for the main loop to minimize pressure drop, avoid excessive elbows and sharp turns, and oversize the compressor slightly to compensate for line losses. Many users successfully run 100 feet of pipe from a basement compressor to a garage tank with no pressure issues.
Final Thoughts on Building Your Garage Compressed Air System
That covers how to set up a compressed air system for a home garage from sizing the compressor to maintaining it years later. The short version: pick a compressor that delivers 1.5 times your peak CFM, run aluminum or copper pipe in a loop with proper slope, install water traps at every outlet, and never use PVC. Spend a weekend planning on paper before you buy anything, and the actual install will go smoothly.
If you are starting from scratch, a $500 to $1,500 budget covers most hobbyists and home mechanics. Pick a quality compressor from a name brand, add an aluminum piping kit, and finish with FRL units at each outlet. You will have shop air that rivals a professional garage for a fraction of the cost of having it professionally installed.