
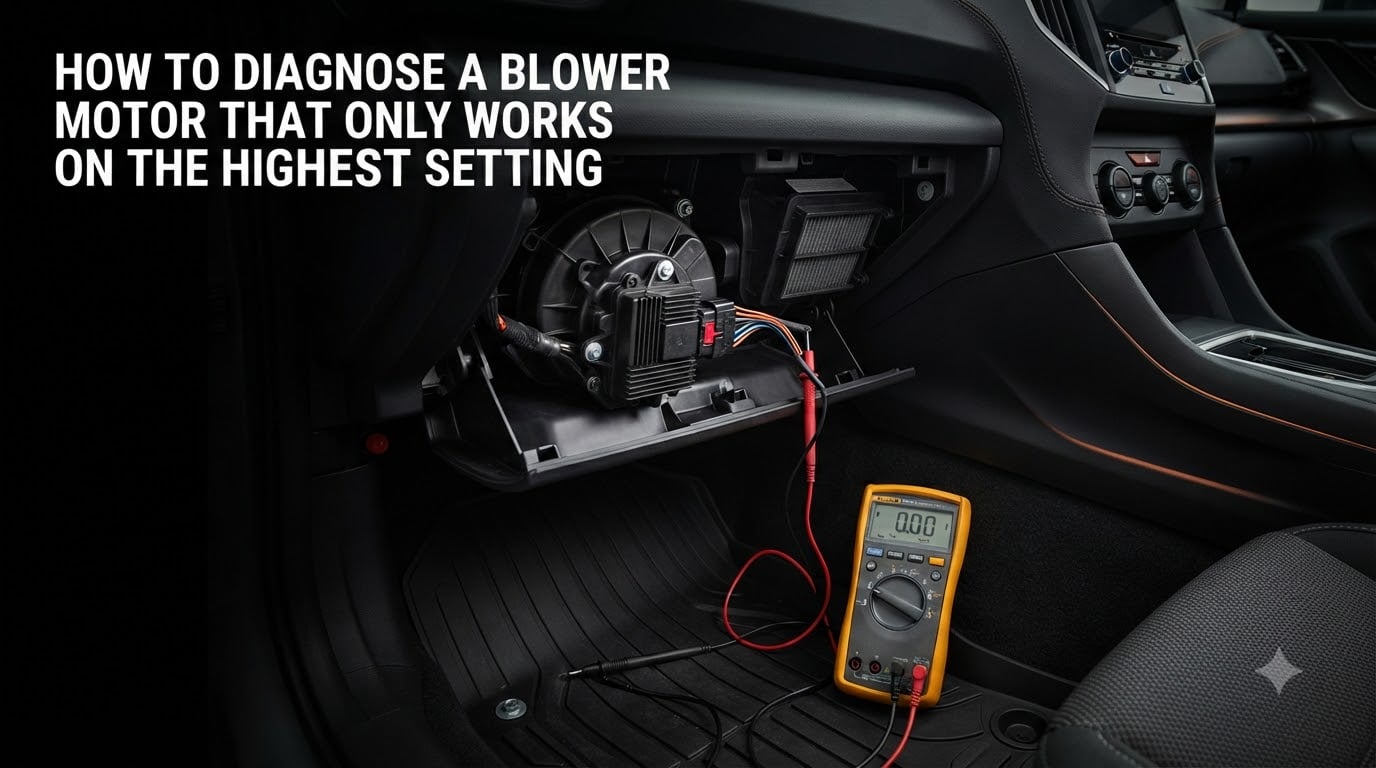
If your blower motor only works on high, the most likely cause is a failed blower motor resistor. The resistor controls every fan speed below maximum by adding electrical resistance into the circuit. When it burns out, only the high-speed circuit — which bypasses the resistor entirely — keeps working.
This is one of the most common HVAC complaints across nearly every vehicle make, from Ford F-150s to Honda Civics to BMWs. I have diagnosed this exact problem dozens of times, and the good news is that with a basic multimeter and about thirty minutes, you can pinpoint the failure yourself.
This guide walks through how to diagnose a blower motor that only works on the highest setting using a clear, step-by-step process. You will learn why the resistor fails, how to test it with a multimeter, how to check current draw so the same part does not fail again, and when you should replace the motor and resistor together.
Safety note: Always disconnect the negative battery cable before disconnecting any blower motor or resistor connector. On home HVAC units, also discharge the run capacitor. Hot electrical connections and melted plastic can cause burns, so let components cool before handling them.
Table of Contents
Why Your Blower Motor Only Works on High?
A blower motor only works on high because the resistor pack that controls the lower speeds has failed. The resistor sits in the blower motor’s air stream so that moving air keeps it cool. It contains a series of resistive coils or traces, each one corresponding to a different fan speed.
Here is the mechanism in plain terms. Lower speeds route the motor’s power through more resistance, which drops the voltage reaching the motor and slows it down. Medium speeds use less resistance. High speed uses a dedicated circuit that sends full battery voltage straight to the motor, bypassing the resistor completely.
That bypass is the reason your fan still roars to life on max even when every other speed is dead. The high-speed circuit is the most direct path to the motor, so it survives even after the resistor’s lower-speed traces have burned open.
Resistors fail for a few predictable reasons. The most common is simply age and heat — those resistive coils get extremely hot during normal operation, and over years of cycles the thin wire burns through. A clogged cabin air filter restricts the cooling airflow across the resistor, which accelerates failure. A blower motor that is starting to drag and draw excessive current will also overheat the resistor and take it out.
This last point is the one most DIYers miss. If your motor is drawing too many amps, swapping in a fresh resistor will fix the symptom for a few weeks or months — and then the new resistor burns out too. I have read forum threads from F-150 owners who replaced the resistor five times before realizing the motor itself was the root cause.
Other Causes When the Fan Only Works on High
A bad resistor is the leading cause, but it is not the only one. Before you order a replacement, rule out these other culprits that produce the same symptom.
Melted or corroded connector. This is the most underdiagnosed cause. The heat from a failing resistor often melts the plastic pigtail connector that plugs into it, and the terminals inside lose tension or corrode. Even a brand-new resistor will not work reliably if the connector is damaged. Inspect the connector for discolored, warped, or brittle plastic and darkened terminals.
Fan speed switch. The dash-mounted switch can develop burned or corroded contacts, especially on the lower-speed positions. If wiggling the switch changes the fan behavior, the switch itself is suspect.
Wiring and ground. A broken wire between the resistor and the motor, or a poor ground connection, can knock out the lower speeds. Look for chafed insulation, especially where harnesses pass through the firewall.
Blower motor relay. Some vehicles use a relay for the high-speed circuit and the resistor for lower speeds. If only certain speeds fail in an unusual pattern, check the relay and its socket for heat damage.
Blower motor control module. On vehicles with variable-speed or automatic climate control, a transistor-based control module replaces the simple resistor. These modules can fail in ways that mimic a bad resistor, and they often require a scan tool to diagnose fully.
Blower motor fuse. A blown fuse usually takes out all speeds, but on some vehicles there are separate fuses for different speed circuits. A quick fuse box inspection takes two minutes and costs nothing.
Symptom-to-Cause Quick Reference
Use this quick reference to match what you are seeing to the most likely cause before you start testing. These pairings come from technician experience and forum reports across dozens of vehicle models.
Only high speed works, lower speeds are dead: Failed blower motor resistor (most common) or melted connector.
No speeds work at all: Blown fuse, failed relay, bad blower motor, or broken power/ground wire.
Intermittent speeds that come and go: Corroded or loose connector, failing fan speed switch, or damaged wiring.
Resistor keeps failing repeatedly: Motor drawing excessive current, clogged cabin air filter, or damaged pigtail connector causing heat buildup.
Grinding or squealing noise on any speed: Worn blower motor bearings — replace the motor, not just the resistor.
Burning smell from the vents: Overheating resistor, melted connector, or debris in the blower cage. Stop using the fan immediately and inspect.
Only one lower speed works: A single burned trace inside the resistor pack — replace the resistor.
How to Test a Blower Motor Resistor with a Multimeter
Testing a blower motor resistor with a multimeter tells you definitively whether the part is bad before you spend money on a replacement. You will need a digital multimeter set to ohms (resistance) and a wiring diagram for your specific vehicle to identify the correct pins.
Step 1: Locate the resistor. The blower motor resistor is almost always plugged into the HVAC case near the blower motor itself, often behind the glove box or under the dashboard on the passenger side. On home furnaces, it is typically on the control board or mounted near the motor.
Step 2: Disconnect the electrical connector. With the ignition off and the key out, unplug the connector from the resistor. Inspect both the connector and the resistor pins for heat damage, melted plastic, or corrosion while you are here.
Step 3: Set your multimeter to ohms. Touch the probes together first to confirm the meter reads near zero, which verifies your leads are good.
Step 4: Measure resistance between pins. Using your wiring diagram, probe between the common (input) pin and each speed output pin one at a time. You should see a specific ohm value for each speed — typically between 0.5 and 50 ohms depending on the speed and vehicle. Higher resistance corresponds to lower fan speeds.
Step 5: Interpret the readings. An OL (open loop) or infinite reading on any speed circuit means that trace is burned open and the resistor is bad. A reading that is wildly off the specified value also indicates failure. If all speed circuits read open, the resistor is completely dead.
Step 6: Back-probe for voltage. If the resistor tests okay but the fan still only works on high, plug the connector back in and back-probe the input wire with the multimeter set to DC volts and the ignition on. You should see battery voltage (around 12V on a car, 120V or 240V on home HVAC). No voltage means the problem is upstream — switch, wiring, or fuse.
How to Check Current Draw to Prevent Repeat Failures?
This is the step that separates a one-time fix from a repair that lasts. If your blower motor is drawing too much current, it will cook a brand-new resistor in short order. I always check amperage draw whenever a customer tells me they have replaced the resistor more than once.
You need a DC clamp meter for this test — the kind that clamps around a single wire without breaking the circuit. Set the meter to DC amps and zero it before measuring.
Step 1: Clamp the meter around the power wire feeding the blower motor. Make sure you are clamping only one wire, not both the power and ground together, or the readings will cancel out.
Step 2: Turn the fan on high and let it run for about thirty seconds to stabilize.
Step 3: Read the amperage. A healthy automotive blower motor typically draws 15 to 25 amps on high speed. Home HVAC blower motors vary widely by horsepower but should fall within the rated FLA (full load amps) printed on the motor nameplate.
Step 4: Compare to spec. If the reading is significantly above the rated amperage, the motor is failing internally — usually worn bearings creating drag, or shorted windings. In that case, you need to replace the motor along with the resistor, or you will be back doing this job again.
Visual Inspection: What a Burnt Resistor Looks Like
Sometimes you do not even need a multimeter. A visual inspection catches a surprising number of failures, and it takes about two minutes once you have the resistor exposed.
A burnt blower motor resistor typically shows obvious heat damage. Look for charred or blackened resistive coils, cracked ceramic substrate, or green and blue discoloration on the metal traces. The plastic housing around the pins may be melted, warped, or browned compared to the original color.
Pay equal attention to the connector. The pigtail that plugs into the resistor is just as prone to heat damage as the resistor itself. If the connector plastic is deformed, the terminals inside have likely lost their spring tension. A loose connection creates resistance, resistance creates heat, and the cycle repeats. Many technicians replace the pigtail connector as a matter of course whenever they replace a burnt resistor.
If you see a melted connector, do not just plug a new resistor into it. Order a replacement pigtail, cut and splice the new connector into the harness with crimp connectors or solder and heat-shrink, and then install the new resistor. Skipping this step is the number one reason resistors fail again within weeks.
Should You Replace the Blower Motor and Resistor Together?
This is one of the most common questions on mechanic forums, and the answer depends on what you find during testing. Use this decision tree to guide your choice.
Replace only the resistor if: The motor passes the current draw test, spins freely with no noise, the connector is in good condition, and this is the first resistor failure. This is the cheapest fix and usually lasts for years.
Replace both the motor and resistor if: The motor draws excessive amperage, makes grinding or squealing noises, has visible shaft play, or you have already replaced the resistor two or more times. A dragging motor overheats the resistor, so installing a new resistor without addressing the motor guarantees another failure.
Replace the resistor and the connector if: The pigtail shows any signs of melting, discoloration, or loose terminals. Many replacement resistors now come with a new pigtail included for exactly this reason.
Many experienced mechanics recommend replacing the motor and resistor together as a pair on high-mileage vehicles regardless, because the labor to access the resistor often overlaps with motor removal. On a vehicle over 100,000 miles, the motor has accumulated wear that puts the new resistor at risk.
Repair Costs and DIY vs Professional Help
For most vehicles, a blower motor resistor is an inexpensive part, and the replacement is well within reach of a home mechanic with basic hand tools.
DIY cost: The resistor itself typically runs $15 to $60 depending on the vehicle. A replacement pigtail connector adds another $10 to $25. If the motor also needs replacing, expect $40 to $120 for the part on most cars, though some luxury or heavy-duty applications cost more.
Shop cost: A shop will charge one to two hours of labor plus the part markup, bringing the total for a resistor replacement to roughly $120 to $300. Adding a blower motor replacement at the same time pushes the shop bill into the $300 to $600 range on most vehicles.
When to call a shop: If the resistor is buried behind the dashboard and requires extensive disassembly, if you suspect a control module issue that needs a scan tool, or if you have replaced the resistor multiple times without success, a professional diagnosis can save you from throwing parts at the problem. Also, if you smell burning plastic or see smoke from the vents, stop driving and get it inspected — there is a real fire risk.
For home HVAC systems, costs are higher because the equipment is larger and the voltages are dangerous. A furnace blower motor resistor or control board typically costs $50 to $200 in parts, and most homeowners should use a licensed HVAC technician for the repair.
Frequently Asked Questions
Why does my blower motor only work on the highest setting?
The most likely cause is a failed blower motor resistor. The resistor controls all speeds below high by adding electrical resistance, while the high-speed circuit bypasses the resistor entirely. When the resistor burns out, only the direct high-speed path continues working.
How do you know if your blower resistor is bad?
Common signs include the fan only working on high, lower speeds being completely dead, intermittent fan operation, and a burning smell from the vents. A visual inspection may show charred coils or a melted connector, and a multimeter test will show an open (OL) reading on the failed speed circuits.
What does a burnt out blower motor resistor look like?
A burnt resistor typically has blackened or charred resistive coils, a cracked ceramic substrate, and discolored or melted plastic around the pins. The connector pigtail may also be warped or browned from heat damage.
How many ohms should a blower motor resistor have?
Readings vary by vehicle and speed, but typically range from about 0.5 ohms on medium-high to 30 or 40 ohms on the lowest speed. An OL or infinite reading on any speed circuit indicates that trace has burned open. Always check your vehicle’s service manual for the exact specification.
Should you replace the blower motor and resistor together?
Replace both if the motor draws excessive current, makes grinding noises, has shaft play, or you have replaced the resistor two or more times. A failing motor overheats the resistor, so replacing only the resistor will lead to another failure. On vehicles over 100,000 miles, many mechanics recommend replacing both as a pair.
Is it safe to drive with a blower motor that only works on high?
It is generally safe to drive temporarily, as the high-speed circuit still works. However, you lose the ability to control fan speed, which is uncomfortable and can cause window fogging. If you smell burning plastic or see smoke from the vents, stop driving immediately and have it inspected due to fire risk.
Why does my blower motor resistor keep failing?
Repeat failures usually mean the blower motor is drawing too much current, the cabin air filter is clogged and starving the resistor of cooling air, or the pigtail connector is melted and creating excess heat. Test the motor’s amperage draw with a clamp meter and inspect the connector before installing another resistor.
Conclusion
A blower motor that only works on high almost always points to a failed resistor, and now you have the full diagnostic path to confirm it. Start with a visual inspection of the resistor and connector, test the resistor with a multimeter, and check the motor’s current draw so the replacement actually lasts.
Remember to inspect the pigtail connector for heat damage every time — replacing a burnt connector along with the resistor is what separates a permanent fix from a recurring headache. If the motor shows any signs of excess current draw or noise, replace both together to avoid cooking another resistor.
With a multimeter, a clamp meter, and about thirty minutes, you can diagnose a blower motor only works on high condition yourself and get your climate control back to full function.