
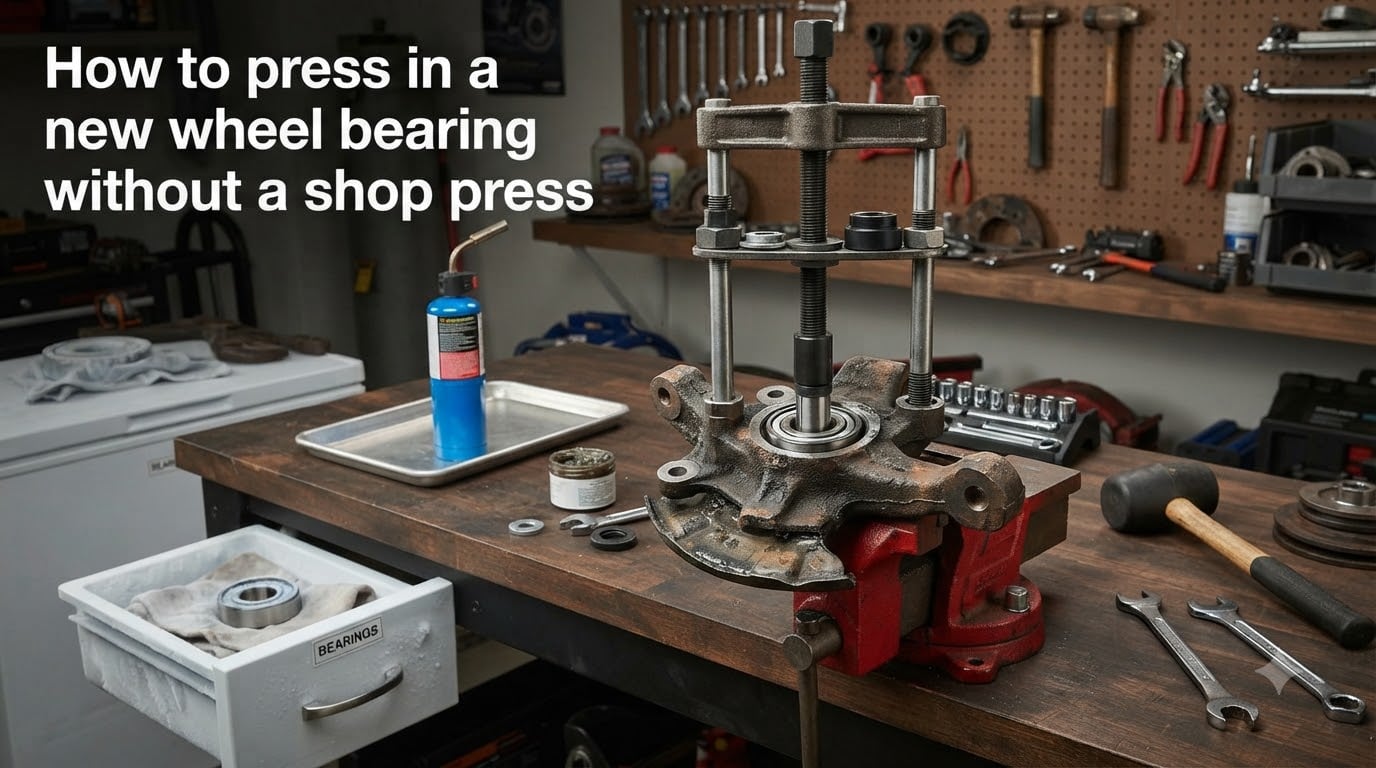
Replacing a press-fit wheel bearing at home sounds intimidating, especially when you do not own a 20-ton hydraulic shop press. I have been there — staring at a brand-new bearing, a bare steering knuckle, and zero professional equipment. The good news is that you can absolutely get a new bearing pressed in without a shop press if you use the right alternative method.
In this guide, I will walk you through four proven ways to press in a wheel bearing at home. You will learn the threaded rod and bearing press kit method, the freeze-and-heat thermal expansion method, the vehicle weight method, and the machine shop fallback. I will also cover the safety rules you need to follow so you do not destroy an expensive bearing or hurt yourself in the process.
Whether you are working on a daily driver in your driveway or helping a friend on the weekend, this guide gives you the step-by-step instructions that forum mechanics and YouTube tutorials agree on. Let us get into how to press in a new wheel bearing without a shop press.
Table of Contents
Understanding Press-Fit Wheel Bearings
A press-fit wheel bearing relies on an interference fit between the bearing’s outer race and the steering knuckle’s bore. The knuckle hole is slightly smaller than the bearing diameter, which means the bearing must be forced in under significant, even pressure. That is why a hydraulic press is the standard tool.
Not every vehicle uses press-fit bearings. Many modern cars and trucks use bolt-in hub bearing assemblies that simply bolt to the knuckle with three or four fasteners. If your vehicle has a hub assembly, you do not need a press at all — you just unbolt the old unit and bolt in the new one.
The methods in this guide apply specifically to press-fit bearings, which are common on older vehicles, many front-wheel-drive cars, and some rear-wheel-drive trucks. Before you start, confirm your bearing type by checking a service manual or reputable parts diagram for your specific make and model.
Press-fit installation matters because uneven force damages the bearing internally. If you push on the inner race, the balls or rollers get crushed between the races. If you apply force at an angle, the bearing seats crooked and fails prematurely. Every method below addresses how to apply straight, even force on the outer race only.
Method 1: Threaded Rod and Bearing Press Kit (Hub Tamer Style)
This is the most reliable DIY method and the one I recommend first. It uses a threaded rod, heavy washers, and a receiving cup to replicate what a shop press does. Tools like the Hub Shark, Hub Tamer, and OTC bearing press kits all use this exact principle. You can also build your own version with hardware-store parts.
Tools You Need
You will need a high-strength threaded rod (typically 5/8-inch or M16 grade 8), matching high-strength nuts, thick steel washers, a receiving cup or pipe that fits over the bearing, a bearing driver or flat plate that contacts only the outer race, a breaker bar, and a socket set. If you buy a kit, all the adapters are included.
Step-by-Step Instructions
Step 1: Remove the steering knuckle from the vehicle. You need the knuckle on your workbench to use this method properly. Remove the axle nut, separate the ball joints and tie rod end, and unbolt the knuckle from the strut.
Step 2: Clean the knuckle bore thoroughly. Use a wire brush and brake cleaner to remove rust, grease, and debris. Any contamination stops the bearing from seating evenly.
Step 3: Apply a thin film of high-temperature bearing grease or anti-seize to the inside of the knuckle bore. This helps the bearing slide in and prevents future corrosion.
Step 4: Position the new bearing in the bore. Make sure it sits flat and square. The bearing must be perfectly aligned with the bore axis before you start applying pressure.
Step 5: Place the receiving cup on the back side of the knuckle, directly behind the bearing. The cup must be large enough to accept the bearing as it passes through but small enough to catch the knuckle material around the bore.
Step 6: Place the bearing driver or flat plate on the front of the bearing. This piece must contact only the outer race of the new bearing. Never push on the inner race.
Step 7: Thread the rod through the center of everything — driver, bearing, knuckle, and receiving cup. Add a heavy washer and nut on each end.
Step 8: Tighten the nut on the driver side using a breaker bar. Turn slowly and steadily. The rod pulls the driver plate forward, pressing the bearing straight into the bore. Keep tightening until the bearing bottoms out flush with the knuckle.
Step 9: Check that the bearing is seated evenly all the way around. Spin the inner race by hand — it should rotate smoothly with no binding or roughness.
Step 10: Reinstall the hub into the new bearing using the same threaded rod setup, this time pressing the hub through the inner race. Use a driver that contacts only the inner race for this step.
This method works because threaded rod can generate enormous linear force — easily enough to press a bearing into a knuckle. The key is using grade 8 hardware so the rod does not stretch or snap under load. A cheap hardware-store threaded rod may bend or break, which is dangerous.
Method 2: Thermal Expansion (Freeze the Bearing, Heat the Knuckle)
The thermal method uses physics instead of force. Metal expands when heated and contracts when cooled. By freezing the bearing and warming the knuckle, you create enough clearance for the bearing to drop or slide in with minimal pressure. Many experienced mechanics on Reddit and Mechanics Stack Exchange report excellent results with this approach.
Tools You Need
You need a freezer (or dry ice for more extreme contraction), a propane torch or induction heater, heavy gloves, safety glasses, a bearing driver or dead-blow mallet, and a surface to protect the knuckle during heating.
Temperature Guidelines
Freeze the bearing overnight at 0 degrees Fahrenheit or colder. A standard kitchen freezer reaches about 0 degrees Fahrenheit, which contracts the bearing enough to help. Dry ice at minus 109 degrees Fahrenheit provides more contraction for tighter fits.
Heat the knuckle bore to a maximum of 250 to 300 degrees Fahrenheit. This is the temperature range that experienced mechanics on Stack Exchange recommend. Never exceed 300 degrees Fahrenheit because excessive heat can damage the knuckle’s metallurgical properties and warp the bore.
Do not use a rose-bud torch on maximum heat. Use a controlled flame or an induction heater that lets you monitor temperature. If you do not have a temperature gun, heat until a drop of water sizzles on the knuckle but do not let the metal glow.
Step-by-Step Instructions
Step 1: Place the new bearing in a sealed plastic bag and put it in the freezer overnight. The bag prevents condensation from forming on the bearing.
Step 2: Remove the knuckle from the vehicle and clean the bore as described in Method 1.
Step 3: Heat the knuckle bore evenly using your torch or induction heater. Move the heat source around the bore to distribute warming. Heat only the area around the bearing bore, not the entire knuckle.
Step 4: While the knuckle is warm, remove the bearing from the freezer. Work quickly — you have a window of about 30 to 60 seconds before temperatures equalize.
Step 5: Position the cold bearing in the warm bore. It should be square and aligned.
Step 6: Press the bearing in by hand if it slides. If it needs a small push, use a bearing driver that contacts only the outer race and tap gently with a dead-blow mallet. Some mechanics report the bearing drops in by hand when the temperature differential is right.
Step 7: Let the assembly cool to room temperature naturally. Do not quench it in water — rapid cooling can warp the knuckle.
Step 8: Verify the bearing is fully seated and spins freely before reinstalling the hub.
This method works best on smaller bearings and in cooler ambient temperatures. It may not generate enough clearance for larger truck bearings or extremely tight interference fits. If the bearing does not go in within the temperature window, switch to Method 1 rather than forcing it.
Method 3: Vehicle Weight as a Press
This method uses the weight of your vehicle to push the bearing into the knuckle. It is the most controversial approach because it involves improvising with a jack and the car’s mass. Forum users on Car Talk Community and Reddit have described it, but many professional mechanics warn that it carries real risk.
When It Can Work
The vehicle weight method is only an option if you are replacing the bearing with the knuckle still on the car. This applies to some front-wheel-drive vehicles where the knuckle stays attached to the strut. It does not work if you have already removed the knuckle.
Step-by-Step Instructions
Step 1: With the wheel removed and the axle nut off, remove the old bearing using a slide hammer or threaded rod puller.
Step 2: Clean the knuckle bore thoroughly.
Step 3: Position the new bearing in the bore, aligned and square.
Step 4: Place a bearing driver or flat steel plate against the outer race of the bearing. The driver must be the right size to push only on the outer race.
Step 5: Place a bottle jack or hydraulic jack under the driver, positioned so the vehicle’s weight pushes down on the driver when the jack is extended.
Step 6: Carefully lower the vehicle onto the jack setup. The weight of the car presses the bearing into the bore.
Step 7: Check progress frequently. Stop the moment the bearing seats flush.
Why This Method Is Risky
I list this method because people ask about it, but I want to be honest about the risks. The driver can slip, the jack can shift, and the bearing can seat at an angle. If the vehicle shifts during the press, you can damage the knuckle, the bearing, or injure yourself. Professional mechanics generally recommend Method 1 or Method 4 over this approach.
If you choose this method, use jack stands for backup support, never work under a vehicle supported only by a hydraulic jack, and have a second person spot the alignment as the bearing goes in.
Method 4: Take the Knuckle to a Machine Shop
Sometimes the smartest DIY move is knowing when to hand off a specific step. Removing the knuckle yourself and taking it to a local machine shop or automotive machine shop is the most reliable way to get a bearing pressed correctly without owning a press.
How It Works
Step 1: Remove the steering knuckle from the vehicle yourself, following the steps in Method 1.
Step 2: Bring the knuckle and the new bearing to a local machine shop, automotive repair shop, or machine shop at an auto parts store. Many NAPA and independent shops offer press services.
Step 3: The shop uses their hydraulic press to remove the old bearing and install the new one in minutes. The work is done by a professional on proper equipment.
Step 4: Pick up the knuckle with the new bearing already installed and reassemble everything on the vehicle.
Cost Expectations
Forum users on Car Talk Community report machine shop costs ranging from $20 to $50 per side. Some shops charge as little as $20 if you walk in during a slow period. Compared to the cost of buying a press kit or the risk of damaging a bearing, this is often the best value.
Call ahead to ask about pricing and turnaround time. Most shops can do the press work while you wait if they are not busy. Bring your own bearing so you control the quality of the part being installed.
This method gives you the professional precision of a hydraulic press without the equipment investment. You save money on labor by doing the removal and reinstallation yourself, and you get a properly pressed bearing that will last.
Safety Warnings: What NOT to Do
Safety is the most important part of this entire process. A damaged wheel bearing can fail at speed, causing wheel vibration, loss of control, or even wheel separation. Follow these rules strictly.
Never Hammer the Bearing Directly
This is the single most repeated warning across every forum, Stack Exchange thread, and YouTube video I researched. Striking a bearing with a hammer transfers impact through the balls or rollers to the races, creating microscopic indentations called brinelling. The bearing will fail prematurely — sometimes within a few hundred miles.
If you must tap a bearing, use a bearing driver that distributes force across the entire outer race and a dead-blow mallet, not a steel hammer. Even then, tapping should be light and only used to start the bearing in the bore.
Never Push on the Inner Race
When pressing a bearing in, force must go through the outer race only. Pushing on the inner race forces the bearing’s internal components to carry the press load, which crushes the balls or rollers between the races. This destroys the bearing before it ever turns a wheel.
Check your driver tool before every press. If it contacts the inner race, you need a larger-diameter driver or a different adapter.
Do Not Overheat the Knuckle
When using the thermal method, keep the knuckle temperature at or below 300 degrees Fahrenheit. Heating beyond this point can alter the aluminum or steel’s heat treatment, weaken the knuckle structurally, and warp the bore so the bearing fit is permanently wrong.
Never use the knuckle-bore heating method on knuckles with sealed wheel bearings already installed. The heat destroys the bearing seals.
Wear Safety Equipment
Always wear safety glasses when pressing, heating, or hammering metal components. Wear heavy gloves when handling heated knuckles and frozen bearings. Keep your face away from the press setup in case a tool slips or hardware fails under load.
Support the Vehicle Properly
If you are working with the vehicle on jack stands, use stands rated for your vehicle’s weight, place them on solid level ground, and never get under a vehicle supported only by a hydraulic jack. Chock the wheels that remain on the ground.
Use a Torque Wrench for Final Assembly
Once the bearing is pressed in and the knuckle is reinstalled, torque every fastener to specification. The axle nut in particular requires precise torque — often 150 to 200 foot-pounds or more depending on the vehicle. An under-torqued axle nut lets the bearing loosen. An over-torqued nut can damage the bearing. Use a calibrated torque wrench, not an impact gun, for the final tighten.
How to Press in a New Wheel Bearing Without a Shop Press: Method Comparison?
Here is a quick summary to help you choose the right method for your situation.
Threaded Rod Press Kit (Method 1): Best overall for DIYers who want to do the job themselves. Works on nearly any press-fit bearing. Requires buying or renting a kit or building your own with grade 8 hardware. Difficulty is moderate. Time is about one to two hours per side.
Thermal Expansion (Method 2): Best for smaller bearings and cooler weather. Costs nothing if you have a freezer and a torch. Difficulty is moderate. Works best as a complement to Method 1 — use both together for stubborn bearings.
Vehicle Weight (Method 3): Only works with the knuckle on the car. Carries the highest risk of misalignment. Difficulty is high and risk is significant. I recommend this only as a last resort.
Machine Shop (Method 4): Best for reliability and peace of mind. Costs $20 to $50 per side. You do the disassembly and reassembly. The shop handles the precision press work. Lowest difficulty for the press step itself.
For most DIY mechanics, the best combination is Method 1 for the press work, with Method 2 as a helper if the bearing is stubborn. If you are not confident in your tools or skills, Method 4 removes all the risk for a small fee.
FAQs
How to make a homemade wheel bearing press?
You can make a homemade wheel bearing press using a length of grade 8 threaded rod (5/8-inch or M16), matching high-strength nuts, thick steel washers, a steel pipe as a receiving cup, and a flat steel plate as a bearing driver. Thread the rod through the driver, bearing, knuckle, and receiving cup, then tighten the nut with a breaker bar to press the bearing in evenly.
What can you use instead of a bearing press?
You can use a threaded rod press kit (like a Hub Tamer or Hub Shark), the thermal expansion method (freezing the bearing and heating the knuckle), the vehicle weight method using a jack, or you can take the knuckle to a machine shop that charges $20 to $50 to press the bearing on professional equipment.
How to press a wheel bearing at home?
The most reliable way to press a wheel bearing at home is to use a threaded rod press kit. Remove the knuckle, clean the bore, position the bearing, set up the threaded rod with a driver on the outer race and a receiving cup behind the knuckle, then tighten the nut with a breaker bar until the bearing seats flush.
Can I hammer in a wheel bearing?
No, you should never hammer a wheel bearing directly. Hammering transfers impact through the bearing internals and creates brinelling — microscopic dents in the races that cause the bearing to fail prematurely. If you must tap a bearing, use a properly sized bearing driver on the outer race with a dead-blow mallet, never a steel hammer.
Can you replace wheel bearings without a press?
Yes, you can replace press-fit wheel bearings without owning a hydraulic press by using a threaded rod press kit, the thermal expansion method, or by taking the removed knuckle to a machine shop. However, if your vehicle uses a bolt-in hub bearing assembly, no press is needed at all.
Do all wheel bearings need to be pressed?
No, not all wheel bearings need to be pressed. Many modern vehicles use bolt-in hub bearing assemblies that attach to the knuckle with three or four fasteners and require no press. Press-fit bearings are common on older vehicles, some front-wheel-drive cars, and certain trucks.
Conclusion
Learning how to press in a new wheel bearing without a shop press opens up a repair you might have thought was out of reach for a home mechanic. Whether you use a threaded rod press kit, the freeze-and-heat thermal method, or simply take the knuckle to a machine shop for a small fee, you can get a professional-quality result in your own garage.
Start with Method 1 if you want full control, combine it with Method 2 for stubborn bearings, and reserve Method 4 as your reliable fallback. Follow the safety rules, never hammer the bearing, always press on the outer race, and torque everything to spec on reassembly. Your new wheel bearing will give you tens of thousands of miles of quiet, smooth service.