
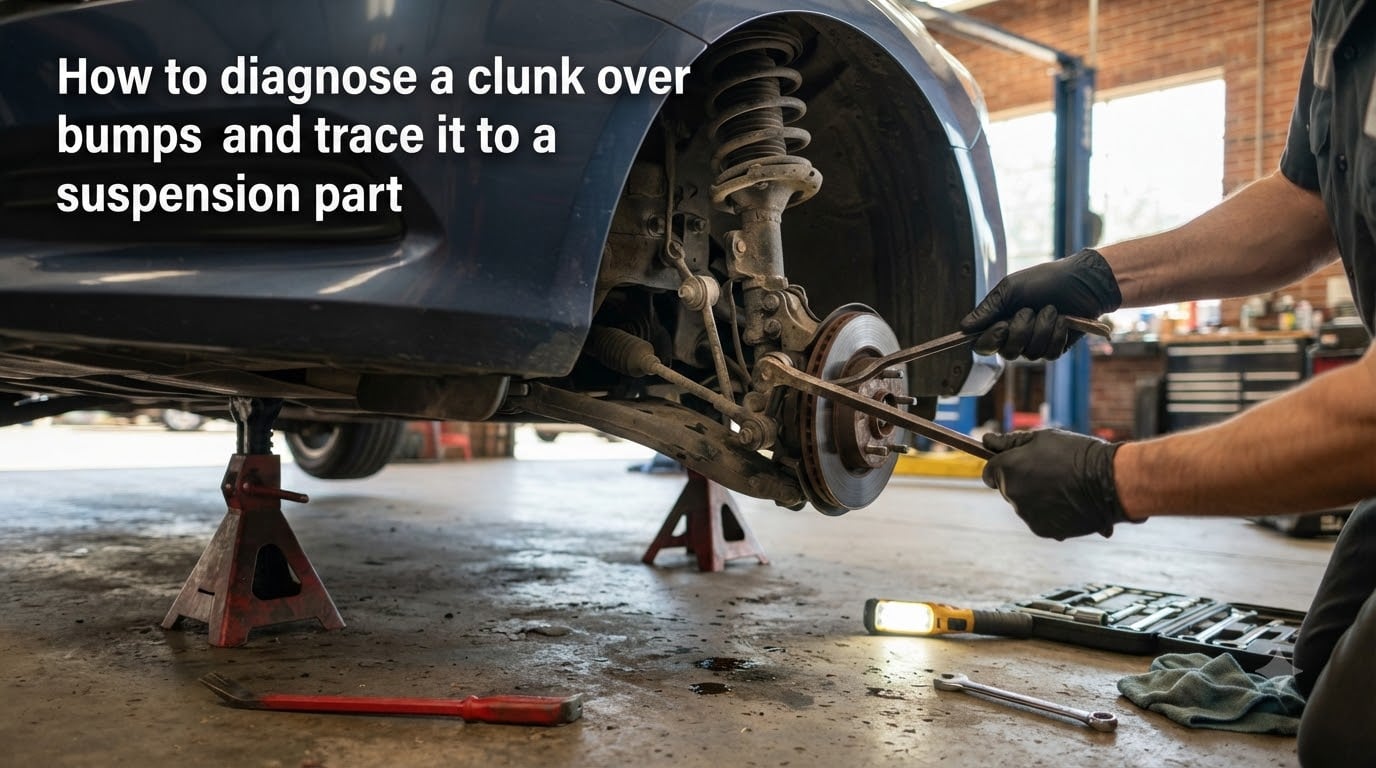
If your car, truck, or SUV has started talking back to you every time you roll over a speed bump, driveway dip, or rough patch of asphalt, you have come to the right place. I have been chasing suspension noises for years, both in my own garage and alongside professional techs, and the truth is this: a clunk over bumps is almost always a worn or loose component hitting its stop. The trick is figuring out which component.
This guide walks through exactly how to diagnose a clunk over bumps and trace it to a suspension part using a method I have refined over hundreds of test drives. You will learn the symptoms, the safety red flags, the tools you need, and a seven-step diagnostic process that goes from cheapest and easiest to most involved. I will also share the verification steps that catch the most common DIY mistake: replacing a part that was never the problem in the first place.
By the end, you should know whether you can fix it in your driveway with a $20 part, or whether it is time to book a shop appointment. Let us get started.
Table of Contents
What a Suspension Clunk Tells You (and What It Doesn’t)?
A clunk is a single, dull, low-frequency impact noise. It happens when something with excess play moves under load, travels until it hits a hard stop, and then transfers that energy into the chassis. One bump, one thud, one quiet moment, then another thud on the next bump.
That rhythm is the key signal. Rattles, on the other hand, are continuous buzzes caused by something loose vibrating at speed. Squeaks are high-frequency noises caused by rubber or plastic rubbing against metal, usually when a bushing is dried out.
When you hear a true clunk, the most common sources are:
Worn sway bar links or end links
Loose ball joints
Cracked or separated control arm bushings
Failed tie rod ends
Broken strut mounts or top bearings
Loose exhaust hangers or heat shields
The clunk has a location (front or rear, left or right), a character (sharp thud vs hollow boom), and a trigger (small bumps, big bumps, bumps while turning, bumps while braking). All three are clues. We will use every one of them.
When to Stop Driving Immediately?
Most suspension clunks are annoying rather than dangerous. Some are not. Before you diagnose anything, make sure you are not in the dangerous category.
Stop driving and call a tow truck if any of these apply:
The clunk is followed by a sudden change in steering feel: looseness, wandering, or a clunk that you can feel through the steering wheel
The clunk only happens under braking, especially with vibration through the pedal
You see uneven tire wear, a torn boot, or a missing cotter pin on a visible joint
The wheel visibly shifts when you grab the top and bottom and rock it
The vehicle sags hard to one side overnight
Ball joints and tie rod ends are safety-critical. A failure at highway speed can mean a sudden loss of steering. If you suspect either, the diagnosis can wait but the driving cannot. Get the car to a shop on a flatbed.
Tools, Setup, and Prep Before You Touch the Car
You do not need much. For a basic diagnosis you can do in your driveway with hand tools, gather:
Floor jack and two jack stands (rated for your vehicle weight)
A good flashlight or work light
A 18-inch pry bar or large screwdriver
A basic socket and wrench set (metric and SAE)
A dial indicator with magnetic base (optional but ideal for ball joints)
Mechanic’s gloves and safety glasses
Always chock the wheels opposite the end you are lifting. Never work under a car supported only by a jack. The single biggest DIY mistake I see is someone skipping jack stands because the driveway is flat and they will “only be a minute.” That is how people get pinned.
Pick a level surface with room to swing a door fully open. Concrete is better than asphalt because asphalt gives under jack stands and the car can settle while you are under it.
Step 1: Reproduce the Clunk on a Test Drive
Before you lift anything, you need to understand what you are chasing. A good test drive tells you the side, the trigger, and the character of the noise. That information alone eliminates half the suspects.
Find a stretch of road with speed bumps or repeated uneven pavement. Drive at a steady 15 to 25 mph and listen for the clunk on every bump. Then try the following variations and note what changes:
Cross the same bumps at different speeds
Approach bumps with the wheel turned slightly left, then right
Brake gently while crossing a bump, then accelerate gently
Roll over the bumps with windows up and windows down
If the clunk gets louder when turning, suspect the sway bar links, ball joints, or outer tie rod on the side you are turning toward. Turning loads those joints more.
If the clunk only happens over small bumps and not big ones, you are usually looking at a bushing with very little remaining compliance, or a strut mount where the bearing has play.
If the clunk only happens when braking, suspect a worn ball joint or a loose wheel bearing, not a sway bar link.
Write down your observations. Two minutes of notes here saves an hour under the car.
Step 2: The Visual Inspection (Cheap Rule-Outs First)
Before you start yanking on suspension parts, look at the cheap stuff. I have seen countless “suspension clunks” that turned out to be a heat shield touching the driveshaft, a broken exhaust hanger, or a loose plastic underbody panel.
With the car parked and the engine off:
Look under the rear bumper for exhaust hangers that have separated. Wiggle the tailpipe by hand. If it moves more than a half inch and the noise source looks like it sits behind the rear axle, you have probably found it.
Inspect all rubber exhaust hangers for cracking or missing chunks.
Grab the plastic underbody panels and shields and wiggle them. Look for missing or broken clips.
Check that the spare tire and tools are tight in the trunk.
Look at the brake calipers and dust shields. A bent dust shield can tap the rotor on bumps.
None of these are suspension parts, but each one produces a noise that gets blamed on the suspension. Twenty minutes of looking saves you from buying a sway bar link you do not need.
Step 3: Sway Bar Links Diagnosis (The Most Common Cause)
If you skip straight to the most likely culprit, you are right 40 percent of the time. Sway bar links (also called stabilizer links or end links) are short connecting rods that link the sway bar to the control arm or strut. They take a beating every time the suspension cycles, and their little bushings wear out first.
Symptoms that point at sway bar links:
Clunk over bumps that gets louder when turning
Clunk that is sharper on one side than the other
Noise happens at low speed over driveway dips and speed bumps
The car feels otherwise tight and stable in a straight line
The pry-bar test: With the car on jack stands and the wheel off (or at minimum the wheel on and the car lifted so the wheel hangs free), locate the sway bar link. It runs vertically from the sway bar to the strut or lower control arm. Place the pry bar between the link body and the mounting point and gently lever it side to side.
Any free play in the joint, any clunking you can feel or hear through the bar, means the link is bad. Even a millimeter of movement is enough to cause noise over bumps. I have replaced dozens of sway bar links where the bushing looked fine visually but had just enough slop to clunk on every compression.
Sway bar links are inexpensive and usually take 15 to 30 minutes per side. Most vehicles use simple bolts at each end. If the bolts are corroded, soak them with penetrating oil the night before.
Step 4: Ball Joint Inspection
Ball joints are the pivots that let the control arm and steering knuckle move up and down while staying connected. They wear, and when they wear they get loose. A loose ball joint is not just noisy, it is dangerous.
Symptoms that point at ball joints:
Clunk that comes with a vague or wandering steering feel
Clunk under braking, especially on the front axle
Uneven tire wear on the inner or outer edges
Visible play when the wheel is rocked by hand at 3 and 9 o’clock
The loaded test (with the wheel on): With the car still on the ground, grab the top of the tire and the bottom of the tire and rock it in and out. A small amount of movement is normal. Any clunk, or any movement you can see the joint making, is a bad joint. Do this on both sides and compare. The looser one is suspect.
The dial indicator test: For a precise measurement, jack the car up so the wheel hangs free and mount a dial indicator on the control arm with the plunger resting against the steering knuckle near the ball joint. Push and pull the wheel in and out by hand. Most manufacturers specify a maximum of about 1.5 mm (0.060 inch) of movement. Anything more and the joint is worn.
If you see a torn or missing boot, the joint is on borrowed time regardless of how much play it has now. Replace it.
Step 5: Control Arm Bushing Inspection
Control arm bushings are large rubber donuts that let the arm pivot while damping vibration. They tend to either crack apart or develop a gap inside the rubber that creates slack.
With the car on jack stands and the wheel off, look at each bushing on the control arm that pivots toward the frame. Common failure signs:
Visible cracks in the rubber
Rubber that has separated from the inner metal sleeve
Grease weeping out of the bushing
The control arm shifts visibly when you pry it up and down with the bar
A normal bushing flexes smoothly when you pry it, like a stiff rubber hinge. A bad bushing has a notch or a hard stop, and the arm jumps past it with a clunk. You can often hear the clunk just by prying.
Note that some vehicles use hydraulic bushings that move slowly and almost feel gooey. That is normal. A failed hydraulic bushing usually leaks fluid.
Step 6: Tie Rod End Diagnosis
Tie rod ends connect the steering rack to the steering knuckle. Like ball joints, they are safety-critical and they wear.
Symptoms that point at tie rods:
Clunk that happens mostly during low-speed steering, like in parking lots
Toe wear on the inside or outside of the front tires
A knocking sound felt through the steering wheel on bumps
Steering that feels loose or has more play than it used to
With the wheel off and the car lifted, grab the tie rod end and try to move it in and out along the axis of the rod. Any play means the inner or outer tie rod is bad. Also turn the steering wheel lock to lock with the engine off and watch for any joint that does not move smoothly.
Replace the whole inner and outer tie rod as an assembly if either one is worn. Most modern vehicles use a one-piece design for simplicity.
Step 7: Strut Mount and Top Bearing Inspection
The strut mount (also called the top mount or top bearing) is the rubber and metal puck that bolts the strut to the chassis. The bearing inside it lets the steering turn without twisting the strut shaft.
A failing strut mount produces a clunk that often sounds like it is coming from inside the cabin, not from the wheel. That is because the noise is transferring through the chassis tower.
Diagnosis: With the car on the ground, push down hard on each corner of the car and release. A bad strut mount will give a single clunk as the strut bottoms and the mount shifts. Listen from inside the car with the windows up. The corner that is louder is the suspect.
You can also turn the steering wheel with the car stationary and the wheels off the ground. A bad top bearing will grind, click, or feel notchy rather than smooth.
Replacing a strut mount is a bigger job because it usually requires compressing the spring. Many DIYers choose to replace the whole strut assembly at this point, which is also acceptable.
Symptom-to-Cause Quick Reference
Use this table to narrow down your suspect before you start prying on parts. Match what you hear and feel to the most likely source.
| Symptom | Most Likely Cause | Confidence |
|---|---|---|
| Clunk louder when turning at low speed | Sway bar link | High |
| Clunk only on small bumps, not big ones | Strut mount or top bearing | Medium |
| Clunk under braking, vague steering | Ball joint | High |
| Clunk from inside cabin, especially on rough roads | Strut mount or top bearing | Medium |
| Clunk in parking lots with steering input | Tie rod end | High |
| Clunk from the rear, exhaust moves when wiggled | Exhaust hanger | Very high |
| Clunk with steering wander or uneven tire wear | Ball joint or tie rod | High |
| Clunk that gets worse over time and on cold mornings | Bushing, especially control arm | Medium |
| Single thud per bump, no change with steering | Loose heat shield or underbody panel | Medium |
How to Verify Your Fix After the Repair
This step is the one most DIYers skip, and it is the difference between guessing and knowing. Once you replace a part, you need to confirm the noise is gone and that you did not introduce a new problem.
Road test checklist:
Drive the same stretch of road that produced the original clunk. Listen for the same noise at the same bumps.
If you replaced a front-end part, swap a left-side test with a right-side test to confirm.
Check that no new clunks have appeared. A new noise usually means a torque issue.
Re-torque every fastener to spec after the wheels are back on the ground and the car is at ride height. Suspension bushings are designed to be loaded at ride height, so torquing them with the wheels off gives an inaccurate preload.
Get an alignment if you replaced any steering or ball joint. Tie rods and ball joints change the toe and camber.
If the noise is still there, do not assume the new part is defective. Go back to the symptom table and re-check the next most likely cause. Two worn parts at the same axle are common.
When to Bring It to a Mechanic
You should hand it off to a professional shop if any of the following are true after your diagnosis:
The clunk is on a strut mount and you do not have a spring compressor
You confirmed a ball joint or tie rod is loose and you do not have a press or the right removal tool
The noise returns after one repair, which usually means two interacting worn parts
You smell burning rubber, see fluid leaking from a strut, or the car sits unevenly
The vehicle is still under warranty and you want to keep the coverage intact
A typical shop diagnosis runs from $80 to $150 depending on region. The repair itself ranges from under $50 for sway bar links (DIY-friendly) to over $800 per corner for a full strut assembly replacement with alignment. Knowing which part is bad before you walk in saves you from a parts-shooting estimate that costs more than the fix.
FAQs
Is it safe to drive with a clunk over bumps?
Generally yes if the clunk is from a sway bar link or bushing, but no if it is from a ball joint, tie rod, or wheel bearing. Stop driving immediately if the clunk is followed by wandering steering, vibration under braking, visible wheel play, or any change in steering feel.
What suspension parts cause clunking noise over bumps?
The most common parts are sway bar links, ball joints, control arm bushings, tie rod ends, strut mounts, and exhaust hangers. Sway bar links are by far the most frequent cause, followed by worn ball joints on higher-mileage vehicles.
How do I know if my clunk is from a sway bar link or a ball joint?
Sway bar links usually clunk louder when you turn the wheel at low speed over a bump. Ball joints clunk under braking or with steering wander and uneven tire wear. The pry-bar test on a sway bar link will show obvious play in the link itself.
Why does my car clunk only on small bumps and not big ones?
Small bumps move the suspension less, so a small amount of play in a worn bushing or strut mount is enough to hit its stop. Big bumps push the suspension through more travel, which can mask the same play. A clunk that disappears on big bumps almost always points to a bushing or strut mount.
How much does it cost to fix a clunking suspension?
Costs vary widely. Sway bar links are typically $15 to $50 per side for parts and one to two hours of labor if you do not DIY. Ball joints run $50 to $150 per side for parts. Strut mounts run $40 to $200 per corner for parts plus an alignment. A full diagnosis at a shop usually runs $80 to $150.
Can bad wheel bearings cause clunking over bumps?
Yes, but the noise from a wheel bearing is usually a hum or growl that changes with speed and turns, not a single clunk. If you hear clunking with a hum, especially when turning, have the wheel bearing checked along with the suspension. Wheel bearings usually need to be pressed in and out, so they are typically a shop job.
Final Thoughts on Tracing a Suspension Clunk
You now have a complete roadmap for how to diagnose a clunk over bumps and trace it to a suspension part, from the test drive that localizes the noise to the pry-bar test that confirms the culprit. Start with the cheap stuff. Do the sway bar links first. Verify with a road test before you assume you are done. If you hit a wall, the symptom-to-cause table gives you a smart next guess.
If this guide saved you from a wasted parts swap or a missed safety issue, share it with a friend who has been chasing the same noise. And if you want me to cover a related topic next, such as how to do a full alignment check at home or what those funny tire wear patterns really mean, let me know.