
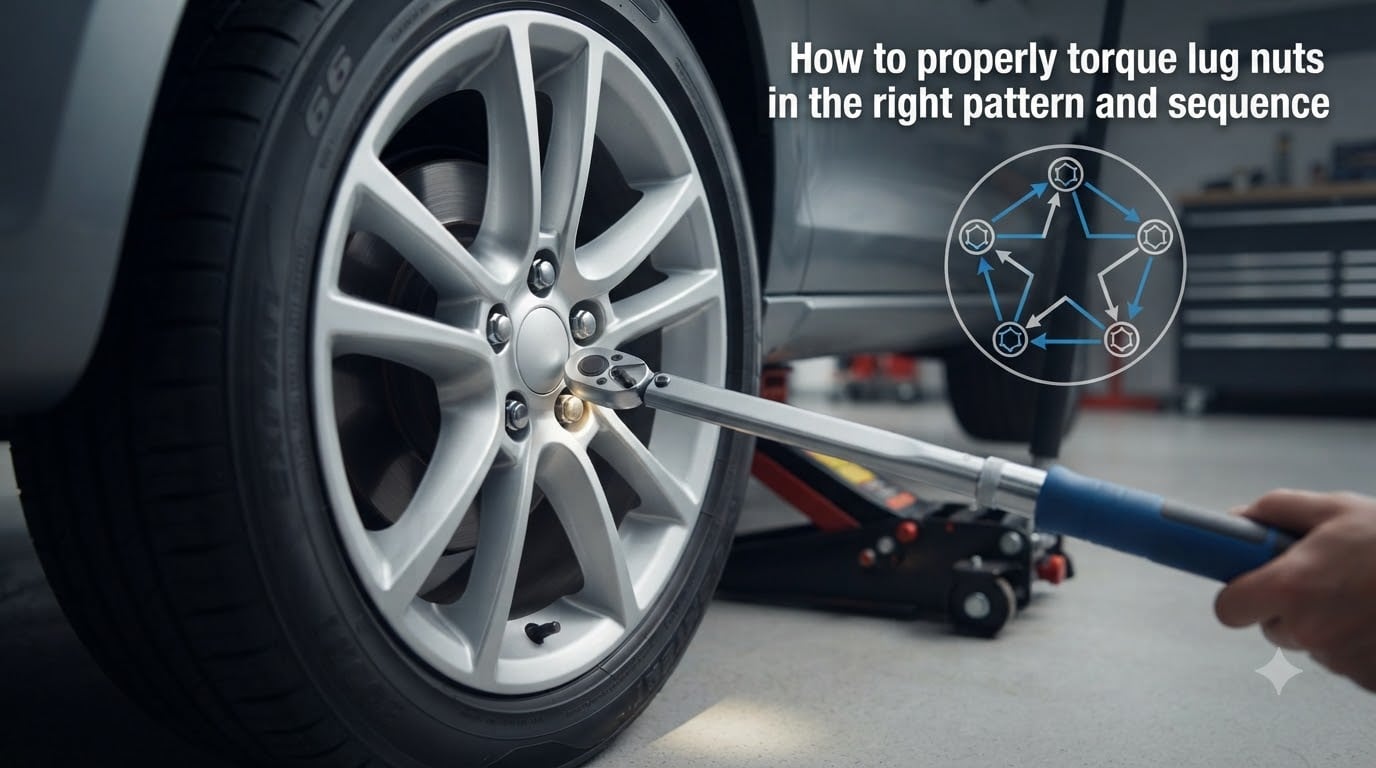
If you have ever swapped a tire, rotated your wheels, or installed a new set of alloys, you have probably asked yourself how to properly torque lug nuts in the right pattern and sequence. The answer matters more than most drivers realize. Over-torqued studs stretch and snap. Under-torqued wheels vibrate loose. The right torque, applied in the right pattern, keeps you, your passengers, and everyone else on the road safe.
I have torqued hundreds of wheels over the years on everything from economy hatchbacks to heavy-duty pickup trucks, and I have seen the consequences when the job is done wrong. In this guide, I will walk you through the exact procedure, the science behind the star pattern, the right tools to use, and the mistakes that send cars to the shop with broken studs or detached wheels.
Table of Contents
Why Proper Lug Nut Torque Matters?
Proper lug nut torque keeps the wheel clamped to the hub at exactly the force your manufacturer designed for. That clamping force holds the wheel true against the brake rotor or drum, transfers torque to the ground, and resists the vibration that comes with every mile of driving.
When lug nuts are too loose, the wheel can wobble, the studs can fatigue, and in a worst-case scenario, the wheel can separate from the vehicle. When lug nuts are too tight, the studs stretch permanently. A stretched stud loses its clamping strength, can no longer hold the proper torque, and eventually snaps. Both situations are dangerous and expensive.
Forum threads are full of stories from drivers who had their wheels installed at a shop and watched a lug nut shear off at 15,000 miles. In most cases, the shop used an impact gun and pushed torque well past 150 ft-lbs on a stud rated for 80 to 100 ft-lbs. The studs did not fail that day. They failed months later, when the driver least expected it.
Understanding Torque Specifications
Torque is a rotational force, measured in foot-pounds (ft-lbs) in the United States or Newton meters (Nm) in most other countries. One ft-lb equals roughly 1.356 Nm. Your vehicle’s torque specification is the exact clamping force the wheel manufacturer requires to hold the wheel securely without damaging the studs.
You can find your specific torque spec in three places: your owner’s manual, the sticker on the driver’s side door jamb, or your vehicle manufacturer’s website. Most passenger cars sit between 80 and 100 ft-lbs. Light trucks range from 100 to 140 ft-lbs. Heavy-duty trucks and trailers can require 165 ft-lbs or more.
Bolt size also influences torque. Smaller bolts need less force, larger bolts need more. A general guideline: 12mm bolts typically need 70 to 80 ft-lbs, 14mm bolts need 85 to 100 ft-lbs, and 9/16 inch (roughly 14mm) studs on many trucks call for 120 to 140 ft-lbs. Always verify your specific spec before you start.
Tools You Need to Properly Torque Lug Nuts
A quality torque wrench is non-negotiable. I recommend a click-type torque wrench for most home mechanics because it is accurate, easy to use, and affordable. Beam-type wrenches are also accurate but harder to read. Digital torque wrenches offer the highest precision, especially for low torque values on smaller passenger cars.
You also need the right socket. Lug nut sockets are typically 17mm, 19mm, 21mm, or 22mm, depending on your vehicle. Using the wrong socket rounds off the corners of the lug nut and creates a much bigger problem. If you have aftermarket wheels with spline-drive or hex-drive lug nuts, you need the matching socket designed for those specific nuts.
A breaker bar helps with initial removal and lets you snug the lug nuts by hand without over-tightening. A torque stick (a colored torque-limiting extension for impact tools) can work in a pinch, but never substitutes for a calibrated torque wrench on a passenger car or daily-driver truck.
The Star Pattern: Why It Works
The star pattern distributes clamping force evenly across the wheel hub. Instead of tightening adjacent lug nuts in sequence, you skip across the wheel and tighten opposite or near-opposite nuts in turn. Each nut pulls the wheel flat against the hub at a different point, so the wheel seats itself gradually and uniformly.
If you tighten lug nuts in a circular pattern, you create a tapered seating surface. One side of the wheel becomes fully seated before the other side, and the wheel ends up slightly off-center. You might not notice it during installation, but you will feel it as a vibration at highway speed. Worse, the uneven seating puts uneven stress on the studs and shortens their life.
Tightening Patterns for 4, 5, 6, and 8 Lug Wheels
The exact sequence depends on your lug count, but the principle stays the same: always work in a star, alternating between opposite sides of the wheel. Here are the four most common configurations.
4-Lug Wheel Pattern
For 4-lug wheels, start at the top nut (12 o’clock position), move to the bottom nut (6 o’clock), then to the right (3 o’clock), then to the left (9 o’clock). Repeat the same sequence for each pass until you reach the full torque spec. Two opposite nuts at a time keeps the wheel centered as it pulls up against the hub.
5-Lug Wheel Pattern
5-lug wheels use a five-point star. Number the lugs 1 through 5 going clockwise. The sequence is 1, 3, 5, 2, 4, then back to 1. In clock positions, you start at the top, then jump to the lower right, then upper left, then lower left, then upper right. Each nut is opposite or near-opposite the previous one, so the wheel seats evenly with every turn.
6-Lug Wheel Pattern
For 6-lug wheels, use the same alternating principle as the 4-lug setup but with more steps. Start at the top (12 o’clock), go to the bottom (6 o’clock), then to the upper right, lower left, upper left, lower right. You end up tightening each nut opposite the previous one, with no two adjacent nuts in sequence.
8-Lug Wheel Pattern (Trucks and Trailers)
Heavy-duty trucks and trailers use 8-lug wheels. The pattern works in pairs: 12 o’clock, 6 o’clock, 3 o’clock, 9 o’clock, then 1:30, 7:30, 4:30, and 10:30. Work in the same order for each pass. This setup is critical because 8-lug wheels carry far more load and any uneven seating shows up immediately under braking.
How to Properly Torque Lug Nuts?
Below is the exact procedure I use on every wheel installation, from a simple tire rotation to a brand-new set of aftermarket alloys.
Step 1: Consult the owner’s manual. Confirm the torque specification for your specific vehicle and wheel combination. Alloy wheels often require less torque than steel wheels. Aftermarket wheels may have a different spec from the OEM wheel.
Step 2: Position the wheel and hand-tighten every lug nut. Mount the wheel on the hub and thread each lug nut on by hand until snug. This step prevents cross-threading, which is the most common beginner mistake and a fast way to ruin a stud.
Step 3: Snug the lug nuts in the star pattern. With the vehicle still on jack stands, use a torque wrench set to about half the final torque value. Work the star pattern, tightening each nut in turn. This first pass seats the wheel flat against the hub.
Step 4: Lower the vehicle to the ground. Drop the suspension to its normal ride height so the wheel sits at the same angle it will during driving. Torquing with the wheel hanging can give you an inaccurate final reading.
Step 5: Apply the full torque in the star pattern. Reset your torque wrench to the full specification and run through the star pattern one more time, tightening each lug nut until you hear the click (or see the indicator) on your wrench. Do not stop at the click. Move on to the next nut.
Step 6: Do a final pass. Go around the star pattern one more time and verify each lug nut clicks at the same setting. This final pass catches any lug nuts you may have under-tightened on the first full pass.
Re-Torque After 50 to 100 Miles
Re-torquing is not optional. New wheels and rotors can shift slightly during the first few heat cycles and miles of driving. Lug nuts that were tight at installation can settle and lose tension. After 50 to 100 miles of driving (or about an hour on the road for heavy vehicles), pull over, set the parking brake, and re-check each lug nut with the torque wrench at the full spec.
Skip this step and you risk a loose wheel at speed. Do not be surprised if aftermarket wheels need a re-torque after even fewer miles. Many installers recommend a second re-torque after 500 miles for aftermarket setups.
Common Mistakes to Avoid
Using an impact gun as the final step. Impact tools deliver inconsistent torque and almost always over-torque passenger car lug nuts. Use the impact gun only for removal, then finish with a calibrated torque wrench.
Tightening in a circle instead of a star. This is the fastest way to warp a rotor or end up with a wheel that vibrates at speed. Always use the star pattern, every time.
Using anti-seize on lug nuts. Anti-seize reduces friction, which means the stud sees more torque than the wrench reading shows. Most manufacturers specifically warn against it. If you do use it, derate the torque spec by about 25 percent, and only apply a thin coat to the stud threads, not the wheel contact surface.
Skipping hand-tightening. Hand-tightening first prevents cross-threading. A cross-threaded stud will not hold torque and must be replaced.
Not calibrating the torque wrench. Most click-type wrenches need calibration every 5,000 cycles or once a year. A wrench that has been dropped or stored with the spring compressed can read 10 to 20 percent off without showing any obvious signs.
Torque Lug Nuts Without a Torque Wrench
Sometimes you have no choice. You are on the side of the road with a flat, no torque wrench, and a spare to mount. In that case, hand-tighten each lug nut as firmly as you can with the lug wrench, then use the wrench to apply roughly 60 to 70 ft-lbs of force (about 100 pounds of pressure on a 12-inch wrench) for a typical passenger car.
This is an emergency-only procedure. Drive straight to a shop, lift the wheel properly, and re-torque to spec as soon as possible. Long-term reliance on hand-tightening alone is unsafe and will eventually leave you stranded.
Frequently Asked Questions
What is the correct torque sequence for lug nuts?
The correct torque sequence for lug nuts is a star pattern. Start at the top nut (12 o’clock), then move to the bottom nut (6 o’clock), then crisscross to opposite or near-opposite positions until all lug nuts are tightened. Repeat the same pattern for each pass.
Does torque sequence matter?
Yes, torque sequence matters. Tightening lug nuts in a circle causes uneven seating, vibration, warped rotors, and stretched studs. The star pattern distributes clamping force evenly across the hub.
Why do you torque lug nuts in a star pattern?
Star pattern torquing pulls the wheel flat against the hub in stages, distributing clamping force evenly. Each nut pulls from a different angle, so the wheel seats itself uniformly rather than cocking to one side.
What is the correct pattern for tightening wheel nuts?
The correct pattern is a star, alternating between opposite or near-opposite nuts. For 5-lug wheels: 1, 3, 5, 2, 4. For 4-lug wheels: 12 o’clock, 6 o’clock, 3 o’clock, 9 o’clock. Work in the same order for each pass.
How often should you re-torque lug nuts?
Re-torque lug nuts after 50 to 100 miles of driving following installation. Aftermarket wheels may need a second re-torque at about 500 miles. Re-torquing catches settling that happens during initial heat cycles.
Can you use an impact wrench on lug nuts?
You can use an impact wrench for removal, but never for final tightening on passenger cars or trucks. Impact wrenches deliver inconsistent torque and almost always over-torque studs. Always finish with a calibrated torque wrench.
Wrapping Up
Knowing how to properly torque lug nuts in the right pattern and sequence is one of the most important skills a driver or DIY mechanic can learn. Get the torque spec from your owner’s manual, hand-tighten first, run a half-torque pass in the star pattern, drop the vehicle to the ground, finish at full torque in the same pattern, and re-torque after 50 to 100 miles.
Skip the impact gun for final tightening, never use anti-seize unless you derate the torque, and always re-torque after your first drive. These habits will save you from the stretched studs, warped rotors, and detached wheels that too many drivers discover the hard way.