
A dead battery on a Monday morning is never fun. But before you blame the battery, there is a good chance your alternator is the real culprit. The alternator is what keeps your battery charged and powers every electrical system while the engine runs, and when it starts failing, even a brand-new battery will go flat within an hour of driving.
Here is the good news. You do not need an expensive diagnostic tool or a trip to the mechanic to figure out whether your alternator is the problem. If you own a digital multimeter and can spare about fifteen minutes, you can run a reliable test right in your driveway.
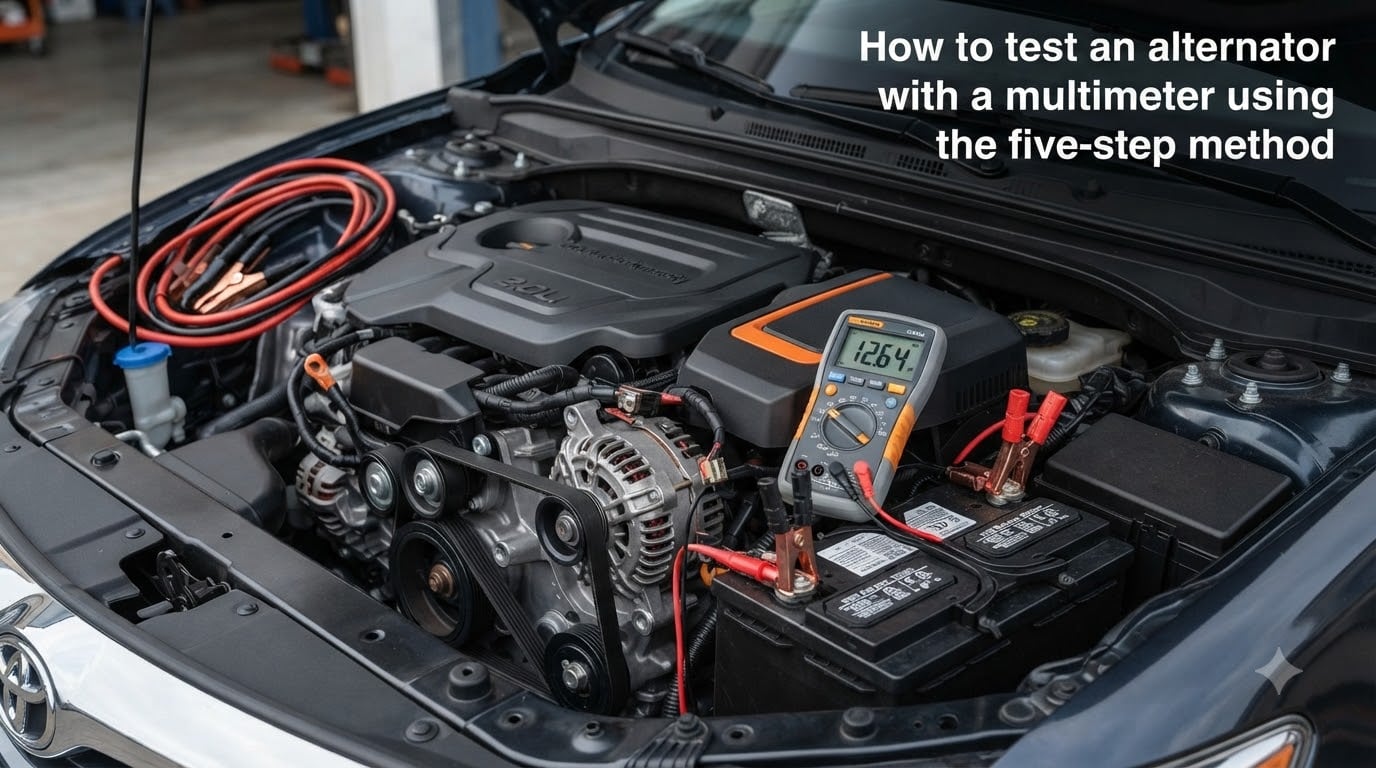
In this guide, I will walk you through exactly how to test an alternator with a multimeter using what I call the five-step method. This is the same sequence professional technicians follow, broken down into simple voltage checks anyone can perform. By the end, you will know whether your alternator is healthy, borderline, or on its way out.
Table of Contents
What Is an Alternator and How It Works?
An alternator is a belt-driven generator mounted on the front of your engine. Its job is to convert mechanical energy from the spinning engine into electrical energy that recharges the battery and runs everything from your headlights to your infotainment system while you drive.
Inside the alternator, a rotor with a magnetic field spins inside stationary armature coils called the stator. This spinning magnetic field induces alternating current, or AC, through electromagnetic induction. Since your car’s electrical system runs on direct current (DC), a component called a diode rectifier converts that AC into DC before the power ever reaches your battery.
A voltage regulator controls how much current the alternator produces. On older vehicles the regulator was a separate box, but on most cars built in the last twenty years it is integrated directly into the alternator. The regulator keeps output between roughly 13.8 and 14.7 volts, which is high enough to charge the battery but not so high that it boils the electrolyte.
When any of these internal components fail, whether it is the rotor, the stator windings, the diode rectifier, or the voltage regulator, your alternator stops producing the correct voltage. That is exactly what the five-step multimeter test is designed to catch.
Tools You Need
The list is short, and you probably already own most of it.
A digital multimeter with a DC voltage mode (any brand works, even a budget model)
Safety glasses and gloves
Access to your vehicle’s battery terminals under the hood
A helper or a way to hold the throttle at roughly 2,000 RPM (optional but helpful for Step 4)
Set your multimeter to the DC voltage setting. If your meter has manual ranges, pick the 20V range, since car electrical systems operate well below 20 volts. Auto-ranging meters handle this automatically.
Safety Warnings Before You Start
Working around a running engine and a car battery carries real risks. A few precautions will keep you and your vehicle safe.
First, remove any loose jewelry, metal watches, or dangling sleeves before opening the hood. The negative battery terminal and engine block are always close together, and a metal watchband bridging the two will cause a nasty short circuit.
Second, keep your fingers on the plastic handles of your multimeter probes. Never touch the metal tips while the engine is running.
Third, and this is the big one, do not disconnect the battery cable while the engine is running to test the alternator. This is an old mechanic’s trick that worked on cars from the 1970s, but on any modern vehicle it can send a voltage spike through the electrical system and destroy the ECU, the engine control unit. I have seen this mistake cost people thousands in fried computers. The multimeter method is safer and far more accurate anyway.
Finally, make sure the vehicle is in park or neutral with the parking brake engaged before you start the engine for any of the running tests.
How to Test an Alternator With a Multimeter?
This is the core of the entire guide. Each step builds on the previous one, and together they tell you not just whether the alternator is producing voltage, but whether it can maintain that voltage under real-world conditions. Follow the steps in order.
Step 1: Test Battery Voltage (Engine Off)
Before you test the alternator, you need a baseline reading of the battery itself. A weak or dead battery will give you misleading alternator readings later, so this step catches that problem first.
With the engine off and the key out of the ignition, connect the red multimeter probe to the positive battery terminal and the black probe to the negative terminal. Make sure the metal probe tips are touching clean lead, not corrosion or paint.
A healthy, fully charged battery should read between 12.4V and 12.6V. If yours reads below 12.0V, the battery is significantly discharged and you should charge it before continuing. A resting voltage below 11.8V suggests the battery may have a dead cell and could be the actual source of your problem, not the alternator.
Write this number down. You will compare it to your running voltage in the next step.
Step 2: Check Voltage With Engine Running
Now start the engine and let it idle. Keep the multimeter probes on the battery terminals exactly as you had them in Step 1.
Watch the voltage reading. It should jump up from your resting reading to somewhere between 13.8V and 14.7V. This increase tells you the alternator is producing current and sending it to the battery.
If the running voltage stays the same as the resting voltage, or actually drops, the alternator is not charging the battery at all. That is a clear sign of a failed alternator, a broken drive belt, or a blown main fuse.
If the voltage reads above 14.7V and climbs toward 15V or higher, the voltage regulator has likely failed and the alternator is overcharging. Overcharging will boil the battery electrolyte, warp internal plates, and destroy the battery quickly if left unfixed.
Most community discussions I have read on r/MechanicAdvice confirm that around 14V at idle is what you want to see. Anything in that 13.8 to 14.7 window means your charging system is doing its job at rest.
Step 3: Perform a Load Test
An alternator can produce correct voltage at idle but fail the moment electrical demand increases. The load test is what separates a healthy alternator from one that is on its last legs.
With the engine still idling, turn on as many electrical accessories as possible. Switch on the headlights to high beam, turn the blower motor to maximum, turn on the rear defroster, and if your car has heated seats, switch those on too.
Watch the multimeter reading closely. The voltage will dip slightly when you first turn everything on, but a healthy alternator will recover and hold steady above 13.5V within a few seconds.
If the voltage drops below 12.5V or bounces around erratically and never recovers, the alternator cannot keep up with demand. This is one of the most common failure modes, and many drivers report that their car runs fine around town but stalls or has dim lights on the highway at night. The load test catches this exact problem.
Step 4: Rev the Engine
Now have a helper hold the engine speed at approximately 2,000 RPM, or use a throttle locking tool if you are working alone. Keep all the accessories from Step 3 still turned on.
At higher RPM, a healthy alternator should produce slightly more voltage than at idle, typically settling between 13.8V and 14.5V. The reading should be smooth and stable, not fluctuating wildly.
If the voltage jumps above 15V when you rev the engine, the voltage regulator is failing to control output at higher speeds. This is a dangerous condition that will overcharge and damage the battery.
If the voltage actually drops when you increase RPM, that points to a mechanical problem such as a slipping serpentine belt or a worn alternator pulley. The belt may grip fine at idle but slip under the higher load of fast spinning components.
Step 5: Interpret Your Results
Now pull together everything you measured across the four steps. The pattern of readings tells you more than any single number.
If your resting voltage was 12.5V, your idle voltage was 14.2V, the load test held above 13.5V, and the rev test stayed under 14.7V, your alternator is healthy and your charging system is working correctly. Whatever electrical problem you are experiencing is coming from somewhere else.
If the resting voltage was low (under 12.0V) but the running voltage was normal, the battery is likely the problem, not the alternator. The alternator is trying to charge it but the battery cannot hold the charge.
If the resting voltage was normal but the running voltage never rose above 12.6V, the alternator is not charging at all. Check the serpentine belt first, then the main charging fuse, and if both are fine the alternator itself has failed internally.
If voltage was normal at idle but collapsed under load or at high RPM, the alternator is weak and failing. It can still produce some current but not enough to handle real driving conditions. Replacement is in your near future.
Voltage Threshold Reference
Here is a quick reference for interpreting any voltage reading you get during this test.
Below 13.0V while running: Alternator is not charging. Likely failed or belt problem.
13.0V to 13.7V while running: Marginal. The alternator is producing some output but is weak or struggling.
13.8V to 14.7V while running: Healthy. This is the normal charging range for a properly working alternator.
Above 15.0V while running: Overcharging. The voltage regulator has failed and the battery is being damaged.
Symptoms of a Bad Alternator
Voltage testing is the most reliable way to confirm alternator health, but your car usually warns you first. Here are the most common symptoms of a failing alternator that should send you to grab your multimeter.
Dashboard battery light. This is the most common first sign. The battery warning light illuminates when the alternator is not producing enough voltage to keep the system above a set threshold. It is a strong indicator but not definitive on its own, which is why testing matters.
Dim or flickering headlights. When the alternator cannot supply enough current, the headlights dim noticeably, especially at idle or when you turn on other accessories. If your lights brighten when you rev the engine, the alternator is weak.
Electrical accessories failing or acting erratically. Power windows may slow down, the radio may reset itself, or the infotainment screen may flicker. These are all signs that system voltage is dropping below what the electronics need.
Engine stalling or hard starting. If the alternator is not keeping the battery charged, eventually there is not enough power to run the fuel pump, ignition coils, and ECU. The engine may stall while driving or crank slowly when you try to restart it.
A whining or grinding noise from the alternator. Worn bearings inside the alternator produce a distinctive whine that changes with engine speed. This often precedes complete failure.
A burning rubber smell. A seizing alternator creates drag on the serpentine belt, causing it to slip and overheat. If you smell burning rubber under the hood, inspect the belt and the alternator pulley.
Troubleshooting Tips
If your test results point to a charging system problem, do not automatically assume the alternator itself is bad. Several cheaper and simpler issues can mimic alternator failure.
Check the serpentine belt first. A loose, cracked, or glazed belt will slip on the alternator pulley and prevent it from spinning at full speed. The belt should sit snug in the pulley grooves with no visible cracks. If it deflects more than about half an inch when you press on the longest span, the tensioner may be worn.
Inspect the battery terminals and cable connections. Corrosion buildup between the clamp and the terminal post creates resistance that drops voltage before it ever reaches the meter. Clean the posts with a wire brush until the lead is shiny, then tighten the clamps firmly.
Check the ground connection. The alternator needs a solid ground path back to the battery negative terminal. A loose or corroded ground strap can cause the same low-voltage readings as a failed alternator. Follow the main ground cable from the battery to where it bolts to the engine block or chassis and make sure that connection is clean and tight.
If your readings suggest overcharging (above 15V), the problem is almost certainly the voltage regulator. On most modern vehicles the regulator is built into the alternator, so replacing the alternator is the fix. On some older cars and heavy-duty trucks, the regulator is a separate replaceable part.
Finally, consider whether the problem might be the battery rather than the alternator. A battery with a shorted internal cell will drag the system voltage down no matter how hard the alternator works. If you have charged the battery fully and it still reads below 12.0V after resting overnight, the battery is the problem.
When to Call a Professional
The five-step method covers the vast majority of charging system diagnoses. But there are a few situations where a professional shop with specialized equipment is worth the cost.
If your multimeter test shows normal voltage across all five steps but you are still experiencing electrical problems, the issue may be a parasitic battery drain, a faulty ground somewhere in the wiring harness, or an intermittent diode failure that only shows up under specific conditions. A shop can perform a starter-amperage draw test and a full charging system analysis with a carbon pile load tester, which applies a controlled heavy load that no driveway test can replicate.
If you are uncomfortable working around a running engine or do not feel confident interpreting the voltage readings, there is no shame in having a professional run the diagnosis. Most auto parts stores will test your alternator and battery for free in their parking lot using a handheld analyzer.
Frequently Asked Questions
How to check if an alternator is bad with a multimeter?
Set your multimeter to DC voltage and connect the probes to the battery terminals with the engine off, then start the engine and check again. A good alternator will raise the voltage from roughly 12.5V to between 13.8V and 14.7V. Turn on your headlights and blower motor to load the system, and the voltage should stay above 13.5V. If the voltage does not rise when the engine starts, or it drops under load, the alternator is likely bad.
How many ohms should an alternator have?
Resistance testing on an alternator is less useful than voltage testing, but a typical alternator field winding measures between 3 and 8 ohms across the slip rings. The stator windings should read under 0.5 ohms between phases with no continuity to ground. For most people, the five-step voltage test is far more practical and reliable for diagnosing alternator problems.
What voltage is a bad alternator?
A running voltage below 13.0V indicates the alternator is not charging the battery. Readings between 13.0V and 13.7V are marginal and suggest a weak alternator. A healthy alternator produces 13.8V to 14.7V. Anything above 15.0V means the voltage regulator has failed and the alternator is overcharging, which will damage the battery.
What are the first signs of a bad alternator?
The most common early signs are an illuminated battery warning light on the dashboard, headlights that dim at idle or when accessories are turned on, electrical accessories acting erratically, a whining noise from the front of the engine, and a battery that goes dead even after being fully charged. If you notice any combination of these symptoms, test the alternator with a multimeter before it leaves you stranded.
Conclusion
Learning how to test an alternator with a multimeter using the five-step method gives you a reliable diagnostic process you can repeat any time your electrical system acts up. Start with a resting battery voltage, confirm the alternator raises voltage at idle, verify it holds under load, check it at 2,000 RPM, and then interpret the full picture.
The whole process takes about fifteen minutes once you are familiar with it, and it can save you from buying a battery you do not need or ignoring an alternator that is about to leave you on the side of the road. Keep a multimeter in your glovebox and you will always have a way to separate a battery problem from an alternator problem in minutes.
If your test points to a failing alternator, get it replaced before the car strands you. A healthy charging system should hold steady between 13.8V and 14.7V under all driving conditions, and now you know exactly how to verify that yourself.