
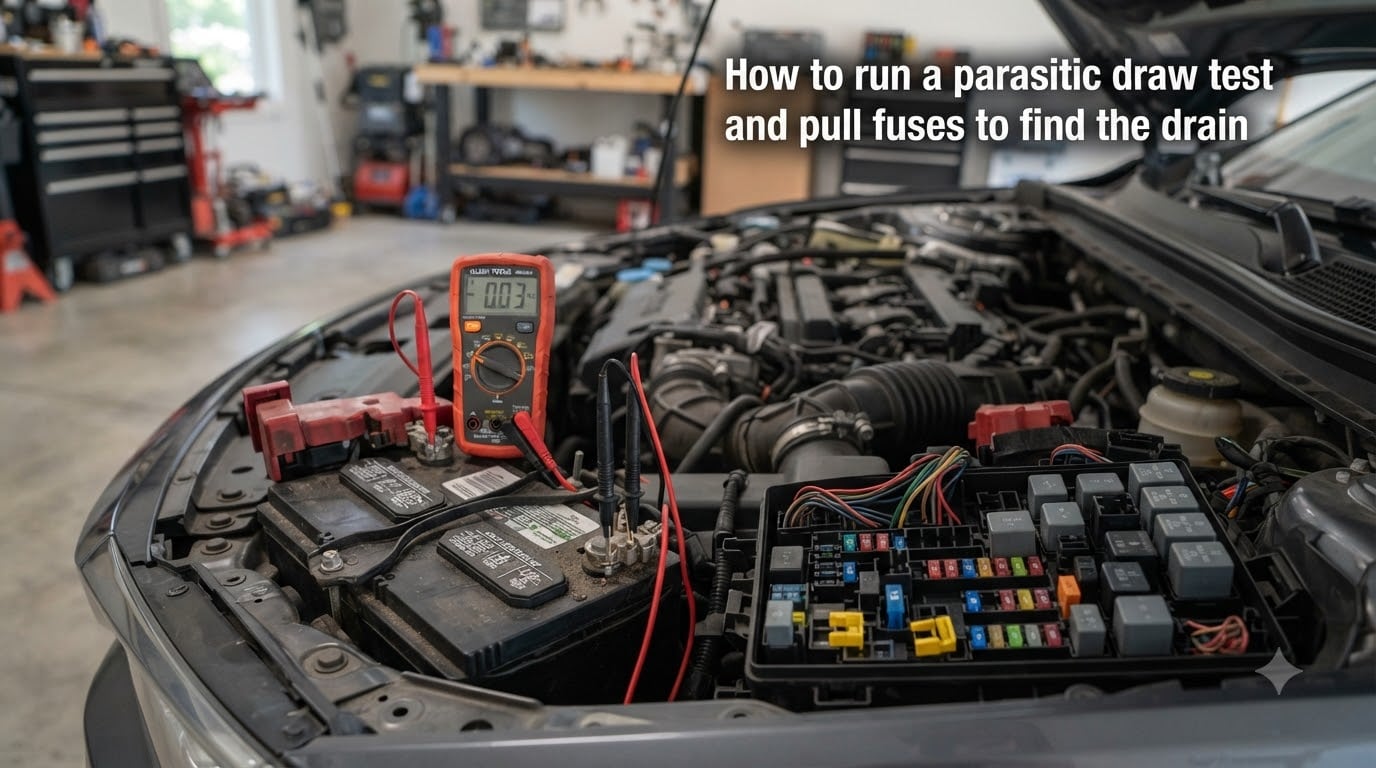
Nothing kills a car battery faster than a hidden electrical drain you cannot see coming. When your battery goes dead overnight or loses charge over a few days of sitting, a parasitic draw test is the diagnostic procedure that tells you exactly which circuit is stealing power. I have run this test dozens of times on everything from old trucks to modern cars packed with control modules, and the process is the same every time once you understand it.
In this guide, I will walk you through how to run a parasitic draw test and pull fuses to find the drain, step by step. You will learn what tools you need, how long to wait for your car’s modules to go to sleep, what readings are normal versus abnormal, and how to isolate the exact fuse causing the problem.
Whether you are a DIYer chasing a dead battery in your driveway or a technician sharpening your electrical diagnosis skills, this procedure will save you hours of guessing and parts swapping.
Table of Contents
What Is a Parasitic Draw?
A parasitic draw is the continuous electrical current your car battery supplies to keep systems alive when the engine is off. A small amount is completely normal. Your engine computer (ECM), radio memory, alarm system, and clock all need power to retain their settings while the vehicle sits parked.
The problem starts when something keeps drawing far more than it should. A stuck relay, a faulty module, a shorted diode in the alternator, or a poorly wired aftermarket accessory can all create an excessive drain that pulls your battery down to dead over hours or days.
Every modern car has some parasitic draw. The key is knowing where the line sits between normal background current and a drain that will leave you stranded.
Signs Your Car Has a Parasitic Draw
The most obvious symptom is a battery that goes dead after the car sits for a period of time. If your battery is fine while driving but dead the next morning, a parasitic drain is the prime suspect.
Other signs include a battery that slowly loses charge over several days of not being driven, repeated jump-starts becoming part of your routine, or warning lights and electrical glitches that appear after the car has been sitting.
If you have already ruled out a bad battery and a failing alternator, the parasitic draw test is your next move.
Tools You Need for a Parasitic Draw Test
You do not need a shop full of equipment, but you do need the right multimeter setup. Here is what I use every time:
Digital multimeter capable of measuring DC amps (10A jack required): Most standard multimeters have a 10-amp jack and a milliamp setting. You need one that can read down to at least 10 milliamps (0.01A) accurately. Cheaper meters may struggle at very low readings, so a mid-range digital multimeter is worth having.
Test leads with alligator clips: You will be connecting the meter in series with the battery negative cable. Alligator clips keep the connection stable and prevent the circuit from breaking if the lead slips, which would wake up the modules and force you to start over.
10-amp inline fuse or test light as a bridge: This protects your multimeter from a current surge when you first make the connection. If something turns on unexpectedly, the fuse blows instead of your meter.
Socket set or wrench: You need to disconnect the battery negative cable. A 10mm wrench covers most vehicles.
Fuse puller or needle-nose pliers: For removing fuses from the box during the isolation phase.
Work light and fuse diagram: Knowing which fuse goes to which circuit saves enormous time. Check your owner’s manual or the inside of the fuse box cover for the diagram.
How to Run a Parasitic Draw Test: Step-by-Step Procedure
This is the core procedure. Follow these steps in order, and do not skip the preparation stages. I have seen people rush straight to pulling fuses and get readings that mean nothing because the car was not properly prepared.
Step 1: Rule Out the Charging System First
Before testing for parasitic draw, confirm your battery and alternator are healthy. Charge the battery fully, then have it load tested at an auto parts store. A weak battery will show confusing readings during the draw test. Test the alternator output as well to make sure it is producing 13.8 to 14.4 volts while running.
Step 2: Scan for Trouble Codes
Plug in an OBD-II scanner and pull any stored codes before you begin. A module that is not sleeping properly often sets a code that points you in the right direction. Write down every code, then clear them so you can see which ones return after the test.
Step 3: Prepare the Vehicle for Sleep Mode
This is the step most people get wrong. Modern cars do not go to sleep the second you turn off the ignition. Control modules stay awake for a period that can range from 15 minutes to over an hour depending on the vehicle.
Turn off the ignition, remove the key, close all doors, and make sure the hood latch is latched (use a screwdriver to click the latch shut if you need the hood open). Lock the doors if your alarm arms the system. Do not open a door or turn on a light during the wait, because that wakes everything back up.
Step 4: Connect the Multimeter in Series
Set your multimeter to the 10-amp DC setting and plug the red lead into the 10A jack. Loosen the negative battery cable clamp and carefully lift it off the battery post without letting it touch anything.
Connect the red meter lead to the negative battery post. Connect the black meter lead to the negative cable terminal you just removed. Your multimeter is now part of the circuit, and all current flowing out of the battery’s negative side passes through the meter.
Important: Do not turn on the ignition or any accessories while connected this way. The meter’s 10-amp fuse will blow instantly if a large load hits.
Step 5: Wait for the Vehicle to Go to Sleep
With the meter connected, watch the reading. Initially you will see a high draw as modules power down in sequence. Within 15 to 30 minutes on most vehicles, the reading should drop to its resting level.
Some vehicles, especially luxury cars with telematics, comfort access, or anti-theft systems, can take 45 minutes to over an hour to fully sleep. Be patient. If you start pulling fuses before the car is asleep, you will chase false readings.
Step 6: Read and Record the Current Draw
Once the reading stabilizes, note the milliamp value. Here is how to interpret what you see:
Under 50 milliamps (0.05A): Normal for most vehicles. No parasitic draw present.
50 to 85 milliamps (0.05 to 0.085A): Borderline. Some newer cars with more modules sit here. May or may not cause problems depending on how long the car sits between drives.
Over 100 milliamps (0.10A): Suspect. You have a parasitic draw that needs to be found.
Over 500 milliamps (0.50A): Significant drain. Something major is staying powered up. This will kill a battery overnight.
Step 7: Pull Fuses One at a Time to Isolate the Drain
With the meter still connected and showing the elevated reading, go to the fuse box. Pull one fuse at a time and watch the meter. If the reading drops significantly when you pull a particular fuse, you have found the circuit with the drain.
Write down the fuse number and the circuit it controls. Put the fuse back before moving to the next one. If pulling a fuse does not change the reading, that circuit is not your problem.
Check both the interior fuse box and the under-hood fuse box. Many vehicles have fuses in both locations, and the drain could be in either one.
Step 8: Trace the Faulty Circuit
Once you know which circuit is drawing power, look at the fuse diagram to see what components are on that circuit. It might be one obvious part, or it might be several. A single circuit can feed a module, a relay, a sensor, and an accessory.
Unplug components on that circuit one by one while watching the meter. When the draw disappears, you have found the component causing the problem.
Step 9: Repair or Replace the Faulty Component
Common fixes include replacing a stuck relay, repairing damaged wiring, replacing a faulty control module, or removing a shorted aftermarket accessory. Once you make the repair, move to the final step.
Step 10: Repeat the Test to Confirm the Fix
Reconnect everything, let the car go through its full sleep cycle again, and verify the draw has dropped to normal. Never assume the fix worked without confirming with a second test. I have seen repairs that fixed one drain only to reveal a second one hiding underneath.
How to Read Your Multimeter: Normal vs Abnormal Draw?
Understanding the numbers is what separates a useful diagnosis from a waste of time. The general rule is that 50 milliamps is the line between normal and excessive for most vehicles.
For a more precise threshold, you can use the reserve capacity formula. Take your battery’s reserve capacity rating in minutes (found on the battery label) and divide by 4. That gives you the approximate maximum acceptable draw in milliamps. For example, a battery with a reserve capacity of 90 minutes divided by 4 gives 22.5 milliamps, which is on the conservative side.
Remember that the goal is not zero milliamps. Every car draws something to keep alive its memory and security systems. You are looking for the one circuit that is drawing more than it should.
How to Pull Fuses to Find the Drain: Two Methods
There are two ways to isolate the parasitic drain, and both work well depending on your situation.
Method 1: Inline Multimeter with Fuse Pulling
This is the classic method described in the steps above. The meter stays connected in series with the battery while you pull fuses. When you pull the fuse for the offending circuit, the meter reading drops. This method is direct and accurate, but it has one drawback: pulling a fuse can sometimes wake up a module, forcing you to wait for the car to sleep again.
Method 2: Voltage Drop Across Fuses
This method lets you find the drain without breaking the battery connection at all. Instead of pulling fuses, you measure the tiny voltage drop across each installed fuse using the millivolt setting on your multimeter.
Every fuse has a small internal resistance. When current flows through it, a small voltage develops across the fuse. By measuring the millivolts across each fuse and comparing to a reference chart for that fuse’s amperage rating, you can estimate how much current each circuit is drawing.
The advantage is that you never disturb the vehicle’s sleep state. The disadvantage is that you need a fuse voltage drop chart, and readings can be very small and hard to interpret on cheaper meters. Many technicians use this as a fast first pass, then confirm with the inline method.
Common Parasitic Draw Culprits and Mistakes to Avoid
Over years of doing this, I have found the same offenders show up again and again. Aftermarket accessories are the number one cause I see. Poorly installed remote starters, dash cams, amplifiers, and alarm systems are frequent culprits because they tap into circuits that never power down.
Faulty relays are next on the list. A relay that sticks closed keeps its circuit powered even when the ignition is off. You can sometimes feel a relay that is warm to the touch when everything should be off.
Control modules that fail to enter sleep mode are harder to find. A body control module, comfort module, or telematics unit that stays awake will draw significant current. These often show up as elevated draw that does not respond to pulling a single fuse because the module communicates across multiple circuits.
Alternator diodes can short and create a path to ground that drains the battery. If your draw does not go away when you pull every fuse in both boxes, disconnect the alternator main lead and check if the draw drops.
The biggest mistake I see is not waiting long enough for the car to sleep before reading the meter. If you check the draw after 5 minutes and see 600 milliamps, that might just be modules shutting down. Wait the full 30 minutes minimum before judging the reading.
Tips for Stubborn and Intermittent Draws
Not every parasitic draw shows up on the first test. Some are intermittent, meaning they come and go based on temperature, time, or a module randomly waking up. These are the hardest to chase.
For intermittent draws, leave the multimeter connected for an extended period and check the reading every 30 minutes. Some modules wake on a timer to run diagnostics or update telematics. You may catch a draw that appears, runs for a minute, then disappears.
Temperature-sensitive draws often come from relays or modules that fail when hot. If the problem only happens after the car has been driven and parked while still warm, try testing immediately after a drive instead of cold.
If your clamp meter shows zero amps but you know there is a draw, you are likely dealing with a meter that is not sensitive enough. Most clamp meters cannot read below 100 milliamps reliably. Use the inline series method with a quality digital multimeter for accurate low-current readings.
Finally, check for aftermarket components that were installed before you owned the vehicle. Hidden tracking devices, abandoned alarm systems, and leftover wiring from removed accessories can all create phantom draws that no fuse diagram will tell you about.
FAQs
How to locate a parasitic battery drain?
To locate a parasitic battery drain, connect a digital multimeter in series with the negative battery cable, wait 30 to 60 minutes for all modules to go to sleep, then pull fuses one at a time while watching the meter. When the reading drops after pulling a specific fuse, that circuit contains the drain. Trace the components on that circuit to find the faulty part.
How to test fuses for parasitic drain?
You can test fuses for parasitic drain two ways. Pull each fuse one at a time while an inline multimeter measures battery draw and watch for the reading to drop. Alternatively, measure the millivolt voltage drop across each installed fuse without removing it, and compare readings to a fuse voltage drop chart to estimate current flow on each circuit.
Does AutoZone test for parasitic drain?
AutoZone and most auto parts stores will test your battery and charging system for free, but they typically do not perform a parasitic draw test. That test requires extended time with the vehicle at rest and access to the fuse boxes, so it is usually done by a mechanic or as a DIY procedure with your own multimeter.
How to find a parasitic drain with a power probe?
A power probe can help find a parasitic drain by testing voltage drop across fuses or by confirming whether a circuit has power when it should not. However, a power probe is less precise than a multimeter for measuring actual current draw. For accurate milliamp readings, the inline multimeter method remains the most reliable approach.
Conclusion
Knowing how to run a parasitic draw test and pull fuses to find the drain turns a frustrating no-start problem into a straightforward diagnostic process. Prepare the vehicle properly, wait for full sleep mode, connect your meter in series, and isolate the circuit by pulling fuses until the reading drops.
The tools are affordable and the procedure is repeatable. Once you find the offending circuit and fix the faulty component, always run the test a second time to confirm the draw is gone for good.