
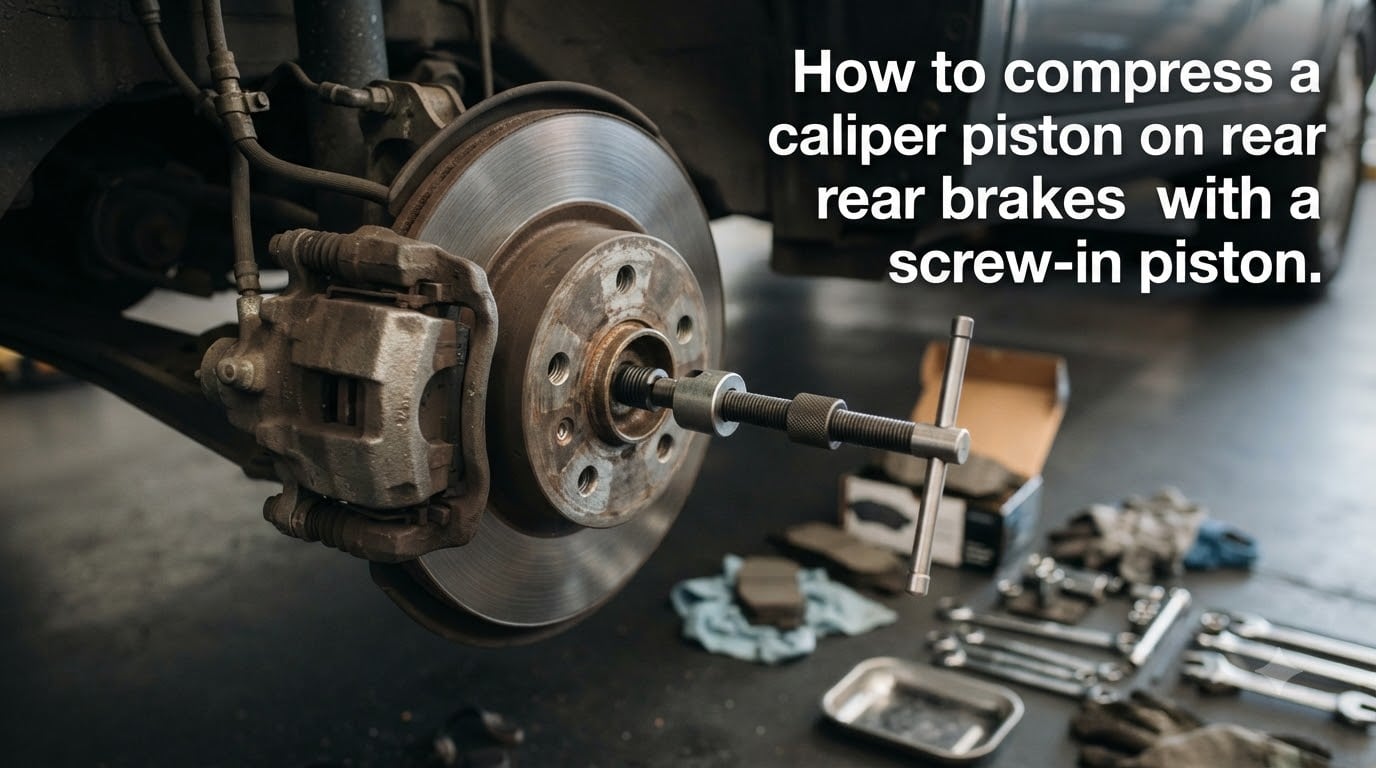
If your rear brakes have a screw-in piston (also called a twist-in or e-brake style piston), you cannot just push it back like you would on a front caliper. You have to turn it while you push it, and the direction is the single biggest source of confusion for DIY mechanics. I have helped friends and neighbors work through enough rear brake jobs to know that a stuck or seized piston can turn a 30-minute pad swap into a frustrating afternoon, so I am writing this guide to walk you through exactly how to compress a caliper piston on rear brakes with a screw-in piston, including the direction to turn it, what to do without the fancy tool, and how to handle a piston that simply refuses to budge.
By the end of this article you will know the tools you need, the exact clockwise or counterclockwise direction for your specific vehicle, a freehand method that works when the tool will not fit, and how to tell when the job has gone beyond what is safe to do in a driveway.
Table of Contents
What Is a Screw-In Caliper Piston and Why It Turns Instead of Pushes?
A screw-in caliper piston is a rear brake caliper piston with internal threads that require rotation to retract it back into the caliper bore, rather than the straight inward push used on most front calipers. The threads engage with a mating mechanism inside the caliper housing, so the piston is essentially screwed back into place the way you would thread a bolt into a nut.
You will typically find this design on rear disc brake calipers that include an integrated parking brake (also called an e-brake style caliper). The internal screw mechanism is what the parking brake uses to apply clamping force: turning it outward pushes the pads against the rotor and holds the vehicle still when parked. When you want to retract the piston for a pad or rotor replacement, you reverse that motion and wind it back in.
This is fundamentally different from the single-piston or four-piston floating calipers you usually see on the front, where the piston just slides straight in and out. With a screw-in rear piston, no amount of pushing alone will compress it. You will feel a solid mechanical stop the moment you try, because the threads are still engaged. The fix is rotation combined with light inward pressure, the same motion as turning a jar lid while pressing down on it.
The good news is that once you understand this, the job becomes very predictable. The bad news is that the direction you need to turn varies between manufacturers, which is exactly why so many people get stuck and end up on forums asking why their rear piston will not compress.
Tools You Need to Compress a Screw-In Caliper Piston
You do not need a huge toolbox for this job, but you do need a few specific things. Gather everything before you raise the vehicle, because hunting for tools with the wheel off is how brackets get scratched and bolts get dropped into the abyss of the engine bay.
Brake caliper piston tool (also called a wind-back tool or rear caliper tool): the proper tool, available at any auto parts store for around $25 to $40, with the right adapters for most pin and screw-style pistons.
Lug wrench and jack stands: to get the wheel off safely. A hydraulic jack alone is never enough; always use jack stands rated for the vehicle weight.
C-clamp or large locking pliers: for the alternative compression method covered below.
Brake hose clamp or locking pliers (Vise-Grip style): to pinch off the flexible rubber brake hose before you retract the piston, preventing fluid from being pushed back up to the master cylinder.
Penetrating oil (PB Blaster, WD-40 Specialist, or similar): essential if the piston is seized from rust or long disuse.
Brake cleaner, wire brush, and clean rags: the piston bore and caliper bracket need to be free of debris before reassembly.
Replacement brake pads and possibly rotors: the entire reason you are compressing the piston in the first place.
Safety glasses and mechanic’s gloves: brake dust is nasty and you really do not want it in your eyes.
If you are buying a piston tool specifically for the screw-in style, look for one that includes dual-sided pins or adjustable adapters. The cheap universal kits often only work for the simpler push-back pistons on the front. Rear calipers almost always need the spin-and-push motion, so an adapter that grips the two notches on the piston face and allows a ratchet to turn it is what you want.
How to Compress a Caliper Piston on Rear Brakes With a Screw-In Piston?
To compress a caliper piston on rear brakes with a screw-in piston, retract the brake shoe or clamp the flexible brake hose, then turn the piston counterclockwise (or clockwise on certain VW, Audi, and BMW models) while applying gentle inward pressure until it sits flush with the caliper housing.
The full step-by-step procedure below assumes you already have the wheel off and the caliper removed or suspended so you can see the piston face clearly. If the caliper is still bolted to the rotor you can still do this, just expect less working room.
Step 1: Prepare the Caliper and Brake Hose
Loosen the lug nuts on the wheel before you raise the vehicle. Lift the car, set it on jack stands, then remove the wheel. Remove the caliper bolts (usually 12mm or 14mm) and slide the caliper off the rotor. Hang it from a wire hanger or bungee cord on the suspension spring so the brake hose is not supporting its full weight.
Now, before you touch the piston, clamp the flexible section of the brake hose with a brake hose clamp or heavy locking pliers. This stops the piston from pushing brake fluid backward through the lines when you compress it, which would otherwise pressurize the entire system and sometimes cause master cylinder seal leaks. If your caliper has a bleeder screw, opening it slightly during compression also helps relieve pressure, but you will need to re-bleed the brakes afterward.
Step 2: Inspect the Piston Face
Look straight at the piston face. You should see either two notches on opposite sides, small holes, or in some cases a toothed pattern around the circumference. Most screw-in pistons have two small notches a few millimeters deep that the caliper tool’s pins engage with. Some have a star-shaped internal pattern, similar to a Torx bolt, and you can rotate these with a matching socket.
Look carefully at the piston for any directional arrow or marking. Some manufacturers (particularly Volkswagen and Audi) stamp a small arrow on the piston face or on the caliper body that points in the direction to turn for retraction. If you see an arrow, trust it and skip the trial-and-error step below.
Step 3: Determine the Correct Rotation Direction
Take your piston tool or a pair of needle-nose pliers, engage the notches, and gently try to turn the piston about a quarter inch counterclockwise while applying light inward pressure. If you feel it thread in smoothly, that is the correct direction. If it feels bound, locked, or tries to back itself out, that is the wrong direction, so switch to clockwise. Most rear calipers take counterclockwise, but there are enough exceptions (notably some VWs, Audis, and certain imports) that this check is worth doing.
Do not force the rotation. The correct direction will turn with very little resistance once you have started applying inward pressure at the same time. The wrong direction will feel like you are tightening a bolt that is already snug.
Step 4: Compress the Piston
Apply steady inward pressure on the caliper or piston tool while simultaneously turning in the correct direction. You will feel the piston thread smoothly back into the bore, typically rotating about 1 to 1.5 full turns to retract fully. Go slowly and keep the rotation even, because uneven turning can cross-thread the piston on its bore.
The piston is fully retracted when it sits flush with or slightly below the inner face of the caliper housing. On most vehicles this leaves just enough room to install fresh, thicker brake pads.
Step 5: Verify Fit With New Pads
Before reassembling, hold the new pads (or the old pads plus the new rotor thickness) against the caliper bracket to confirm the retracted piston gives you clearance for installation. If the new pads still do not fit, the piston is not fully retracted or you have the wrong pads for the caliper.
Remove the brake hose clamp, reinstall the caliper over the new pads and rotor, torque the caliper bolts to the manufacturer spec (usually 25 to 40 ft-lbs for the guide pins, but check a service manual for your specific vehicle), and you are ready for the brake bleeding process that finishes the job.
Clockwise vs Counterclockwise: Which Way Do You Turn the Piston?
Most rear brake caliper pistons turn counterclockwise to retract, but Volkswagen, Audi, and certain BMW and Mercedes models are the well-known exceptions that require clockwise rotation, so always confirm direction with the markings on your specific piston before applying force.
This is the most confusing part of the entire job and the single biggest reason people give up and pay a shop. It feels like the question should have a single answer, but it does not, because the parking brake mechanism in different vehicles is right-hand or left-hand threaded for packaging reasons inside the caliper bore. Here is how to remove the guesswork entirely.
Look for an arrow: many pistons have a small molded arrow on the face, or the caliper body has an arrow stamped next to the piston. The arrow indicates the direction to turn for retraction. Match what is on the part, not what is in the forum.
Check the vehicle-specific forum: a quick search for “your vehicle make and model plus “rear caliper piston direction”” usually returns posts from other owners who have already done this exact job. Specific vehicles are consistent within their model years, so a single confirmation saves you a lot of trouble.
Test with light pressure: as described in Step 3 above, engage the piston gently and try counterclockwise first. If it threads in, great. If it resists, switch to clockwise. The resistance on the wrong direction is unmistakable within a quarter turn.
A common variation worth noting is that some older GM and Chrysler rear calipers also have internal threads but use a piston tool that looks nearly identical to the standard push-back tool. The clockwise counterclockwise rule still applies, so do not assume that just because the tool fits you have the right one. Read the markings.
How to Compress a Rear Caliper Piston Without a Special Tool?
To compress a rear caliper piston without a special caliper tool, clamp the brake hose, grip the piston face with large locking pliers or channel-locks engaged in the notches, and turn the pliers counterclockwise (or clockwise on VW/Audi models) while a second person or a C-clamp provides inward pressure.
The proper tool is faster and safer, but plenty of people have done this with simple hand tools when they were stuck on a Saturday with no auto parts store open. Here are the three methods that actually work without the dedicated tool.
Method 1: Needle-Nose Pliers in the Notches
Stick a large pair of needle-nose or water-pump pliers into the two notches on the piston face. Twist the pliers while pressing inward on the caliper with your other hand. This is the most common freehand method, and it works surprisingly well when the piston is not seized, but it is tiring and does not give you much leverage.
Method 2: C-Clamp With Two Wood Blocks
Place a small block of wood (or a piece of stiff cardboard) flat against the piston face to distribute force, and another block on the back of the caliper housing. Open the C-clamp wide, seat it on the two blocks, and tighten slowly while turning the piston with a pair of pliers in the notches. The clamp provides the inward force and your hand provides the rotation. This is what I usually reach for when I do not want to dig out the piston tool kit.
Method 3: Wood Dowel and Hammer (Last Resort)
Place a dowel or the rounded end of a wooden broom handle against the piston face and tap gently with a hammer while rotating. This will absolutely not work on a screw-in piston, because the threads will not budge without rotation, so this method is for plain push-back pistons only. Mixing it up is a common mistake that strips caliper bores, so confirm the piston type before reaching for the hammer.
Honestly, if you are going to do rear brakes more than once, buy the $30 piston tool with the right adapters. It pays for itself the first time you use it, and it stops you from rounding off the notches on the piston face, which becomes an expensive repair if you gouge them up badly enough.
Why Won’t My Rear Brake Piston Compress? Troubleshooting Common Problems?
If your rear brake piston will not compress, the most common causes are a seized piston from rust (soak it with penetrating oil and wait 30 minutes), still-pressurized brake lines (clamp the hose or open the bleeder), or trying to push instead of turn the piston. Of these, failure to turn it is by far the most common.
I have run into every one of these problems at some point, and they all have a workable solution if you stay patient and diagnose them in the right order. Here is the troubleshooting checklist I use, in the order that catches the most problems fastest.
Are you turning it, not just pushing? This catches about 70% of stuck-piston complaints. Screw-in pistons need rotation plus inward pressure. If you are using a regular C-clamp or pushing with pliers and no rotation, it will not move.
Is the brake hose still pressurized? Even a clamped hose can sometimes leak pressure through the clamp. Open the bleeder screw on the caliper and let a small amount of fluid drip out while you compress. Remember to bleed the brakes after reassembly.
Is the piston seized from rust? Soak the piston face and the visible caliper bore with penetrating oil. Wait 30 minutes, then try again. Repeat with more oil if needed. Never use force on a frozen piston because you will crack the caliper, which is an immediate replacement situation.
Is the tool not fitting? On some rear calipers, the piston is so far extended that the standard tool will not seat. Twist the piston with channel-locks first to retract it just enough to expose the notches properly, then switch to the proper tool.
Are the bracket bolts stripped? A common rookie mistake, and what frustrated one of the Reddit users in the MechanicAdvice forum. The answer there is to stop immediately, drill out the bolt, and replace it. Pushing harder on the caliper only makes this worse.
If you have worked through this list and the piston still will not budge, the caliper is probably seized internally and needs replacement. At that point, the right call is to stop the DIY job and either take it to a mechanic or replace the caliper as a unit, which is a straightforward bolt-on job with a bleeder procedure.
Safety Precautions Before You Start
Brakes are the most important safety system on your vehicle, so do not skip any of these precautions, even if you have done rear brakes a dozen times before. A small mistake here is the difference between a routine job and a car that does not stop.
Always use jack stands, never just the hydraulic jack. A jack can fail, and a falling car is the kind of accident you only need to have once to regret.
Wheel chocks on the opposite corner. Even on flat pavement, a vehicle on jack stands can shift. Chocks cost almost nothing and remove a category of accidents entirely.
Clamp the brake hose before retracting the piston. Without clamping, you push old brake fluid backward through the system, which can damage the master cylinder seals or introduce air into the lines.
Wear eye protection. Brake dust contains heavy metals and irritant particles. A pair of safety glasses is five minutes of inconvenience versus months of eye irritation.
Torque the caliper bolts to spec. A loose caliper bolt causes uneven pad wear, brake noise, and in extreme cases, a caliper that falls off the bracket while driving. Use a torque wrench.
Bleed the brakes after reassembly. Anytime you open the hydraulic system, even just by retracting a piston, you risk introducing air. Pump the pedal a few times and verify a firm pedal before driving.
One more piece of advice: do not remove the master cylinder cap thinking it will relieve pressure. On most modern vehicles the cap seals the reservoir, and the master cylinder has internal valves that keep the system pressurized regardless. Removing the cap on certain vehicles can actually introduce air and create a soft pedal. Leave it alone unless your service manual explicitly tells you otherwise.
FAQs
How to compress rear caliper pistons without a tool?
To compress rear caliper pistons without a dedicated tool, clamp the flexible brake hose with locking pliers first, then grip the piston notches with large channel-lock or needle-nose pliers. Turn the pliers counterclockwise (or clockwise on certain VW and Audi models) while pushing the caliper inward, or use a C-clamp with wooden blocks on the piston face and caliper backplate to provide the inward force while you turn the piston with pliers at the same time. Always confirm the rotation direction on a test quarter-turn before applying real force.
How do you screw in a brake caliper?
Screwing in a brake caliper piston means rotating it back into the caliper housing by turning it in the correct direction (counterclockwise on most vehicles, clockwise on some VW, Audi, BMW, and Mercedes models) while applying gentle inward pressure. You can screw the piston in using a brake caliper piston tool that engages the notches on the piston face, or in a pinch with large locking pliers inserted into those same notches. Look for a directional arrow on the piston or check your vehicle-specific forum before deciding which way to turn.
How to retract the rear caliper piston?
To retract the rear caliper piston, first clamp the flexible brake hose so you do not push fluid backward into the master cylinder, then remove the wheel and caliper so you can see the piston face clearly. Engage the two notches on the piston with a piston tool or large needle-nose pliers, then turn the piston counterclockwise (or clockwise on certain imports) while applying steady inward pressure. Fully retract the piston until it sits flush with the caliper housing, which gives you enough clearance to install new, thicker brake pads.
Why won’t my rear brake piston compress?
If your rear brake piston will not compress, the most common cause is that you are pushing it instead of turning it, because screw-in rear pistons require rotation plus inward pressure to retract. Other causes include a seized piston from rust (fix with penetrating oil and 30 minutes of waiting), pressure still trapped in the brake lines (fix by clamping the brake hose or opening the bleeder), or the wrong direction of rotation (test with light pressure to find which way threads in). If the piston still will not move after addressing each of these, the caliper is likely seized internally and needs replacement.
Do all rear brake calipers have screw-in pistons?
No, not all rear brake calipers have screw-in pistons. Screw-in pistons are found almost exclusively on rear calipers with an integrated parking brake (also called e-brake style calipers), because the internal screw mechanism is what the parking brake uses to apply clamping force. Rear calipers without an integrated parking brake often use the same straight push-back pistons found on the front, which can be compressed with a C-clamp alone. To confirm your caliper type, look at the piston face: if it has two notches or a toothed internal pattern, it is screw-in; if it has a smooth dome, it is a push-back style.
Final Thoughts
Knowing how to compress a caliper piston on rear brakes with a screw-in piston comes down to three things: confirming the rotation direction before applying force, using the right tool (or a good pliers-and-C-clamp substitute), and giving a stuck piston enough time with penetrating oil before deciding it is seized. Most rear brake jobs that turn into all-day headaches are stuck because the piston was being pushed instead of turned, or because the direction was assumed without checking.
If you take one thing away from this guide, let it be this: turn the piston gently a quarter-inch in your best-guess direction before committing to full rotation. The correct direction will thread smoothly with light inward pressure, and the wrong direction will feel obviously wrong within that quarter turn. That single test will save you more time than any tool in your toolbox.
Take your time on the first try, follow the safety precautions, and your rear brake pad or rotor replacement will go smoothly. If you hit a wall that the troubleshooting list cannot clear, stopping and calling a mechanic is always the right answer, because the cost of a professional caliper replacement is far less than the cost of a brake failure on the road.