
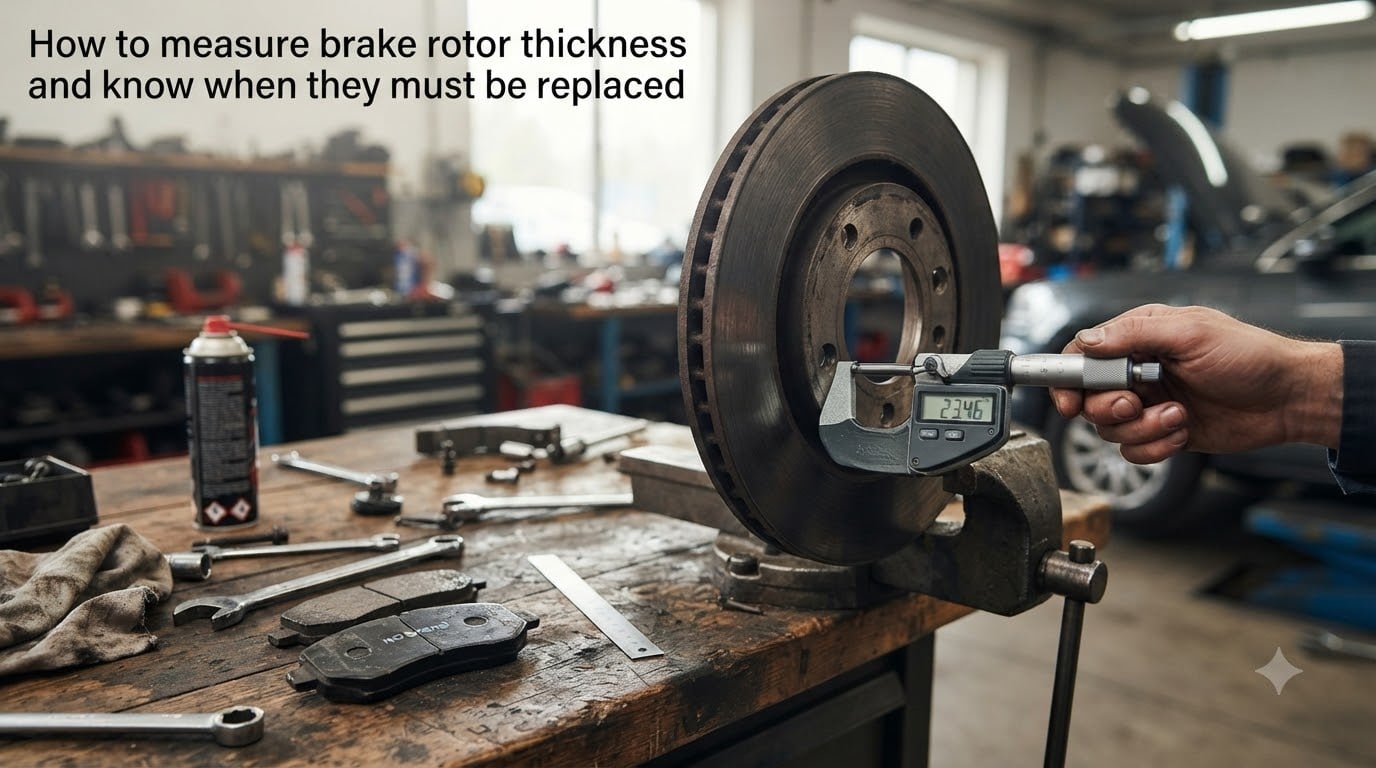
Knowing how to measure brake rotor thickness is one of those skills that separates guesswork from real automotive maintenance. Whether you are replacing brake pads and want to check if the rotors are still safe, or you are tracking down a vibration in the steering wheel, getting an accurate thickness measurement tells you exactly where you stand.
I have measured dozens of rotors over the years, from daily commuters to track-day cars, and the process is simpler than most people think. You need the right tool, the right measurement points, and the manufacturer’s minimum specification. In this guide, our team walks through every step so you can measure brake rotor thickness confidently and know precisely when your rotors must be replaced.
Table of Contents
What Is Brake Rotor Thickness and Why It Matters?
Brake rotor thickness is the measurement of how much material remains on the friction surface of the brake disc. Every time you press the brake pedal, the pads clamp against the rotor and wear away a microscopic layer of metal. Over tens of thousands of miles, that adds up.
Thickness matters because it directly controls the rotor’s ability to dissipate heat. A thicker rotor absorbs and sheds heat more effectively. When the material gets too thin, the rotor cannot manage thermal loads, and braking performance drops fast.
There is also a structural component. A rotor below its minimum thickness specification has reduced mechanical strength. Under heavy braking, thin rotors are more prone to warping, cracking, and in extreme cases, catastrophic failure.
That is why every manufacturer stamps a minimum thickness specification directly on the rotor, usually labeled “MIN TH” followed by a number in millimeters. This is the discard thickness. Once your rotor measures at or below that number, it must be replaced.
How to Measure Brake Rotor Thickness?
Learning how to measure brake rotor thickness comes down to using the right tool and checking the right spots. Here is the step-by-step process our team uses every time.
Tools You Need
You have two main options. A micrometer is the gold standard because it delivers the most precise reading, typically to 0.01 mm. A digital caliper works well too, though it is slightly less accurate on curved surfaces.
Do not use a standard ruler or tape measure. The precision simply is not there, and brake specifications are measured in fractions of a millimeter.
Step 1: Remove the Wheel
Jack up the vehicle safely and remove the wheel to expose the brake caliper and rotor. You can measure with the caliper still mounted, but you will have more access with the wheel off.
Step 2: Clean the Rotor Face
Wipe the braking surface clean with brake cleaner and a rag. Built-up dust, rust, or debris will throw off your measurement by adding thickness that is not actually rotor material.
Step 3: Measure at Multiple Points
This is where most people go wrong. You cannot measure once and call it done. Brembo and other manufacturers recommend measuring in at least four different points around the rotor face.
Place the micrometer or caliper on the smooth braking surface, avoiding any slots, drilled holes, or rust rings. Measure near the outer edge, the middle, and the inner edge of the pad contact area. Rotate the rotor 90 degrees and repeat.
Record every reading. The lowest value is the one that matters. That single thinnest point determines whether the rotor is still safe to use.
Step 4: Compare Against the MIN TH Specification
Look for the “MIN TH” stamping on the rotor hat or edge. It will show a number like 26.0 mm or similar. If your thinnest measurement is at or below that number, the rotor must be replaced.
If the spec is not stamped on the rotor, check the manufacturer’s service manual or look it up using your VIN through a parts retailer. Guessing is not an option here.
Step 5: Check for Disc Thickness Variation
While you are measuring, pay attention to the spread between your highest and lowest readings. If the difference exceeds 0.015 mm, you have disc thickness variation, or DTV. Even if the rotor is above the minimum spec, DTV causes pedal pulsation and vibration that means the rotor needs resurfacing or replacement.
How to Measure Rotor Thickness Without a Micrometer?
Not everyone has a micrometer in their toolbox. A digital caliper is the most common alternative, and it works well if you account for one problem: the rotor edge has a lip from wear that prevents the caliper jaws from sitting flat against the braking surface.
Here is a trick mechanics on forums like r/MechanicAdvice recommend. Take two thin, flat pieces of metal of known equal thickness, such as small shim stock or feeler gauge blades. Place one on each side of the rotor face, past the wear lip. Clamp the caliper around both shims and the rotor, then subtract the combined shim thickness from the reading.
It is not as fast as a micrometer, but it gives you a measurement accurate enough to decide whether replacement is needed. For anyone doing routine maintenance at home, this method is a reliable workaround.
Where to Find Minimum Rotor Thickness Specification?
The manufacturer’s minimum rotor thickness specification is not a suggestion. It is the point at which the rotor is no longer safe to use. Here is where to find it.
First, check the rotor itself. Most manufacturers stamp “MIN TH” or “MIN THICKNESS” on the edge of the rotor hat or on the casting between the vanes. It will be followed by a number in millimeters.
If the stamping is rusted off or illegible, look up the specification by your vehicle’s make, model, and year. Most online parts retailers list the OEM rotor specifications, including new and minimum thickness, on the product page.
The most reliable method is a VIN lookup. Enter your 17-digit VIN into a dealership or OEM parts portal, and it will return the exact part number for your vehicle. Cross-reference that part number with the manufacturer’s spec sheet to get the precise minimum thickness in mm.
Do not rely on generic brake rotor thickness charts. Specifications vary widely between vehicles, even within the same model line across different years. Always confirm the exact number for your specific rotor.
Signs That Rotors Need Replacement
Measuring is the definitive way to know, but your rotors usually warn you before they hit the minimum spec. Here are the symptoms our team always checks for.
Steering wheel vibration under braking. This is the most common sign. A pulsing or shaking steering wheel when you press the pedal usually means the rotor is warped or has uneven thickness variation.
Brake pedal pulsation. If the pedal kicks back against your foot rhythmically, the rotor surface is no longer flat. This is a classic DTV symptom.
Squealing or grinding noise. High-pitched squeals can mean the wear indicator is contacting the rotor. Grinding means the pad material is gone and metal is contacting metal, which damages the rotor instantly.
Visible grooves or scoring. Deep grooves cut into the rotor face mean debris or worn pad material has been dragging across it. Light scoring can be machined out, but deep grooves often mean replacement.
Blue discoloration. A blue or purple tint on the rotor face indicates extreme overheating. The metal structure has changed, and the rotor is more likely to crack.
Visible cracks. Hairline cracks around the edge of drilled holes or across the face are serious. Even small cracks spread under thermal stress and can cause rotor failure.
Rust on the braking surface. Heavy surface rust that does not clean off after a few brake applications means the rotor has been sitting too long or is pitted beyond safe use.
Longer stopping distances. If your vehicle takes noticeably longer to stop, thin rotors may be overheating and causing brake fade.
Uneven pad wear. If one pad is worn far more than the others, a warped or uneven rotor could be the cause.
Vehicle pulling to one side. A rotor with significantly different thickness or friction characteristics left to right can cause the vehicle to pull during braking.
What Happens If You Drive With Worn Rotors
Driving on rotors below the minimum thickness specification is dangerous, and the consequences get worse the longer you wait. Here is what actually happens.
Heat dissipation drops sharply. Thin rotors have less mass to absorb thermal energy, so they reach high temperatures much faster under moderate braking. This causes brake fade, where the friction coefficient between the pad and rotor drops and stopping distances increase dramatically.
In severe cases, overheated rotors can transfer enough heat to the brake fluid to cause vapor lock. When brake fluid boils, gas bubbles form in the lines. Since gas is compressible, the brake pedal goes soft or sinks to the floor with little stopping force.
Thin rotors also develop thermal cracks more quickly. These cracks start small but grow with every heat cycle. A cracked rotor can shatter under hard braking, which means instant loss of braking on that wheel.
Worn rotors destroy brake pads faster. An uneven, scored, or warped rotor chews through pad material, turning a simple rotor replacement into a full brake job. Addressing rotor wear early saves money on pads and prevents damage to the caliper and other components.
Finally, both rotors on the same axle should always be replaced together. Replacing only one side creates unequal braking force, which can cause the vehicle to pull or skid during emergency stops.
The 30-30 Brake Rule Explained
The 30-30 brake rule is a bed-in or break-in procedure for new brake pads and rotors, not a wear measurement. It refers to performing 30 gradual stops from 30 mph with moderate brake pressure, allowing the components to cool between each stop.
This process transfers an even layer of pad material onto the new rotor surface. Proper bed-in improves braking performance, reduces noise, and extends the life of both pads and rotors.
While the 30-30 rule is about break-in rather than measurement, it is related to thickness. A properly bedded rotor wears more evenly, which means your thickness measurements stay consistent and predictable over the life of the rotor.
Frequently Asked Questions
At what thickness should brake rotors be replaced?
Brake rotors should be replaced when the thinnest measured point reaches the manufacturer’s minimum thickness specification, stamped as MIN TH on the rotor. Most passenger car rotors have a discard thickness somewhere between 20 and 28 mm depending on the vehicle, but always check the exact spec for your rotor rather than using a generic number.
What is the 30-30 rule for brakes?
The 30-30 rule is a brake bed-in procedure for new pads and rotors. You perform 30 moderate stops from 30 mph, allowing cooling time between each stop. This transfers pad material evenly onto the rotor surface for better performance and longer life.
How to tell if brake rotors need to be replaced?
Measure the rotor at four or more points with a micrometer or caliper. If the thinnest reading is at or below the MIN TH specification, replace the rotor. Visual signs include steering wheel vibration, pedal pulsation, deep scoring, blue discoloration, and visible cracks.
Can rotors last 150,000 miles?
Under ideal highway driving conditions with gentle braking habits, rotors can last 100,000 to 150,000 miles. However, city driving, heavy loads, and aggressive braking typically reduce rotor life to 30,000 to 70,000 miles. Always verify remaining life by measuring thickness rather than relying on mileage alone.
Conclusion
Measuring brake rotor thickness is not complicated, but it does require the right tool and attention to detail. Use a micrometer or caliper, measure at four or more points on the braking surface, and compare the thinnest reading against the manufacturer’s MIN TH specification. That number tells you definitively whether your rotors must be replaced.
If you found this guide on how to measure brake rotor thickness helpful, the best next step is to grab a micrometer and check your rotors at your next brake pad swap. Catching a thin rotor before it fails keeps you safe and saves you from a more expensive repair down the road.