
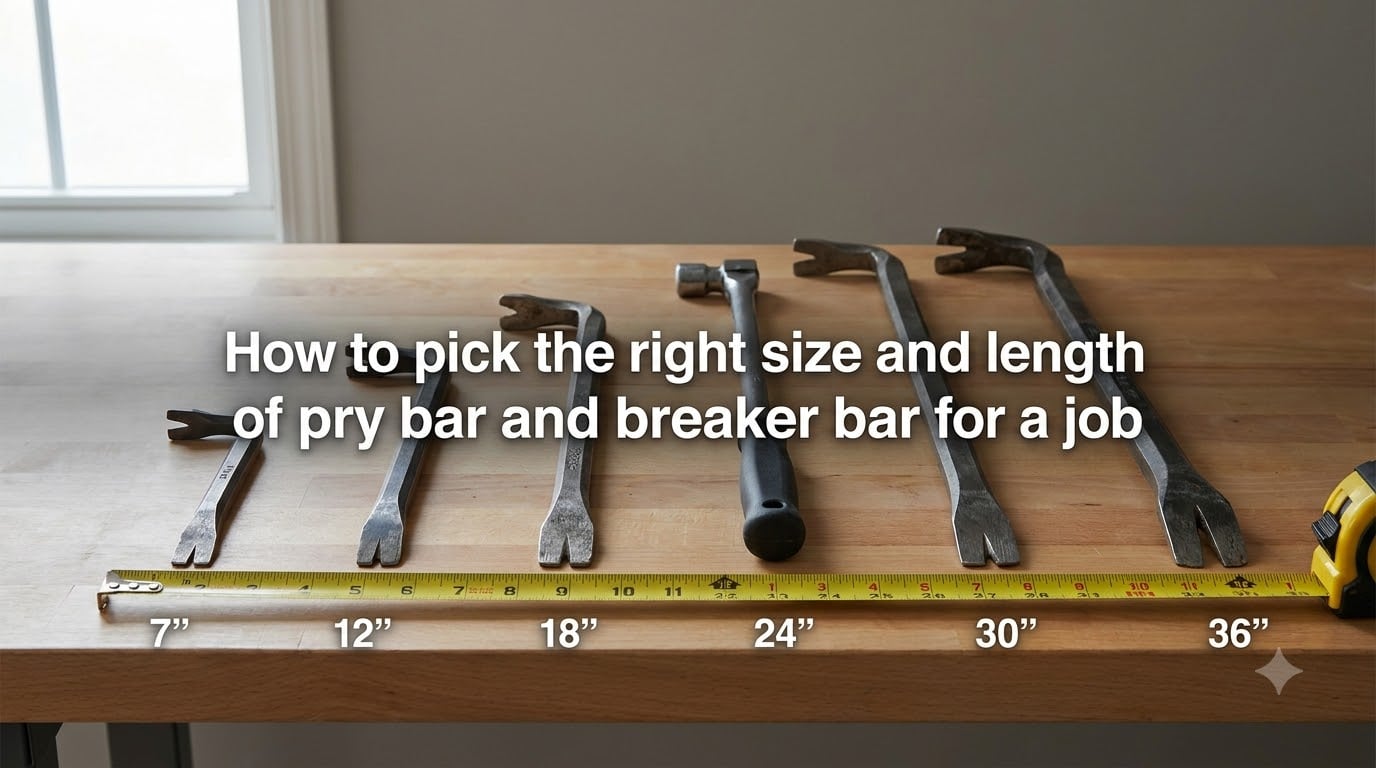
Picking the wrong size or length of pry bar or breaker bar is one of the most common frustrations I see in workshops, garages, and job sites. I learned this the hard way years ago when I tried to remove a stuck lug nut with a 12-inch pry bar and spent an hour fighting it when a 24-inch breaker bar would have done the job in 30 seconds. Knowing how to pick the right size and length of pry bar and breaker bar for a job saves time, prevents injury, and saves you from snapped tools and stripped fasteners.
In this guide, I’ll walk you through everything I wish someone had told me when I started. We’ll cover the real differences between pry bars and breaker bars, what each length actually does, how to match the tool to your specific job, and the safety habits that separate pros from people who end up in the ER. By the end, you’ll be able to walk into any tool aisle and pick the right bar with confidence.
Table of Contents
What Is a Pry Bar and How Does It Work?
A pry bar is a hand tool designed to apply leverage between an object and a fulcrum to separate, lift, or move materials. It typically consists of a long steel shaft with one end shaped for prying (a claw, chisel, or tapered point) and the other end often bent into a curve for pulling or nail removal.
The core principle behind every pry bar is mechanical advantage. The longer the bar, the more leverage you generate with the same amount of force. A 12-inch pry bar might give you 6x leverage, while a 36-inch pry bar can give you 18x or more. This is why a longer pry bar feels dramatically easier to use, even though you are pushing with the same arm strength.
The Basic Mechanics of Leverage
When you place the tip of a pry bar under an object and push down on the handle, you create a Class 1 lever. The fulcrum is the bend or curve in the bar where it contacts the surface. The load is the stuck object, and the effort is your hand pushing down. The longer the distance from the fulcrum to your hand compared to the fulcrum to the load, the more force you can apply.
For example, if your fulcrum sits 2 inches from the load and your hand sits 24 inches from the fulcrum, you get a 12:1 mechanical advantage. This means 10 pounds of hand pressure becomes 120 pounds of lifting force at the tip. That math is why a longer pry bar almost always feels easier.
Pry Bar Anatomy: Shaft, Head, and Tip
Most pry bars share three key components. The shaft is the main steel body, which can be round, hex, flat, or contoured. The head is the working end shaped into a claw, chisel, or tapered point designed to fit under or around the object you are prying. The tip is the very end of the head, often hardened to prevent mushrooming or chipping during heavy use.
The material matters too. Quality pry bars are made from forged alloy steel, heat-treated for strength. Cheaper bars may bend, flex, or snap under heavy load. On Reddit’s r/Tools, multiple users have reported cheap pry bars snapping during serious pulling jobs, so investing in quality construction pays off in safety and longevity.
What Is a Breaker Bar and How Does It Work?
A breaker bar is a long handle with a square drive at one end designed to fit a socket. Unlike a ratchet, it does not have a ratcheting mechanism. It is built to multiply torque for breaking loose stubborn nuts, bolts, and fasteners without damaging threads or the tool.
The breaker bar’s purpose is specific: provide enough leverage to crack a fastener that is stuck due to rust, thread-locking compound, or over-torquing. Once the fastener breaks loose, you typically switch to a ratchet to actually spin it off.
How a Breaker Bar Multiplies Torque
Just like a pry bar, a breaker bar uses leverage to multiply force. The standard formula is torque equals force times length. A 24-inch breaker bar gives you twice the torque of a 12-inch breaker bar when you apply the same hand pressure. This is why automotive technicians always reach for the longest breaker bar they can fit.
For example, a typical passenger car lug nut is torqued to around 100 ft-lbs. After years of corrosion, it can effectively require 200+ ft-lbs to break loose. A 12-inch breaker bar would require massive hand force, but a 24-inch breaker bar cuts that effort in half.
Breaker Bar Anatomy: Drive Square, Handle, and Head
A breaker bar has three parts. The drive square is the protruding square stub (sized 1/4, 3/8, 1/2, 3/4, or 1 inch) that fits into a matching socket. The handle is typically a long steel bar, often with a knurled or textured grip for slip resistance. The head is the housing around the drive square, which on some models can pivot slightly to allow access in tight spots.
Unlike ratchets, breaker bars have no internal gears or pawls. This makes them stronger, more durable, and capable of delivering far more torque without breaking. It also means you must reposition the bar by lifting and turning it each time you want to rotate the fastener.
Pry Bar vs Breaker Bar: Key Differences You Need to Know
This is where most guides fall short. People use the terms interchangeably, but pry bars and breaker bars serve completely different purposes. I learned this distinction after ruining a few fasteners and stripping some threads along the way.
The core difference is this: pry bars are designed to separate, lift, or move objects using mechanical leverage. Breaker bars are designed to multiply torque on a socket to loosen fasteners. Pry bars work against the world around you. Breaker bars work through a socket against a specific nut or bolt.
Here is a quick comparison to keep the difference clear:
Primary use: Pry bar separates materials and lifts objects. Breaker bar loosens stuck nuts and bolts.
Working end: Pry bar has a claw, chisel, or tapered tip. Breaker bar has a drive square for sockets.
Force type: Pry bar applies linear prying force. Breaker bar applies rotational torque.
Typical length: Pry bars range from 6 to 60+ inches. Breaker bars typically run 18 to 50 inches.
Best for: Pry bar for demolition, nail pulling, alignment. Breaker bar for automotive, machinery, and stuck fasteners.
You can sometimes use a pry bar in place of a breaker bar for very light automotive work, but you cannot easily use a breaker bar to pry open a crate or pull a nail. Keep both in your kit for full coverage.
Standard Pry Bar Lengths and What Each Is Used For
Pry bar length is the single most important selection factor. The wrong length either gives you too little leverage or makes the tool unusable in tight spaces. Here is the length-by-use breakdown I rely on after years of trial and error.
Mini Pry Bars (Under 12 Inches)
Mini pry bars are typically 6 to 12 inches long and serve niche purposes. I keep a 7-inch mini pry bar in my everyday carry because it opens crates, pulls staples, pries lids, and handles dozens of small tasks daily. Members of Reddit’s EDC community echo this experience, with users reporting they reach for their mini pry bar 1 to 2 times per day for trivial tasks that would otherwise damage fingernails or require pliers.
These short bars offer minimal mechanical advantage, so they are not for serious prying. They excel in tight spaces, electronics work, trim removal, and small mechanical jobs where a full-size bar would be clumsy or too long to fit.
Short Pry Bars (12 to 18 Inches)
A 12 to 18-inch pry bar is the sweet spot for trim work, light demolition, and small mechanical jobs. I use a 16-inch flat bar constantly for removing baseboards, pulling nails, prying open paint cans, and separating stuck components. The 18-inch size in particular is the most popular “general purpose” pry bar length among weekend mechanics and homeowners.
These bars give you enough leverage for most light to medium work while staying maneuverable in tighter spaces. On Reddit’s r/Tools, when asked “18 inch or 24 inch if you can only have one,” many users chose 18 inches because it is more versatile across everyday tasks.
Medium Pry Bars (18 to 36 Inches)
Medium pry bars in the 18 to 36-inch range are the workhorses of construction and demolition. A 24-inch gooseneck wrecking bar is one of the most popular choices among framers, demolition crews, and serious DIYers. It gives you solid leverage for pulling nails, prying boards, and separating framing members without being unwieldy.
I reach for a 30-inch wrecking bar when I am doing serious demolition or framing work. The extra length translates directly to more pulling power and less strain on my hands and back. Garage Journal forum members consistently recommend a 24 to 30-inch gooseneck wrecker bar for serious pulling work.
Long Pry Bars (36 Inches and Up)
Long pry bars, sometimes called digging bars or lining bars, run 48 to 72 inches or even longer. These are heavy-duty tools used for breaking up concrete, digging post holes, aligning structural members, and moving large objects. They are also sometimes called “72 pry bars” when sold at the popular 6-foot length.
For everyday homeowner or weekend warrior use, you probably do not need anything this long. But for fencing, decking, foundation work, or rural property maintenance, a long pry bar becomes essential. They are heavy, often 10 to 20 pounds, and are really meant for stationary work rather than portable tasks.
Types of Pry Bars and Their Best Uses
Beyond length, the shape of the pry bar determines what it does well. I keep at least four different pry bar types in my shop because each excels at different jobs. Trying to use a crow bar for trim work, for example, is a recipe for damaged wood and frustration.
Wrecking Bars and Gooseneck Bars
A wrecking bar is a heavy, flat pry bar with a curved gooseneck end. The gooseneck is bent back on itself, creating a small slot for pulling nail heads. Wrecking bars are the classic demolition tool, used for ripping apart framing, pulling nails from reclaimed lumber, and general heavy prying. Lengths typically run 18 to 36 inches.
For framing and demolition, I recommend a 24 to 30-inch gooseneck wrecking bar. Anything shorter lacks the leverage for tough nails. Anything longer becomes unwieldy overhead.
Crow Bars
A crow bar is the iconic pry bar with one end tapered into a wedge point and the other bent into a slight curve with a small claw or chisel. Crow bars are versatile general-purpose pry bars used for everything from opening crates to light demolition. They typically run 12 to 36 inches.
The tapered wedge point is excellent for separating joints and prying boards apart. The claw end pulls nails and pries lids. If you only own one pry bar, a 24-inch crow bar is a reasonable choice for general use.
Pinch Bars
A pinch bar is a shorter, stockier pry bar with a tapered point designed for maximum leverage in tight spaces. Pinch bars are commonly used in automotive work for separating ball joints, pulling cotter pins, and prying stuck components. They typically run 12 to 24 inches.
The thicker stock and shorter length of a pinch bar give you tremendous force without flex. I use a 16-inch pinch bar constantly in automotive and machinery work where I need serious force but cannot fit a longer bar.
Flat Pry Bars
Flat pry bars are thin, wide bars designed for trim work, flooring, and finish carpentry. The wide flat profile distributes force to avoid denting or damaging finished surfaces. They typically run 12 to 24 inches.
For flooring removal, trim pulling, and finish work, a flat pry bar is essential. Trying to use a round crow bar for trim work will destroy your trim and your patience. Get a dedicated flat pry bar for any work involving finished surfaces.
Digging Bars
A digging bar is a long, heavy bar (48 to 72 inches) with a pointed end on one side and sometimes a tamper or chisel on the other. They are used for breaking up hard soil, digging post holes, prying rocks, and aligning structural members. They are not really “pry bars” in the traditional sense, but they serve a similar leverage purpose.
If you are setting fence posts, building decks, or doing any concrete work, a digging bar earns its keep quickly. The heavy weight does most of the work for you.
Specialty Pry Bars (Railroad, Lining, Stripping)
Specialty pry bars serve specific industries. Railroad claw bars have a specialized claw for pulling rail spikes. Lining bars are used for shifting heavy rails. Stripping bars are thin, wedge-shaped bars used for removing trim and molding without damage.
Unless you work in these industries, you probably do not need specialty bars. But knowing they exist helps you recognize why a “one-size-fits-all” pry bar approach often falls short.
Standard Breaker Bar Lengths and Drive Sizes
For breaker bars, length matters but drive size matters more. The drive size determines what sockets fit, and the length determines how much torque you can apply. Let me break down each drive size and its ideal use case.
1/4 Inch Drive Breaker Bars
1/4-inch drive breaker bars are small, lightweight tools typically 6 to 12 inches long. They are used for precision work on small fasteners, electronics, bicycles, and small engines. They are not common, but they exist for specialty applications.
For most people, a 1/4-inch drive ratchet covers this size range adequately. A dedicated breaker bar at this size is a niche tool.
3/8 Inch Drive Breaker Bars
3/8-inch drive breaker bars typically run 12 to 18 inches long and are designed for medium-duty automotive and mechanical work. They fit 3/8-inch drive sockets, which cover most common automotive fastener sizes from 8mm to 19mm.
If you do mostly automotive work on cars and light trucks, a 3/8-inch drive breaker bar is a versatile choice. It offers more torque than a typical 3/8-inch ratchet while still fitting in tight engine bays.
1/2 Inch Drive Breaker Bars
The 1/2-inch drive breaker bar is the most popular size for automotive and general mechanical work. They typically run 18 to 30 inches long and fit 1/2-inch drive sockets, which cover most lug nuts, suspension bolts, and larger mechanical fasteners.
For most home mechanics and DIYers, a 24-inch 1/2-inch drive breaker bar is the gold standard. It provides enough torque to crack most automotive fasteners while remaining manageable. This is the answer to the common PAA question “Should I get a 1/2 or 3/8 breaker bar” for general automotive work: go with 1/2-inch if you can only have one.
3/4 Inch Drive Breaker Bars
3/4-inch drive breaker bars are heavy-duty tools typically 24 to 40 inches long, used for trucks, heavy equipment, agricultural machinery, and industrial applications. They fit larger sockets and provide enormous torque for very stuck fasteners.
For most homeowners and even most mechanics, a 3/4-inch drive breaker bar is overkill. But for heavy truck work, tractor maintenance, and industrial settings, it is essential. Members of automotive Facebook groups often recommend 18-inch 3/4-inch drive breaker bars with conduit extensions for added leverage on stubborn truck lug nuts.
1 Inch Drive Breaker Bars
1-inch drive breaker bars are the largest commonly available size, used primarily in heavy industrial settings, large machinery, and ship work. They are massive tools, often 40+ inches long, designed for fasteners that require several hundred foot-pounds of torque to break loose.
Unless you work in heavy industry, you will never need a 1-inch drive breaker bar. Skip this size unless you have a specific application.
How to Choose the Right Length for Your Job?
Now that you understand the options, let me give you the decision framework I use every time I reach for a pry bar or breaker bar. This is the practical “how to pick the right size and length of pry bar and breaker bar for a job” framework that pulls everything together.
Match Length to Available Space
First, measure your workspace. A 36-inch pry bar is useless if you are working inside a cabinet or under a sink. A 12-inch bar is equally useless if you need to lift a 200-pound object. Always start by determining the maximum length you can physically maneuver in your workspace, then pick the longest bar that fits.
For tight spaces like engine bays, under cabinets, or inside appliances, go with 12 to 18 inches. For open framing or yard work, go with 24 to 36 inches. For stationary heavy work, go with 48+ inches.
Calculate Required Mechanical Advantage
Estimate how much force you actually need. For light trim work, 6:1 leverage from an 18-inch bar is plenty. For pulling 16d framing nails, you want at least 12:1 leverage, which means a 24 to 30-inch bar. For breaking loose 100+ ft-lb lug nuts, you want maximum leverage, which means a 24-inch or longer breaker bar.
A simple rule: when in doubt, go longer. A bar that is too long is just slightly inconvenient. A bar that is too short will not do the job and may snap under excessive force.
Consider Your Strength and Reach
Be honest about your strength and reach. A 60-inch bar generates incredible leverage, but if you cannot physically control it, you risk injury or property damage. Match the bar length to your ability to control it safely. For most adults, 24 to 36 inches is a comfortable maximum for overhead work.
Also consider your workspace height. Overhead work in a basement requires more bar length than the same work at chest height.
Quick Reference: Job-to-Length Matrix
Here is the cheat sheet I keep taped to my shop wall for quick reference:
Trim and finish work: 12 to 18-inch flat pry bar
General household tasks: 16 to 18-inch crow bar
Framing and demolition: 24 to 30-inch gooseneck wrecking bar
Heavy demolition and concrete: 36 to 48-inch wrecking bar
Digging and alignment: 48 to 72-inch digging bar
Automotive fasteners: 18 to 24-inch 1/2-inch drive breaker bar
Truck and heavy equipment: 24 to 40-inch 3/4-inch drive breaker bar
Small mechanical work: 12 to 18-inch 3/8-inch drive breaker bar
Print this list and keep it in your shop. After a few jobs, the right length will become second nature.
Safety Guidelines for Using Pry Bars and Breaker Bars
Pry bars and breaker bars are among the most dangerous tools in your shop because they store enormous energy under load. A slipping breaker bar can break bones instantly. A snapping pry bar can send shrapnel flying. I have seen both happen, and both are entirely preventable with basic safety habits.
Personal Protective Equipment
Always wear safety glasses when using a pry bar or breaker bar. A slipping tool can launch chips of rust, paint, or even metal fragments at high velocity. Heavy work gloves protect your hands from pinch points and splinters. Steel-toed boots protect your feet from dropped tools, which can weigh 10 to 20 pounds on long bars.
For demolition work, consider a hard hat. Falling debris from overhead prying is a real risk on job sites.
Proper Body Positioning
Stand to the side of the bar, not directly behind it. If the bar slips, it flies in the direction of the force, which means directly toward your face or chest if you are standing behind it. Stand with your feet shoulder-width apart for balance, and keep your knees slightly bent.
Never put your hand on top of a pry bar to add downward force. If the bar slips, your hand will be crushed between the bar and the work surface. Always grip from the side.
Avoiding Common Injuries
The most common pry bar injury is the “snap-back” when a bar slips off a fastener or surface. The bar can strike your face, chest, or hands with significant force. Always make sure your fulcrum point is solid before applying force, and keep your face out of the line of fire.
The most common breaker bar injury is the “wrench kick” when a stuck fastener suddenly breaks free. The bar can spin rapidly and strike your knuckles or face. Always use slow, steady force on a breaker bar, and be ready for the sudden release.
Tool Inspection Before Use
Inspect your pry bar or breaker bar before each use. Look for cracks, bends, mushroomed tips, or excessive wear. A bent pry bar will not transfer force correctly and may snap under load. A mushroomed tip on a breaker bar can shatter sockets.
If your tool shows any signs of damage, replace it. Quality tools are not that expensive compared to an ER visit.
Maintenance and Care Tips
Quality pry bars and breaker bars will last decades with minimal care. Keep them clean, lightly oiled to prevent rust, and stored in a dry location. Avoid dropping them on hard surfaces, which can chip hardened tips or crack handles.
For breaker bars, occasionally inspect the drive square for wear. A worn drive square can round out socket corners, ruining both the socket and the fastener. Replace worn breaker bars rather than risking damaged sockets and fasteners.
Sharpening the chisel or claw end of a pry bar is sometimes appropriate, but only if you have the skills. A poorly sharpened tip can shatter or chip. For most users, factory edges work fine and last for years.
Frequently Asked Questions
How do I choose the right pry bar length?
Choose your pry bar length by matching it to the available space and the leverage you need. For tight indoor work, use 12 to 18 inches. For general household tasks, 16 to 18 inches is ideal. For framing and demolition, go with 24 to 30 inches. For heavy-duty work like moving large objects or breaking concrete, use 36 inches or longer. Always pick the longest bar that still fits comfortably in your workspace.
What length breaker bar should I get?
For most automotive work, a 24-inch breaker bar is the ideal length. It provides enough leverage to crack stuck lug nuts and suspension bolts while remaining manageable. For trucks and heavy equipment, go with 36 to 40 inches. For small engines and tight mechanical work, 18 inches is sufficient. The longer the bar, the more torque you generate with the same hand force.
Should I get a 1/2 or 3/8 breaker bar?
If you can only buy one breaker bar, get a 1/2-inch drive. The 1/2-inch drive is the most common size for automotive and mechanical work, fits the largest range of common sockets, and handles the toughest jobs most people encounter. A 3/8-inch breaker bar is useful for tight spaces and smaller fasteners, but a 1/2-inch breaker bar covers far more applications.
What is a 1/2 inch breaker bar used for?
A 1/2-inch breaker bar is used for high-torque applications including automotive lug nuts, suspension bolts, drivetrain fasteners, and large mechanical assemblies. It fits 1/2-inch drive sockets, which cover the most common automotive and industrial fastener sizes. The 1/2-inch drive is the industry standard for serious mechanical work.
What is the most useful breaker bar length?
The most useful breaker bar length is 24 inches for a 1/2-inch drive model. This length balances leverage with maneuverability, making it ideal for the widest range of automotive and mechanical jobs. It fits in most engine bays, generates enough torque for stuck fasteners, and remains comfortable to use for extended periods.
What is the best length for a pry bar?
The best length for a pry bar depends on the job, but 18 inches is the most versatile all-around length. An 18-inch pry bar handles trim work, light demolition, automotive tasks, and general household jobs. For more demanding work, a 24 to 30-inch gooseneck wrecking bar is the next step up. Owning both gives you full coverage from light to heavy tasks.
Conclusion
Picking the right size and length of pry bar and breaker bar for a job comes down to three things: matching the tool type to the task, matching the length to the available space and required leverage, and matching the drive size to the fasteners you are working with. Pry bars separate and lift. Breaker bars loosen stuck fasteners. Longer bars give more leverage but require more space.
My practical recommendation is to start with a quality 18-inch crow bar and a 24-inch 1/2-inch drive breaker bar. These two tools cover the vast majority of household and automotive jobs. Add a 24-inch gooseneck wrecking bar if you do any framing or demolition. Add a flat pry bar if you do any finish work. With those four tools, you can handle almost anything.
Take the time to inspect your tools before each use, wear proper safety gear, and never substitute a pry bar for a breaker bar or vice versa. The right tool for the job is not just faster and easier. It is safer, and it protects both you and your equipment. 2026 is a great year to upgrade your tool kit with the right sizes and lengths for the work you actually do.