
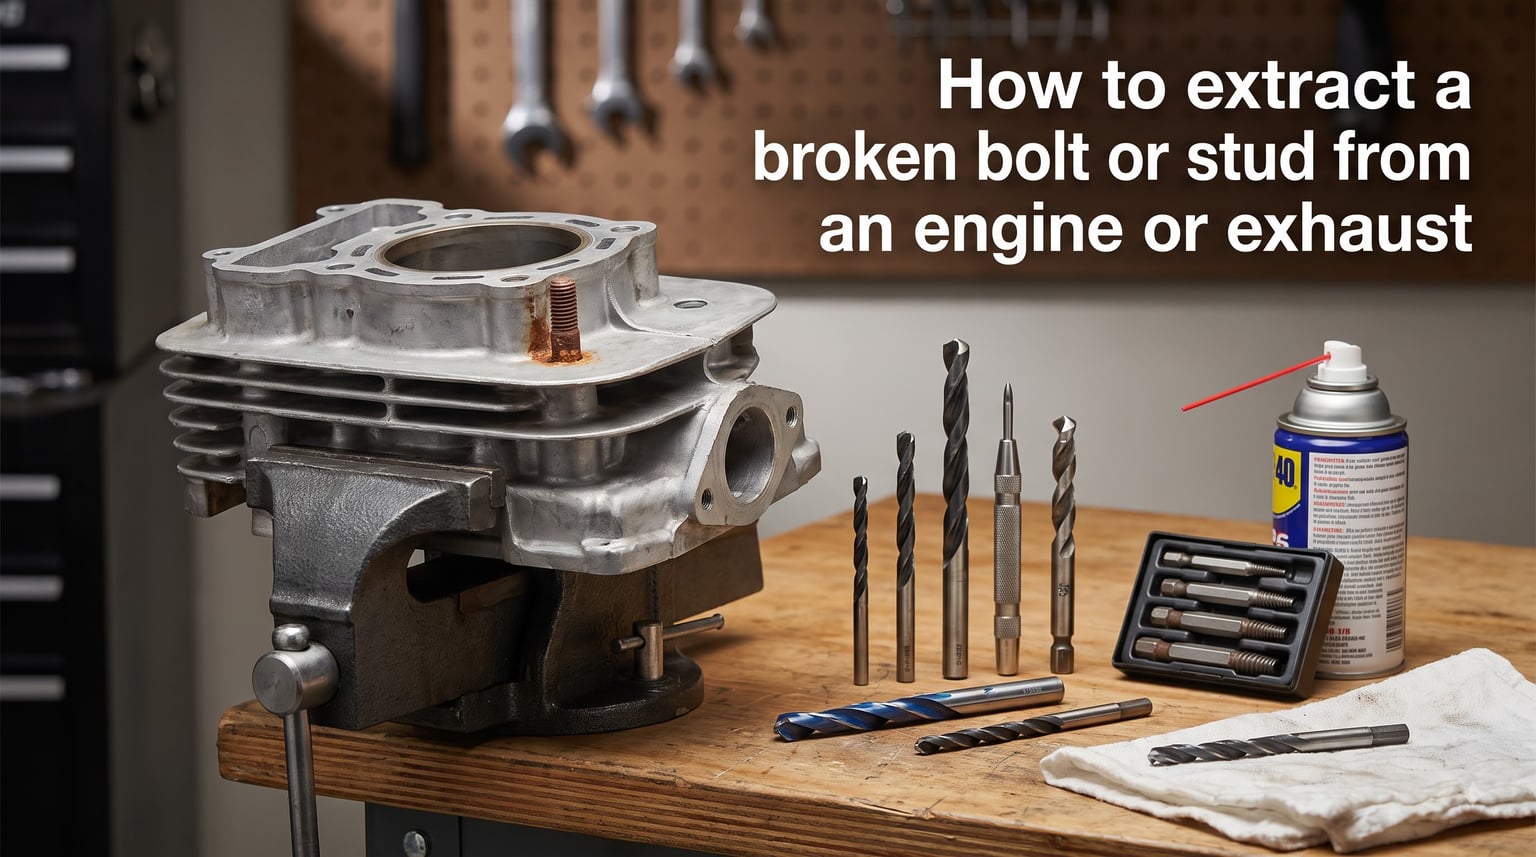
I have lost count of how many broken bolts I have wrestled with over the years, but the frustration never gets easier. That moment when a wrench slips, you feel the snap, and suddenly a simple exhaust job turns into a multi-day project is one every DIY mechanic dreads.
This guide covers exactly how to extract a broken bolt or stud from an engine or exhaust, whether it is sitting flush with the surface, recessed deep in a blind hole, or snapped off with just enough sticking out to grab. I will walk through four proven methods ranked from easiest to most advanced, share the tools you need for each, and tell you straight up when it is time to call a professional.
Whether you are dealing with a snapped exhaust stud, a rounded-off head bolt on an aluminum cylinder head, or a corroded manifold fastener that fought you to the death, you will find an extraction method that fits your situation below.
Table of Contents
Why Bolts Break in Engines and Exhausts?
Bolts rarely snap because of a single mistake. They fail from a combination of stress factors that build up over years of service. Understanding the cause helps you prevent the next one.
Heat cycling is the biggest culprit on exhaust manifolds. Exhaust gases reach 1,200 degrees Fahrenheit or higher, and the surrounding components swing between hot and cold constantly. Each cycle expands and contracts the metal at a different rate. Steel bolts and aluminum heads expand at different speeds, which slowly works the fastener loose or cracks it at the weakest point.
Galvanic corrosion is the second silent killer. When you mate a steel bolt to an aluminum engine block, you create a tiny battery every time moisture creeps in. The aluminum actually sacrifices itself to protect the steel, but the steel threads corrode and seize in the process. After five or ten years, that bolt is no longer a fastener; it is a chemical weld to the surrounding threads.
Over-torquing rounds out the top three. Torque specifications on modern engines are tighter than most DIYers realize. A cylinder head bolt that calls for 22 lb-ft can snap at 40 lb-ft, especially if it has been heat-cycled a thousand times. Skip the torque wrench and you are gambling.
Essential Tools for Broken Bolt Extraction
Before you start drilling or welding, gather the right tools. Trying to improvise is how broken bolts turn into damaged engine heads.
For penetrating oil method (Method 1):
Quality penetrating oil (Kroil, PB Blaster, or Liquid Wrench Penetrating Oil)
Vise-grip pliers or locking pliers
Small hammer or brass punch
Shop rags and a wire brush
For drill and extractor method (Method 2):
Center punch and hammer
Left-hand drill bit set (sized 60-70% of the bolt diameter)
Spiral or straight flute extractor set (screw extractor, often called easy-out)
Variable-speed drill (corded is preferable for torque control)
Cutting fluid or tapping lubricant
For welding method (Method 3):
TIG or MIG welder
Stainless or mild steel nut slightly larger than the bolt diameter
Welding gloves, jacket, and auto-darkening helmet
Wire brush for post-weld cleanup
For heat method (Method 4):
Propane or MAP gas torch, OR a portable induction heater
Heat-resistant gloves
Fire extinguisher nearby
Wet rags to protect nearby components
Preparation Before You Start
Every successful extraction starts with prep work. Skipping these steps is the difference between a 30-minute job and a three-day nightmare.
Clean the area thoroughly with a wire brush and brake cleaner. Oil, grease, and debris will contaminate your drill bit, ruin your weld puddle, or catch fire when you apply heat. Spend ten minutes on this and save hours later.
Apply penetrating oil and wait. Soak the broken bolt at least 24 hours before you attempt extraction. Reapply every few hours if possible. Heat cycling the bolt (warming it gently with a torch then letting it cool) helps the oil wick deeper into the threads. Forum veterans swear by Kroil over WD-40 because it creeps into microscopic gaps faster.
Identify your break type. You will use different methods depending on whether the bolt is:
Exposed (sticking out enough to grab with pliers)
Flush (broken even with the surface)
Recessed (broken below the surface, deep in a blind hole)
Wear safety glasses. Metal shavings from drilling are razor-sharp and travel at high speed. This is non-negotiable.
Method 1: Penetrating Oil and Pliers (For Exposed Bolts)
If the bolt broke with even a quarter inch sticking out above the surface, you have the easiest possible case. This method works for exposed exhaust manifold studs, protruding head bolts, and fasteners that snapped above the surface.
Step 1: Soak the broken bolt with penetrating oil. Apply liberally and wait at least one hour, ideally overnight. Reapply every few hours if you have time.
Step 2: Grab the exposed portion with sharp-jawed vise-grip pliers. Standard pliers will slip. You need the locking, serrated-jaw type that bites into the metal.
Step 3: Try turning counterclockwise first (lefty loosey). Apply steady, even pressure rather than yanking. If it does not budge, try gently rocking back and forth while pulling outward.
Step 4: If it still will not move, tap the side of the bolt lightly with a hammer to shock the threads, then reapply penetrating oil and wait another hour.
Step 5: Once loose, back the bolt out slowly to avoid snapping it again at a lower point. Clean the threads with a tap before reinstallation.
This method works about 70% of the time on exposed bolts and costs nothing beyond penetrating oil. It is the first thing to try before reaching for the drill.
Method 2: Drill and Extractor (For Flush Broken Bolts)
When the bolt broke even with the surface, you cannot grip it with pliers. Drilling is your next best option, and it is what most professional mechanics reach for first on flush breaks.
Step 1: Use a center punch to make a precise starting dimple in the exact center of the broken bolt. This guides your drill bit and prevents wandering, which can destroy the surrounding threads. Take your time and aim well.
Step 2: Select a left-hand drill bit sized to 60-70% of the bolt’s diameter. The reverse thread on the bit often catches the broken bolt and walks it out without needing an extractor at all. This is the single best trick in broken bolt removal.
Step 3: Drill straight down with steady pressure at a low RPM (300-500 RPM). Let the bit do the work. Use cutting fluid to keep temperatures down. Drilling too fast hardens the metal and snaps drill bits.
Step 4: If the bolt backs out while drilling, congratulations, you are done. If not, switch to your extractor set. Insert the spiral or straight flute extractor into the drilled hole and turn counterclockwise.
Step 5: If the extractor slips, stop. You will only make things worse by drilling a larger hole or rounding off the bolt further. Move to Method 3 or seek professional help.
This method has a high success rate for flush broken bolts but requires precision. If you are not comfortable drilling perfectly straight into a small bolt, practice on scrap metal first or hand the job to someone who is.
Method 3: Welding a Nut (For Deep or Rough Breaks)
When drilling fails or the break is too deep for safe drilling, welding a nut to the broken stub is the most reliable method. Experienced mechanics on Reddit and hobby-machinist forums consistently recommend this approach for stubborn cases.
Step 1: Select a nut one or two sizes larger than the broken bolt diameter. The extra room gives you a solid weld puddle without welding directly to the bolt if you can avoid it.
Step 2: Clean both the nut and the broken bolt surface thoroughly. Any oil, rust, or paint will create a porous weld that breaks under torque.
Step 3: Position the nut squarely over the broken bolt and tack weld it in place at one point to hold it steady.
Step 4: Fill the gap between the nut and the bolt with weld material. For steel bolts on cast iron, a MIG welder with mild steel wire works well. For aluminum heads with steel bolts, a TIG welder with stainless wire is safer and reduces heat input.
Step 5: Let the assembly cool completely. Welding aluminum or thin steel and then immediately twisting can crack the surrounding material. Patience here pays off.
Step 6: Use a wrench on the welded nut to back the bolt out. The torque resistance is transferred through your weld to the bolt threads.
This method is the one I reach for when the bolt snapped below the surface in a blind hole or when an extractor failed and left the bolt further mangled.
Method 4: Heat Application (Torch or Induction Heater)
Heat works through thermal expansion. The bolt expands faster than the surrounding metal when heated, which breaks the corrosion bond holding it in place. This method works best as a complement to other techniques, not as a standalone solution.
Step 1: Protect nearby components. Remove or shield fuel lines, wiring, plastic connectors, and any rubber parts within 12 inches. Use wet rags to dissipate heat on critical surfaces.
Step 2: Heat the bolt area with a propane torch or induction heater. Aim the flame at the surrounding metal, not directly at the bolt itself. You want the surrounding material hot, which causes the bolt to expand outward when you switch to heating it directly.
Step 3: Heat the bolt directly until it glows cherry red (for steel) or darkens (for aluminum). Apply penetrating oil while the bolt is hot; the heat helps the oil wick into the threads.
Step 4: Let it cool slightly, then try extraction with vise-grips or your drilled extractor.
Induction heaters are safer than torches because they heat only the metal directly under the coil. They are more expensive to buy but can be rented from tool rental shops.
Warning: Never use heat on aluminum cylinder heads near combustion chambers. The heat can warp the head or ignite residual fuel vapors. If you smell fuel, stop immediately.
How to Extract a Broken Bolt or Stud: Method Comparison?
Here is a quick comparison of all four methods so you can pick the right one for your situation.
Penetrating Oil and Pliers: Difficulty 1/5. Tools needed: penetrating oil, vise-grips. Best for exposed bolts with at least 1/4 inch sticking out. Time: 30 minutes to overnight.
Drill and Extractor: Difficulty 3/5. Tools needed: center punch, left-hand drill bit, extractor set. Best for flush broken bolts. Time: 1-3 hours including soaking.
Welding a Nut: Difficulty 4/5. Tools needed: welder, nut, welding gear. Best for deep, recessed, or previously damaged bolts. Time: 1-2 hours including cooling.
Heat Application: Difficulty 2/5. Tools needed: torch or induction heater. Best as a supplement to other methods. Time: 30 minutes.
For most DIYers with a flush broken bolt, the left-hand drill bit trick handles it without ever needing an extractor. Save the welding method for when nothing else works.
What to Do When Extraction Fails: Thread Repair Options
Sometimes the bolt comes out but takes the threads with it. Other times, the bolt refuses to move no matter what you try. Here is what to do next.
Heli-Coil or Time-Sert thread repair inserts let you restore damaged threads to original or stronger specifications. Heli-Coil is cheaper and adequate for most applications. Time-Sert is stronger and better for high-stress areas like cylinder head bolts.
Professional machine shop extraction costs between $150 and $500 per bolt depending on location and complexity. A shop has CNC equipment, welding capability, and experience that lets them tackle bolts you cannot budge at home. If the bolt is in a cylinder head, the cost of professional removal is almost always less than replacing the head.
Sometimes the right answer is to accept the loss. If a bolt is in a non-critical location and your drill bits keep snapping inside it, you can drill out the entire bolt, tap the hole to the next larger size, and use a larger bolt. This is a last resort but it works.
Prevention: How to Avoid Broken Bolts in the Future?
The best extraction is the one you never need. Take these steps when reassembling exhaust and engine components.
Apply anti-seize compound to every bolt that goes into aluminum or that sees heat. Anti-seize prevents galvanic corrosion and lets you remove bolts cleanly years later. A small tube costs less than $10 and saves hundreds in future extraction headaches.
Use a torque wrench. Always. Torque specifications exist because engineers calculated the clamping force needed, and over-torquing is one of the leading causes of broken bolts. Look up the spec for your specific application.
Consider stainless steel replacement bolts for exhaust manifolds. They resist corrosion better than the OEM steel bolts and are less likely to seize. Fel-Pro and Mr. Gasket both sell quality exhaust stud kits.
Inspect exhaust hardware every oil change. Catching a loose or corroded bolt early is a 15-minute fix. Catching it after it snaps is a weekend project.
Safety Warnings
Eye protection is mandatory when drilling or hammering. Metal shavings cause permanent eye damage.
Fire safety matters when using torches. Have a fire extinguisher within reach and clear flammable materials from the area.
Aluminum heads warp easily. Avoid prolonged heat application near combustion chambers.
Stop if the bolt is not moving. If your drill bit keeps snapping or your extractor keeps slipping, you are about to cause more damage. Take it to a professional.
FAQs
How to get a snapped exhaust stud out?
Soak the broken stud with penetrating oil for at least 24 hours, then try vise-grip pliers if any portion is exposed. For flush breaks, center-punch the stub and drill with a left-hand drill bit sized to 60-70% of the stud diameter. The reverse threads often walk the stud out without needing an extractor. If drilling fails, weld a nut to the stub and back it out with a wrench.
How to get a snapped bolt out of an engine?
Identify whether the bolt is exposed, flush, or recessed. For exposed bolts, use vise-grip pliers after penetrating oil soak. For flush bolts, drill with a left-hand drill bit and use a screw extractor. For recessed bolts in blind holes, weld a nut to the stub or use an induction heater to break the corrosion bond. Always start with the least invasive method.
How to get broken studs out of an engine block?
Apply penetrating oil daily for several days if possible. Heat the surrounding metal to expand the block, then cool the stud itself. Drill with a left-hand bit and use an extractor set sized appropriately. For aluminum blocks, avoid excessive heat and prefer welding a nut over drilling to reduce the risk of thread damage.
How to extract a broken bolt stud?
Broken bolt extraction is the process of removing a snapped or corroded fastener fragment from an engine component without damaging the surrounding threads. Methods include penetrating oil and pliers for exposed breaks, drilling with a left-hand bit and extractor for flush breaks, welding a nut for difficult cases, and heat application to break corrosion bonds.
What is the best way to extract a broken bolt?
The best method depends on the break type. For exposed bolts, penetrating oil and vise-grips work 70% of the time. For flush bolts, a left-hand drill bit alone often succeeds without needing an extractor. For stubborn cases, welding a nut to the stub is the most reliable professional method. Heat application works best as a supplement to other techniques.
What are the different types of broken bolt extractors?
The main types are spiral flute extractors (also called easy-outs), which bite into the drilled hole and twist counterclockwise, and straight flute extractors, which are less aggressive but less likely to break. Left-hand drill bits are not extractors but often remove bolts without needing one. For blind holes, specialty extractors with tapered shafts help reach recessed stubs.
How to extract a broken starter bolt?
Starter bolts often break due to corrosion between the steel bolt and aluminum bell housing. Soak with penetrating oil, then apply heat to the bell housing area (not the bolt itself) to expand the surrounding metal. Drill with a left-hand bit if flush, or weld a nut if the bolt is recessed. Be careful of nearby wiring and the flywheel when drilling.
Conclusion
Knowing how to extract a broken bolt or stud from an engine or exhaust saves you time, money, and the embarrassment of a half-finished repair. Start with the easiest method that fits your break type: penetrating oil and pliers for exposed bolts, left-hand drilling for flush breaks, welding a nut as the heavy-duty backup.
Gather your tools, take your time, and remember that patience usually beats force. If you have tried the methods above and the bolt is still stuck, bring it to a machine shop. Knowing when to stop is just as important as knowing how to start.
For 2026 and beyond, anti-seize compound and a torque wrench are your two best defenses against the next broken bolt. Use them on every exhaust and engine reassembly.