
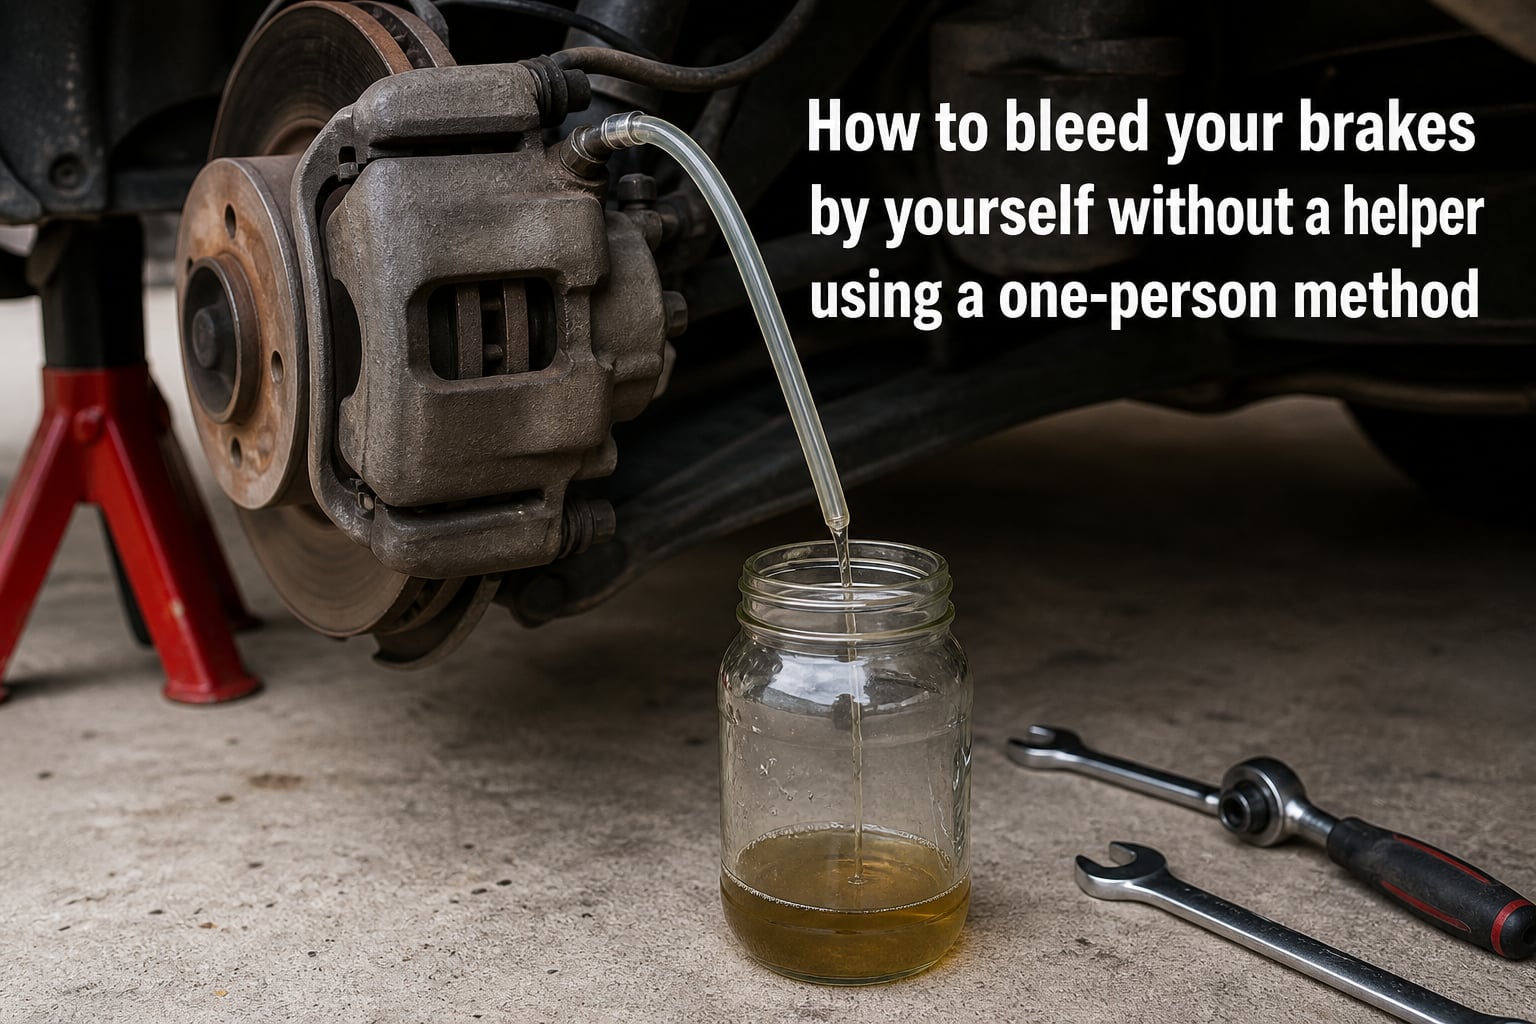
Yes, you can absolutely bleed your brakes by yourself without a helper. I have done it on three different cars in my driveway, and the secret is using a one-person method that traps the old fluid while letting air escape. This guide covers three proven techniques (gravity, bottle-and-hose, and vacuum pump) so you can pick the one that fits your tools and patience.
Air trapped in brake lines makes your pedal feel spongy and reduces stopping power. Bleeding pushes that air out so the hydraulic system works the way it should. The good news is you don’t need a second person sitting in the driver’s seat. Each method below is something one person can finish in a parking spot.
Table of Contents
Safety First: What to Do Before You Touch a Bleeder Screw
Brake fluid is corrosive and your brakes are your most important safety system. Skip these precautions and you risk damaging paint, getting hurt, or driving with compromised brakes. I learned this the hard way when I got brake fluid on my fender and watched the clear coat melt.
Here is what you need before starting any method:
Wheel chocks on at least two wheels – the car should never roll while you work underneath.
Safety glasses and nitrile gloves – brake fluid splashes and irritates skin.
A drip pan and old rags – brake fluid eats through regular paint in minutes.
Fresh brake fluid in the correct DOT rating – check your owner’s manual (DOT 3, DOT 4, or DOT 5.1 are most common).
A sealed container for waste fluid – never pour used brake fluid on the ground.
Never let the master cylinder reservoir run dry during bleeding. If air gets sucked into the master cylinder, you will have to start over. Keep the fluid topped up within a quarter inch of the MAX line throughout the job.
Tools You Need for Each One-Person Method
Each technique uses slightly different gear. Here is a quick comparison so you can decide before you crawl under the car.
Gravity bleeding: Only needs a clear hose and a jar. Slowest method (1-3 hours) but almost no effort.
Bottle/jar method: Clear vinyl tubing (3/16 inch or 1/4 inch fits most bleeder nipples), a clean glass jar, and a box-end wrench.
Vacuum pump method: A hand-held vacuum brake bleeder (around $25-40) that screws onto the bleeder valve.
I recommend the bottle method for first-timers. It is the most forgiving and uses parts you probably already have in the garage.
How to Bleed Brakes by Yourself Using the Gravity Method?
Gravity bleeding is the simplest one-person method because you do almost nothing. Open the bleeder screw, let old fluid drip out, and walk away. The downside is time. It can take an hour or more per wheel depending on how much air is in the system.
Follow these steps to gravity bleed your brakes:
Loosen each bleeder screw about a quarter turn with a box-end wrench. Do not remove them – just crack them open.
Slip a short piece of clear tubing over the bleeder nipple so fluid drips into a catch pan instead of running down the caliper.
Top off the master cylinder reservoir and leave the cap off so air can equalize.
Wait and watch – fluid will slowly drip out as gravity pushes it through the lines.
Check the reservoir every 15-20 minutes and top it off before it gets below the MIN line.
Tighten each bleeder screw once fluid runs clear with no bubbles.
Expect to refill the master cylinder two or three times during a full gravity bleed on four wheels. Reddit users consistently report gravity bleeding works best overnight if you have nowhere to be.
Bottle Method: The Most Popular DIY One-Person Bleed
The bottle-and-hose method is what most home mechanics reach for first. You attach a hose to the bleeder valve, run the other end into a jar of clean brake fluid, then press the brake pedal by hand to push fluid and air out. This works because the submerged hose end prevents air from being sucked back in.
Here is the step-by-step for bleeding brakes alone with a bottle:
Cut a 2-foot piece of clear vinyl tubing that fits snugly over the bleeder nipple. Aquarium air line tubing works great.
Fill a clean glass jar halfway with fresh brake fluid and submerge the free end of the hose in it.
Press the tubing onto the bleeder screw at the wheel you are bleeding.
Crack the bleeder valve open about half a turn with your wrench.
Press the brake pedal slowly until it hits the floor, then close the bleeder screw before releasing the pedal.
Repeat 5-10 times per wheel until no air bubbles come out of the submerged hose end.
Top off the master cylinder after every few pumps so it never runs dry.
The key timing trick is closing the bleeder screw while the brake pedal is still pressed down. This prevents air from being sucked back into the caliper when the pedal rises. I wasted an hour learning this on my first car.
Vacuum Pump Method: The Fastest One-Person Bleed
A vacuum pump brake bleeder attaches to the bleeder valve and pulls fluid out with suction. No pedal pumping needed, which makes it the fastest solo method. The pump costs around $30 but pays for itself the first time you use it.
To bleed brakes with a vacuum pump:
Attach the vacuum pump’s threaded adapter to the bleeder screw and tighten by hand.
Connect the pump’s collection bottle to the other end of the hose.
Pump the vacuum handle 8-10 times to create suction.
Crack open the bleeder valve – fluid and air will flow into the collection bottle.
Watch for bubbles in the clear tube. Keep pumping until no more air appears.
Close the bleeder valve, then release the vacuum by opening the pump’s relief valve.
Move to the next wheel and repeat. Check the master cylinder after every wheel.
The main risk with vacuum bleeding is that strong suction can sometimes introduce air through a worn seal. If your pedal still feels spongy after vacuum bleeding, switch to the bottle method to verify the system is fully purged.
Wheel Bleeding Sequence: Which Wheel to Start With
Always bleed your brakes in the correct order. The sequence depends on whether your car has a diagonal split or front-rear split brake system. Most modern cars use a diagonal split (also called X-pattern), where the master cylinder feeds the right-front and left-rear on one circuit, and the left-front and right-rear on the other.
The standard bleeding sequence for a diagonal split system is:
Right rear (farthest from the master cylinder on the first circuit)
Left front (second wheel on the same circuit)
Left rear (start of the second circuit)
Right front (last wheel)
For older rear-wheel-drive cars with a front-rear split, bleed the right-rear, left-rear, right-front, left-front. Your vehicle’s service manual will confirm which pattern applies. Bleeding out of order means air can stay trapped in the lines and you will chase a spongy pedal for days.
How to Know When Brake Bleeding Is Complete?
The job is done when two things happen. First, no more air bubbles appear in the clear hose at the bleeder valve. Second, the brake pedal feels firm and solid under your foot, with no sponginess or extra travel before the brakes engage.
Here is my final-check routine after finishing every wheel:
Inspect the clear hose for at least two full pedal pumps per wheel with zero bubbles.
Pump the pedal 10 times with the engine off and confirm it stays firm and high.
Check the master cylinder level – it should sit at the MAX line with no air bubbles visible inside the reservoir.
Top off the fluid and reinstall the reservoir cap tightly.
Test drive at low speed in a parking lot before driving on the road.
If the pedal still sinks slowly to the floor, there is still air trapped somewhere. Move to the troubleshooting section below.
Common Mistakes to Avoid When Bleeding Brakes Alone
Most failed brake bleeds come from the same handful of errors. I have made each one at least once, so here is the cheat sheet.
Letting the master cylinder run dry. This is the #1 mistake. The instant the reservoir empties, air enters the master cylinder and you have to bleed the whole system from scratch.
Using the wrong DOT fluid. Mixing DOT 5 (silicone) with DOT 3 or DOT 4 will ruin seals. Always match what’s already in the system.
Over-tightening the bleeder screw. These screws are small and soft. Snap one off and you are looking at a caliper replacement. Snug is enough.
Bleeding in the wrong order. Air stays trapped if you do not follow the diagonal sequence.
Not properly seating the hose on the bleeder nipple. Air leaks around a loose hose and fools you into thinking there is still air in the line.
A good habit is to test the bleeder screw torque with a small wrench before starting. If it feels crunchy or stripped, replace it. Bleeder screws are cheap and a stuck one can ruin your whole afternoon.
Troubleshooting a Spongy Pedal After Bleeding
Sometimes the pedal still feels mushy after you have bled all four wheels. Before you tear the system apart, work through this checklist. Most spongy pedal issues have simple fixes.
Recheck the master cylinder level. Low fluid allows air to enter the booster and master cylinder.
Look for fluid leaks at the caliper, wheel cylinder, brake lines, and master cylinder. Even a small drip pulls air in.
Verify the bleeder screw is fully closed. A half-open screw will pull air into the system every time the pedal releases.
Inspect the brake hoses for swelling or cracking. A collapsed internal hose can mimic air in the lines.
Try a second bleed on every wheel. Sometimes one pass misses a stubborn pocket of air. Repeat the bottle method on each wheel.
If your pedal still sinks after two bleeding attempts, the master cylinder itself may have internal leaks. That is a bigger repair and worth a visit to a shop for a proper diagnosis.
Speed Bleeders: The Solo Mechanic’s Best Upgrade
Speed bleeders are replacement bleeder screws with a built-in one-way check valve. Open the screw, pump the pedal, close the screw – no hose or jar needed for routine top-ups. They cost about $10 for a set of four and turn a one-person job into a five-minute task.
I installed a set on my daily driver two years ago and they have been problem-free. The only downside is that the check valve can clog if you skip bleeding for several years. Cleaning them is simple – just remove and rinse with brake fluid.
Frequently Asked Questions
Can you bleed brakes without a helper?
Yes, you can absolutely bleed brakes without a helper. The three most common one-person methods are gravity bleeding (just open the valve and wait), the bottle-and-hose method (use a clear tube submerged in fluid to prevent suck-back), and the vacuum pump method (uses a hand pump to pull fluid out). Each method works without anyone pressing the pedal for you.
How can you bleed your brakes with only one person?
The easiest one-person method is the bottle-and-hose technique. Attach a clear hose to the bleeder valve, run the other end into a jar of clean brake fluid, crack the bleeder open, then press the brake pedal by hand. Close the bleeder screw before releasing the pedal so air cannot suck back into the caliper. Repeat until no more bubbles appear.
How long does gravity brake bleeding take?
Gravity bleeding typically takes 1-3 hours per wheel and can run longer if the system has a lot of air. It is the slowest one-person method but requires the least effort. Most DIYers who choose gravity bleeding leave the car overnight with the bleeder screws cracked open and a hose dripping into a pan.
Do you need special tools to bleed brakes?
No, you do not need special tools for the bottle or gravity methods. A piece of clear vinyl tubing (3/16 inch or 1/4 inch fits most vehicles), a glass jar, and a box-end wrench are enough. The vacuum pump method does require a hand-held vacuum brake bleeder, which costs around $30 and speeds up the job significantly.
What order do you bleed the wheels?
For most modern cars with a diagonal split brake system, bleed in this order: right rear, left front, left rear, right front. For older rear-wheel-drive cars with a front-rear split, bleed right rear, left rear, right front, left front. Always start with the wheel farthest from the master cylinder on each circuit.
Final Thoughts on Solo Brake Bleeding
Knowing how to bleed your brakes by yourself saves money and gets your car back on the road faster. The bottle-and-hose method is the best starting point for most people, the gravity method is perfect if you have time, and the vacuum pump method is worth the investment if you plan to do your own brake work regularly. Whichever method you choose, keep the master cylinder topped off, follow the correct wheel sequence, and double-check the pedal feel before driving. Spongy pedal complaints disappear when air is fully purged from the lines.