
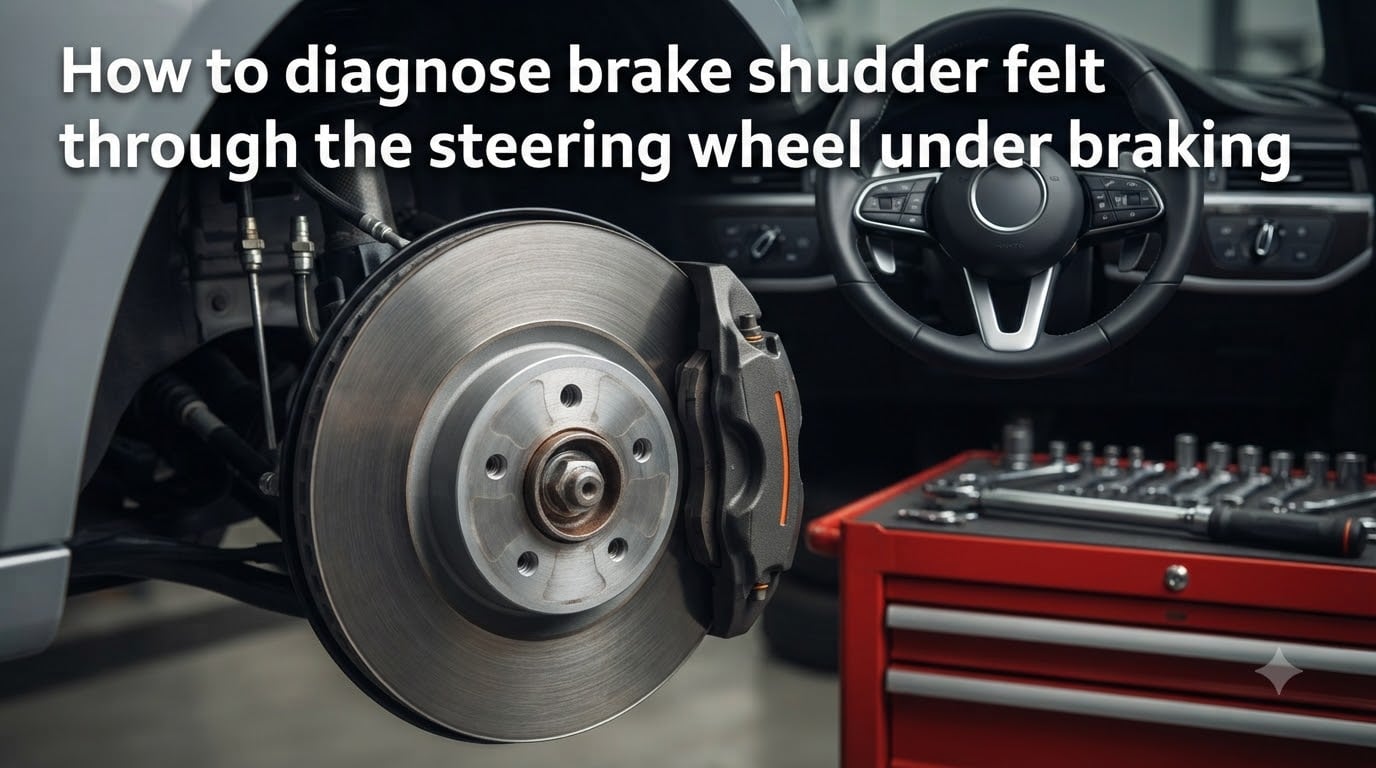
That pulsing sensation rippling through your steering wheel when you press the brake pedal is more than just annoying. It is your car telling you something in the braking system is uneven, worn, or failing. The good news is that you can narrow down the cause at home with a methodical approach, and understanding what to look for can save you from unnecessary parts replacements.
Brake shudder felt through the steering wheel almost always points to the front brakes, since the front rotors connect directly to the steering system through the hub and suspension. Rear brake problems tend to send vibrations through the brake pedal or the seat instead. That single distinction is your first diagnostic clue.
In this guide, I will walk you through how to diagnose brake shudder felt through the steering wheel under braking, covering the most common causes in order of likelihood, speed-specific patterns that no one else explains clearly, and a step-by-step checklist you can follow in your driveway. I have pulled insights from mechanic forums, technical bulletins, and real owner experiences to make sure this covers what actually happens on the road.
Table of Contents
What Is Brake Shudder and Why It Travels to Your Steering Wheel?
Brake shudder is the vibration you feel through the steering wheel, brake pedal, or chassis when you apply the brakes. It happens when brake pads press against a rotor surface that is not perfectly flat or evenly thick. Instead of smooth, consistent friction, the pads bounce over high and low spots, sending rapid pulses through the brake system.
The reason you feel front brake problems in the steering wheel comes down to mechanical connections. Your front brake rotors bolt to the wheel hubs, which connect to the steering knuckles, tie rods, and steering rack. When a rotating rotor has an uneven surface, that imperfection transmits directly through the hub assembly and up the steering column. Rear brake issues do not have this direct steering connection, so they show up as a pulsing brake pedal or a vibration in the seat.
Two technical terms come up constantly when diagnosing brake shudder. Disc Thickness Variation (DTV) means the rotor has worn unevenly so it is thicker in some spots and thinner in others. Lateral runout means the rotor wobbles side to side as it spins instead of running perfectly true. Both conditions produce the same symptom: a shudder through the steering wheel under braking.
How to Diagnose Brake Shudder Felt Through the Steering Wheel Under Braking
The right diagnostic approach starts with observation, not parts swapping. Before removing a single wheel, pay attention to when the shudder occurs, how severe it is, and what else you notice. The pattern tells you more than any single test.
Here is the framework I recommend for narrowing things down:
First, confirm the shudder only happens under braking. If the steering wheel vibrates while cruising without touching the brakes, you are looking at a tire balance or suspension issue, not a brake problem. Second, note the speed range where the shudder is worst. Third, pay attention to brake pedal feel. A pulsing pedal alongside steering wheel vibration points to rotors, while a soft or spongy pedal suggests air in the lines or a caliper problem.
Front vs Rear Brake Shudder: Why the Distinction Matters
Knowing whether the problem is in the front or rear brakes narrows your diagnosis immediately. Most DIYers skip this step and end up replacing parts that were never the issue.
Here is how to tell the difference:
Vibration in the steering wheel: Front brakes. The steering system picks up every imperfection in the front rotors and transmits it directly to your hands. This is the most common pattern.
Vibration in the brake pedal: Could be front or rear. The brake pedal reflects pressure fluctuations from any rotor in the system. If the pedal pulses without steering wheel vibration, check the rear brakes first.
Vibration in the seat or floorboard: Rear brakes. The rear axle sits directly under the cabin, so rear rotor or drum issues send vibrations straight through the floor pan.
You can confirm the front vs rear question with a road test. Find a safe, empty stretch of road and apply the parking brake very gently at low speed. If the shudder appears, the problem is in the rear brakes. If it does not, the front brakes are the likely culprit. Be careful with this test and never yank the parking brake at speed.
Warped Rotors and Disc Thickness Variation (DTV)
Uneven rotor surfaces are the single most common cause of brake shudder through the steering wheel. But the word “warped” is misleading. Most rotors that produce shudder are not actually bent. They have developed Disc Thickness Variation.
DTV happens when brake pad material transfers unevenly onto the rotor surface over time. Every time you brake, a microscopic layer of friction material gets deposited on the rotor. If that deposition is uneven, due to hard braking followed by sitting at a stop with hot pads pressed against the rotor, those deposits build up in patches. The rotor is now effectively thicker in those areas. When the pads pass over these thick spots, they get pushed back slightly, creating the pulsing sensation.
True lateral runout, where the rotor wobbles side to side, is less common but does happen. It can result from improper installation, a dirty hub mounting surface, or impact damage from hitting a curb or pothole. Runout as small as 0.003 inches can produce noticeable shudder.
To diagnose rotor issues:
Jack up the front of the car and remove both front wheels. Spin each rotor by hand and watch the gap between the rotor face and a fixed reference point like the brake pad edge. Any visible wobble or side-to-side movement indicates lateral runout. For DTV, use a micrometer to measure rotor thickness at eight points around the circumference. A variation of more than 0.001 inches is enough to cause shudder.
If you do not have a micrometer, a dial indicator mounted to a fixed bracket can measure runout directly. Most auto parts stores loan these tools for free.
Brake Pad Wear and Uneven Deposits
Brake pads themselves can cause shudder, even when the rotors are in good shape. Worn, glazed, or contaminated pads create uneven friction that mimics rotor problems.
Pad glazing happens when pads overheat from repeated hard braking or from riding the brakes down a long hill. The friction surface becomes hard and glassy, losing its grip and grabbing inconsistently. If you pull the pads and see a shiny, dark, cracked surface instead of a matte gray friction material, they are glazed.
Contamination is another culprit. Oil, grease, or brake fluid leaking onto the pads creates soft spots that grab unevenly. A leaking caliper seal or a leaky wheel bearing can coat the pads in fluid without you realizing it. If one pad looks darker or feels oily compared to the others, contamination is likely.
Uneven pad wear, where one pad is significantly thinner than the others on the same caliper, points to a sticking caliper or slide pin rather than a pad problem. The pad itself is the symptom, not the cause.
If you just installed new pads and rotors and immediately notice shudder, the problem may be improper bedding-in. Bedding-in is the process of transferring an even layer of friction material onto the new rotor surface through a series of controlled stops. Skipping this step or doing it wrong leaves uneven deposits that cause shudder from day one. Most quality pad manufacturers include bedding instructions in the box. Follow them exactly.
Stuck Calipers and Seized Slide Pins
A sticking brake caliper is a frequent but often overlooked cause of brake shudder. When a caliper cannot float freely on its slide pins, it applies uneven pressure to the rotor. One pad drags constantly while the other barely touches, creating heat buildup, uneven wear, and shudder.
Caliper slide pins are the metal guide bolts that let the caliper slide back and forth as the pads wear. Over time, the grease on these pins dries out or gets contaminated with water and road grime. The pins seize in their bores, and the caliper stops floating. This is one of the most common brake problems I see discussed in mechanic forums, and it often gets misdiagnosed as warped rotors because the symptoms overlap.
Signs of a sticking caliper include excessive brake dust on one wheel compared to the other, a wheel that is noticeably hotter after driving, the car pulling to one side under braking, and a burning smell from one corner.
To diagnose, jack up the car and have a helper press and release the brake pedal while you watch the caliper. It should squeeze inward when the pedal is pressed and retract slightly when released. If it does not retract, the caliper piston or slide pins are seized. Pull the slide pins, wipe them clean, inspect for rust or pitting, and regrease with high-temperature silicone brake grease. If the pins are heavily corroded, replace them. They are inexpensive.
A seized caliper piston is a more serious issue. The piston can rust inside the bore, especially in vehicles driven in winter salt conditions. If the piston will not retract with a caliper compression tool, the caliper needs to be rebuilt or replaced.
Speed-Specific Diagnosis: High-Speed vs Low-Speed Shudder
No competitor I found explains this, but the speed at which shudder occurs is one of your strongest diagnostic clues. Different causes produce vibration at different speeds, and understanding these patterns can save you from guessing.
Shudder at highway speeds, 55 to 70 mph, under light braking: This is the classic DTV pattern. At highway speeds, even a tiny thickness variation gets amplified by the rotational speed of the rotor. Light braking means the pads are just barely touching, so they ride over the uneven spots instead of pressing through them. This is the most common complaint I see in forums, and it almost always points to rotor thickness variation.
Shudder at low speeds, under 30 mph, during moderate braking: This pattern often points to more severe rotor damage, such as deep scoring, a cracked rotor, or a badly warped rotor with significant runout. At low speeds the pads have more time to follow the rotor surface, so severe imperfections create a slower, more pronounced pulsing. It can also indicate a suspension component that is worn enough to allow wheel movement under braking torque.
Shudder only under hard braking: If the steering wheel shakes only when you slam the brakes, check whether ABS is activating. ABS pumps the brakes rapidly to prevent lockup, and that pulsing is normal during a panic stop on a slippery surface. But if ABS activates during normal hard braking on dry pavement, a wheel speed sensor may be faulty. If ABS is not involved, hard-braking shudder can indicate severely warped rotors or a loose wheel bearing that allows the rotor to tilt under heavy load.
Shudder that comes and goes: Intermittent shudder is the most frustrating to diagnose. It often points to a caliper that is starting to seize but has not fully stuck yet. The caliper sticks intermittently, builds heat, and creates uneven pad deposits that cause shudder temporarily until the rotor cools and the deposits smooth out. Moisture in the brake fluid can also cause intermittent grabbing.
Non-Brake Causes: Wheel Bearings, Tires, and Suspension
Not every vibration under braking comes from the brakes themselves. Worn wheel bearings, tire issues, and loose suspension components can all produce steering wheel shake that gets worse when you brake, because braking shifts weight forward and loads the front suspension.
Wheel bearings: A worn front wheel bearing allows the hub and rotor to wobble slightly. At speed, this creates a humming or grinding noise and a vibration that intensifies under braking as the brake torque pushes against the loose bearing. To test, jack up the front of the car and grab the tire at the 12 and 6 o’clock positions. Push in and pull out firmly. Any play or clunking indicates a worn bearing. Repeat at 3 and 9 o’clock to check tie rod ends. A healthy bearing has zero detectable play.
Tire balance and tire issues: An out-of-balance tire or a tire with a separated belt can cause steering wheel vibration that becomes more noticeable under braking. The key difference is timing. Tire-related vibration is usually present at a specific speed range even without braking. If the vibration appears only when you press the pedal, it is brake-related. If it is there all the time but gets slightly worse under braking, check the tires.
Suspension components: Worn control arm bushings, ball joints, or tie rod ends allow the front wheels to move slightly under the weight transfer of braking. This movement can feel like shudder. The clue is that suspension-related vibration is usually accompanied by a clunking noise, wandering steering, or uneven tire wear. Inspect all front suspension components for play with the car jacked up.
Loose wheel nuts: Never skip the basics. A loose wheel nut allows the wheel and rotor to shift under braking torque, creating shudder. After any tire rotation or brake work, recheck wheel nut torque after 50 miles of driving. Use a torque wrench, not an impact gun, and follow the star pattern.
Step-by-Step Diagnostic Checklist
Follow this checklist in order to systematically narrow down the cause of your brake shudder. Each step takes a few minutes and eliminates possibilities without spending money on parts.
Step 1: Road test and document the symptoms. Drive at various speeds and brake under different conditions. Note the speed range where shudder is worst, whether it happens under light or hard braking, and whether you feel it in the steering wheel, pedal, or seat. Write it down.
Step 2: Confirm it is brake-related. Drive at the speed where shudder occurs without touching the brakes. If the vibration is still there, the problem is tires, suspension, or wheel bearings. If it only appears under braking, continue to the next steps.
Step 3: Check for pulling. Brake firmly on a flat, straight road with your hands loosely on the wheel. If the car pulls left or right, you have a caliper or pad issue on one side. Uneven braking force is a strong indicator of a stuck caliper or contaminated pads.
Step 4: Inspect wheel temperatures. After a normal drive including some braking, carefully feel each wheel. A wheel that is significantly hotter than the others indicates a sticking caliper dragging that brake. Use caution since a dragging brake can make a wheel extremely hot.
Step 5: Jack up the car and check for play. Grab each front tire at 12 and 6 o’clock and rock it. Play here means a worn wheel bearing. Then grab at 3 and 9 o’clock and rock. Play here means worn tie rod ends. Neither should move.
Step 6: Remove the wheels and inspect the rotors. Look for deep scoring, blue heat marks, cracking, or a visible lip on the outer edge. Spin the rotor by hand and watch for wobble. Measure thickness at multiple points with a micrometer if available.
Step 7: Inspect the brake pads. Check for uneven wear between the inner and outer pad, glazing, contamination, or cracking. Note if one side is worn significantly more than the other, which points to a caliper problem.
Step 8: Check the caliper slide pins. Remove the caliper and pull the slide pins. They should slide smoothly with no resistance. If they are dry, rusted, or pitted, clean and regrease them or replace them.
Step 9: Check brake fluid condition. Old, moisture-laden brake fluid causes internal corrosion and inconsistent braking. If the fluid is dark brown or more than two years old, flush the system.
Step 10: Reassemble with proper torque. Use a torque wrench on all fasteners, especially wheel nuts. Follow the star pattern and the manufacturer’s torque spec. Improper wheel nut torque is a leading cause of rotor runout after brake service.
Is It Safe to Drive With Brake Shudder?
This is one of the most common questions in car forums, and the answer depends on severity and cause. Mild shudder from minor DTV is generally safe to drive with for a short period. The vibration is annoying but does not immediately compromise braking performance. However, it will get progressively worse as the uneven wear continues.
Moderate to severe shudder is not safe to ignore. If the steering wheel shakes hard enough to blur your vision or the brake pedal kicks back significantly, your braking distance is increased. In an emergency stop, that delayed response can be the difference between avoiding a collision and not.
Specific red flags that mean stop driving immediately include: a grinding or scraping noise, the brake pedal going to the floor, the car pulling hard to one side under braking, or a spongy brake pedal. Any of these indicate a safety-critical failure that needs immediate attention.
My recommendation is to diagnose and fix brake shudder as soon as you notice it. What starts as a minor pad deposit issue can escalate into a seized caliper, a ruined rotor, or a brake failure if left alone for months.
Cost to Fix Brake Shudder: What to Expect
Cost is a major worry for most drivers, and the uncertainty of not knowing what is wrong makes it worse. Based on forum data and real-world repair estimates, here is what you can expect to pay for the most common brake shudder fixes.
Having your front rotors resurfaced, also called machining, typically costs between $167 and $294 per axle at a shop. This is the cheapest fix if your rotors are thick enough to be cut and the cause is DTV or minor runout. Many shops include new pads at this price point.
Replacing front rotors and pads together runs from $294 to $594 per axle, depending on the vehicle and parts quality. This is the most common repair for brake shudder and addresses the two most frequent causes at once. European vehicles and performance cars with larger rotors sit at the higher end.
A seized caliper replacement adds $130 to $350 per caliper, on top of the rotor and pad cost. Budget for this if your diagnostic steps point to a sticking caliper. You should always replace calipers in matched pairs per axle to keep braking balanced.
If you do the work yourself, rotor and pad kits are available for $80 to $250 per axle depending on the vehicle. Calipers run $40 to $120 each. The trade-off is your time and the need for basic hand tools, a jack and stands, a torque wrench, and ideally a micrometer or dial indicator.
Preventing Brake Shudder From Coming Back
Once you fix the current issue, a few habits will keep brake shudder from returning. These are the practices that mechanics and experienced track drivers rely on.
After any brake job, properly bed in the new pads and rotors. Follow the manufacturer’s procedure, which typically involves a series of moderate stops from 60 mph followed by a cool-down period with the brakes released. This transfers an even friction layer onto the rotors and prevents DTV from developing.
Avoid sitting stopped with your foot on the brake after a hard stop. The pads held against a hot rotor create a localized hot spot that leaves a thick pad deposit. At the next light after hard braking, let the car creep forward slightly or shift into neutral.
Clean the hub mounting surface meticulously before installing rotors. Even a tiny flake of rust or dirt between the hub and rotor creates runout. Use a wire brush or Scotch-Brite pad on the hub face, wipe it clean, and verify with a straightedge. A dial indicator on the installed rotor is the gold standard.
Always use a torque wrench on wheel nuts, never an impact gun. Over-torquing warps rotors. Under-torquing lets the wheel shift. Uneven torque creates lateral runout. Recheck torque after 50 miles on any wheel that has been removed.
Flush brake fluid every two years. Old fluid absorbs moisture, which causes internal corrosion in calipers and reduces boiling point. A simple fluid flush is the cheapest insurance against caliper problems.
FAQs
What causes shuddering under braking?
The most common causes of shuddering under braking are uneven rotor surfaces (Disc Thickness Variation), lateral runout, worn or glazed brake pads, sticking calipers with seized slide pins, and loose wheel bearings. DTV from uneven pad material deposits is the single most frequent cause, responsible for the majority of steering wheel shudder complaints.
Why is the brake pulsating felt in my steering wheel?
Brake pulsation is felt in the steering wheel because the front brake rotors connect directly to the steering system through the wheel hub, steering knuckle, and tie rods. When a rotor has an uneven surface, that imperfection transmits through the hub and up the steering column. Rear brake issues do not have this direct connection, so they are felt in the pedal or seat instead.
How to fix brake judder under light braking?
To fix brake judder under light braking, first diagnose whether the cause is DTV, pad deposits, or a sticking caliper. If rotors have DTV, have them resurfaced or replaced. Clean and regrease caliper slide pins. Install new pads and properly bed them in by performing a series of moderate stops from 60 mph followed by a cool-down period. Always torque wheel nuts to spec using a torque wrench.
Why does my steering wheel shudder when I brake hard?
Hard braking shudder can indicate severely warped rotors, a loose wheel bearing that tilts under heavy brake load, or ABS activation. If the pulsing is rapid and rhythmic on dry pavement, check for a faulty wheel speed sensor causing false ABS engagement. If ABS is not involved, inspect rotors for cracks and deep scoring, and check wheel bearings for play.
How much does it cost to fix a brake shudder?
Fixing brake shudder typically costs between $167 and $594 per axle. Rotor resurfacing with new pads runs $167 to $294 per axle. Full rotor and pad replacement costs $294 to $594 per axle depending on the vehicle. A seized caliper replacement adds $130 to $350 per caliper. DIY repairs using quality parts can reduce costs to $80 to $250 per axle.
Is it okay to drive with a brake shudder?
Mild brake shudder from minor DTV is generally safe for short-term driving but will worsen over time. Moderate to severe shudder that blurs your vision or kicks the brake pedal is not safe and increases stopping distance. Stop driving immediately if you hear grinding, the pedal goes to the floor, the car pulls hard to one side, or the pedal feels spongy. Diagnose and fix any brake shudder as soon as possible.
What is the most common cause of brake judder?
Disc Thickness Variation (DTV) is the most common cause of brake judder. DTV occurs when friction material from the brake pads deposits unevenly onto the rotor surface over time, creating spots that are thicker than others. This typically results from improper bedding-in, riding the brakes after hard stops, or uneven caliper pressure from sticking slide pins.
Should I replace rotors and pads at the same time?
Yes, in most cases you should replace rotors and pads together. New pads on worn or uneven rotors will quickly develop the same deposit pattern that caused the original shudder. New rotors with old pads risk glazing and uneven transfer. Replacing both as a set ensures a clean, even friction surface and allows proper bedding-in of the new components.
Conclusion
Diagnosing brake shudder felt through the steering wheel under braking comes down to a methodical process. Start with a road test to identify the speed and conditions where the vibration occurs. Use the front-vs-rear distinction to narrow your focus. Then work through the causes in order of likelihood: rotor DTV, pad issues, caliper problems, and finally non-brake causes like wheel bearings and suspension.
The speed-specific patterns I covered give you an edge that most diagnostic guides skip. Highway-speed shudder under light braking almost always means DTV. Low-speed pulsing suggests severe rotor damage. Intermittent shudder points to a caliper that is on its way to seizing.
Do not put off brake diagnosis. What starts as a mild vibration can escalate into unsafe braking performance. Follow the step-by-step checklist, use the right tools, and if anything is beyond your comfort level, take it to a trusted mechanic with your diagnostic notes in hand. Knowing what is wrong before you walk into the shop keeps you in control of the repair.