
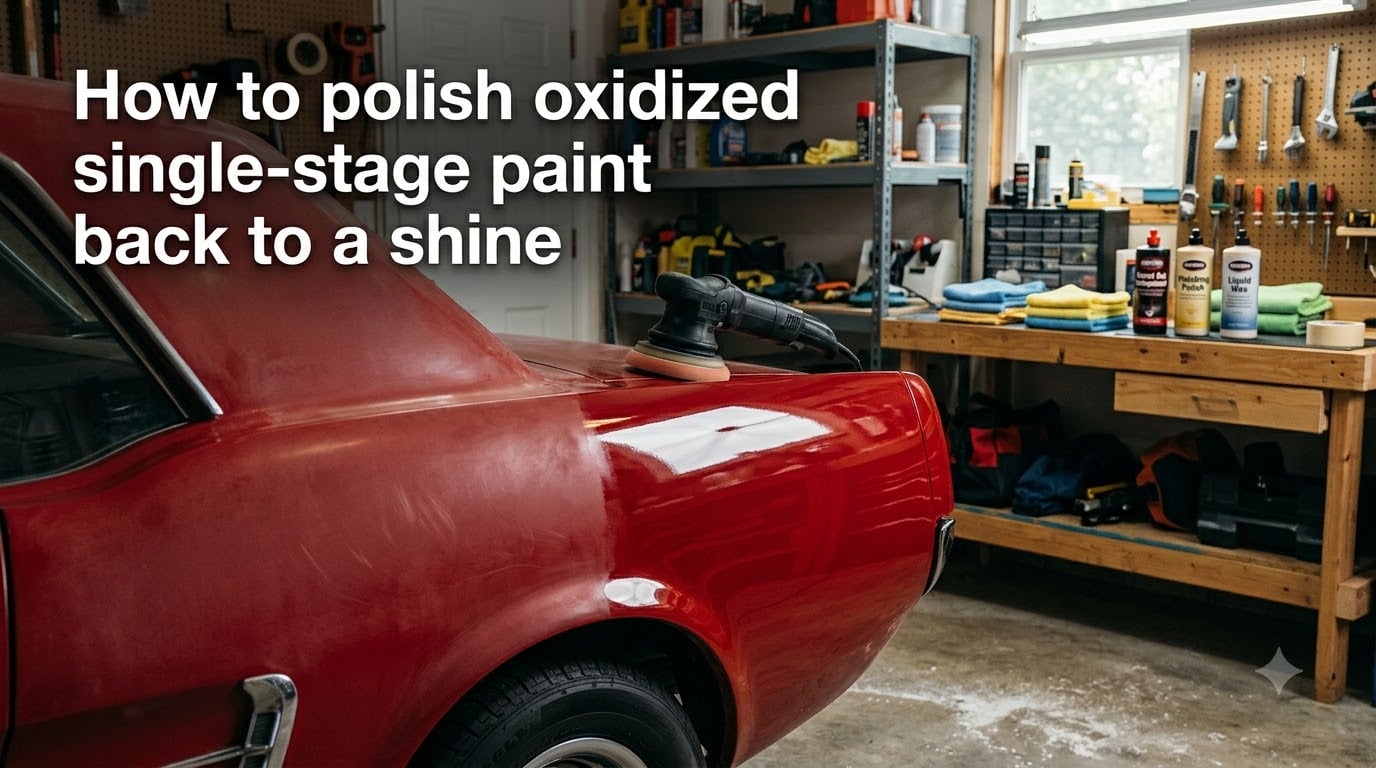
If your classic car, truck, or motorcycle has paint that looks cloudy, faded, or chalky, oxidation is the likely culprit. Vehicles finished with single-stage automotive paint are especially vulnerable because the pigment sits right at the surface, exposed to UV rays, salt, and weather without the protection of a clear coat. The good news is that you can usually reverse this damage yourself.
Learning how to polish oxidized single-stage paint back to a shine is a skill every classic car owner should have in their toolbox. With the right abrasives, a bit of patience, and a careful approach, you can bring even heavily faded paint back to a deep, wet-looking gloss.
In this guide, I will walk you through everything from identifying single-stage paint to assessing oxidation severity, choosing between hand and machine polishing, and protecting your results. Whether you are restoring a vintage Miata, an E30, or an antique hot rod, these steps will help you bring that paint back to life.
Table of Contents
What Is Single-Stage Paint and Why Does It Oxidize?
Single-stage paint is an automotive coating that combines color pigment and gloss in one layer. Unlike the two-stage paint system used on most modern vehicles, there is no separate clear coat on top. The paint you see is the paint that protects the body underneath.
This type of paint was standard on cars manufactured before the mid-to-late 1980s, and it is still used today on commercial vehicles, some classic car restorations, and budget repaints. Red, black, and single-stage whites are particularly notorious for fading because their pigments are more reactive to UV exposure.
Because the pigment is exposed directly to sunlight, moisture, and airborne contaminants, single-stage paint oxidizes much faster than two-stage systems. Oxidation happens when oxygen molecules bond with the paint’s surface, breaking down the resin that holds the pigment together. The result is a dull, chalky film sitting on top of otherwise healthy paint underneath.
The key insight is this: oxidation usually only affects the top few microns of the paint film. If you can carefully remove that dead layer, the rich color underneath is still there waiting to be revealed. That is exactly what paint correction accomplishes.
How to Identify if Your Car Has Single-Stage Paint
Before you start polishing, you need to confirm that your vehicle actually has single-stage paint. If you compound a modern two-stage system the wrong way, you risk burning through the clear coat and causing permanent damage.
The easiest way to tell is to do the rag test. Take a clean white microfiber cloth, apply a small dab of finishing polish or rubbing compound, and rub it firmly on a hidden area like the inside of the door jamb or under the hood. If the rag picks up body color, you have single-stage paint. If the rag stays clean, you are dealing with a clear coat system.
Age is another strong indicator. Most passenger cars built after the late 1980s use two-stage paint. Classic cars, antiques, hot rods, and some budget repaints commonly use single-stage. If your vehicle has patches that look cloudy or chalky while other areas still shine, that uneven fading is a classic sign of single-stage paint breaking down.
Oxidation Severity Guide: Light, Medium, and Heavy
Not all oxidation is created equal, and matching your approach to the severity will save you hours of work and reduce the risk of damage. Use this guide to assess your paint before you start.
Light oxidation shows up as a dull, slightly cloudy finish with no chalky residue when you run your hand across it. The color still looks consistent, just muted. A finishing polish and a soft foam pad, often applied by hand, is usually enough to bring back the gloss.
Medium oxidation is visible as patchy fading with a noticeable white or gray haze, especially on horizontal surfaces like the hood and roof. The surface feels slightly rough. You will need a cutting compound followed by a finishing polish, and a dual-action polisher will make this job much faster than working by hand.
Heavy oxidation leaves the paint looking chalky, with color literally wiping off onto a rag when you touch it. The surface may feel powdery and look almost white on red or dark-colored cars. This level of damage requires aggressive compounding, possibly wet sanding, and a real risk of burning through the paint. If you are a beginner, heavy oxidation is the point where calling a professional detailer or paint shop makes sense.
Tools and Products You Will Need
Having the right supplies on hand before you start will keep the process smooth and prevent costly mistakes. Here is what I recommend based on what works for single-stage paint correction.
For surface preparation, you need a quality car wash soap, a clay bar or clay mitt, detailing spray for lubrication, and a stack of clean microfiber towels. The clay bar is non-negotiable. Forum detailers on r/AutoDetailing consistently stress that skipping the clay step drags contaminants across the paint and adds swirl marks during compounding.
For the correction phase, you want a cutting or rubbing compound for heavier oxidation and a finishing polish to refine the surface and restore gloss. Meguiar’s Ultimate Compound and Ultimate Polish come up repeatedly in forum threads as reliable choices for single-stage paint. You will also need foam pads in cutting, polishing, and finishing grades.
For protection afterward, you need a quality carnauba wax, a synthetic sealant, or a ceramic coating. I will cover why this step matters so much in the protection section below.
If you are using a machine, a dual-action (DA) polisher is the safest option for most DIYers. Rotary polishers are faster but much riskier on thin single-stage paint because they generate more heat in one spot.
Step-by-Step Restoration Process for Oxidized Single-Stage Paint
This is the core process I use to bring faded single-stage paint back to a shine. Follow these steps in order, and always test on a small hidden panel first.
Step 1: Wash the vehicle thoroughly. Start with a two-bucket wash using a pH-neutral car shampoo. Dirt, grime, and old wax will clog your pads and scratch the paint during polishing. Pay extra attention to horizontal surfaces where oxidation and contamination build up the most.
Step 2: Decontaminate with a clay bar. Spray a clay lubricant or detailing spray onto a small section, then gently rub the clay bar back and forth. You will feel the bar grab at first, then glide smoothly as the embedded contaminants come off. Fold the clay frequently to expose a clean face. Never skip this step on single-stage paint.
Step 3: Do a test spot in a hidden area. Pick a spot like the lower rear quarter panel or under the trunk lip. Apply your cutting compound with a polishing pad and work a 2-foot by 2-foot section using your polisher on a low speed. This test tells you how much pressure, what pad, and how many passes you need before you commit to the whole car. It also confirms whether your paint is healthy enough to take the correction.
Step 4: Compound the oxidized paint. Working in 2-foot by 2-foot sections, apply a thin line of cutting compound to your pad. Start the polisher at a low speed to spread the product, then bump up to medium speed. Use slow, overlapping passes with light to moderate pressure. The abrasive in the compound is removing that dead, oxidized layer. You should see color transfer on your pad, which is normal and confirms you are working single-stage paint.
Step 5: Refine with a finishing polish. After compounding, the surface will look better but may still have micro-marring and haze. Switch to a softer finishing pad and a fine polish. This step removes the swirl marks left by the compound and brings up the deep, wet-look gloss. Work the same sections and wipe clean with a microfiber towel between each step.
Step 6: Inspect and repeat if needed. Single-stage paint often needs two or even three correction passes, especially on heavily oxidized areas. Check your work under good lighting and from different angles. If haze or dullness remains, repeat the polishing step before moving on.
Step 7: Seal and protect the restored paint. This is where most people stop too early. Without protection, oxidation can start creeping back within weeks. Apply a carnauba wax for a traditional deep look, a synthetic sealant for longer durability, or a ceramic coating for the longest-lasting protection. I cover this step in detail further down.
Hand Polishing vs Machine Polishing: Which Should You Use
One of the most common questions I see on detailing forums is whether you can polish single-stage paint by hand, or if a machine is mandatory. The short answer is that both methods work, but they suit different situations.
Hand polishing is the safest approach and perfect for beginners. You have complete control over pressure and can feel how the paint is responding. For light oxidation on small panels, a good finishing polish applied with a foam applicator can produce noticeable improvement in 20 to 30 minutes per panel. The downside is that hand polishing is physically tiring, slow, and limited in how much material it can remove. Heavily oxidized paint will test your patience if you only work by hand.
Machine polishing with a dual-action (DA) polisher is what most detailers recommend for medium to heavy oxidation. A DA polisher moves the pad in two simultaneous patterns, which cuts faster than hand polishing but stays much safer than a rotary because it does not concentrate heat in one spot. You can correct an entire car in 4 to 8 hours with a DA, compared to 20 to 30 hours by hand on the same level of damage.
Rotary polishers are the most aggressive option. They spin in a single direction and can remove serious oxidation fast, but they also generate significant heat and increase the burn-through risk on thin single-stage paint. I do not recommend rotary polishers for first-timers working on classic or antique vehicles.
If you are not sure which route to take, start with hand polishing on a test panel. If you are happy with the improvement but it is taking too long, invest in an entry-level DA polisher. The forum consensus is clear: DA polishers give you professional-looking results with minimal risk if you follow the steps carefully.
Common Mistakes to Avoid When Polishing Single-Stage Paint
Single-stage paint is unforgiving. One wrong move can leave you with a burn-through that requires a full repaint. Here are the mistakes I see most often, and how to avoid each one.
Skipping the test spot. This is the number-one mistake beginners make. Paint thickness varies wildly on older vehicles, especially on cars that have been repainted or had bodywork. Always test your compound, pad, and pressure on a hidden area before you commit to a visible panel.
Using too aggressive a pad or compound. Heavy-cut pads and coarse rubbing compounds can remove paint faster than you realize. On single-stage paint, where the pigment itself is what you are polishing, removing too much means burning through to the primer. Start with the least aggressive combination that gets results, then step up only if needed.
Running the polisher dry. Once a compound or polish dries out, it stops cutting cleanly and starts dragging abrasive particles across the paint. This causes micro-scratches and swirl marks. Work in small sections, stop while the product is still wet, and wipe off residue before it dries.
Working in direct sunlight or on hot paint. Heat softens paint and accelerates compound drying. Both increase the risk of burning through. Work in a garage or shaded area, ideally with surface temperatures below 80 degrees Fahrenheit.
Not protecting after correction. This is the mistake that lets oxidation come roaring back. Freshly polished single-stage paint is raw and exposed. Without a wax, sealant, or coating on top, UV rays will start breaking down the pigment again within weeks. Always finish with protection.
Confusing single-stage with two-stage paint. If you compound a clear-coated car expecting color transfer on your pad, you may keep pushing past the clear coat and into the base coat before you realize your mistake. Always do the rag test first.
How to Protect Single-Stage Paint After Restoration?
Polishing restores the shine, but protection is what keeps it there. Single-stage paint has no built-in clear coat, so whatever you apply on top is the only barrier between your freshly revived pigment and the elements.
The traditional choice is carnauba wax. It gives single-stage paint a warm, deep glow that many classic car owners love. The trade-off is durability. Carnauba typically lasts 1 to 3 months before it needs reapplication. If your car lives outside or gets driven regularly, plan on waxing every 6 to 8 weeks.
Synthetic polymer sealants are the middle-ground option. They last 4 to 6 months, apply easily, and provide strong UV protection. Many detailers recommend layering a sealant underneath a carnauba top coat for the best combination of durability and visual depth.
Ceramic coatings offer the longest protection, often lasting 2 to 5 years with proper maintenance. They bond directly to the paint and create a hard, hydrophobic surface that resists UV, chemicals, and contamination. The application process is more demanding and requires the paint to be flawlessly corrected first, but for a show car or collector vehicle, the long-term payoff is significant.
Beyond coatings, simple habits make a big difference. Garage the vehicle whenever possible. Wash it every two weeks with a pH-neutral shampoo to remove contaminants before they bond. Use a quick detailer between washes to remove bird droppings and tree sap quickly, since both can etch into single-stage paint within hours.
FAQs
How to fix oxidized single-stage paint?
Fix oxidized single-stage paint by washing the surface, decontaminating with a clay bar, applying a cutting compound with a foam pad to remove the dead oxidized layer, refining with a finishing polish, and sealing with wax, sealant, or ceramic coating. Always test on a hidden area first.
Can you polish single-stage paint by hand?
Yes, you can polish single-stage paint by hand using a foam applicator and a finishing polish. Hand polishing works well for light oxidation and small panels, but it is slow and physically demanding. For medium to heavy oxidation, a dual-action polisher is much faster and more effective.
Does WD-40 remove oxidation on car paint?
WD-40 can temporarily mask oxidation by adding oil to the surface, making faded paint look shinier for a short time. However, it does not remove the oxidized layer, and the effect washes off quickly. Proper paint correction with compound and polish is the only way to truly restore oxidized single-stage paint.
How long does polished single-stage paint stay shiny?
Polished single-stage paint can stay shiny for several months to a few years depending on the protection applied. Carnauba wax lasts 1 to 3 months, synthetic sealants last 4 to 6 months, and ceramic coatings can protect for 2 to 5 years. Without protection, oxidation can begin returning within weeks.
Is there a way to reverse oxidation permanently?
Oxidation cannot be reversed permanently because single-stage paint constantly exposes pigment to UV rays. Polishing removes the current oxidized layer and restores the shine, but applying a durable protective coating like ceramic and maintaining it regularly is the only way to slow oxidation from coming back.
Final Thoughts on Restoring Single-Stage Paint
Knowing how to polish oxidized single-stage paint back to a shine gives you the power to rescue faded classics without paying for a full repaint. The process comes down to seven steps: wash, clay, test, compound, polish, inspect, and protect. Take your time, start with the least aggressive approach, and never skip the test spot.
Single-stage paint rewards patience. Work in small sections, keep your pads clean, and protect the finished surface as soon as you are done. Do those things, and that dull, chalky finish can become a deep, mirror-like shine that turns heads at every car show.