
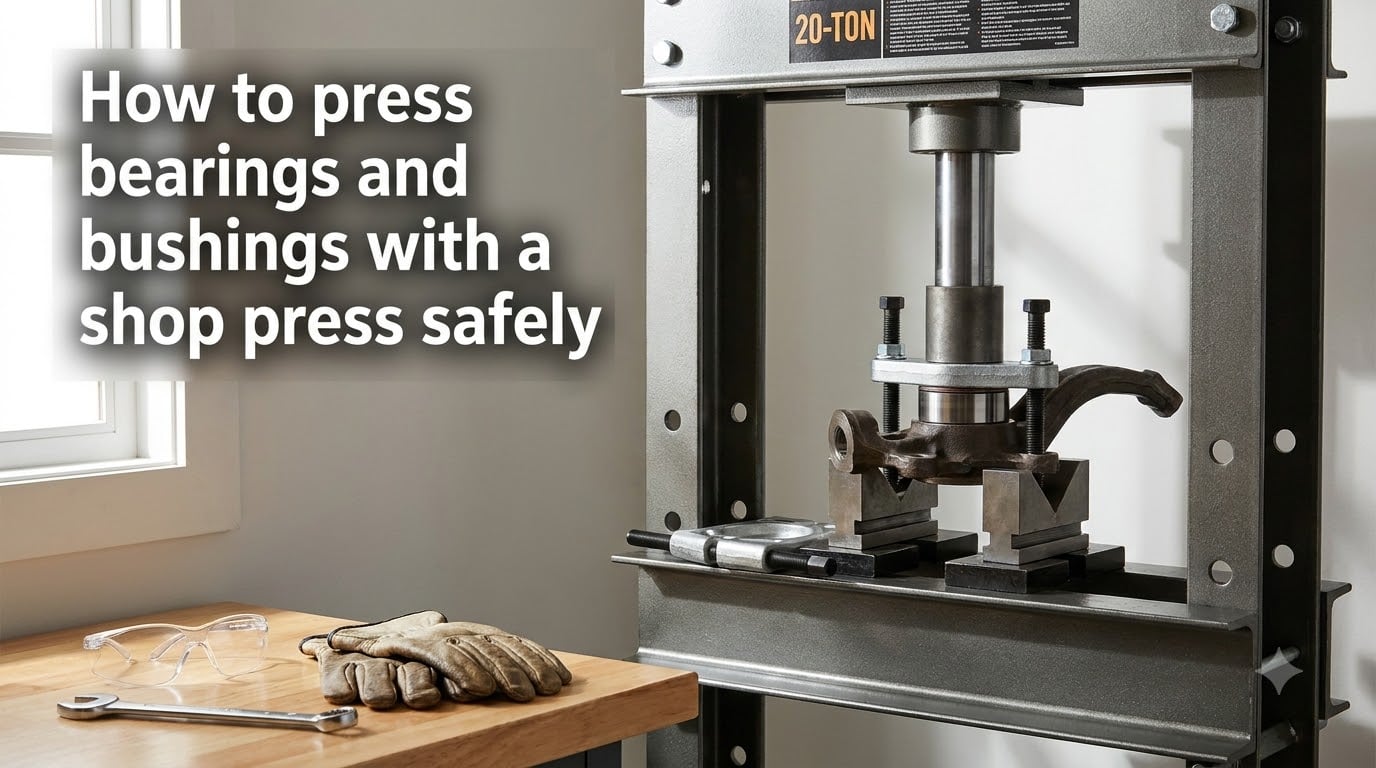
Learning how to press bearings and bushings with a shop press safely can save you hundreds of dollars per job and give you total control over your own repairs. Shops commonly charge $150 or more just to press a single wheel bearing, and that adds up fast when you maintain multiple vehicles. Our team has spent years pressing stubborn bearings, seized bushings, and rusted u-joints in home garages and professional shops alike, and we have learned that success comes down to three things: the right tonnage, proper tooling, and respect for the forces involved.
A hydraulic shop press applies steady, controlled force that no hammer or vise can match. But that same force can launch a bearing across the room, crack a control arm, or cause serious injury if you skip the basics. This guide walks through everything from choosing your press size to the exact step-by-step process for both bearings and bushings, plus the temperature tricks and alternative methods that no top-ranking competitor covers well.
Whether you are wrestling with a rusted front wheel bearing on a daily driver or installing fresh control arm bushings on a project car, the procedures below will help you get the job done right the first time.
Table of Contents
Understanding Shop Press Basics
A shop press is a hydraulic machine that uses a pumped cylinder to push a ram downward with measurable, repeatable force. The ram drives components into or out of their housings through what is called a press fit, where the inner part is slightly larger than the bore it sits in.
That interference fit is what holds a bearing or bushing in place under normal operating loads. Pressing replaces that fit by overcoming the friction with controlled force, ideally pushing on the component straight and square so it seats evenly.
The two numbers that define a press are tonnage, which is the maximum force it can apply, and the daylight opening, which is the vertical clearance between the ram and the bed. Ram stroke is how far the ram travels, and it matters more than most beginners realize for longer components.
Most home and small shop presses are H-frame hydraulic units, hand-pumped or air-over-hydraulic. They range from 6-ton benchtop models to 20- and 50-ton floor-standing units. For automotive bearing and bushing work, a 20-ton H-frame is the sweet spot for capacity, price, and footprint.
How to Press Bearings and Bushings with a Shop Press Safely: Choosing the Right Tonnage
Picking the correct tonnage is the single most important decision you will make, and it is the most common question DIY mechanics ask on forums. The answer depends on what you are pressing and how stuck it is.
A 6-ton press handles small bushings, light u-joints, and pinion bearings, but most users find it underpowered for anything automotive that has seen road salt. A 12-ton press works for many control arm bushings, smaller wheel bearings on compact cars, and most u-joints, and it is a popular first press for hobbyists.
Forum mechanics overwhelmingly recommend a 20-ton press as the minimum for automotive wheel bearings, especially on trucks, SUVs, and any vehicle driven in winter conditions. Rusted and seized bearings routinely need 15 tons or more to break loose, leaving you no headroom on a 12-ton unit.
Heavy truck hubs, kingpin bushings on semis, and large sleeve bearings benefit from a 50-ton press, but that is overkill for the average home builder.
One critical note: tonnage ratings assume you push on the correct surface. A 20-ton press can still damage a bearing if you load the inner race while the outer race is unsupported. Tooling and technique often matter more than raw capacity.
Essential Safety Precautions and Protective Equipment
Safety is not a footnote here. A shop press stores enormous energy, and when something lets go, it lets go violently. Every step below comes from real mistakes reported by mechanics.
Wear the right gear. ANSI Z87.1 safety glasses are non-negotiable, and a face shield is better when pressing large bearings. Leather gloves protect from sharp edges but should fit closely so they do not get caught in the press. Steel-toe boots guard against dropped parts and arbor plates.
Inspect before every job. Check the frame for cracks, the ram for leaks, the gauge (if equipped) for accurate readings, and the bed pins for wear. A cracked weld on a cheap H-frame can fail catastrophically under load.
Support the workpiece properly. The single biggest cause of press injuries is a component that pops out because it was not supported evenly. Use matched arbor plates or V-blocks so the load is balanced across the full diameter of the bore.
Never stand directly in line with the ram. Position yourself to the side so a launched component flies past you, not at you. Many experienced press operators run the pump from an angle and watch the gauge rather than staring straight down the ram.
Bleed pressure slowly. Releasing load suddenly can cause a just-pressed bearing to spring back out. Back the ram off gradually so the component settles into its final position.
Keep the area clear. No bystanders, no loose tools on the bed, no phones in your hand. A distraction at full pressure is exactly when failures happen.
Tooling You Need: Arbor Plates, Bearing Splitters, and V-Blocks
The right accessories turn a press from dangerous to precise. Skipping them is the difference between a clean install and a ruined part.
Arbor plates are flat steel plates with notches and slots that support the workpiece from below. You slide them across the bed to find a slot that lets the bearing pass through while still catching the housing. A good set has multiple slot widths for different bore sizes.
A bearing splitter is a two-piece wedge tool that hooks behind a bearing or bushing so you can pull it straight out without damaging the shaft. It is essential for removing bearings that sit on a stub axle where you cannot get a socket behind them.
V-blocks cradle round shafts so they do not roll or skew while you press. Use them for u-joints, pinion shafts, and any cylindrical part that needs to stay centered.
Sockets and drivers in a range of sizes let you push only on the correct race. For installation, you push on the race that fits the bore. For wheel bearings, that means pushing on the outer race when pressing into the knuckle, never on the inner race.
A press brake kit and step mandrels are nice for specialty work like bending brackets or pressing in seals, but they are not needed for most bearing and bushing jobs.
Buy tooling as you need it rather than in a giant kit. The two pieces beginners always wish they had on day one are a bearing splitter and a matched set of arbor plates.
Step-by-Step: Pressing Bearings Out and In
This is the core procedure, and it works for wheel bearings, pinion bearings, and most press-fit bearings in housings. Follow every step in order.
Step 1: Clean and inspect. Remove grease, rust, and debris from the housing and the bearing. Apply penetrating oil to seized bearings and let it soak for at least 30 minutes, ideally overnight.
Step 2: Position the housing on arbor plates. Place the bearing housing face down on the arbor plates so the bearing can drop through a slot. Make sure the housing sits flat and is fully supported on the outer rim.
Step 3: Support the inner race for removal. Use a bearing splitter or a socket that fits against the inner race only. The socket must be small enough to pass through the bore as the bearing exits.
Step 4: Lower the ram slowly. Bring the ram into contact with the driver or splitter, then pump slowly while watching alignment. If the bearing starts to cock or skew, stop immediately, re-square, and try again.
Step 5: Apply steady pressure until the bearing releases. A rusted bearing may sit motionless under load for several seconds before popping free. Stay clear of the line of fire and keep the pressure on until it drops out.
Step 6: Clean the bore and inspect. Remove burrs with a honing stone or fine sandpaper. The bore should be smooth, round, and within tolerance for the new bearing.
Step 7: Start the new bearing by hand. Square the new bearing in the bore and start it with light taps from a dead-blow mallet so it cannot tilt under the ram.
Step 8: Press using the correct driver. Place a driver against the outer race only and lower the ram slowly. Stop the instant the bearing seats flush, because over-travel will damage the bearing.
Step 9: Verify seating. Spin the bearing by hand. It should turn smoothly with no notchiness. Any roughness means it was loaded on the wrong race or cocked during install.
Step-by-Step: Pressing Bushings Out and In
Bushings follow the same principles but are more forgiving because rubber and polyurethane have some give. Steel sleeve bushings press like bearings.
Step 1: Mark the orientation. Control arm bushings often have an offset or a specific clocking position. Scribe a reference mark on the arm and the bushing before removal.
Step 2: Support the arm on arbor plates. Use a slot that clears the bushing outer shell. For control arms, support the arm close to the bushing boss to prevent bending.
Step 3: Drive the old bushing out. Use a socket or pipe that just fits inside the boss to push the bushing through. Old rubber bushings often tear, leaving the steel shell behind, which you then slit with a hacksaw and collapse inward to remove.
Step 4: Lube and start the new bushing. Apply a thin film of silicone lubricant for polyurethane or soapy water for rubber. Never use petroleum-based grease on rubber bushings, because it degrades them.
Step 5: Press straight and slow. Use a driver that matches the bushing outer diameter. Stop when the bushing reaches your reference mark or seats flush.
Step 6: Torque the fasteners at ride height. This is the step everyone forgets. Tighten control arm pivot bolts only after the vehicle is back on the ground at normal ride height, or the bushing will be preloaded and fail early.
Temperature Methods: Heat and Freeze Technique
None of the top-ranking competitors cover this, and it is one of the most effective tricks in the shop. Metal expands when heated and contracts when cooled, and you can use that differential to reduce the force needed.
The freeze method works for installation. Put the new bearing or bushing in a freezer overnight so it shrinks by a few thousandths of an inch. Warm the housing gently with a heat gun or propane torch, taking care not to discolor the metal. The combination can make a bearing drop in by hand or with very light press pressure.
The heat method works for removal. Heat the housing around the bearing evenly with a torch or induction heater. The housing expands faster than the bearing, breaking the corrosion bond. Combine heat with penetrating oil for seized parts.
Never use an open flame near rubber bushings, grease, or fuel lines. Induction heaters are the safer choice for bushings and on-vehicle work.
Common Mistakes and How to Avoid Them
Pushing on the wrong race. Loading the inner race while pressing the outer race into a housing brinells the bearing and ruins it within miles. Always push on the race that interfaces with the bore.
Letting the bearing cock. A tilted bearing galls the bore and may not seat fully. Stop at the first sign of skewing, re-square, and restart.
Using too small a press. Hitting the tonnage limit on a seized bearing is dangerous. The component can let go suddenly when you finally exceed the holding force.
Skipping lubrication on bushings. Dry polyurethane squeaks and binds. Dry rubber tears during install. Always lubricate with the correct product.
Forgetting ride height torque. Preloaded bushings fail in thousands of miles, not immediately, so the mistake is easy to miss until it is too late.
Pressing Without a Shop Press: Alternatives
Not everyone has a press, and a single job may not justify buying one. Several alternatives work for specific cases.
A heavy-duty bench vise can press small bushings and bearings if you use sockets as drivers on both sides. It works for u-joints and small control arm bushings, but it cannot generate the force for seized automotive wheel bearings.
A ball joint press kit (the common OTC-style C-clamp tool) handles many control arm bushings and some wheel bearings when used with the correct adapters. It is slow but portable and rents free from most auto parts stores.
The freeze-and-heat method alone, described above, sometimes lets a bearing drop in with light tapping. This is the most popular no-press method reported on mechanic forums.
Renting a press from a tool rental yard or Harbor Freight by the day is often cheaper than paying a shop, and you keep the skills for next time. Just budget for buying the arbor plates and drivers separately, since rental presses rarely include them.
For rusted, seized wheel bearings on daily drivers, do not improvise. Take the knuckle to a machine shop. The fee is small compared to a destroyed knuckle.
Signs of a Bad Bearing Press Job
Catching a mistake early prevents a comeback. Watch for these symptoms after any press job.
A grinding or humming noise within the first few miles almost always means the bearing was loaded on the wrong race or cocked during install. Vibration at speed suggests the bearing is not seated square in the bore. Uneven tire wear on the corner you just serviced points to a bind in a bushing that was pressed at the wrong clocking or torqued off the vehicle.
Any of these signs means stop driving and recheck the install. A bearing pressed wrong will fail fast and can take the hub or knuckle with it.
FAQs
How to properly press in bearings?
Clean the bore, start the bearing square by hand with a dead-blow mallet, then press using a driver that contacts only the outer race. Lower the ram slowly and stop the instant the bearing seats flush. Spin the bearing by hand to confirm smooth rotation with no notchiness.
Can you press bushings with a ball joint press?
Yes, a ball joint press (C-clamp style kit) works for control arm bushings and smaller bushings when used with the correct adapters. It is slower than a hydraulic press and lacks the force for seized or large automotive bushings, but it is portable and rents free from most parts stores.
Is a 10 ton press enough for wheel bearings?
A 10-ton press is borderline for automotive wheel bearings and often insufficient for rusted or seized units. Forum mechanics overwhelmingly recommend a 20-ton press as the minimum for wheel bearings on trucks, SUVs, and any vehicle driven in winter conditions, because seized bearings routinely need 15 tons or more to break loose.
How to press out bearings without a press?
Use a ball joint press kit with adapters, a heavy-duty bench vise with sockets as drivers, or the heat method to break corrosion bonds. For rusted, seized wheel bearings on daily drivers, take the knuckle to a machine shop rather than improvising, since a destroyed knuckle costs far more than the shop fee.
Conclusion
Mastering how to press bearings and bushings with a shop press safely comes down to choosing the right tonnage, using proper tooling, and respecting the forces at work. A 20-ton press with arbor plates, a bearing splitter, and the correct drivers will handle nearly any automotive job you encounter. Take your time, support every workpiece evenly, and walk away from any setup that looks sketchy.
The temperature methods and no-press alternatives above give you options even without owning a press. Start with an easy job like a control arm bushing, build your confidence, and work up to wheel bearings. Your wallet and your skills will both thank you.