
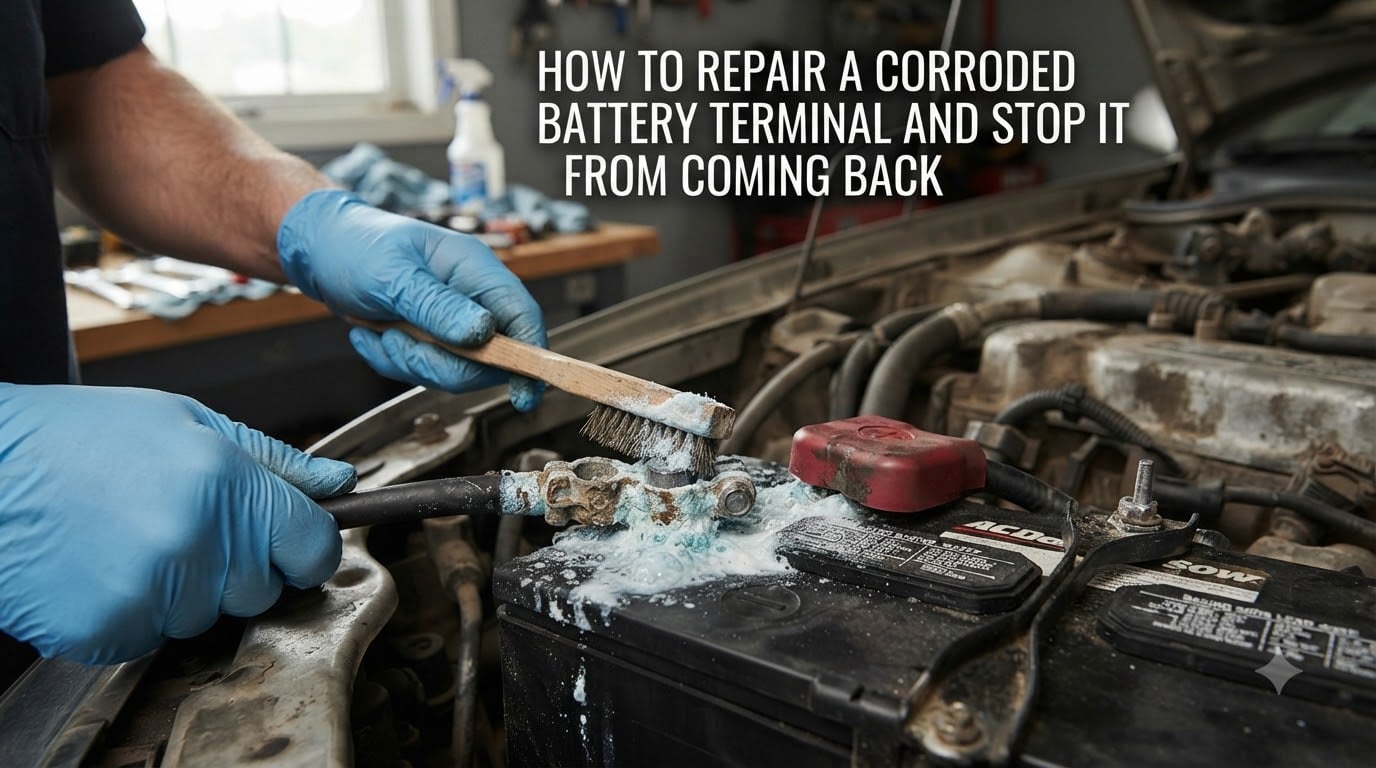
I remember the morning my truck refused to start in a grocery store parking lot. The terminals were caked in that familiar white powdery residue, and I had cleaned them just three months earlier. That frustration is exactly why I wrote this guide: a real plan to repair a corroded battery terminal and a prevention routine that actually keeps it from coming back.
If you have popped the hood on any car, boat, RV, or lawn mower and seen chalky crust, fuzzy blue-green fuzz, or a flaky white build-up clinging to the terminals, you are looking at battery terminal corrosion. It is one of the most common causes of a no-start, dim headlights, and mysterious electrical gremlins. The good news: you can fix it yourself in under an hour with a few basic supplies.
In this guide, I will walk you through what corrosion actually is, how to clean it safely, and a maintenance routine I personally use to keep my own vehicles corrosion-free. By the end, you will know exactly when to clean, when to replace, and how to stop the cycle for good.
Table of Contents
What Causes Battery Terminal Corrosion?
Battery terminal corrosion is the result of a chemical reaction between the lead terminals, the sulfuric acid electrolyte inside the battery, and hydrogen gas that escapes through the vents. The reaction forms lead sulfate, which is what you see as that crusty white, blue, or green build-up around the posts.
Most lead-acid batteries will off-gas slightly even under normal operation. When that gas reacts with the metal terminals and atmospheric moisture, you get corrosion. The color of the build-up can actually tell you something about the root cause:
White or grayish powder: Normal lead sulfate corrosion, often from age or mild off-gassing.
Blue-green or teal: Usually copper sulfate, which means the corrosion has reached the copper cable strands under the insulation.
Heavy white crust on the negative terminal: Often a sign of undercharging, a weak alternator, or a battery that is slowly discharging.
Heavy white crust on the positive terminal: Typically points to overcharging or a voltage regulator issue.
Understanding which terminal is corroded can save you from chasing the wrong problem. A persistent negative-side build-up often means your charging system is not bringing the battery back to full capacity. A persistent positive-side build-up can mean the alternator is pushing too many volts and cooking the electrolyte.
Beyond the chemistry, a few common triggers accelerate corrosion. Loose battery cable ends let gases escape past the seal. An overfilled battery can leak electrolyte through the vents. Extreme temperature swings make the battery work harder and off-gas more. And a battery that is more than four or five years old will simply corrode faster as internal components wear.
Is Corrosion on Battery Terminals Dangerous
Yes, it can be, and you should take a few precautions before touching anything. Lead-acid batteries contain sulfuric acid and release hydrogen gas, which is flammable. A spark near a heavily corroded terminal can ignite trapped gas, and acid on your skin or in your eyes is a serious medical issue.
Here is the safety list I follow every time, written into a checklist taped inside my garage cabinet:
Work in a well-ventilated area, never in an enclosed garage with the door down.
Wear safety glasses and nitrile gloves. The corrosion powder is acidic and toxic.
Remove all metal jewelry, especially rings and watches. A dropped wrench across a live terminal can weld to the chassis and burn you.
Keep a baking soda and water solution nearby to neutralize any spilled acid.
Have a fire extinguisher rated for electrical fires within reach.
Never lean directly over the battery while working on it.
If you notice a rotten egg smell, the battery is venting heavily. Stop and let it air out before continuing. If the battery case is cracked, bulging, or leaking, do not attempt to clean it. Replace it instead and recycle the old one at any auto parts store.
Tools and Supplies You Will Need
The beauty of this repair is that most of what you need is already in your kitchen or garage. I have cleaned terminals in a parking lot with a bottle of water, a rag, and a stick of gum wrapper, so do not let a missing tool stop you from trying.
For a proper job, gather the following before you start:
Wrenches: Usually 10mm for the terminal bolts, but check your specific battery.
Baking soda: About two tablespoons mixed with a cup of water makes a neutralizing paste.
Wire brush or terminal cleaning brush: A dedicated battery terminal brush is under $5 and worth every penny.
Old toothbrush or small stiff bristle brush: For scrubbing the cable ends and tight spaces.
Clean rags or shop towels: You will go through more than you think.
Safety glasses and nitrile gloves: Non-negotiable.
Dielectric grease or petroleum jelly: For sealing the cleaned terminals.
Optional but recommended: Anti-corrosion washers, terminal protector spray, or battery felt pads.
If you do not have baking soda, white vinegar works on alkaline battery corrosion in toys and electronics but is not ideal for car batteries. Coke is a famous old-school trick that works because of the phosphoric acid, but the sugar residue can attract dirt and cause problems later. Stick with baking soda for lead-acid batteries.
How to Repair a Corroded Battery Terminal Step by Step?
This is the process I have used on dozens of vehicles, and it works on cars, trucks, boats, and RVs. The total time is usually 30 to 45 minutes, even if the corrosion is heavy. Take your time and do not skip the protective coating at the end.
Step 1: Turn off the vehicle and remove the keys. Pop the hood and let the engine cool completely. A warm battery off-gases more and is more volatile.
Step 2: Disconnect the negative cable first. This is critical. The negative terminal is marked with a minus sign or the letters “NEG.” Loosen the bolt with your wrench, then wiggle the clamp off the post. Tuck the cable away from the battery so it cannot spring back into contact.
Step 3: Disconnect the positive cable second. Positive is marked with a plus sign or “POS.” Loosen the bolt and remove the clamp. Once both cables are off, you can safely work on the battery without risk of shorting.
Step 4: Apply the baking soda paste. Mix two tablespoons of baking soda with one tablespoon of water until it forms a thick paste. Smear it over both terminals and the cable clamps. You will see it fizz. That fizzing is the acid being neutralized. Let it sit for two to three minutes.
Step 5: Scrub the terminals and clamps. Use your wire brush to scrub the posts until the shiny lead is visible. The terminal brush I use has a female brush for the inside of the clamps and a male brush for the posts. For heavy corrosion, take a few minutes and put some muscle into it. Use the old toothbrush to reach inside the cable clamps and clean the contact surfaces.
Step 6: Rinse and dry thoroughly. Pour a small amount of clean water over the terminals to rinse off the baking soda residue. Dry everything with a clean rag. Moisture left behind will start the corrosion cycle again, so be thorough.
Step 7: Reconnect the cables in reverse order. Positive first, then negative. Tighten the bolts snugly, but do not over-torque and crack the lead posts. The clamp should not wiggle at all.
Step 8: Apply protective coating. This is the step most people skip, and the reason corrosion keeps coming back. Smear a thin layer of dielectric grease or petroleum jelly over the terminals and connectors. If you have anti-corrosion washers, slip them over the posts before reconnecting. This seals out the moisture and gas that cause corrosion in the first place.
How to Stop Battery Terminal Corrosion From Coming Back?
Cleaning corrosion is half the job. The other half is making sure it does not return in three months. After personal trial and error across six vehicles over fifteen years, I have built a routine that keeps terminals clean for years, not months.
Monthly visual check. Pop the hood once a month and look at the terminals. It takes 30 seconds. If you see any white powder forming, you can clean it off before it becomes a problem. Catching it early is the difference between a 5-minute wipe-down and a 45-minute restoration.
Quarterly deep inspection. Every three months, check the cable tightness, the condition of the protective coating, and the state of the alternator belt. Worn belts and loose cables are two of the most common hidden causes of recurring corrosion.
Annual voltage test. Use a multimeter to check the battery voltage with the engine off. A healthy battery reads 12.4 to 12.7 volts. With the engine running, the charging system should read 13.7 to 14.7 volts. Readings outside this range point to undercharging or overcharging, both of which accelerate corrosion.
Use terminal protectors. Anti-corrosion washers, felt pads soaked in inhibitor solution, or a light coating of dielectric grease after every cleaning will dramatically slow the buildup. I prefer the washers because they last longer and do not need reapplication.
Address root causes. If your battery is more than five years old and the corrosion keeps coming back, the battery itself may be the problem. Internal degradation causes more off-gassing and faster corrosion. A new battery is cheaper than a tow truck.
Fix loose cable ends. A wiggling cable end lets gas escape past the seal. If the clamp is loose even after tightening, replace it. New universal battery cable ends are under $5 and take ten minutes to install with a simple crimp or bolt.
When to Clean Versus Replace the Battery or Terminals
Cleaning is not always the right answer. Here is the framework I use to decide. Clean the terminals if the corrosion is light to moderate, the battery holds a full charge, the cables are tight, and the battery is less than four years old.
Replace the battery if the case is cracked, swollen, or leaking, the battery will not hold a charge after a full recharge, or the battery is more than five years old and showing signs of struggle. Most auto parts stores will test your battery for free and tell you honestly whether it needs replacement.
Replace the cable ends if the copper strands inside the insulation are corroded green or black, the clamp is loose even when fully tightened, or the insulation is cracked and exposing bare wire. New ends are cheap and easy to install.
A persistent positive-side corrosion that keeps returning after cleaning almost always points to an overcharging alternator. Get the charging system tested before you blame the battery. A mechanic or auto parts store can run this test in five minutes.
Cleaning Alkaline Battery Corrosion in Toys and Electronics
The same principles apply, but the chemistry is different. Alkaline batteries in toys, remote controls, and flashlights leak potassium hydroxide, which forms a white crusty or crystalline residue. This is more common in devices that sit unused for months.
For small electronics, use white vinegar or lemon juice on a cotton swab to neutralize the alkaline residue. Baking soda will not work on alkaline leaks. Scrub gently with a toothbrush, dry completely, and check the battery contacts for corrosion. If the contacts are badly pitted or broken, replacement is the better option.
Many toy cars and battery compartments can be brought back to life with vinegar, a cotton swab, and some patience. For deeper corrosion, a small amount of isopropyl alcohol on a swab can help remove stubborn residue.
Frequently Asked Questions
Why does the corrosion on my car battery terminal keep coming back?
Recurring corrosion usually points to one of three root causes: an overcharging alternator, a battery that is aging and off-gassing more than normal, or loose battery cables that let gas escape past the seal. Clean the terminals, apply a fresh coat of dielectric grease or anti-corrosion washers, and have your charging system tested if the buildup returns within a few months.
Can a corroded battery terminal be fixed?
Yes, in most cases. Light to moderate corrosion can be cleaned away with baking soda, water, and a wire brush. The terminal itself is solid lead and does not corrode away easily. Severe corrosion that has eaten into the cable copper or pitted the lead post deeply may require replacement of the cable end or the battery itself, but the repair is straightforward and inexpensive.
What can I put on my battery terminal to stop corrosion?
Dielectric grease, petroleum jelly, or anti-corrosion washers are the most effective options. Dielectric grease is designed specifically for this purpose and lasts the longest. Petroleum jelly works almost as well and is cheaper. Anti-corrosion washers, which sit over the posts under the cable clamps, provide a chemical inhibitor that protects for years. Avoid heavy grease that traps heat, and never use regular motor oil as it can break down over time.
Will WD-40 keep battery terminals from corroding?
WD-40 can provide short-term protection because it displaces moisture, but it is not the best long-term choice. It tends to dry out after a few weeks and can actually attract dirt over time. Dielectric grease or petroleum jelly is more durable and designed for electrical connections. If you use WD-40 in a pinch, expect to reapply every month or two. For a permanent solution, anti-corrosion washers are the gold standard.
Final Thoughts
Repairing a corroded battery terminal is one of the most satisfying DIY car fixes because it is fast, cheap, and immediately effective. The real win comes from the prevention routine: monthly visual checks, quarterly deep inspections, and a proper protective coating after every cleaning.
If you take one thing away from this guide, let it be this: clean the terminals, apply dielectric grease or anti-corrosion washers, and address the root cause. That combination is how to repair a corroded battery terminal once and stop it from coming back for years. Your future self, standing in a parking lot with a working engine, will thank you.