
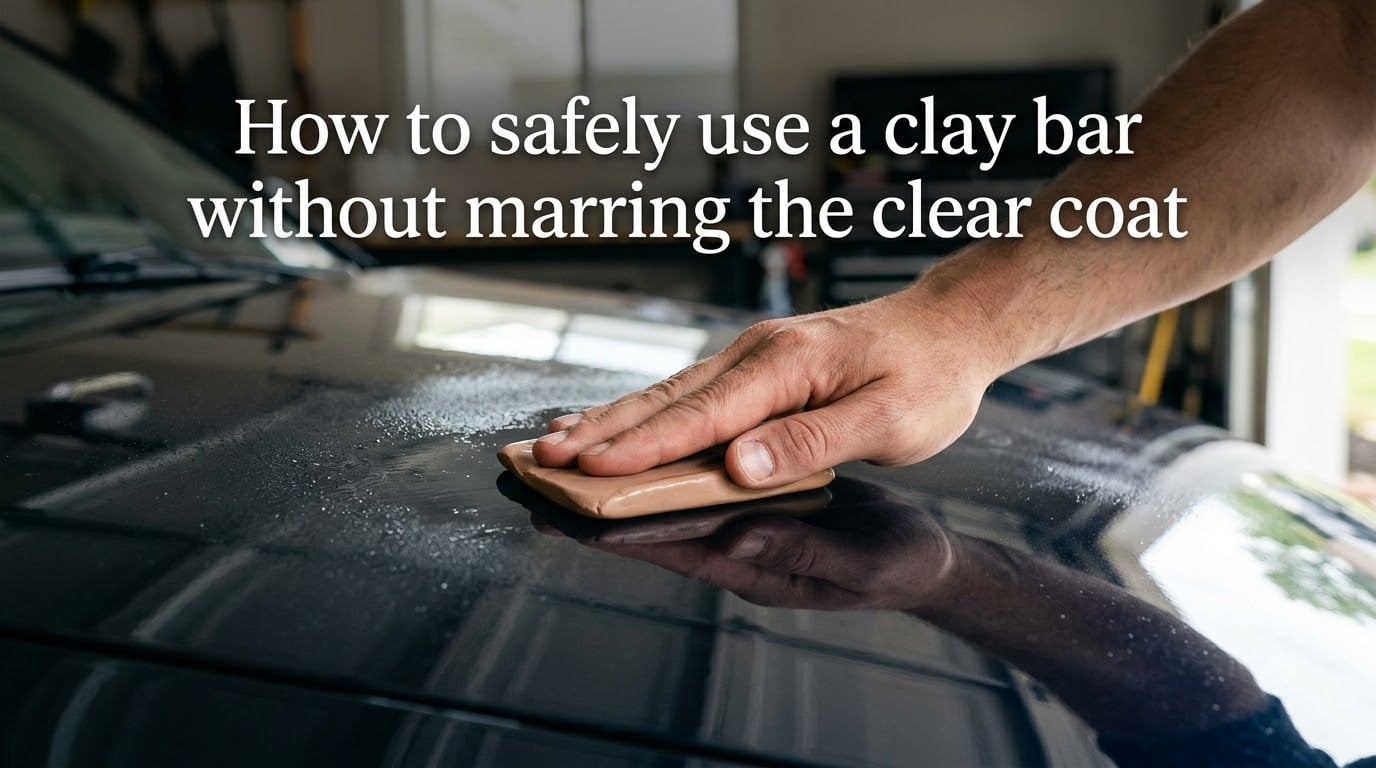
I learned about clay bar marring the hard way. My first time claying a car, I pressed too hard on a dry section of the hood and left a haze of micro-scratches that took a full weekend of polishing to fix. That experience sent me down a rabbit hole of detailing forums, pro technique videos, and a lot of trial and error.
The truth is, using a clay bar safely comes down to a handful of principles that most beginners get wrong on their first attempt. The clay bar itself is not the enemy. Poor lubrication, too much pressure, and contaminated clay are what leave those dreaded swirl marks in your clear coat.
Here is the quick version before we get into the details. To safely use a clay bar without marring the clear coat:
Lubricate generously and never let the surface dry out.
Use light pressure and let the clay do the work.
Move in straight lines, never circular motions.
Knead and refold the clay frequently to expose a clean surface.
Discard immediately if the clay touches the ground.
Follow those five rules and you will avoid 90 percent of the marring issues that plague first-time users. Now let us walk through the full process so you can clay your car with confidence.
Table of Contents
What a Clay Bar Actually Does to Your Paint?
A clay bar is a pliable resin compound designed to remove bonded contamination that regular washing cannot touch. Think of it as a mechanical cleaner that physically grabs embedded particles and pulls them out of the clear coat.
Every day your car is outside, contaminants bond to the paint surface. Brake dust containing ferrous metal particles gets deposited from your own brakes and the traffic around you. Industrial fallout, tree sap, road tar, hard water minerals, and paint overspray all embed themselves into the clear coat over time. No amount of soap and water will remove these because they are chemically or mechanically bonded to the paint.
When you glide a clay bar across properly lubricated paint, the soft resin slides over the smooth surface but catches on the rough, raised contamination. The clay literally encapsulates those particles inside itself, lifting them away from the clear coat. The result is paint that feels like glass.
Here is the part most guides gloss over. Clay is mildly abrasive by nature. It is physically dragging material across your clear coat. Even with perfect technique, a clay bar removes a microscopic layer of clear coat along with the contamination. That is why technique matters so much. Done right, the removal is negligible. Done wrong, you grind trapped grit across the paint and leave visible scratches.
This is also why clay is always the second step in decontamination, never the first. You want to remove as much contamination as possible chemically before you ever touch the paint with clay.
The Plastic Bag Test: Do You Actually Need to Clay?
Before you clay anything, run the plastic bag test. This is the single best diagnostic tool for determining whether your paint needs claying at all, and every professional detailer uses it.
Wash and dry your car thoroughly first. Then put a clean hand inside a thin plastic sandwich bag or a latex glove. Gently run your fingertips across the paint through the plastic. The thin barrier amplifies your sense of touch and reveals contamination you cannot feel with bare skin.
If the surface feels perfectly smooth and glassy, you do not need to clay. Save it for another day. If you feel any roughness, grittiness, or a dragging sensation, those are bonded contaminants. Your paint needs clay.
Test multiple panels separately. The horizontal surfaces like the hood, roof, and trunk lid almost always collect more contamination than vertical panels. The lower doors and rear bumper typically feel the roughest because they catch the most road grime and brake dust.
Skip claying if your paint is already perfectly smooth. Every time you clay, you remove a tiny amount of clear coat. There is no reason to do it unless the paint actually needs it.
Chemical Decontamination First: The Correct Order
This is where I see beginners go wrong constantly. They grab the clay bar immediately after washing, skipping chemical decontamination entirely. That forces the clay to do all the heavy lifting, which means more passes, more pressure, and more risk of marring.
The correct decontamination order is wash, chemically decontaminate, then clay. Here is why that sequence matters.
After your standard two-bucket wash, spray an iron remover across the paint. Iron removers contain chemical agents that dissolve ferrous particles embedded in the clear coat. The brake dust and rail dust that would otherwise be ground around by your clay bar gets dissolved and rinsed away before you ever touch the paint. The product typically turns purple as it reacts with iron particles, which gives you a visual confirmation that it is working.
Let the iron remover dwell for the time specified on the bottle, usually two to five minutes, then rinse thoroughly. Do not let it dry on the surface.
If you have tree sap, road tar, or adhesive residue, address those with a dedicated tar and sap remover before claying as well. These solvents break down the chemical bonds that hold those contaminants to the paint.
By removing the chemical and metallic contamination first, you dramatically reduce what the clay bar has to deal with. Less contamination means fewer passes, less pressure, and a fraction of the marring risk. The clay only has to handle whatever the chemicals could not dissolve.
Essential Supplies Checklist
Gather everything before you start. Once your hands are wet and covered in clay residue, you do not want to be hunting for supplies.
Clay bar in the appropriate grade for your paint (see the grades section below)
Clay lubricant or detailing spray in a spray bottle
Clean microfiber towels, at least four to six, folded into quarters
A spray bottle of water if using a water-based lubricant
Good lighting, ideally a work light or inspection lamp to check your progress
An iron remover product for chemical decontamination
A clean work area out of direct sunlight, ideally in a garage or shaded space
On the lubricant question, you have options. Dedicated clay lubricant formulations are designed to provide the right balance of slickness and cleanup. Quick detailer sprays work well too. Some detailers use soapy water in a spray bottle, which is economical but can dry out faster than dedicated lubricants.
Whatever you choose, the key rule is simple. Never let the surface feel tacky or grabby while the clay is moving. If you feel resistance, spray more lubricant immediately.
How to Safely Use a Clay Bar Without Marring the Clear Coat?
This is the core process. Follow these steps in order and you will achieve a smooth, decontaminated finish without leaving scratches in your paint.
Step 1: Flatten and Prepare the Clay
Take your clay bar and flatten it into a pancake shape about the size of your palm, roughly three to four inches across. You want it thin enough to conform to the curves of the panel but thick enough that you are not pressing your fingertips directly into the paint through the clay.
If the clay is stiff and hard to shape, warm it in your hands for a minute. It should feel pliable, like putty. Cold clay will not conform to the paint surface and increases the risk of dragging.
Step 2: Work in a Shaded Area
Never clay in direct sunlight or on hot paint. Heat causes your lubricant to evaporate rapidly, which means the surface dries out mid-pass. That is the number one cause of marring. Work in a garage, under a canopy, or in deep shade.
If the paint feels warm to the touch, let it cool down before starting. This also makes the clay more consistent in its pliability.
Step 3: Spray the Panel Liberally
Spray your clay lubricant across a section roughly two feet by two feet. The surface should look visibly wet and glossy. If you can see the lubricant beading up or pooling, you have enough. If it looks like a thin mist that is already evaporating, spray more.
The golden rule of lubrication: when in doubt, spray more. You cannot over-lubricate. You absolutely can under-lubricate, and that is what causes marring.
Step 4: Use Light Pressure Only
Place the flattened clay on the wet surface and begin moving it with the weight of your hand only. The pressure should feel like you are resting your hand on the surface, not pushing into it. Imagine you are testing whether a surface is hot without committing your full weight.
This is where beginners go wrong. People instinctively press harder when they feel resistance, thinking more force will remove contamination faster. In reality, the clay does the work through its natural tackiness. Pressing harder just forces trapped grit deeper into the clear coat.
Step 5: Move in Straight Lines, Never Circles
Glide the clay in straight, overlapping lines. Move front to back on horizontal panels like the hood and roof, following the direction airflow would naturally travel across the car. On vertical panels, move top to bottom.
Never use circular motions. Circular clay movement creates circular scratches in the clear coat that catch light from every angle and become highly visible. Straight-line scratches are far less noticeable because they only catch light from one direction.
Keep your passes short, about six to eight inches at a time. Long sweeping strokes are harder to control and tend to involve more wrist rotation that can introduce unwanted pressure variation.
Step 6: Check Your Progress Frequently
After three or four passes over a section, wipe the area with a clean microfiber towel and feel it with your bare hand or the plastic bag test. If it feels smooth, move on to the next section. If it still feels rough, apply more lubricant and make a few more passes.
Do not keep working the same spot indefinitely. If you have made five or six passes and the contamination persists, you may need a more aggressive clay grade or a specialized chemical remover for that particular contaminant.
Step 7: Knead and Refold the Clay
As you work, the clay accumulates contamination on its surface. You will see it darken and feel it become less effective. Every one or two panels, knead the clay to encapsulate the dirty surface inside, then flatten it again to expose a fresh, clean face.
This is critical. A clay bar with a buildup of grit on its surface is essentially sandpaper. Folding the contamination inside the clay buries it where it cannot scratch your paint, and gives you a clean working surface again.
Stretch and fold the clay three or four times until the surface looks uniform and clean. Flatten it back into your palm-sized pancake and continue.
Step 8: Work Top to Bottom
Start with the roof, then the hood and trunk, then the upper door panels, and finish with the lower panels and bumpers. The lower sections of the car are always the most contaminated because they catch the most road spray and brake dust.
By working top to bottom, you keep the cleaner sections clean and avoid transferring heavy contamination upward. It also means your clay stays cleaner longer because you are tackling the lightest contamination first.
You may want to reserve a separate piece of clay for the lower panels if they are particularly bad. A heavily contaminated clay bar is more likely to cause marring on any surface.
Step 9: Wipe and Inspect Each Section
After claying each section, immediately wipe away the lubricant residue with a clean microfiber towel. Do a final feel test and a visual inspection under good light. Look for any haze, streaking, or visible scratching.
If you see light marring, do not panic. Very light haze from claying is normal on softer paints and will typically be removed when you apply your paint protection or do a light polishing pass. Deep scratches, however, mean you went too aggressive and will need paint correction.
10: If You Drop It, Throw It Away
This rule has no exceptions. If your clay bar touches the ground, the garage floor, your shoe, or any surface that is not your freshly washed car, throw it in the trash immediately.
Clay is soft and sticky. The instant it hits the ground, it picks up sand, grit, pebbles, and microscopic debris that you will never fully see or remove. If you use that clay again, you are grinding rocks into your clear coat. It is not worth the risk to save a few dollars.
This is why many detailers break a full clay bar into three or four pieces before starting. If you drop one piece, you lose a quarter of your clay, not the whole bar.
Clay Bar Grades: Which One Is Safe for Your Paint?
Clay bars come in three main grades, and choosing the right one is essential for avoiding marring. Using too aggressive a clay on soft paint is a guaranteed way to leave scratches.
Fine grade clay is the gentlest option and the safest choice for beginners. It removes light contamination and is very low risk for marring on almost any paint type. If you are new to claying or working on a dark-colored car where scratches are more visible, start here. You may need more passes to remove heavy contamination, but the safety margin is worth it.
Medium grade is the most common all-purpose option. It removes moderate contamination including light overspray and heavier industrial fallout. This is the grade most experienced detailers reach for as their daily driver clay. It strikes a balance between effectiveness and safety, though it can leave light marring on very soft paint systems.
Heavy grade clay is aggressive and should only be used on severely contaminated paint or for removing stubborn overspray and bonded contaminants that lighter grades cannot touch. Heavy clay carries a real risk of visible marring on most paint systems and should generally be followed by a polishing step. If you are asking whether heavy grade is right for you, it probably is not.
For most cars in normal condition, a fine or medium grade clay used with proper technique is more than sufficient. Reach for heavy grade only when you have a specific contamination problem that lighter clay cannot solve.
Clay Bar vs Clay Mitt vs Clay Towel
This is one of the most common questions on detailing forums, and there is no single right answer. Each tool has its strengths and trade-offs.
The traditional clay bar offers the most control and the lowest marring risk when used correctly. Because you knead and refold it constantly, you are always working with a clean surface. The downside is speed. Claying a full car with a traditional bar takes 45 to 90 minutes, and the bar wears out after a few uses.
A clay mitt has clay material bonded to a glove that fits over your hand. It is dramatically faster than a bar because you cover more area per pass and can work it like a wash mitt. The trade-off is that you cannot knead and refold a mitt. Once the surface loads up with contamination, you rinse it off, but embedded particles stay trapped. This means mitts can cause more marring on softer paints because you are working with a surface that has accumulated grit.
A clay towel works on the same principle as a mitt but in a flat pad format. It is even faster for large panels and is reusable many times over. Like the mitt, the main concern is that trapped contamination cannot be fully removed by rinsing, so the towel gradually becomes more abrasive with use.
My recommendation for beginners is a fine grade traditional clay bar. The ability to expose a fresh surface by kneading is your best defense against marring. Once you are comfortable with the technique and understand how lubrication and pressure feel, a mitt or towel becomes a reasonable time-saver.
Common Mistakes That Cause Marring
After years of detailing and reading countless forum posts from frustrated beginners, the same mistakes come up over and over. Here is what causes clay bar marring and how to avoid each one.
1. Not enough lubrication. This is the number one cause of marring, period. If the surface feels at all grabby or you see the lubricant drying, you are grinding dry clay across your paint. Spray generously and reapply whenever you feel any resistance. There is no such thing as too much lubricant.
2. Pressing too hard. Beginners equate force with effectiveness. Clay works through its natural tackiness, not through pressure. If you lean into the clay, you force trapped particles deeper into the clear coat. Rest your hand on the surface and let the clay glide.
3. Using circular motions. Circular movements create scratches that catch light from every angle and are far more visible than straight-line marks. Always move the clay in straight lines following the length of the panel.
4. Not kneading the clay often enough. A clay surface that has picked up contamination is effectively loaded sandpaper. If you do not fold that dirty surface inside and expose a clean face, you are dragging grit across your paint with every pass.
5. Claying in direct sun or on hot paint. Heat evaporates your lubricant in seconds, leaving you clay on a dry surface. This is almost guaranteed to leave marring. Work in shade and let hot panels cool.
6. Using a clay bar that has been dropped. No matter how clean the ground looks, a dropped clay bar has picked up microscopic abrasive particles. Throw it away immediately.
7. Claying without washing first. Surface dirt and loose grime should always be washed away before claying. If you clay over loose dirt, you are pushing it across the paint instead of removing it.
8. Using too aggressive a grade. Heavy grade clay on soft paint will leave visible scratches even with perfect technique. Start with fine or medium grade and only escalate if contamination persists.
What to Apply After Claying?
Claying removes your existing wax or sealant along with the contamination. You have just exposed fresh, bare clear coat to the elements. If you do not apply protection afterward, that newly smooth surface will collect contamination again rapidly and you will be back to square one.
At an absolute minimum, apply a quality carnauba wax or synthetic sealant immediately after claying. This replaces the protective barrier you just removed and locks in that glass-smooth finish.
If you are planning a ceramic coating, the clay bar step is essential preparation. Ceramic coatings bond to the clear coat surface, and any contamination left beneath the coating will be sealed in permanently. After claying, you should also do an isopropyl alcohol wipedown or use a dedicated panel wipe to remove any remaining residue before applying the coating.
For those who want to go further, a light polishing step after claying removes any faint marring the clay may have left and restores full gloss. This is optional if you used proper technique with fine grade clay, but it is a good idea before applying a premium coating or if you have a dark-colored car where every imperfection shows.
The key takeaway: never clay without following up with protection. An unprotected, freshly clayed surface will degrade faster than one that was never clayed at all.
How Often Should You Clay Bar Your Car
For most daily-driven vehicles, claying once or twice a year is sufficient. A spring decontamination to remove winter road grime and a fall session before applying winter protection covers most needs.
Garaged vehicles driven occasionally may only need claying every two years. Daily drivers in heavy traffic or industrial areas may need it two to three times annually.
Let the plastic bag test be your guide rather than the calendar. If the paint feels smooth after washing, skip the clay. If it feels gritty, it is time. There is no benefit to claying smooth paint, and every pass removes a microscopic layer of clear coat.
Special Surfaces: Glass, Headlights, and Matte Paint
Clay is not just for painted panels. It works on glass and other surfaces, but each material has its own considerations.
Glass can be clayed using the same technique as paint, and it is highly effective for removing bonded water spots, sap, and road grime that glass cleaner cannot dissolve. Use a fine grade clay and plenty of lubricant. Glass is harder than clear coat, so marring risk is minimal, but be cautious around tinted windows. Never clay the inside of tinted glass, as the clay can scratch the tint film.
Headlights benefit from claying, especially older plastic lenses that have accumulated oxidation and road contamination. Clay removes surface contamination before you polish or restore the lens. Use light pressure and keep the surface well-lubricated.
Matte and satin paint requires a completely different approach. This is where standard clay bar technique fails completely. Matte finishes get their look from microscopic texture in the paint. Clay is designed to flatten and smooth texture, which means it will permanently damage a matte finish by creating glossy spots. Never use a traditional clay bar on matte or satin paint. If you have a matte vehicle and need decontamination, use chemical cleaners specifically formulated for matte finishes and consult a professional if contamination is severe.
For fiberglass and gelcoat surfaces like boats and RVs, clay bars work well and the technique is the same. Gelcoat is generally more durable than automotive clear coat, so you have a slightly larger safety margin. However, the same lubrication and pressure rules apply.
Frequently Asked Questions
How to avoid clay bar marring?
Use generous lubrication, apply only light hand pressure, move in straight lines, knead the clay frequently to expose a clean surface, and never clay in direct sunlight or on hot paint. Following these five principles prevents nearly all marring issues.
Does clay bar hurt clearcoat?
A clay bar removes a microscopic layer of clear coat along with bonded contamination. With proper technique, this removal is negligible and invisible. With poor technique, clay can leave visible scratches and haze. The clay itself is not dangerous to clear coat. Improper use is what causes damage.
Can you use a clay bar without polishing?
Yes, you can clay without polishing if you use a fine grade clay with proper lubrication and light pressure. Most daily drivers will not need polishing after claying. However, darker paints and show-quality finishes benefit from a light polishing step to remove any faint marring and restore full gloss.
What are the downsides of using a clay bar?
Clay removes existing wax or sealant, requires you to reapply protection immediately afterward. It removes a microscopic layer of clear coat each time. Improper technique can cause marring. Dropped clay must be discarded entirely. Traditional bars are single-use per vehicle and wear out after a few sessions.
What happens if you drop your clay bar?
Throw it away immediately. Clay is soft and sticky, so it picks up sand, grit, and abrasive particles the instant it touches the ground. These particles cannot be fully removed by rinsing or kneading. Using a dropped clay bar will grind rocks into your clear coat and cause severe scratching.
How often should you clay bar your car?
Most daily-driven vehicles need claying once or twice per year. Use the plastic bag test to determine timing: if the paint feels smooth after washing, skip the clay. If it feels gritty or rough, it is time to decontaminate. There is no benefit to claying smooth paint.
Conclusion
Learning how to safely use a clay bar without marring the clear coat is not complicated, but it does require discipline. Every marring horror story traces back to the same root causes: insufficient lubrication, excessive pressure, or a contaminated clay surface.
Keep those five core rules in mind. Lubricate generously and constantly. Use only the weight of your hand. Move in straight lines. Knead the clay to keep a clean working surface. Throw away anything that touches the ground.
Start with a fine grade clay on a cool car in the shade, work top to bottom in small sections, and always follow up with paint protection. If you are unsure about any step, practice on a lower panel or a less visible area first.
The reward for getting this right is paint that feels like glass and gives your wax, sealant, or coating a flawless surface to bond to. Take your time, trust the process, and your clear coat will thank you.