
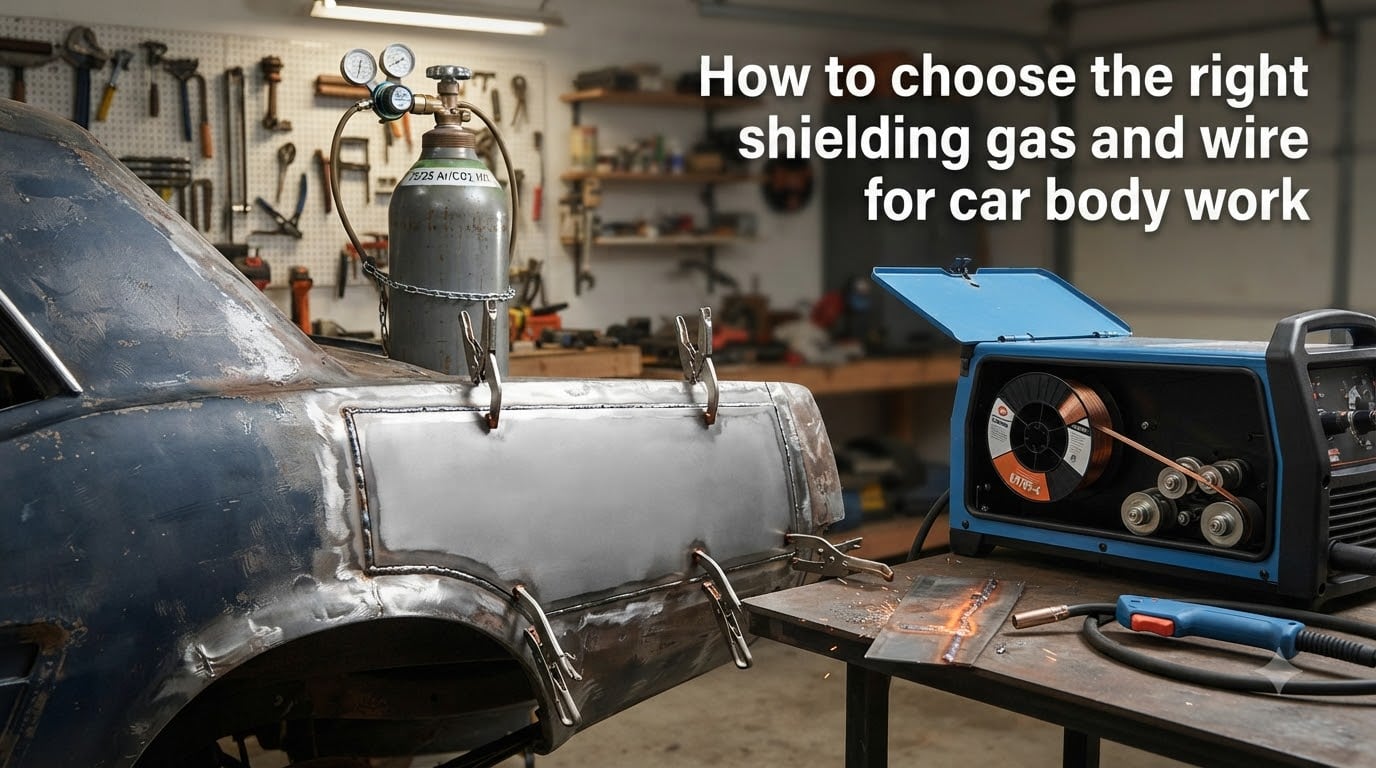
I learned this the hard way on my first patch-panel job. I pulled out a tank of pure CO2, grabbed whatever solid wire my shop had lying around, and proceeded to burn through an 18-gauge fender in about three seconds. The MIG welder was fine. The settings were close. The shielding gas and wire for car body work were completely wrong for the job.
Auto body panels live in a weird welding sweet spot. They’re thin enough that heat management is everything, but they’re made of mild or high-strength steel that needs real penetration at the weld seam. That combination makes shielding gas and filler wire the two most important decisions you’ll make before you pull the trigger.
In this guide I’ll walk you through exactly how I choose shielding gas and wire for car body work today, including the specific blends, wire classifications, and size-to-thickness pairings that work on everything from a quarter panel to a frame rail. Whether you’re patching rust, fitting a patch panel, or doing serious collision repair, getting this right saves you from hours of grinding and rework.
Table of Contents
Understanding Shielding Gas for Car Body Work
Shielding gas in MIG welding does one job: it shields the molten weld puddle from atmospheric contamination. Oxygen and nitrogen in the air will react with the molten metal, producing porosity, weak welds, and ugly spatter. The gas flowing out of your MIG welder’s nozzle pushes that air away so the puddle stays clean.
For car body work that job gets harder because the metal is thin. Standard MIG settings assume you’ll lay down a strong bead with deep penetration. On a 20-gauge door skin, that same penetration punches straight through in a heartbeat. Your shielding gas blend directly affects how much heat gets dumped into the weld, which makes it the single biggest dial you can turn for burn-through prevention.
What shielding gas does in MIG welding
The gas flowing through your MIG gun does three things at once. It protects the puddle from contamination, it shapes the arc characteristics, and it controls how much heat is dumped into the base metal. Each gas blend does these in different proportions.
Argon is inert and produces a smooth, stable arc with low spatter. CO2 is active and gives you deeper penetration but rougher welds and more spatter. Most automotive work needs a blend of both, and that ratio is what you’ll spend the most time dialing in. Pure CO2 runs too hot for most car body work, and pure argon barely penetrates at all on steel.
Why auto body work demands specific gas blends
Thin sheet metal is the issue. A truck frame in 1/4-inch steel wants every bit of heat and penetration it can get. A roof panel in 0.035-inch steel wants the opposite. That tension is why the 75/25 argon/CO2 blend became the industry standard for collision repair: it gives you enough penetration to fuse patch panels to surrounding metal without blowing holes through the skin.
I-CAR and Miller both recommend the same blend for automotive welding on mild and high-strength steels. That consistency across the industry is not an accident. The 75% argon / 25% CO2 ratio hits the sweet spot for sheet metal between roughly 18 and 22 gauge.
Types of Shielding Gas and Their Uses
There are four shielding gas options you’ll see at a welding supply shop, and each one has a specific role in car body work. Choosing between them depends on what you’re welding, how thick it is, and how clean the steel is.
75/25 argon/CO2 blend (C-25)
75% argon / 25% CO2, sold as C-25, is the workhorse blend for automotive MIG welding. It runs cooler than pure CO2 and lays down a smooth bead with good penetration on mild steel. This is what I keep hooked up for 90% of my car work, from rust patches to quarter-panel replacements.
For sheet metal between 18 and 22 gauge, C-25 gives you a forgiving arc. You can see the puddle clearly, you can adjust on the fly, and you’ll get a finish that doesn’t need an hour of grinding before primer. If you buy one shielding gas for your MIG welder and you weld cars, this is the one.
100% CO2
100% CO2 is cheaper per cubic foot and gives you deeper penetration than C-25. The trade-off is more spatter, a rougher bead, and hotter puddle behavior. On thin sheet metal you’ll burn through faster.
I keep a tank of pure CO2 around for thicker steel work (frame rails, substructure, brackets) but I never run it on body panels. If a beginner asks me what gas to use for their first fender patch, the answer is always C-25, never pure CO2.
Pure argon for aluminum
If you ever weld aluminum body panels or aluminum fuel tanks, you need pure argon. Argon is inert and won’t react with aluminum the way CO2 does. Anything marketed as a 75/25 blend or a tri-mix will give you ugly welds on aluminum.
Welding aluminum also means switching to an aluminum wire spool (typically ER4043 or ER5356) and using a spool gun or push-pull system. Pure argon, aluminum wire, and aluminum base metal is the only combination that works.
Stainless steel tri-mix
For stainless exhaust work or stainless patch panels, you want a tri-mix blend of helium, argon, and CO2 (often sold as 90% helium / 7.5% argon / 2.5% CO2). Tri-mix produces the cleanest bead on stainless steel and gives you the best heat control. Most hobbyists skip this and weld stainless with C-25, which works but produces slightly more discoloration.
Choosing the Right MIG Wire for Auto Body
Wire selection trips up more beginners than gas selection. Most MIG welders run 0.030 inch or 0.023 inch solid wire, and the spool you grab from the shelf needs to match the steel you’re welding and the gas you’re using. The classification stamped on the spool (ER70S-3, ER70S-6, and so on) tells you exactly what’s inside.
What ER70S means
ER70S is the AWS classification for mild steel welding wire. ER stands for electrode or filler rod, 70 is the minimum tensile strength in thousands of psi (70,000 psi), and S means it’s a solid wire. The number after the dash (3, 6, 2) tells you the chemical makeup of the wire and the kind of shielding gas it pairs with.
For car body work you’ll usually be choosing between ER70S-3, ER70S-6, and occasionally ER70S-2. Each one has a slightly different chemistry, and that chemistry changes how it welds on dirty or rusty steel.
ER70S-3 vs ER70S-6
ER70S-3 is the standard mild steel wire. It welds clean, lays down a tidy bead, and is the cheapest of the three common options. It’s the right choice when you’re welding brand-new OEM panels or freshly ground clean steel.
ER70S-6 has more deoxidizers in it (silicon and manganese) and tolerates dirty or slightly rusty steel better than ER70S-3. When I’m doing rust repair on a 30-year-old truck, I reach for ER70S-6 first because it keeps porosity down on metal I can’t grind down to shiny every time.
The performance difference between the two on clean metal is small. The performance difference on dirty metal is noticeable. For a beginner’s garage welder doing one-off repairs, ER70S-6 is the safer general-purpose pick.
ER70S-2 for cleaner steel
ER70S-2 is a tri-deoxidized wire (aluminum, titanium, and zirconium added). It welds even dirtier steel than ER70S-6 and is often the choice for body shops working on used or salvaged panels. It’s more expensive and slightly harder to find, but the puddle stays calm even when the steel has surface rust or mill scale.
Matching Wire Size to Metal Thickness
Wire diameter is one of the easiest levers to pull for controlling heat input on thin metal. Smaller diameter wire means less current to feed it, lower heat, and less risk of burn-through. Larger diameter wire means more deposition and deeper penetration on thicker steel.
Here is the wire size to thickness chart I use in my own shop.
0.023 inch wire: sheet metal from 22 to 25 gauge (about 0.028 inch down to 0.020 inch). This is the thinnest commonly available MIG wire and works well on roofs, door skins, and thin patch panels. Pair with C-25 and you’ll rarely burn through.
0.030 inch wire: 18 to 22 gauge steel (0.047 inch down to 0.028 inch). This is the most common automotive MIG wire size. It works on body panels, floor pans, trunk lids, and most rust repair patches. Pair with C-25 and you’re set up for 90% of car body work.
0.035 inch wire: 16 gauge and thicker (0.060 inch and up). Use this for frame rails, subframes, brackets, and structural sections. It deposits more filler metal per minute and gives the heat sink those thicker components need. Still pair with C-25 unless you specifically want the hotter arc of pure CO2.
Burn-through is almost always a heat management problem, and 0.023 inch wire gives you about 15 to 20% less heat input than 0.030 inch at the same voltage setting. If you keep blowing holes on thin panels, the fix isn’t always your gas or your technique — it’s often just smaller wire.
Gas and Wire Combinations for Common Applications
Once you know your gas and your wire size, picking the right pairing for a specific job is straightforward. Here is what I run for the three most common auto body welding tasks.
Patch panels and body skins
For door skins, fender patches, and quarter panels you want 75/25 argon/CO2 (C-25) shielding gas with 0.023 or 0.030 inch ER70S-6 wire. Pure CO2 will burn through faster. Pure argon won’t penetrate well enough. ER70S-3 will work on clean metal but ER70S-6 is more forgiving on used panels. Run lower voltage (around 16 to 18V) and slower wire feed speed than you think you need.
Frame and structural components
Frame rails, subframes, and structural brackets are 14 gauge and thicker. Switch to 0.035 inch ER70S-6 wire, keep C-25 shielding gas, and you can turn up the heat (18 to 22V) for full penetration. If you’re doing 1/4-inch frame work, pure CO2 will give you slightly deeper penetration but at the cost of more spatter.
Exhaust system repairs
Stock exhaust systems are mild steel; aftermarket stainless exhausts need different wire. For mild steel exhaust use C-25 with 0.030 inch ER70S-6 wire. For stainless exhaust use a tri-mix shielding gas with 0.030 inch ER308L stainless wire. Stainless needs more heat to flow properly, so don’t try to weld it with C-25 if you can avoid the discoloration.
Flux Core vs Gas-Shielded MIG for Auto Body
Flux core welding is the gasless alternative. Instead of a separate shielding gas cylinder, the wire itself has a flux core that produces a shielding gas as it burns. For car body work this sounds appealing — no cylinder, no regulator, no flow meter to set — but it comes with trade-offs that matter.
When flux core works for car body work
Flux core welding produces a hotter puddle and lays down more filler per pass. It is more forgiving on dirty or rusty steel because the flux cleans the puddle as it goes. For thicker structural sections (1/8 inch and up), out-of-position work, and outdoor repairs, flux core has real advantages. Gasless flux core MIG welders are popular for farm and field repair because they don’t need shielding gas at all.
Flux core also gives you deeper penetration on thick steel without a shielding gas cylinder, which means less equipment to drag around for a one-off frame repair.
Why gas-shielded MIG is preferred for sheet metal
For thin body panel work, gas-shielded MIG with C-25 and 0.023 or 0.030 inch ER70S wire produces cleaner, cooler welds with less spatter. Flux core on sheet metal creates huge spatter clouds, harder-to-grind beads, and more heat distortion. It can work in a pinch, but it’s not the first choice for finish-quality body work.
If you buy a MIG welder specifically for car body work, buy the gas-shielded version with the cylinder setup. Flux core is a great backup, not a primary tool for sheet metal.
Welding Positions and Technique Tips
Beyond gas and wire, your technique has a big effect on weld quality. For automotive sheet metal work, the two biggest technique decisions are wire stickout and travel direction.
Wire stickout for thin sheet metal
Wire stickout is the distance between the contact tip and the workpiece. The longer the stickout, the wider the arc spreads and the cooler the puddle. The shorter the stickout, the more concentrated the heat.
For thin body panels, run a longer stickout (about 3/8 inch to 1/2 inch) to spread the heat and reduce burn-through risk. For thicker structural steel, shorten the stickout (about 1/4 inch to 3/8 inch) to concentrate heat for penetration. Most new welders run their stickout too short, which dumps too much heat into thin metal.
Push vs pull technique
Pushing the gun (travel angle 5 to 15 degrees forward) gives you lower penetration, a flatter bead, and better visibility of the puddle. It is the standard technique for thin sheet metal work.
Pulling the gun (dragging angle 5 to 15 degrees back) gives you deeper penetration and is preferred for thicker steel and structural work. It hides the puddle but fuses metal more aggressively.
For car body panels, push almost always. You’ll see the puddle, you’ll control the heat better, and you’ll avoid blowing through the metal.
Common Mistakes to Avoid
After years of teaching beginner welders in my garage and watching forum threads on weldingweb.com, I see the same handful of mistakes over and over. Most of them are shielding gas or wire related, and most are easy to fix.
Using pure CO2 on sheet metal: Pure CO2 runs hot and burns through thin panels. Switch to C-25 and you’ll instantly get more control.
Using 0.035 inch wire on door skins: That’s way too much heat for thin panels. Drop to 0.023 or 0.030 inch and you’ll stop burning holes.
Running too much gas flow: Excessive flow rate (above 25 to 30 cubic feet per hour) creates turbulence and pulls in atmospheric contamination. For most hobby welders 15 to 20 CFH is plenty.
Running too little gas flow: Less than 10 CFH starves the puddle of shielding and you’ll see porosity in every weld. Stick to the 15 to 20 CFH range.
Not checking the regulator: When was the last time you checked your regulator was actually flowing gas? A kinked hose, empty tank, or stuck solenoid can leave you welding with no shielding at all. Always purge and check gas flow before striking an arc.
Troubleshooting Guide
Weld defects usually trace back to one of three things: gas, wire, or technique. Here’s how to read what your welds are telling you.
Porosity (tiny holes in the bead): Almost always a shielding gas issue. Check your flow rate, check for drafts, and make sure you’re running a gas blend (not pure CO2 on dirty steel). Switching from ER70S-3 to ER70S-6 often clears up porosity on used metal.
Excessive spatter: Usually voltage is too high for the wire feed speed, or you’re running pure CO2 on something that should have C-25. Drop voltage slightly, or switch shielding gas.
Burn-through on sheet metal: Heat is too high. Options in order of preference: drop wire size (0.035 to 0.030 to 0.023), switch from CO2 to C-25, slow wire feed, increase travel speed, or shorten the puddles with stitch welds instead of one continuous bead.
Poor penetration on thicker steel: Reverse the above. Switch to 0.035 wire, switch to pure CO2 if you’re already running C-25, slow travel speed, and increase voltage slightly.
Dirty, discolored stainless welds: Running C-25 on stainless instead of tri-mix. Switch the gas and post-weld cleanup with a stainless wire brush.
Cost Considerations for Gas and Wire
Gas and wire costs catch beginners off guard. A small 20 CFH tank of C-25 runs about $30 to $50 to refill at a welding supply shop, and a 2-pound spool of 0.030 inch ER70S-6 wire runs about $20 to $30. Pure CO2 is roughly 30% cheaper than C-25 per fill, and tri-mix runs about 2x as much as C-25.
For occasional hobby use, a small tank of C-25 plus a single spool of 0.030 inch ER70S-6 will cover most car body work for a long time. Buy the smallest tank you can find so you’re not paying for inert gas you’re not using — small tanks are also easier to store in a residential garage.
Safety Precautions When Welding on Cars
Welding on cars is not the same as welding on a workbench. There are flammable fluids, batteries, airbags, and fuel systems that can ruin your day if you ignore them.
Vehicle prep before welding
Disconnect the battery before any welding on the car. Strike an arc near a connected battery and the current can spike through the electrical system. Pull the battery cables, ideally both terminals, and tuck them away from any grounding point.
Remove or relocate the fuel tank if you’re welding near it. Fuel vapors are heavier than air and will sit in low spots like a quarter panel for hours after the car was last driven. If you can’t remove the tank, keep a fire extinguisher within arm’s reach.
Discharge airbags if you’re working in the dashboard area, behind the steering wheel, or near seat-mounted airbag modules. A welding arc near an undeployed airbag can cause it to deploy, with obvious risks.
Cylinder and ventilation safety
Store your shielding gas cylinder upright and chained in your garage. A tipped-over argon/CO2 cylinder can shear off the valve and become a rocket. Always turn off the cylinder at the valve when you’re done welding.
Weld in a ventilated space, especially with pure CO2. CO2 displaces oxygen in an enclosed space and can make you dizzy, give you headaches, or worse. A garage with the door open and a fan moving air is the minimum.
Wear an auto-darkening welding helmet rated for MIG welding (shade 10 to 13), leather welding gloves, and a flame-resistant jacket. Long sleeves and natural fiber clothing are best. Synthetic fibers will melt to your skin if a spark catches them.
Frequently Asked Questions
What size MIG wire is best for bodywork?
For most automotive body panels use 0.030 inch ER70S-6 wire. For thinner sheet metal like roof skins and door panels where burn-through is a concern, step down to 0.023 inch wire.
What shielding gas is best for car body work?
A 75% argon / 25% CO2 blend (called C-25 or 75/25) is the industry standard for automotive collision repair. It works for both mild steel and high-strength steel panels and gives the best balance of penetration and puddle control on thin metal.
What gauge sheet metal is used in auto body repair?
Most car body panels are 18 to 22 gauge mild steel (0.028 inch to 0.047 inch). Door skins and roof panels run toward the thinner end at 20 to 22 gauge. Frame sections and structural components are typically 14 to 16 gauge (0.060 inch to 0.075 inch) or thicker.
What type of welding is best for autobody work?
MIG welding (GMAW) is the most common type for automotive collision repair. It runs faster than TIG, is more forgiving on thin metal than stick, and produces clean welds that are easy to grind flat for body filler.
Can you use flux core wire for car body work?
Flux core can be used for thicker structural sections of a car but is not the first choice for thin body panel work. It runs hotter, produces more spatter, and leaves a rougher bead that requires more cleanup than gas-shielded MIG with 75/25 argon/CO2.
Is 75/25 gas good for MIG welding car body?
Yes. 75/25 argon/CO2 is the recommended shielding gas for MIG welding car body panels on both mild steel and high-strength steel. It is the blend taught in I-CAR collision repair training and used in professional body shops.
Conclusion
Choosing the right shielding gas and wire for car body work comes down to a few reliable rules. Run 75/25 argon/CO2 (C-25) as your primary shielding gas. Use ER70S-6 wire in 0.030 inch for most sheet metal and 0.023 inch for the thinnest panels. Switch to 0.035 inch for thicker structural work and to pure CO2 or flux core only when you need deeper penetration.
Set your wire stickout a bit longer than usual, push the gun rather than drag, and you’ll get clean welds with minimal burn-through. Above all, prep the car for safety before you strike an arc — disconnect the battery, address fuel risks, and ventilate your workspace. From there, it’s practice, more practice, and the occasional patch panel you wished had gone better.