
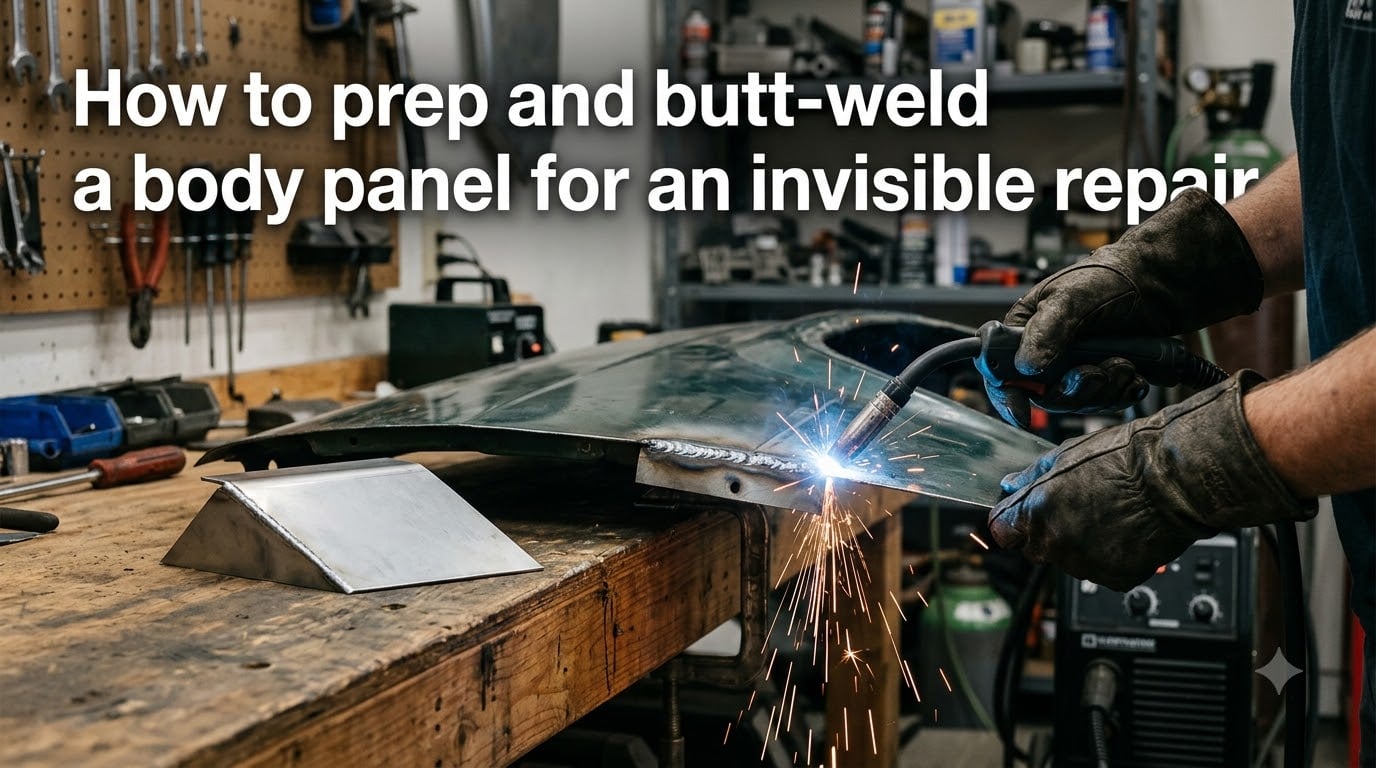
When rust eats a quarter panel or a fender takes a hit, the repair that separates a professional-looking job from an obvious patch is how the metal is joined. A proper butt weld on a body panel leaves almost no filler behind and lets body lines flow like they came from the factory. I have welded dozens of patch panels over the years, and the same rule always applies: clean prep, low heat, short tacks, and patient finishing. This guide walks you through how to prep and butt-weld a body panel for an invisible repair, from cutting the patch to grinding the final weld smooth.
Table of Contents
What Butt Welding Is and Why It Matters for Body Panels?
A butt weld joins two pieces of metal edge-to-edge with no overlap. When ground flush, the seam disappears under a skim of filler or even bare primer. For an invisible repair on a body panel, this is the gold standard.
Butt welds differ from flange welds and plug welds in one key way: there is no overlapping metal to trap corrosion or telegraph a body line. A flange weld folds one panel over another, leaving a step that shows through paint. A plug weld punches holes in an overlapping panel and fills them, which works fine on floor pans but creates a row of bumps on an outer body panel.
The trade-off is that butt welds demand precision. The two edges must line up exactly, the gap must be tight, and heat input must stay low. When done right, a butt-welded body panel can be finished with only a skim coat of filler before paint, and the original body line stays intact.
Tools and Materials You Need Before You Start
Before you strike an arc, gather everything so you are not stopping mid-weld to hunt for a tool. Heat management depends on working in short bursts, so having the right gear staged makes the difference between a flat panel and a warped one.
MIG welder with gas shielding (or flux core if that is all you have)
.023 or .025 inch wire for thin sheet metal
75/25 argon/CO2 shielding gas
4.5 inch angle grinder with thin cutting discs and flap discs
1mm cutting disc for leveling welds
Wire brush and dedicated grinding discs for bare metal
Locking pliers, panel clamps, or self-locking welding magnets
Body hammers, dolly, and a joggler tool (for flanges or returns)
Safety gear: auto-darkening helmet, leather gloves, fire-resistant jacket
How to Prep a Body Panel for a Butt Weld?
Panel preparation is where most invisible repairs are won or lost. I take my time here because a clean fit-up means less filler later and far fewer chances of warping the panel when I weld.
Step 1: Remove the Damaged Section
Cut out the rusted or bent section with a thin cutting disc, following the natural body lines wherever possible. Leave clean, straight edges rather than ragged curves. A straight edge makes it much easier to cut the patch panel to match.
Step 2: Make the Patch Panel
Cut your replacement metal slightly oversized, about 1/8 inch larger than the opening on all sides. This overlap gives you room to trim for a perfect fit. Match the original metal thickness as closely as you can. Most automotive sheet steel runs 18 to 22 gauge (0.8 to 1.0 mm).
Step 3: Use the 45-Degree Cut and Butt Technique
Here is the trick that forum veterans swear by. Tack the slightly oversized patch over the opening every few inches. Then, with the patch held firmly in place, run your grinder with a thin cutting disc at a 45-degree angle around the patch, cutting through both panels at once. The 45-degree bevel leaves a narrow V-groove when the patch is removed, and the edges meet perfectly because they were cut together.
This method eliminates the gap mismatch you get from measuring and cutting separately. I learned this from a fabricator who showed me a quarter-panel repair where you literally could not find the weld after paint.
Step 4: Clean Both Edges Thoroughly
Grind or sand both mating edges back to bright metal. Paint, primer, rust, and undercoating contaminate the weld and cause porosity. Use a dedicated grinding disc for bare metal, never one that has touched paint or body filler.
Step 5: Fit and Clamp the Patch
Drop the patch into the opening. The 45-degree edges should sit flush with almost no gap. Clamp or magnet the panel in place so it cannot shift when you start welding. A self-locking magnet at each corner keeps everything aligned.
Welder Setup and Settings for Thin Sheet Metal
Most home welders run far too hot for bodywork. Sheet metal as thin as 0.5 mm on aftermarket patches will blow through if you set the machine for 1/8 inch steel. Lower the heat until you can lay a short tack without burning a hole.
Recommended Settings by Metal Thickness
| Metal Thickness | Wire Size | Voltage (approx.) | Wire Speed (approx.) |
|---|---|---|---|
| 22 gauge (0.8 mm) | .023 inch | 16-17 V | Slow |
| 20 gauge (0.9 mm) | .023 or .025 inch | 17-18 V | Slow to medium |
| 18 gauge (1.0 mm) | .025 inch | 18-19 V | Medium |
These numbers are starting points. The real test is on a scrap piece of the same metal. You want a steady sizzle, not a popping arc. If the wire stutters and freezes, raise the wire speed slightly. If you blow holes, drop the voltage or shorten your arc length.
Gas Shielded MIG vs Flux Core
Gas shielded MIG with 75/25 argon/CO2 gives cleaner welds with less spatter on thin sheet metal. It is the preferred method for bodywork because the finished weld grinds smoother and looks better. Flux core works in a pinch, especially outdoors where wind blows away shielding gas, but it produces more slag, more spatter, and a rougher bead. For an invisible repair, gas shielded MIG is worth the extra setup.
Tack Welding Technique With Cooling Cycles
Heat distortion is the number one enemy of an invisible repair on a body panel. Every tack you lay dumps heat into a small area, and that heat builds up fast. The cure is short welds, generous spacing, and time to cool between passes.
Use the 6-8 Tack Rule
Lay no more than 6 to 8 tack welds before stopping to let the area cool completely. I count each tack as about a quarter inch of weld, just enough to hold the panels together. Skip across the seam rather than welding in one direction. Tack at the top, jump to the opposite end, then fill in between. This balances heat input and keeps the panel from curling toward the weld.
Stitch Welding Between Tacks
Once the tacks are cool, fill in between them with short stitch welds. A stitch weld is a 1 to 2 inch run, then you stop, move, and continue. Never lay a continuous bead along the entire seam in one pass. Continuous welds pour heat into the metal and lock in distortion that is almost impossible to hammer out later.
Cool Between Passes
Touch the panel near the weld with the back of your bare hand. If it is too hot to hold, it is too hot to keep welding. For room temperature work, this usually means waiting 60 to 90 seconds between stitch passes. Keep a damp rag or a spray bottle of water nearby to speed cooling. Wipe dry before the next weld so water does not cause porosity.
Finishing Techniques for an Invisible Repair
Finishing is what separates a welded panel from a butt-welded invisible repair. The goal is to leave the weld flush enough that a thin coat of filler is all you need before primer and paint.
Grind With a 1mm Cutting Disc First
Before reaching for a flap disc, run the edge of a 1mm cutting disc lightly along the weld to knock down the high spots. This removes material faster than a flap disc and generates less heat. Keep the disc flat against the panel and let the disc edge do the work.
Follow Up With a Flap Disc
Once the welds are level, switch to a fine-grit flap disc to blend the seam into the surrounding metal. Work in both directions across the weld, not just along it. Cross-sanding hides the transition better than sanding parallel to the seam.
Check With a Straightedge
Hold a straightedge or the edge of a credit card across the weld. Light should not pass between the straightedge and the panel. Any dip or crown means more work with the flap disc or a skim of body filler before paint.
Use a Joggler for Hard-to-Reach Seams
On wheel arches, lips, or any seam where you cannot grind from both sides, a joggler tool lets you stretch the flange and weld from the back. The finished surface stays untouched and only a skim coat is needed. This is a niche technique but it produces some of the cleanest invisible repairs possible.
Common Mistakes and How to Avoid Them
Even experienced fabricators run into the same handful of problems on body panel welding. Knowing what to watch for saves hours of grinding and filling.
Blow-through: The single most common issue on thin sheet metal. Lower the voltage, shorten your arc, and move faster. If you blow a hole, fill it with a small patch from behind rather than trying to bridge it with weld alone.
Porosity and contamination: Small holes along the weld bead mean dirty metal or inadequate shielding. Clean back to bright steel and check that your gas flow is around 20 to 25 cubic feet per hour.
Warping and oil-canning: The panel pulls toward the weld as it cools. To prevent this, weld in alternating short bursts, leave the panel unclamped on one side so it can move freely, and use a body hammer to flatten the panel between passes while the metal is still warm.
Misaligned body lines: If the patch sits high or low in the opening, the body line will never line up no matter how good the weld looks. Shim the patch from behind before tacking, and double-check with a straightedge before you strike an arc.
FAQs
How to make a weld invisible?
Grind the weld flush with a 1mm cutting disc first to knock down high spots, then blend with a fine-grit flap disc worked in both directions. Check with a straightedge, and finish with a thin skim coat of body filler before primer and paint.
How to weld body panels without warping?
Use the lowest heat that will melt the metal, lay short stitch welds instead of continuous beads, and limit yourself to 6 to 8 tacks before stopping to cool. Skip across the seam to balance heat input, and hammer the panel flat between passes while the metal is still warm.
What is the best welding method for body panels?
Gas shielded MIG with .023 or .025 inch wire on 18 to 22 gauge steel gives the cleanest, easiest-to-finish welds for bodywork. TIG produces excellent results on very thin metal but is slower. Flux core works outdoors but leaves more slag and spatter, making an invisible repair harder to achieve.
Can you use flux core to weld body panels?
Yes, flux core will weld body panels and is a good choice when you are working outside or do not have shielding gas. Expect more spatter, more slag to chip away, and a rougher bead that requires extra grinding before you can finish the seam invisibly.
How many tack welds before I need to cool the area?
Lay no more than 6 to 8 tack welds before stopping to let the metal cool completely. Touch the panel near the weld with the back of your hand. If it is too hot to hold comfortably, wait another 60 to 90 seconds or mist the area with water and wipe dry before continuing.
Final Thoughts on Butt-Welding a Body Panel for an Invisible Repair
An invisible butt weld on a body panel comes down to three habits: clean prep, low heat, and patient finishing. The 45-degree cut and butt technique gives you a near-perfect fit-up, gas shielded MIG keeps the weld clean, and the 6 to 8 tack rule stops heat distortion before it starts. Spend the time to grind the seam flush and your reward is a body line that flows like it never knew a panel was replaced.
If you are tackling your first patch panel, practice on scrap of the same gauge before you commit to the real repair. Weld a few inches, grind it down, and see how the metal behaves. Once you have the rhythm down, the same steps that work on scrap will give you a butt-welded body panel repair that disappears under a coat of paint. For more repair guides and shop tips, keep exploring Minor Mania.