
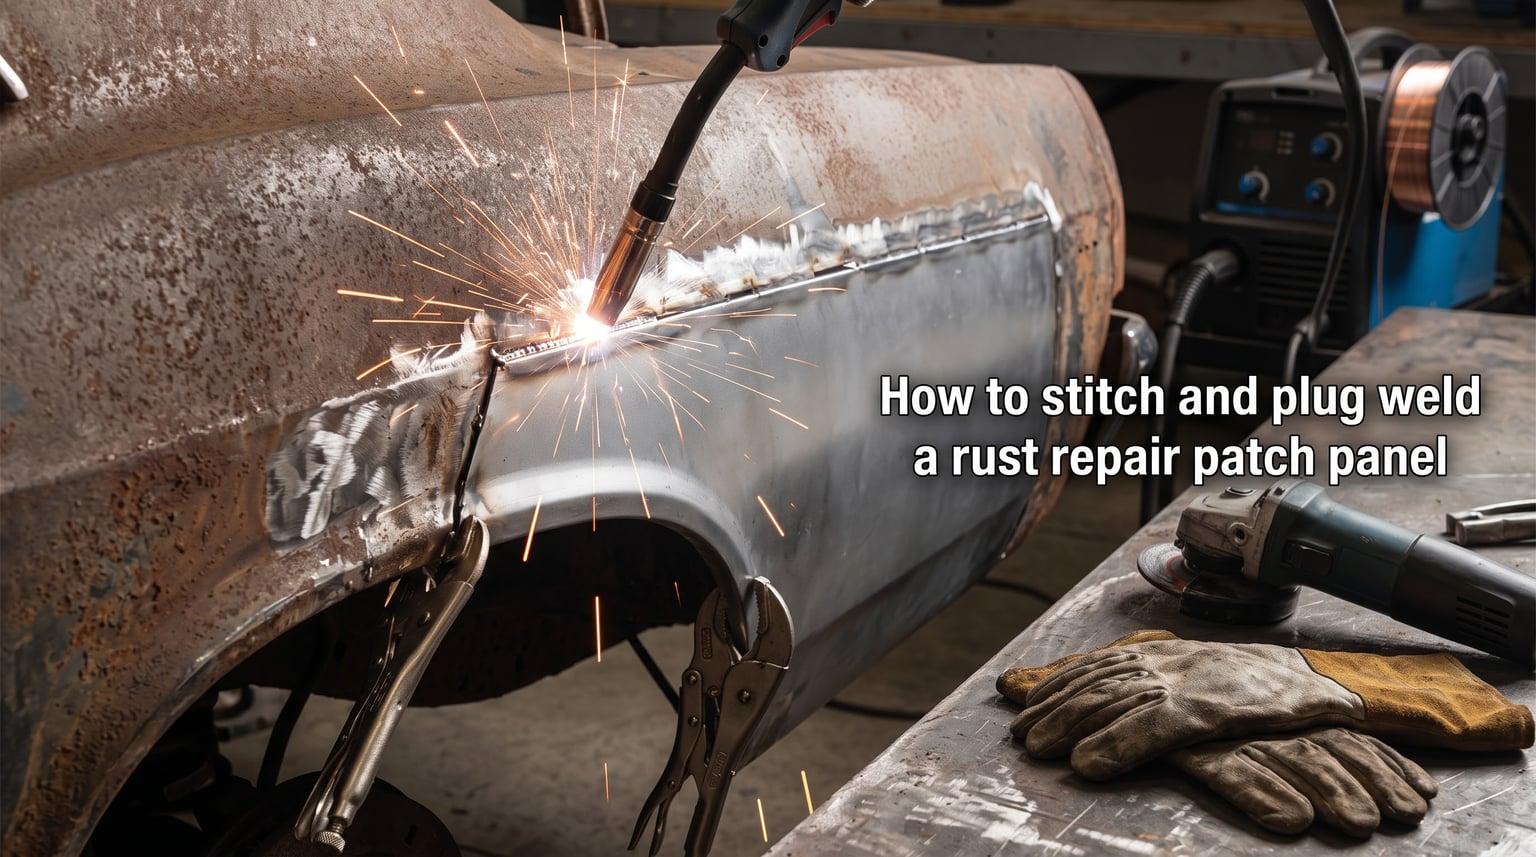
Rust is the enemy of every classic car restorer and DIY auto body enthusiast. When corrosion eats through a quarter panel, rocker panel, or fender, you need to cut out the damage and weld in a replacement patch panel. Learning how to stitch and plug weld a rust repair patch panel is the skill that separates a hack job from a repair that lasts decades.
I have spent years welding patch panels on everything from MGB roadsters to muscle car floors. The techniques in this guide come from real shop time, forum discussions with professional welders, and plenty of trial and error on my own project cars. If you are tackling your first rust repair, this walkthrough will save you from the mistakes I already made.
Stitch welding and plug welding are two complementary techniques that let you replace rusted sections of automotive body panels while maintaining structural integrity. Stitch welding creates a continuous seam along a butt joint. Plug welding fills pre-drilled holes to join overlapping metal layers, mimicking factory spot welds. Used together, they let you repair flat sections and layered seams alike.
This guide covers every step from assessing the rust damage through final finishing. Whether you use a MIG welder or a TIG welder, the same principles apply. By the end, you will know exactly how to approach your next patch panel job with confidence.
Table of Contents
Stitch Welding vs Plug Welding: What’s the Difference?
The difference between stitch welding and plug welding comes down to joint type and technique. Stitch welding joins two pieces of sheet metal edge-to-edge along a butt joint. Plug welding joins overlapping metal layers by filling a hole drilled through the top panel.
Stitch welding produces a continuous seam. You lay short weld passes, typically 1 inch or less, along the joint with cooling time between each pass. This controls heat buildup and minimizes warpage in thin gauge metal. The result is a strong butt weld that can be ground flush for an invisible repair.
Plug welding replaces the factory spot welds that hold overlapping panels together. You drill or punch holes through the top layer of metal, clamp it over the bottom layer, then fill each hole with weld. The molten metal fuses both layers together. Plug welding is the go-to technique for areas where panels overlap, like where a patch meets a factory flange.
Here is a quick breakdown of when to use each technique:
Stitch welding – Use on butt joints where two metal edges meet, typically in the middle of a body panel where you want an invisible repair.
Plug welding – Use on lap joints and flanges where metal overlaps, like rocker panels, thresholds, and areas with factory spot welds.
Both together – Many repairs use stitch welding for the visible seam and plug welding for the flanged edges or corners.
A common approach on quarter panel repairs is to stitch weld the top and side edges where the patch meets the original metal, then plug weld the 90-degree bends where layers overlap. This combination gives you a seamless visible surface and strong structural joins where you cannot see them.
Tools and Equipment You Need
Having the right tools makes patch panel welding dramatically easier. Here is what you need before you start cutting metal:
Welding equipment:
MIG welder or TIG welder capable of welding 20 to 22 gauge sheet metal
Appropriate wire or filler rod (ER70S-6 MIG wire for mild steel, or matching TIG rod)
Welding gas (75/25 argon/CO2 for MIG, pure argon for TIG on steel)
Welding helmet with adjustable shade
Cutting and shaping tools:
Angle grinder with cutting wheel and flap disc
Die grinder or Dremel for fine cuts
Aviation snips or pneumatic shears for trimming thin metal
Hole punch or drill bit set for plug weld holes (typically 5mm or 3/16 inch)
Clamping and fitting:
Cleco pins and Cleco pliers for temporary fastening
Locking pliers (Vise-Grips) in various sizes
Magnetic welding clamps for holding angles
Panel flanging tool for creating lap joints
Safety and finishing:
Welding gloves and leather jacket
Fire extinguisher rated for flammable liquids
Respirator for grinding and welding fumes
Wire brush, body filler, and epoxy primer
Safety Precautions Before You Start Welding
None of the top competitors cover safety, and that is a problem. Welding on a vehicle carries real hazards that can injure you or destroy your car if ignored. Here is what you need to know before striking an arc.
Eye and skin protection is non-negotiable. A welding helmet with the correct shade lens (shade 9 to 13 for MIG and TIG) prevents flash burn to your retinas. Even brief exposure to arc flash causes a painful condition called welder’s flash that feels like sand in your eyes for days. Wear leather gloves and a jacket to prevent UV burns on exposed skin.
Fire is the biggest risk when welding on a car. Remove all combustible materials from the work area, including carpet, wiring, fuel lines, and rubber seals near the repair zone. Stuff welding blankets into body cavities behind the panel to catch sparks. Keep a charged fire extinguisher within arm’s reach, not across the garage.
Ventilation matters more than most beginners realize. Welding and grinding galvanized or coated metal releases toxic fumes. Work in a well-ventilated space and use a respirator rated for welding fumes. Never weld near fuel tanks or brake lines without removing or shielding them first.
Battery disconnection prevents electrical damage. Disconnect the negative battery terminal before welding on any vehicle. The welding current can travel through the vehicle’s electrical system and fry the ECU, alternator, or other electronics. Clamp your welder’s ground directly to the bare metal near the repair area.
Assessing the Rust Damage
Before cutting anything, you need a clear picture of what is actually rusted versus what just looks bad. Surface rust on otherwise solid metal does not require a patch panel. Perforation rust, where the metal has holes or flakes apart when probed, needs to be cut out.
Tap the suspect area with a small pick hammer or screwdriver handle. Solid metal produces a sharp, metallic ring. Rusty metal sounds dull and thuds. Push a pick into any suspicious spots. If it breaks through, that section needs replacement.
Always cut back to solid, shiny bare metal with at least half an inch of healthy metal beyond the visible rust. Rust travels further under paint than you can see from the surface. If you do not remove enough, the repair will fail within a few years as corrosion creeps back under the weld.
For structural areas like frame rails, floor pan supports, or rocker panel reinforcements, consider whether the damage is beyond your skill level. If the rust affects more than 50 percent of a structural component, or if the panel supports weight or suspension mounting points, a professional assessment is worth the money. Cosmetic repairs on quarters, fenders, and doors are well within the DIY range.
Making a Template and Pattern for Your Patch
The masking tape pattern technique is the most reliable way to create an accurately shaped patch panel. This method comes straight from professional body shops and works for any panel shape.
Start by cleaning the area around the damage down to bare metal with a wire wheel or flap disc. This gives you a clear view of where solid metal meets rusted metal. Mark your cut line on the solid metal with a marker, staying at least half an inch beyond the visible rust damage.
Lay wide masking tape over the area you plan to replace, overlapping each strip slightly. Press the tape firmly into all contours and flanges. Use a marker to trace your cut line directly onto the tape. Then carefully peel the tape off in one piece. This tape pattern is now your exact template for the patch panel shape.
Stick the tape pattern onto your replacement sheet metal stock. Trace around it with a marker, adding a small margin of extra material if you plan to use a butt joint. Cut along your traced line with aviation snips, a cutoff wheel, or a pneumatic shear. The patch should match the cutout shape precisely.
For complex shapes with bends or flanges, use the tape pattern to identify where each fold goes. Mark the bend lines on both the tape and the patch metal before making any folds. A panel flanging tool creates the small lips that let you overlap panels for plug welding.
Preparing the Patch Panel
Preparation determines whether your weld holds and your panel fits flush. A patch that does not fit right before welding will never look right after welding.
Start by cleaning both the patch and the surrounding original metal to bare, shiny steel. Any remaining paint, rust, or undercoating will contaminate the weld and cause porosity. Use a wire wheel, flap disc, or chemical stripper to get down to clean metal on both sides of the joint.
For a butt joint, the edges of both the patch and the original panel should meet with zero gap. An interference fit, where the patch is very slightly oversized so it presses into place, is ideal. Gaps wider than the thickness of the sheet metal will cause burn-through and weak welds. Use a file or die grinder to fine-tune the fit.
For plug welding, create your lap joint by flanging the edge of either the patch or the original panel. A panel flanger creates a small stepped lip so the two pieces overlap flat. Then drill or punch 5mm (3/16 inch) holes every 1 to 1.5 inches along the overlapping section. These holes are where you will fill with weld to join the layers.
Clamp the patch into position using Cleco pins through pre-drilled holes, locking pliers, or both. Cleco pins are spring-loaded temporary fasteners that thread through a 3mm hole and pull the panels tight. They let you check the fit before committing to any welds. Confirm the patch sits flush with the surrounding surface with no high spots or gaps.
TIG vs MIG for Patch Panels
Both MIG and TIG welders can produce excellent patch panel welds, but they have different strengths. The right choice depends on your budget, experience, and the specific job.
MIG welding is the most common choice for DIY auto body work. It is faster, easier to learn, and more forgiving of imperfect fit-up. A MIG welder feeds wire continuously, which helps fill small gaps between panels. For sheet metal, use 0.023 inch or 0.025 inch wire with a 75/25 argon/CO2 gas mix. The downside is that MIG deposits slightly more heat into the panel, which increases warpage risk on thin metal.
TIG welding offers superior heat control and produces cleaner welds with less grinding required. TIG uses a foot pedal to control amperage in real time, letting you back off instantly if the metal starts to distort. This makes it the preferred choice for thin gauge sheet metal, especially on visible panels where you want minimal finishing. The trade-off is a steeper learning curve and slower travel speed.
Here is a side-by-side comparison:
Heat control: TIG wins with foot pedal amperage control. MIG requires careful technique and short passes.
Speed: MIG is faster once set up. TIG is slower but more precise.
Learning curve: MIG is beginner-friendly. TIG takes significantly more practice.
Finish quality: TIG produces smaller, cleaner weld beads that grind flat easily. MIG beads are larger and need more grinding.
Fit-up tolerance: MIG fills gaps better. TIG demands tight, nearly gap-free fit-up.
Cost: MIG welders are less expensive. TIG setups cost more but last decades.
For a beginner doing their first patch panel, a MIG welder with 0.023 inch wire is the practical choice. As your skills grow, upgrading to TIG will pay off on visible, high-quality restorations.
How to Stitch Weld a Patch Panel: Step by Step?
Stitch welding a patch panel requires patience and a methodical approach. The goal is to build a continuous weld bead across the entire joint while keeping heat input low enough to prevent warping the thin sheet metal.
Step 1: Tack weld the entire seam first. Place small tack welds every 1 to 2 inches along the joint, alternating sides as you go. This locks the panel in position and prevents it from shifting as heat builds. If the patch tries to gap during tacking, clamp it back down and re-tack.
Step 2: Start your first stitch weld pass. Begin at one end of the seam and lay a weld bead no longer than 1 inch. Focus on maintaining consistent arc length and travel speed. For MIG, use a push angle of about 10 to 15 degrees. For TIG, add filler rod as needed to fill the joint.
Step 3: Stop and let the metal cool. This is the most important step in stitch welding. After each 1-inch pass, stop welding and let the panel cool until you can comfortably touch the metal near the weld. This prevents heat from accumulating and distorting the panel. Using compressed air to speed cooling is acceptable, but avoid quenching with water which can cause brittleness.
Step 4: Move to a different section. Do not weld right next to your previous pass. Jump to a section on the opposite side of the patch, or at least 4 to 5 inches away from the last weld. This staggered approach distributes heat evenly across the panel rather than concentrating it in one area.
Step 5: Repeat until the seam is complete. Continue alternating between 1-inch passes and cooling periods, jumping around the joint to avoid heat concentration. A typical patch panel seam takes 15 to 30 passes with cooling time between each one. Be patient, as rushing leads to warpage.
Step 6: Fill any remaining gaps. Once you have covered the entire seam with intermittent welds, go back and fill the small gaps between passes. These connecting welds can be short, just enough to bridge the gap. Let each one cool before moving to the next.
Step 7: Inspect for complete fusion. Run your finger along the backside of the seam if accessible. You should feel slight penetration on the back side, confirming the weld went through the full thickness of the metal. No penetration means a weak joint that will crack.
How to Plug Weld Sheet Metal
Plug welding replaces factory spot welds when you cannot access the back side of a joint. It is the standard technique for joining overlapping panels like rocker sections, floor pans, and flanged edges.
Step 1: Drill holes in the top panel. Use a 5mm (3/16 inch) drill bit or pneumatic hole punch to create holes in the overlapping panel. Space them every 1 to 1.5 inches along the seam. Clean the edges of each hole to bare metal so the weld fuses cleanly.
Step 2: Clamp the panels tightly together. Any gap between the layers will cause the plug weld to fail. Use locking pliers, Cleco pins, or spring clamps to pull the top panel firmly against the bottom layer. Check that the panels are flat with no bowing.
Step 3: Position your torch at the hole. For MIG, hold the gun perpendicular to the panel with the wire directed at the center of the hole. For TIG, hold the torch at a slight angle and start the arc on the bottom layer of metal through the hole.
Step 4: Start welding in the center of the hole. Begin the arc on the bottom panel, not the edge of the top panel. Let the weld pool fill outward from the center, melting into the bottom layer first. For MIG, use a slight circular motion to distribute the filler metal evenly.
Step 5: Fill the hole completely. Add filler until the molten pool reaches the edge of the hole and fuses with the top panel. The finished plug weld should be slightly raised, forming a small nugget. Avoid overfilling, which creates a large glob that is difficult to grind flat.
Step 6: Move to the next hole after cooling. Just like stitch welding, alternate between holes rather than welding them sequentially. Skip around to distribute heat and prevent warpage. Let each plug weld cool for 15 to 30 seconds before moving on.
Step 7: Test each weld. Strike each plug weld nugget with a hammer and listen for the sound. A solid weld sounds sharp and metallic. A weak or unfused weld sounds dull and may crack under impact. If any weld fails this test, grind it out and redo it.
A properly executed plug weld should penetrate through to the bottom layer, creating a strong nugget that bonds both panels. The nugget diameter should be roughly the same as the hole diameter, with full fusion at the edges where the top and bottom layers meet.
Preventing Heat Warpage and Distortion
Heat warpage is the number one problem beginners face when welding thin sheet metal panels. The good news is that it is almost entirely preventable with the right technique.
The fundamental rule is to never let any single area of the panel get too hot. Heat causes the metal to expand. When it cools, the expanded metal shrinks unevenly, pulling the panel out of shape. Once a panel warps, fixing it requires specialized shrinking techniques that are difficult for beginners.
Short weld passes are your primary defense. Keep every weld under 1 inch, and ideally closer to half an inch on thin 20 to 22 gauge metal. After each pass, wait until the metal is cool enough to touch before welding again. Eastwood recommends 1 inch passes as the absolute maximum, and less is better for thin gauge.
Hammer welding, also called hammer planishing, reduces warpage between passes. After each tack or stitch weld, lightly tap the weld bead with a planishing hammer against a dolly on the back side. This stretches the shrunk metal back to its original shape. The secret experienced welders share on forums is simple: planish every tack as you go, and the panel never gets out of shape.
Thermal paste or heat sink compound applied to the metal on either side of the weld zone draws heat away from the panel. Some welders use copper blocks clamped behind the weld area as a heat sink. These tools are especially helpful on thin metal where warpage risk is highest.
Skip welding is another effective technique. Instead of welding one section to completion, jump around the panel placing tacks and short passes in different areas. This spreads heat across the entire panel rather than concentrating it in one spot. Combine skip welding with cooling time and hammer welding for the best results.
Grinding, Finishing, and Sealing the Weld
The welding is only half the job. How you finish the weld determines whether the repair is invisible or obvious from across a parking lot.
Start grinding with a 40 or 60 grit flap disc on an angle grinder. Hold the disc flat against the panel surface and grind the weld bead down gradually. Never tilt the grinder on its edge, as this digs gouges into the surrounding metal. Work slowly and check your progress often.
Once the weld is nearly flush, switch to a finer grit. An 80 grit flap disc followed by a Roloc disc in 120 grit brings the surface smooth. The goal is to grind the weld flush with the surrounding panel without removing any of the original metal. Stop as soon as the weld blends into the surface.
Run your hand over the finished area. Any high spots indicate weld that still needs grinding. Low spots mean you ground too aggressively or the weld had insufficient fill. Small lows can be filled with body filler, but deeper ones may need a re-weld.
Apply a thin skim coat of body filler over the seam to fill any minor imperfections. Sand the filler smooth with 180 grit, then 320 grit paper until the surface is uniform. Some restorers prefer body lead for a more traditional, durable finish, but body filler is easier for beginners and works well for most repairs.
This is where competitors stop, but sealing the weld is critical for preventing future rust. Apply epoxy primer to the bare metal immediately after grinding. Epoxy primer seals the metal from moisture and provides a barrier that prevents corrosion from starting under the repair. For areas with access to the back side, spray cavity wax or weld-through primer inside the panel to protect the seams you cannot see.
Without this sealing step, moisture migrates into the welded seam and rust forms within a year or two. The repair fails from the inside out, and you end up cutting the same area again. Always prime and seal every welded seam.
Common Mistakes to Avoid
Learning from other people’s mistakes saves you time and metal. Here are the most frequent errors that ruin patch panel repairs:
Welding too hot and too long. Beginners tend to run long continuous welds thinking they are being thorough. In reality, this warps the panel and burns through thin metal. Stick to short passes with cooling time between each one.
Poor fit-up before welding. If the patch does not fit flush before you start welding, no amount of welding skill will fix it. Spend the time to get a tight, gap-free fit. It is the single biggest factor in a clean repair.
Not cleaning the metal thoroughly. Paint, rust, undercoating, and galvanizing contaminate the weld pool and cause porosity. Weak, bubbly welds are almost always traced back to dirty metal. Grind everything to bare shiny steel before striking an arc.
Grinding too aggressively. It is easy to get carried away with a flap disc and grind into the surrounding panel, creating lows that require body filler to fix. Use light pressure and check your work constantly.
Skipping the primer and sealer. A beautiful weld will rust through in months if you do not seal it with epoxy primer. Bare welded metal corrodes faster than the original galvanized panel ever did.
Using the wrong wire size. Standard 0.030 inch MIG wire is too heavy for 22 gauge auto body sheet metal. Switch to 0.023 inch wire for better control and less heat input.
Not practicing first. Forum members consistently note that YouTube makes panel welding look easier than it is. Grab some scrap sheet metal of the same gauge and practice your technique before touching your actual project car.
FAQs
How to plug weld sheet metal?
To plug weld sheet metal, drill 5mm (3/16 inch) holes every 1 to 1.5 inches in the top overlapping panel. Clamp the panels tightly together, then start your arc in the center of each hole on the bottom layer of metal. Fill the hole outward until the weld pool fuses with both layers, creating a raised nugget. Alternate between holes to distribute heat, letting each weld cool before moving to the next.
Does JB Weld work on rusted metal?
JB Weld epoxy can fill small pinholes and seal minor surface rust, but it is not a structural repair for perforated auto body panels. It does not restore the strength that rusted metal has lost. For any panel with actual holes or structural damage, cutting out the rust and welding in a proper patch panel is the correct repair. JB Weld works best as a temporary fix or for filling tiny pits after welding.
How deep should a plug weld be?
A plug weld should penetrate fully through the top panel and fuse into the bottom layer of metal. For auto body sheet metal, the weld nugget should reach the bottom panel and form a bond roughly the diameter of the drilled hole. You can verify penetration by inspecting the back of the bottom layer for slight discoloration or a small bump where the heat traveled through. A weak plug weld that does not reach the bottom layer will fail under stress.
How do you stitch weld?
Stitch welding involves laying short weld passes of 1 inch or less along a joint, with cooling time between each pass. Start by tack welding the seam every 1 to 2 inches. Then weld a 1 inch section, stop, let the metal cool until you can touch it, and move to a different section of the seam. Continue alternating around the joint until the entire seam is welded, then fill any gaps between passes. This technique controls heat input and prevents warpage in thin sheet metal.
Wrapping Up
Mastering how to stitch and plug weld a rust repair patch panel takes patience and practice, but the results are worth it. Stitch welding gives you invisible seams on visible panels. Plug welding handles overlapping layers where you cannot reach the back side. Together, these two techniques let you tackle almost any auto body rust repair with professional results.
The key principles are simple: clean the metal thoroughly, get a tight fit-up before welding, keep your passes short with cooling time between each, and seal the finished weld with epoxy primer. Practice on scrap metal first, and do not rush the job. Your classic car deserves a repair that lasts as long as the rest of the body.
Grab your welder, make your template, and start practicing. Every stitch and plug weld you lay gets you closer to a rust-free restoration.