
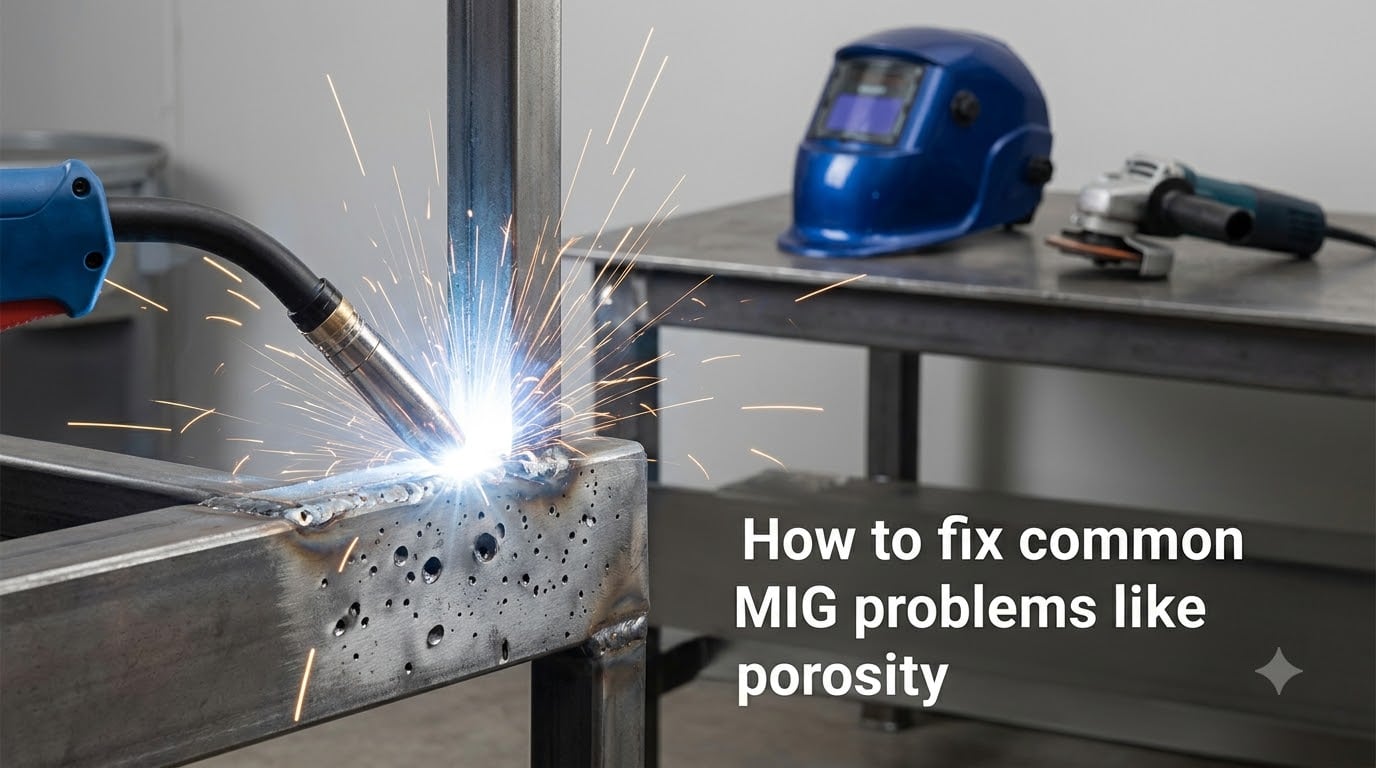
Porosity is the most common MIG welding defect, showing up as tiny holes or bubbles trapped inside or on the surface of a weld bead. I have seen this frustrate hobbyists and professionals alike, and the fix usually comes down to a handful of diagnostic steps you can run in your shop in under an hour.
This guide covers what porosity is, the four main types you will encounter, what actually causes them, and how to fix MIG porosity once it shows up. I have also included a troubleshooting checklist based on real experiences shared by welders on forums like Reddit, plus the specific gas flow numbers most guides leave out.
Table of Contents
What Is Porosity in MIG Welding?
Porosity in MIG welding is a defect where gas becomes trapped inside the weld metal as it solidifies, leaving small holes, pits, or bubbles in or on the bead surface. These cavities form when atmospheric gases (oxygen, nitrogen, or hydrogen) enter the molten weld pool because the shielding gas failed to protect it properly.
Once the metal cools and hardens, those trapped pockets remain as permanent voids. Porosity is more than a cosmetic issue. It reduces the cross-sectional strength of the weld, creates stress concentration points, and can lead to joint failure under load. This is why fixing MIG porosity quickly matters for any structural or load-bearing application.
In a Miller Welds study I have referenced for years, porosity ranks among the top three MIG defects alongside lack of fusion and burn-through. The good news is that it is almost always preventable once you know what to look for.
Types of Porosity You Might See
Porosity comes in four distinct forms, and identifying which one you have will point you toward the right fix. Most guides skip this step, but I have found it cuts troubleshooting time in half.
Surface Porosity
Surface porosity shows up as small pits or pinholes scattered along the top of the weld bead. It is the most common type and usually points to shielding gas problems at the moment of welding, like gas flow issues, drafts, or a contaminated nozzle.
Distributed Porosity
Distributed porosity appears as small holes spread throughout the entire weld bead, often visible only when you grind or cut into the weld. This type usually indicates contamination on the base metal or a long-term shielding gas failure during the weld.
Wormholes
Wormholes are elongated tunnels that run along the weld direction, looking like small worm tracks inside the bead. They form when gas escapes upward through the solidifying weld but gets trapped before reaching the surface. Wormholes are almost always linked to excessive gas flow, dirty base metal, or moisture contamination.
Crater Pipes
Crater pipes appear as a single larger hole at the end of a weld bead, where the arc was stopped. They form because the weld pool shrinks as it cools, and if you do not fill the crater properly, the molten metal pulls away from the center and leaves a void. Crater pipes are fixed with proper crater-fill techniques at the end of each weld pass.
What Causes Porosity in MIG Welds?
The root cause of almost all MIG porosity is the same thing: contamination of the weld pool by atmospheric gases. The specific reason it happens falls into one of three categories: shielding gas issues, base metal contamination, or machine problems. Below is the breakdown I use when I troubleshoot a porosity problem in my own shop.
Shielding Gas Problems
Inadequate shielding gas coverage is the single biggest cause of porosity, according to Hobart Brothers, Miller Welds, and every other source I have reviewed. Here is what to check first.
Gas flow rate is too low or too high. The recommended range is 8 to 12L/min (around 15 to 25 cubic feet per hour). Anything below 8L/min will not protect the weld pool, and anything above 15L/min creates turbulence that sucks in atmospheric air.
The gas cylinder is empty or nearly empty. A welder on Reddit described spending two hours chasing porosity before realizing his regulator was reading pressure from an empty cylinder.
The gas hose has a leak. Check all fittings, especially at the regulator and gun inlet. You can spray soapy water on connections and watch for bubbles.
The gas nozzle is clogged or too far back. Spatter buildup inside the nozzle or excessive contact tip recess reduces gas coverage. The recommended stickout for the contact tip is no more than 1 to 2mm beyond the gas nozzle.
Wind or drafts are blowing the gas away. MIG welding outdoors or near open doors requires a draft shield. Even a 5 mph breeze can break up the shielding gas envelope.
Base Metal Contamination
If your shielding gas setup is perfect and you still see porosity, the base metal is the next suspect. Contamination introduces hydrogen, oil, paint, rust, or moisture into the weld pool.
Oil, grease, or paint on the surface. These vaporize when heated and become trapped as gas pockets. Wipe the joint with acetone or a dedicated degreaser before welding.
Rust or mill scale. These contain moisture and oxides that release gas during welding. Grind the surface back to clean, shiny metal before you start.
Moisture on the metal. Welding wet or damp metal is a guaranteed porosity problem. Store your stock indoors and dry it before welding if needed.
Dirty or rusty filler wire. A welder on the r/Welding subreddit traced random porosity to a batch of rusty ER70S-6 wire he had stored in a damp garage. Discard any wire showing visible rust.
Machine and Equipment Issues
If your shielding gas and base metal both check out, the problem is likely inside your MIG setup. I have seen each of these cause porosity in real workshop settings.
Worn or wrong-size contact tip. A contact tip that is too large or too small for your wire diameter causes erratic arcs that pull in atmospheric gases. Replace the tip if the hole is worn or elongated.
Clogged gas diffuser. The diffuser sits inside the nozzle and distributes gas evenly. Spatter buildup here restricts flow. Clean it during routine maintenance.
Damaged MIG liner. A kinked or dirty liner disrupts wire feed and can affect gas flow in some gun designs. Replace the liner if you see metal shavings when you blow it out.
Wire feed speed mismatch. Too slow or too fast relative to your voltage setting creates an unstable arc that fails to maintain proper shielding. Follow the settings chart for your specific wire and material thickness.
Wrong shielding gas for the material. Using 100% CO2 on thin steel or wrong gas mix for stainless or aluminum causes porosity. For mild steel MIG welding, 75% argon/25% CO2 is the standard choice.
Why Porosity Suddenly Appears With Unchanged Settings
One of the most common questions on welding forums is, “My settings worked fine last week. Why am I getting porosity now?” In my experience, this almost always comes down to one of three things.
First, your shielding gas cylinder may have run low or out without you noticing. Second, a consumable like the contact tip or gas diffuser may have worn out gradually. Third, the base metal itself may be different from your previous job, even if it looks the same. A different supplier, a different batch, or stored-in-damp-conditions steel can all introduce new contamination.
A diagnostic trick I learned from a forum post: if another welder is connected to the same gas cylinder and getting clean welds, the problem is in your machine, not the gas supply. This isolates the issue fast.
How to Prevent Porosity Before It Starts
Preventing porosity is faster and cheaper than fixing it. Here is the step-by-step checklist I run through before every critical MIG weld. Most steps take under five minutes once they become habit.
Step 1: Verify Gas Flow
Set your flow meter to 10L/min as a baseline for indoor MIG welding on mild steel. Increase slightly for outdoor work or longer whip lengths. Check that the actual flow matches the dial by briefly disconnecting at the gun and watching the ball rise.
Step 2: Check Gas Hoses and Connections
Inspect the hose from the regulator to the gun for cracks or kinks. Tighten all fittings and run a soapy water leak test on every connection point. A small leak will rob you of coverage without setting off any alarms.
Step 3: Inspect Consumables
Check the contact tip for wear, the gas nozzle for spatter buildup, and the diffuser for blockage. Replace any consumable showing damage or excessive wear. Keep a spare set on hand so you are never tempted to push a worn tip too far.
Step 4: Clean the Base Metal
Grind or wire-brush the weld area back to bright, shiny metal on both sides of the joint if possible. Wipe with acetone to remove oils and fingerprints. For thicker sections or critical work, preheat the metal to drive off any surface moisture.
Step 5: Store Filler Wire Properly
Keep your welding wire in a dry environment, ideally in its original sealed packaging or a dedicated wire storage cabinet. Avoid leaving spools in the garage or shop where humidity and temperature swings can cause rust over time.
Step 6: Block Drafts
Set up portable screens or windbreaks if you are welding near open doors, fans, or outdoor conditions. Even mild air movement can disrupt the shielding gas envelope and cause porosity you cannot fix any other way.
Step 7: Run a Test Bead
Before welding your actual workpiece, lay down a short test bead on a scrap piece of the same material. Inspect it visually and, if possible, bend it or grind into it to check for hidden porosity. This five-minute step has saved me countless hours of rework.
How to Fix Porosity Once It Appears
Yes, you can fix porosity. The fix involves grinding out the defective weld and re-welding with corrected settings. Trying to weld over porosity without removing it will leave the original voids trapped inside the new weld, which is worse than starting fresh.
Step 1: Grind Out the Defective Weld
Use a grinding disc to remove the entire porous weld and at least 1 to 2mm of the base metal beneath it. The goal is to reach clean, solid parent metal with no visible pores or pitting.
Step 2: Identify and Correct the Cause
Before re-welding, walk through the cause list above and fix whatever you find. Common culprits I see in repair situations: a nearly empty gas cylinder, a clogged nozzle, or oil contamination from handling the workpiece with bare hands.
Step 3: Re-Weld With Verified Settings
Lay down a new bead using your corrected setup. Watch the arc behavior closely. A stable, smooth arc with minimal spatter usually indicates good shielding. If you still see porosity, stop and re-check gas flow and base metal cleanliness before going further.
Step 4: Inspect the Repair
Visually inspect the new weld for surface porosity, then grind a small test area or use dye penetrant if you need to verify internal soundness. For critical work, a destructive test on a sample coupon is the only sure way to confirm a clean weld.
Other Common MIG Problems to Watch For
Porosity is the most common MIG defect, but it rarely travels alone. Here are a few related issues to keep an eye on while you are troubleshooting.
Lack of fusion happens when the weld metal does not properly fuse with the base metal, usually because voltage is too low or travel speed is too fast. It often shows up alongside porosity in poorly set machines.
Excessive spatter is the molten metal droplets that stick to the workpiece around the weld. High spatter levels usually point to incorrect voltage, wrong shielding gas, or a dirty base metal, which are the same conditions that cause porosity.
Burn-through happens when too much heat blows through thin material. It is the opposite end of the spectrum from porosity, but both indicate your settings are out of balance for the material thickness.
Undercut is a groove at the weld toe caused by excessive current or travel speed. Like porosity, it weakens the joint and should be ground out and re-welded.
Frequently Asked Questions
Why am I getting porosity in my MIG welds?
Porosity in MIG welds is almost always caused by inadequate shielding gas coverage or contamination of the weld pool. The most common culprits are incorrect gas flow rate (outside the 8 to 12L/min range), leaks in the gas hose or fittings, a clogged or worn gas nozzle, drafts blowing away the shielding gas, or contamination on the base metal such as oil, rust, paint, or moisture. Check these areas first before suspecting machine issues.
How do I rectify porosity in welding?
To rectify porosity, first identify and fix the cause by checking gas flow, inspecting consumables, and cleaning the base metal. Then grind out the entire porous weld plus 1 to 2mm of the underlying base metal to reach clean, solid parent metal. Finally, re-weld using your corrected settings, and verify the repair with a visual inspection or, for critical work, a destructive test on a sample coupon.
What is the most common defect in MIG welds?
Porosity is widely recognized as the most common defect in MIG welds. It appears as small holes, pits, or bubbles trapped in or on the surface of the weld bead and is caused by atmospheric gases contaminating the molten weld pool. Lack of fusion and burn-through are the next most common MIG defects, but porosity tops the list across nearly every industry troubleshooting guide.
Can you fix porosity?
Yes, porosity can be fixed by grinding out the defective weld down to clean base metal, correcting the underlying cause (gas flow, contamination, or consumable wear), and re-welding with verified settings. You cannot simply weld over porosity, as the original voids will remain trapped inside the new weld and create a stronger likelihood of joint failure.
Final Thoughts on Fixing MIG Porosity
Porosity is one of the most common MIG welding problems, but it is also one of the most preventable. Once you understand that porosity is always about contamination of the weld pool, you can run through the same diagnostic checklist every time: check shielding gas flow and coverage, inspect base metal cleanliness, then verify machine consumables. Most welders fix their porosity problem inside fifteen minutes using this approach.
The key to long-term success is building good habits. Set your gas flow to 10L/min as a baseline, keep a spare set of consumables on hand, store your filler wire in a dry place, and run a test bead on scrap before every critical weld. These small steps will save you hours of rework and produce cleaner, stronger welds over the life of your MIG setup.
If you are still seeing porosity after working through this guide, the next step is to bring your machine to a welding supply shop for a bench check, or post a clear photo and description of your setup on a forum like r/Welding for community troubleshooting. Sometimes a fresh pair of eyes catches what you have been staring at for an hour.