
Your engine is idling rough, the RPM needle keeps climbing for no reason, and your check engine light is staring at you. Sound familiar? Chances are you are dealing with a vacuum leak, and tracking it down does not require an expensive smoke machine.
You can find vacuum leaks using carb cleaner, a can that costs under five dollars and lives in most garage cabinets. The method is fast, effective, and used by mechanics every day. But it does come with fire risks that you need to respect.
In this guide, I will walk you through exactly how to find a vacuum leak using carb cleaner, step by step. We will cover the symptoms that point to a leak, the safety precautions that keep you from starting a fire, the exact spray locations that matter, and how to read the results. I will also share alternative methods if carb cleaner is not your thing.
By the end, you will have a clear plan to diagnose your engine the way a shop tech would, minus the diagnostic fee.
Table of Contents
What Is a Vacuum Leak and Why Should You Care?
A vacuum leak happens when unmetered air sneaks into your engine past a damaged gasket, a cracked vacuum hose, or a loose fitting. That air never passed through the throttle body or carburetor the way it was supposed to. The engine computer does not know about it, so it fails to add the right amount of fuel to match.
What you end up with is a lean fuel condition. There is too much air and not enough fuel for proper combustion. Your engine runs hotter, shakes at idle, and may even stumble when you accelerate.
Engines rely on manifold vacuum to power all sorts of auxiliary systems. Brake boosters, PCV valves, fuel pressure regulators, and HVAC controls all depend on that vacuum staying sealed. A leak in one spot can throw off multiple systems at once.
Vacuum leaks are common on older vehicles with aging rubber hoses and hardened gaskets. But even newer cars develop them, especially at the intake manifold plenum and throttle body gaskets where heat cycling takes a toll.
The carb cleaner spray test is one of the oldest tricks for finding these leaks. When you spray the cleaner near a leak point, the liquid gets sucked into the engine instead of air. That momentarily richens the mixture and changes the way the engine idles, telling you exactly where the problem is.
Symptoms That Tell You a Vacuum Leak Exists
Before you start spraying anything, you want to confirm that a vacuum leak is actually the likely culprit. Here are the symptoms I look for first.
Rough idle is the number one sign. The engine shakes, the RPM needle wobbles, and the whole car feels like it wants to stall. This happens because one or more cylinders are running leaner than the rest.
High idle RPM is another dead giveaway. If your engine is hanging at 1,200 or 1,500 RPM when warm and settled, unmetered air is likely getting in and bumping up the throttle response.
A whistling or hissing sound from the engine bay, especially at idle, is air being pulled through a small crack or gap. Track that sound before you even pick up a spray can.
Check engine light with lean codes is the digital confirmation. The two most common codes are P0171 (System Too Lean, Bank 1) and P0174 (System Too Lean, Bank 2). When the oxygen sensor detects excess oxygen in the exhaust, it sets these codes, and a vacuum leak is a frequent cause.
Stalling or hesitation on acceleration can also point to a leak. The engine struggles to maintain proper air-fuel ratio under load because the unmetered air throws off fuel trims.
Power brake pedal feels hard if the leak is at the brake booster vacuum line. You will notice the pedal is stiff and stopping distance increases.
If you have two or more of these symptoms, a vacuum leak is a strong suspect and the carb cleaner test is your next step.
Safety Precautions Before You Start Spraying
Carb cleaner is extremely flammable. That is the single most important thing to understand before you do this test. Forum users on r/MechanicAdvice have shared stories of accidental fires from spraying near hot exhaust manifolds. I take those warnings seriously, and so should you.
Keep a fire extinguisher within reach. A small ABC dry chemical extinguisher is fine. Do not rely on a garden hose to put out a fuel fire.
Never spray near the exhaust manifold, exhaust headers, or catalytic converter. These components run at several hundred degrees and can ignite the carb cleaner vapor instantly.
Work in a well-ventilated area. Carb cleaner fumes are toxic. An open garage door or working outdoors is the minimum. Avoid enclosed spaces.
Remove any rags, paper towels, or oily materials from the engine bay before you start. One stray spark near a solvent-soaked rag is all it takes.
Wear safety glasses and nitrile gloves. Carb cleaner strips skin oils and can irritate your eyes if it splashes.
Do not smoke or have any open flame nearby. This includes pilot lights on gas water heaters if you are working in a basement garage.
Have the engine at normal operating temperature but not overheated. A warm engine makes the test more effective because rubber parts expand, but a red-hot exhaust manifold is a fire hazard.
If you are not comfortable with any of this, the alternative methods later in this guide, like soapy water or a smoke machine, are safer choices.
Tools You’ll Need for the Carb Cleaner Test
You do not need much. Here is the full list.
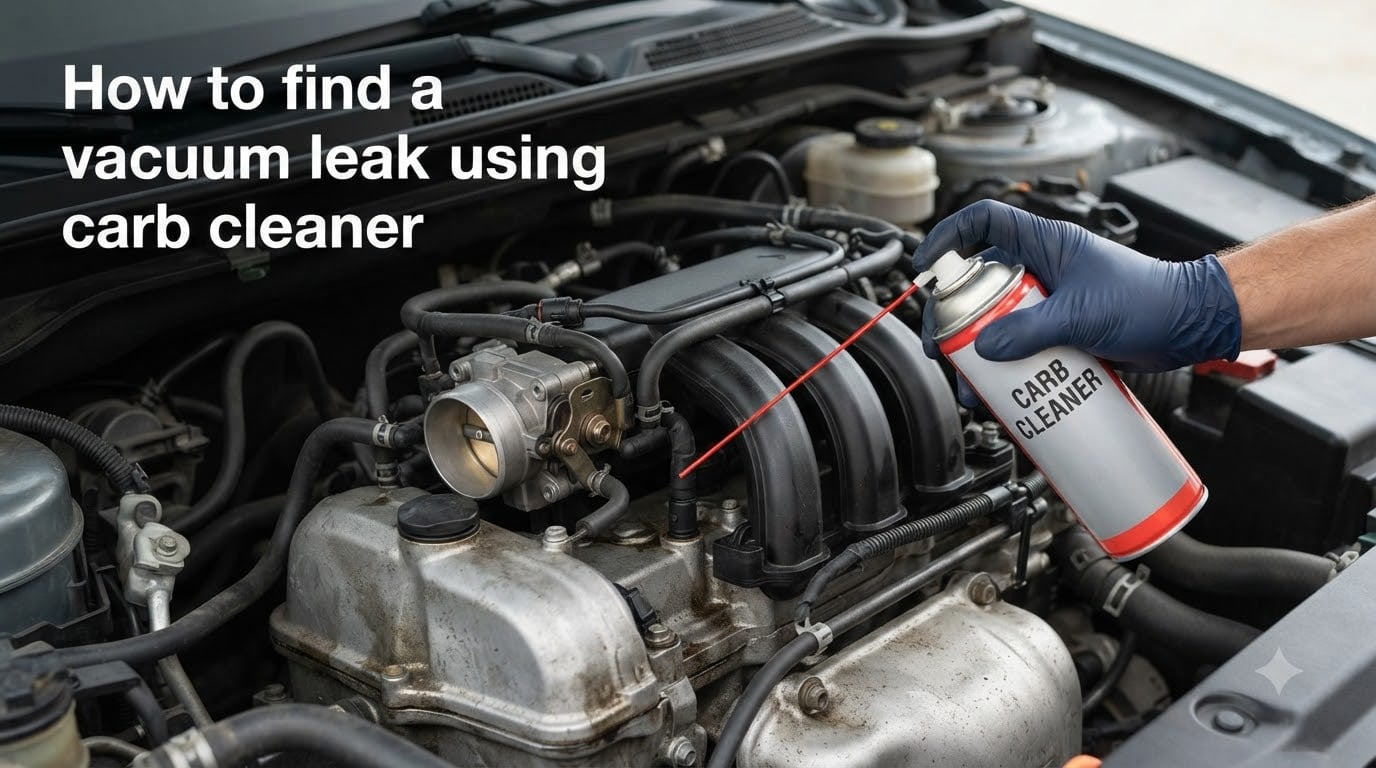
One can of carburetor cleaner with a spray straw (the narrow red tube that snaps onto the nozzle)
Safety glasses
Nitrile gloves
A fire extinguisher rated ABC
A flashlight or work light
A mirror on a stick (helpful for seeing behind the intake manifold)
An OBD2 scanner if you want to monitor fuel trims in real time (optional but useful)
That is it. The spray straw matters because it lets you direct a narrow stream at specific gasket seams and hose connections instead of fogging the whole engine bay.
How to Find a Vacuum Leak Using Carb Cleaner: Step-by-Step
This is the core procedure. Follow each step in order and take your time.
Step 1: Start the engine and let it reach operating temperature. A warm engine idles more consistently, which makes it easier to detect changes when you spray. Let it warm up for about ten minutes.
Step 2: Set the engine to idle. Do not hold the throttle open. You want a steady, low idle so that any RPM change is obvious. If your car has a high-idle cold mode, wait until it drops to normal warm idle.
Step 3: Attach the spray straw to the carb cleaner nozzle. This gives you precision. Without it, the cleaner disperses too widely and you cannot pinpoint the leak.
Step 4: Begin spraying at the intake manifold gasket seams. These are the joints where the manifold meets the cylinder head. Move the straw slowly along each seam, pausing for a few seconds at each section.
Step 5: Spray around the throttle body gasket. The base of the throttle body where it bolts to the intake plenum is a common leak point, especially on plastic intake manifolds.
Step 6: Work your way along every vacuum hose. Follow each hose from end to end, spraying at the connections where hoses slide onto nipples or barbed fittings. Pay attention to elbows and sharp bends where rubber cracks first.
Step 7: Spray around the PCV valve and its grommet. The PCV valve sits in a rubber grommet in the valve cover, and that grommet hardens and leaks over time.
Step 8: Check the brake booster vacuum connection. The large hose that runs from the intake to the brake booster has a check valve that can fail. Spray at both ends of that hose.
Step 9: Listen and watch for a change in idle. This is the moment of truth. If the cleaner gets sucked into a leak, the engine RPM will change, the idle will smooth out, or the exhaust note will deepen momentarily.
Step 10: Mark the spot. When you get a reaction, note the exact location. Use a piece of tape or a paint pen so you can find it again when it is time to fix the leak.
Step 11: Move on and retest. There can be more than one leak. Do not stop after finding the first one. Work your way around the entire intake system methodically.
Step 12: Shut off the engine before you stop for a break. Do not leave the engine running while you walk away or reach for tools. Minimize the time the engine is running while you are spraying.
How to Interpret the Results
Knowing what the engine is telling you is just as important as knowing where to spray. Here is how to read the reactions.
If the idle smooths out and RPM drops slightly: You found the leak. The carb cleaner temporarily sealed the gap, the engine pulled in the cleaner instead of unmetered air, and the air-fuel mixture briefly returned to normal. That smoother idle is your confirmation.
If the idle RPM rises: Some engines react by increasing RPM when the cleaner is drawn in. Either way, a change in idle behavior at the spray point means you have found a leak.
If nothing changes: Either there is no leak at that spot, or the leak is too small for the spray test to catch. Move to the next location. If you have sprayed every seam and hose with zero reaction, the problem may not be a vacuum leak at all, or you may need a smoke machine for tighter leaks.
If the idle changes but you cannot narrow it down: This usually means the cleaner is vaporizing before it reaches the leak. Try short, controlled bursts instead of a long spray. Carb cleaner evaporates quickly, which is one of its downsides for pinpoint accuracy.
If multiple areas react: You may have multiple leaks, which is common on older vehicles. Fix them all, not just the most obvious one.
One forum tip I have found valuable: watch your OBD2 fuel trims while you spray. If the long-term fuel trim suddenly swings toward zero when you hit a spot, that confirms a lean condition was being corrected and you just removed the source.
Common Vacuum Leak Locations to Check First
Not every spot on the engine is equally likely to leak. Here are the locations I check first, based on how often they fail.
Intake manifold gasket is the most common source of vacuum leaks. The gasket sits between the manifold and the cylinder head, and heat cycling causes it to harden and shrink. On V6 and V8 engines, check both banks.
Vacuum hoses are next. Rubber degrades from heat and ozone over time. Hoses under the intake, near the exhaust, or routed close to hot components fail first. Squeeze each hose. If it feels hard, brittle, or cracks under your fingers, replace it.
Throttle body gasket is a frequent offender, especially on engines with plastic intake manifolds. The gasket compresses and leaks where the throttle body bolts to the plenum.
PCV valve and grommet leak when the rubber grommet in the valve cover ages. The PCV valve itself can also stick open, creating a constant vacuum source that throws off idle.
Brake booster is a large vacuum consumer. The booster diaphragm can tear, or the check valve at the hose connection can fail. If your brake pedal feels stiff along with idle problems, start here.
Vacuum caps and tees are easy to overlook. A rubber cap on an unused vacuum port rots and falls off, leaving an open hole. Check every cap on the intake manifold.
EVAP purge valve can stick open and create a constant vacuum leak. This one often triggers a specific EVAP code alongside the lean condition.
Intake plenum gasket on the upper intake, common on GM 3800 Series II engines and similar designs. These plastic intakes are notorious for gasket failure.
Alternative Methods to Find a Vacuum Leak
Carb cleaner is effective, but it is not your only option. Some alternatives are safer, and some are more accurate. Here is how they compare.
Propane torch (unlit): This is the method many mechanics prefer. You open the valve on an unlit propane torch and run the hose around gasket seams and vacuum fittings. Propane is drawn into the leak and richens the mixture, just like carb cleaner. The advantage is that propane does not leave residue and you have better flow control with the valve. The downside is that propane is still flammable, so the same fire precautions apply.
WD-40: WD-40 works on the same principle but is less dramatic in its effect. It evaporates more slowly than carb cleaner, which can actually help you watch the idle change over a longer window. Multiple forum users confirm it works, but the reaction is subtler. Watch closely.
Brake cleaner: Some people use brake parts cleaner, but I do not recommend it. It is even more volatile than carb cleaner, dries almost instantly, and the fumes are harsher. Stick with carb cleaner if you are going the solvent route.
Starting fluid (ether): Avoid this. Ether is extremely volatile and ignites at low temperatures. The risk of fire is significantly higher than with carb cleaner. There is no good reason to use it when safer alternatives exist.
Soapy water: Safe and non-flammable. Spray a soapy water solution around suspected leak areas while the engine is off, then start the engine. A vacuum leak will pull the water inward and you may see bubbles or a slight change in idle. This method works best on larger leaks and is not as precise as the solvent sprays.
Smoke machine: The professional standard. You pump low-pressure smoke into the intake system with the engine off and watch where it escapes. It is the most accurate method and carries zero fire risk. The downside is cost. A smoke machine runs from $40 for a budget unit to several hundred for a pro model. If you work on cars regularly, it is worth the investment.
Cigar or smoke trick: An old mechanic trick where you blow smoke (from a cigar or a smoke source) near the intake while the engine idles. The vacuum pulls the smoke in at the leak point. It is crude but works in a pinch.
For most DIYers, the choice comes down to carb cleaner for speed and propane for control. If fire risk is a dealbreaker, soapy water or a budget smoke machine are your answers.
How to Fix a Vacuum Leak After You Find It?
Finding the leak is half the job. Fixing it properly is what restores your engine to normal.
Cracked vacuum hose: Replace the entire hose, not just the cracked section. Use the correct inside diameter. Slide the new hose onto the fitting fully and route it away from exhaust heat if possible.
Failed intake manifold gasket: This is a bigger job. You need to remove the intake manifold, clean both mating surfaces completely, and install a new gasket. Use OEM-quality gaskets. Follow the manufacturer torque sequence when reassembling, because uneven torque can recreate the leak.
Throttle body gasket: Remove the throttle body, clean the mating surface, and install a new gasket. This is a straightforward job on most engines.
PCV grommet or valve: Pull the old PCV valve out of the grommet, replace the grommet, and install a new PCV valve. These parts are inexpensive and should be replaced as preventive maintenance every 30,000 to 50,000 miles.
Brake booster failure: If the booster diaphragm is torn, the booster needs to be replaced or rebuilt. The check valve at the hose connection can be replaced separately if it is the only problem.
Missing or rotted vacuum cap: Replace with a new rubber cap of the correct size. Do not use tape or a folded-over hose end as a permanent fix.
After any repair, clear the OBD2 codes and take the car for a test drive. Watch your fuel trims to confirm they have returned to normal range. If the lean code comes back, there is another leak you missed.
One tip from the forum community: after fixing leaks on a carbureted engine, reset the idle mixture and idle speed screws. A vacuum leak changes the effective mixture, and the previous idle settings will no longer be correct.
OBD2 Codes Linked to Vacuum Leaks
Vacuum leaks show up in your engine computer as specific trouble codes. Understanding these codes helps you confirm the diagnosis and verify the fix.
P0171 (System Too Lean, Bank 1) is the most common code associated with a vacuum leak. The oxygen sensor on bank one is reading too much oxygen in the exhaust, meaning the engine is running lean. The computer has been adding fuel via long-term fuel trims to compensate, and it has reached its limit.
P0174 (System Too Lean, Bank 2) is the same condition on bank two. On V6 and V8 engines, if both P0171 and P0174 appear together, a vacuum leak affecting the whole intake is the prime suspect, as opposed to a single fuel injector or one bad O2 sensor.
P0507 (Idle Air Control System RPM Higher Than Expected) can appear when a vacuum leak raises idle RPM above what the computer commands.
P0300 through P0308 (Random or Specific Misfire) may show up if the lean condition is severe enough to cause a cylinder to misfire. The misfire is a symptom of the vacuum leak, not a separate ignition problem.
To check your fuel trims with a scanner, look at both short-term and long-term fuel trim values. A positive long-term trim above 10 percent on one or both banks strongly suggests the computer is compensating for unmetered air. After you fix the leak, those trims should return to near zero.
Not every P0171 is caused by a vacuum leak. A failing mass airflow sensor, clogged fuel injectors, or low fuel pressure can also trigger it. But vacuum leaks are one of the cheapest and easiest causes to check, which is why the carb cleaner test is the right first diagnostic step.
FAQs
Can you spray carb cleaner to find a vacuum leak?
Yes. Spraying carb cleaner near gasket seams, vacuum hoses, and intake connections while the engine idles is an effective way to find vacuum leaks. If the cleaner gets drawn into a leak, the engine idle will change, telling you the leak location. Always follow fire safety precautions because carb cleaner is highly flammable.
How to find a carburetor vacuum leak?
To find a carburetor vacuum leak, start the engine and spray carb cleaner around the carburetor base gasket, intake manifold gasket, and all vacuum hose connections. Work slowly and listen for a change in idle speed or smoothness. When the idle reacts, you have found the leak. Common spots are the carb base gasket and the throttle shaft bushings.
What is the best thing to use to find a vacuum leak?
A smoke machine is the most accurate and safest tool for finding vacuum leaks. For a budget alternative, an unlit propane torch offers better control than carb cleaner with similar effectiveness. Carb cleaner is the cheapest and fastest option but carries the highest fire risk. Soapy water is the safest choice for large leaks.
Where is the most common place for a vacuum leak?
The intake manifold gasket is the most common location for a vacuum leak. Heat cycling causes the gasket to harden and shrink over time, allowing unmetered air to enter. Other frequent leak points include vacuum hoses, the throttle body gasket, the PCV valve grommet, and the brake booster vacuum connection.
Wrapping Up
Finding a vacuum leak using carb cleaner is one of those DIY skills that pays for itself the first time you use it. A five-dollar can and ten minutes of careful spraying can save you a diagnostic fee and get your engine running right again.
The keys to doing it safely and effectively are simple. Warm the engine, use the spray straw for precision, work methodically around every gasket seam and hose connection, and watch the idle for any change. Always keep a fire extinguisher nearby and never spray near hot exhaust components.
If carb cleaner feels too risky for your situation, propane, soapy water, or a budget smoke machine are solid alternatives that get the same job done. Once you find the leak, replace the failed gasket or hose, clear your codes, and verify that your fuel trims return to normal.
Take it one step at a time, trust what the engine tells you, and you will have your car back to a smooth idle without a shop bill.