
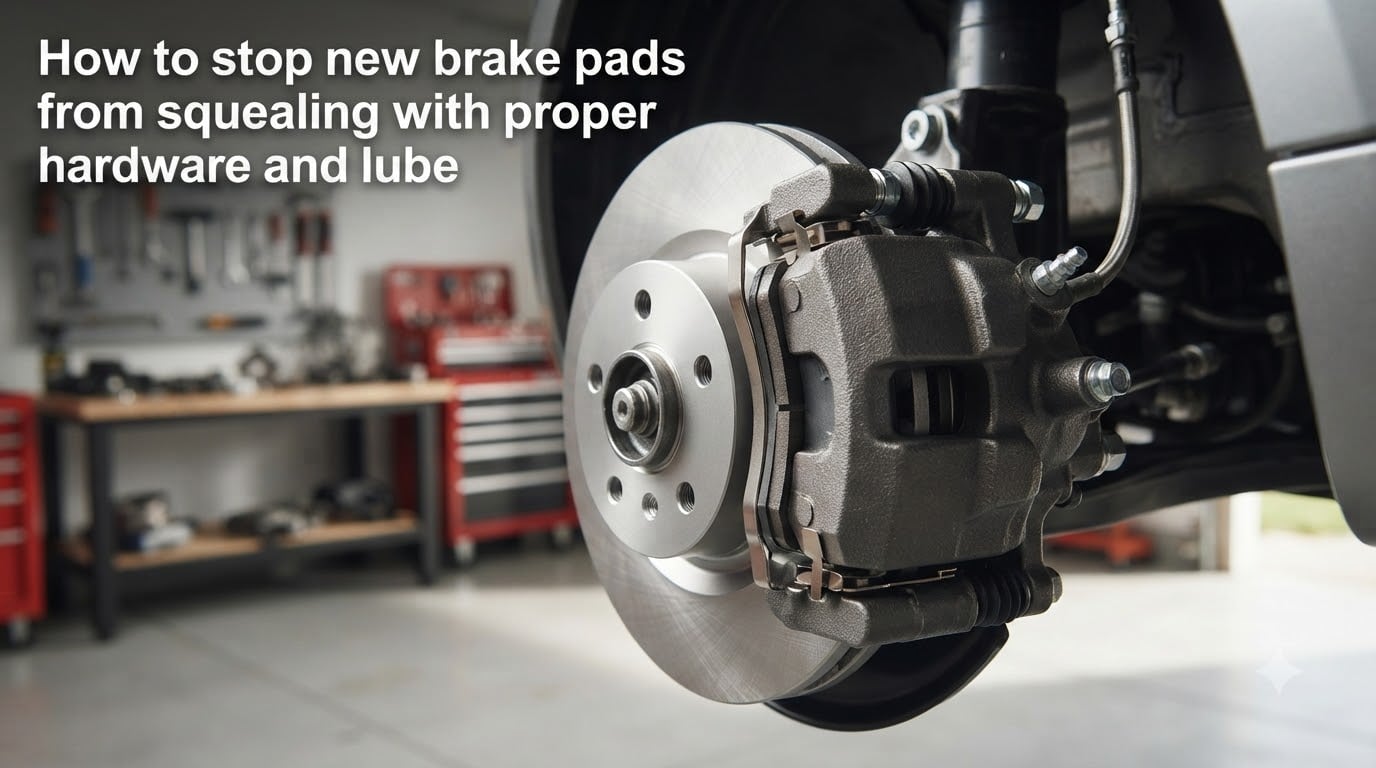
You just installed new brake pads, and now your car squeals like a wounded cat every time you come to a stop. I have been there, and I know how frustrating it feels after spending hours and money on fresh parts. The good news is that squealing new brakes are almost always fixable, and the cause usually comes down to three things: hardware, lubrication, or break-in.
Learning how to stop new brake pads from squealing starts with understanding that the noise is vibration, not a sign that your brakes are failing. When the brake pad vibrates against the caliper and rotor at a high frequency, it produces that piercing squeal. Proper hardware and the right lube in the right places dampen that vibration and silence the noise.
In this guide, I will walk you through exactly why new pads squeal, the specific contact points where lubrication matters, the 30-30-30 break-in procedure, and the DIY mistakes that make the problem worse. Whether you just did your own brake job or a shop did it for you, you will know exactly what to check and fix.
Table of Contents
Why New Brake Pads Squeal in the First Place?
Brake squeal is a high-frequency vibration problem, plain and simple. When the brake pad makes contact with the rotor, microscopic movements happen between the pad, the caliper, and the surrounding hardware. Without proper damping, those vibrations hit a resonant frequency that your ears pick up as a squeal.
Think of it like a tuning fork. The brake pad and rotor are the metal components that vibrate, and the hardware kit (pad clips, shims, slide pins) acts as the dampener that keeps things quiet. When that dampening system is worn, missing, or dry, the squeal begins.
This is why new pads often squeal more than old ones. Fresh pad material has a different surface texture and friction coefficient than your old worn pads. The new pad and rotor need time to mate together perfectly, and during that mating process, vibration levels are higher.
There is also a difference between the sounds your brakes make. A squeal is high-pitched and continuous, usually caused by vibration. A squeak is intermittent and often tied to moisture. A grind means metal-on-metal contact and indicates a serious problem you need to address immediately.
Common Causes of Brake Squeal After New Pad Installation
Before you can fix the problem, you need to identify which of these common culprits is causing your squeal. Most squealing falls into one of five categories.
Insufficient Lubrication on Contact Points
This is the number one cause of new brake squeal. The contact points where the brake pad ears meet the caliper bracket, and where the caliper piston meets the back of the pad, need a thin film of high-temperature brake grease. Without it, metal rubs against metal and vibrates with every stop.
I see this constantly in forums like r/MechanicAdvice. DIYers install new pads but skip the grease step entirely, or they apply it to the wrong areas. Even a brand-new pad will squeal if the contact points are bone dry.
Reusing Old, Worn Brake Hardware
Pad clips, anti-rattle shims, and slide pins wear out over time. When you reuse old hardware with new pads, the hardware has already lost its spring tension and dampening ability. Loose-fitting hardware lets the pad move around more than it should, and that movement creates squeal.
Reddit users frequently report that shops skip hardware replacement to save time and money. If your new brakes started squealing right after a shop did the work, ask whether they installed new hardware kits or reused the old ones. This is a common shortcut that leads directly to noise complaints.
Glazed Pads or Rotors
Glazing happens when brakes overheat and the pad material hardens into a glass-like surface. A glazed pad cannot grip the rotor properly, and the smooth hard surface tends to vibrate and squeal. New pads can glaze quickly if you do hard stops during the break-in period instead of gentle ones.
You can identify glazing by looking at the pad surface. A healthy pad has a slightly rough, matte finish. A glazed pad looks shiny, smooth, and almost reflective. If your pads are glazed, you may be able to sand them lightly with medium-grit sandpaper to break the glaze, though replacement is the long-term fix.
Incomplete or Skipped Break-In Procedure
New pads and rotors need a proper bedding-in process to transfer an even layer of pad material onto the rotor surface. Without this transfer layer, the pad and rotor surfaces do not mate properly, and vibration increases. Many DIYers and even some shops skip this step entirely.
The break-in procedure is not optional if you want quiet brakes. It typically takes about 200 to 300 miles of careful driving for pads to fully seat, but a proper bedding-in procedure accelerates and improves that process dramatically.
Moisture and Surface Rust
Overnight moisture or light rain can cause a thin layer of surface rust on the rotors. When you brake in the morning, the pads scrape off that rust and may squeal for the first few stops. This type of squeal is completely normal and goes away as the rotors heat up and dry off.
However, if the squealing persists beyond the first few stops on a dry day, moisture is not your problem. You need to look at the other causes on this list.
How to Stop New Brake Pads From Squealing?
Here is the exact process I use to silence squealing brakes after a new pad installation. Follow these steps in order, and you will address the most common causes systematically.
Step 1: Remove the Wheels and Inspect the Hardware
Jack up the car safely, remove the wheel, and take a close look at the brake assembly. Check the pad clips for signs of wear, cracking, or warping. Inspect the slide pins by pulling them out of the caliper bracket and looking for rust, pitting, or dried-out grease.
If the hardware looks worn, bent, or corroded, replace it. A new hardware kit costs relatively little compared to the pads and rotors, and it is the single biggest noise-reduction upgrade you can make.
Step 2: Replace Worn Pad Clips and Hardware
Remove the old pad clips from the caliper bracket. Clean the bracket channels thoroughly with a wire brush and brake cleaner until the metal is bare and smooth. Press the new pad clips into place, making sure they seat fully and securely in the bracket grooves.
If your new pads came with anti-rattle shims, install those too. Some shims come pre-installed on the pads, while others are separate pieces that clip onto the backing plate. Follow the manufacturer’s instructions for your specific pad set.
Step 3: Clean All Components With Brake Cleaner
Spray down the caliper, bracket, pads, and rotor with brake cleaner. Wipe everything with a clean lint-free rag. This removes any old grease, dust, oil from your fingers, and manufacturing residue that could cause uneven contact or contamination.
Never use parts cleaner, soap, or other solvents on brake components. Brake cleaner is specifically formulated to evaporate completely without leaving residue. Other cleaners can leave a film that reduces friction or attracts dust.
Step 4: Apply Lubrication to the Correct Contact Points
This is the step where most people go wrong, so pay close attention. Apply a thin layer of high-temperature brake grease to these specific points only:
The pad ears or tabs where they slide into the caliper bracket clips
The back of the brake pad where the caliper piston makes contact
The caliper slide pins (after cleaning and regreasing them)
The edges of the backing plate where they contact the caliper fingers
Between the pad and the anti-rattle shim (if equipped)
Use a small amount. You want a thin film, not a thick gob. Too much grease attracts dirt and can actually make things worse over time.
Step 5: Reassemble, Torque, and Test
Put everything back together, making sure the pads slide freely in the clips by hand. Torque all bolts to the manufacturer’s specification. Put the wheel back on, lower the car, and pump the brake pedal several times before driving to seat the caliper piston against the pads.
Then perform the break-in procedure described in the next section. Do not skip this, even if everything looks perfect during reassembly.
Where to Apply Brake Grease (and Where NOT To)?
This section deserves its own deep dive because getting lubrication wrong can ruin your brakes or create a safety hazard. I have seen people spray products on friction surfaces and turn a small squeal into a total brake failure.
Where TO Apply Brake Grease
Apply grease only to metal-to-metal contact points where vibration occurs. These are the surfaces where the pad backing plate touches the caliper, not where the friction material touches the rotor. The key contact points are the pad ears, the caliper piston contact area on the pad backing, the caliper slide pins, and any shim-to-metal interfaces.
When greasing slide pins, pull them completely out of the bracket. Wipe off all old grease with a clean rag, inspect for pitting or rust, and apply fresh high-temperature silicone brake grease. Push the pins back in and make sure they slide smoothly with slight resistance.
Where NOT to Apply Brake Grease
Never apply any lubricant to the friction face of the brake pad. This is the side that presses against the rotor. Grease on the friction surface will contaminate the pad, reduce stopping power, and create a dangerous driving condition.
Never apply grease to the rotor surface either. The rotor needs clean, bare metal to generate friction against the pad. Any oil or grease on the rotor gets transferred to the pad and permanently contaminates both components.
Also avoid spraying anything on the friction surfaces to stop noise. Products like WD-40, penetrating oils, or generic sprays will soak into the pad material and destroy its friction properties. I have seen people try this as a shortcut, and it always makes things worse.
How Much Brake Grease to Use
Less is more. You want a thin, even film that covers the contact area completely but does not squeeze out in globs when the caliper presses the pad. Think of it like seasoning a cast iron pan, not like frosting a cake.
If grease squeezes out past the contact area when you press the pad into place by hand, you have applied too much. Wipe off the excess with a clean rag before reassembly. Excess grease will eventually migrate and could reach the friction surface.
The 30-30-30 Brake Break-In Procedure
The 30-30-30 method is a widely recommended bedding-in procedure that transfers an even layer of pad material onto the rotor surface. This transfer layer is what makes brakes quiet and effective. Without it, the pad and rotor surfaces remain rough and inconsistent, which leads to vibration and squeal.
Here is how to perform the 30-30-30 break-in procedure correctly:
The First 30: Perform 30 Controlled Stops From 30 MPH
Find a quiet, straight road with no traffic. Drive to 30 mph and apply the brakes smoothly to slow down to about 5 mph. Do not come to a complete stop. Immediately accelerate back to 30 mph and repeat. Do this 30 times in succession.
Use moderate, consistent pedal pressure. You want firm braking but not a panic stop. The goal is to heat up the pads and rotors gradually and evenly so the pad material deposits smoothly onto the rotor.
The Second 30: Let the Brakes Cool for 30 Minutes
After the 30 stops, the rotors will be hot. Do not park the car and sit on the brakes at a standstill, because the pads can leave an imprint on the hot rotor that causes uneven deposition and vibration. Instead, drive gently without braking hard for several minutes to let the rotors cool gradually.
Then park the car and let everything cool for at least 30 minutes. Ideally, let it sit for an hour or more. The cooling process sets the transfer layer and completes the bedding-in chemistry.
Signs the Break-In Worked
After the procedure, your brakes should feel smoother and more responsive. Any initial squeal should diminish significantly within the first 50 to 100 miles of normal driving after bedding-in. If the squeal persists after 300 miles post-procedure, you have a hardware or lubrication issue that the break-in alone will not fix.
Note that some high-performance or track-oriented pad compounds require a more aggressive break-in procedure specified by the manufacturer. Always check the pad manufacturer’s recommendations for your specific pads.
When New Brake Squeal Is Normal vs When to Worry
Not all brake noise is a sign of trouble. Knowing the difference between normal break-in sounds and serious problems can save you unnecessary worry and help you catch real issues early.
Normal Brake Noises
A light squeal or squeak during the first few days after installation is common, especially during the break-in period. Morning moisture squeal that goes away after the first few stops is also completely normal. Some pad materials, particularly semi-metallic compounds, are naturally noisier than others during bedding-in.
If the noise is intermittent, happens at very low speeds, and gradually decreases over the first 200 to 300 miles, you are likely experiencing normal break-in noise. Perform the 30-30-30 procedure if you have not already, and give it time.
Concerning Brake Noises
Persistent squealing that does not improve after 300 to 500 miles of driving is not normal. A grinding sound means metal-on-metal contact, which could indicate a pad that has worn down to the backing plate or a rotor that is severely damaged. Either situation requires immediate attention.
If your brake pedal feels spongy, the car pulls to one side during braking, or the steering wheel vibrates when you brake, you have a problem beyond simple squeal. These symptoms point to caliper issues, warped rotors, or brake fluid problems that need professional diagnosis.
When to Seek Professional Help
If you have followed all the steps in this guide, replaced the hardware, lubricated the contact points, performed the break-in procedure, and the squeal persists after 500 miles, take the car to a qualified mechanic. You may have a stuck caliper, a warped rotor, or pad material that is incompatible with your rotors.
A stuck or seized caliper keeps the pad pressed against the rotor constantly, causing overheating, glazing, and persistent noise. This is not something you can fix with grease or hardware. It requires caliper rebuilding or replacement.
Common DIY Mistakes That Cause Brake Squeal
Forum discussions on r/MechanicAdvice and other communities reveal the same mistakes repeated over and over. Here are the errors I see most frequently and how to avoid them.
Using WD-40 Instead of Brake Grease: WD-40 is a penetrating oil, not a lubricant. It evaporates quickly, leaves residue, and provides no high-temperature protection. It also contaminates friction surfaces if it gets anywhere near the pad face. Only use brake-specific high-temperature grease on brake contact points.
Reusing Old Hardware to Save Money: I understand the temptation to reuse pad clips and shims that look fine. But hardware loses its spring tension and dampening properties over tens of thousands of miles. A new hardware kit costs less than a tank of gas and eliminates the most common cause of squeal.
Getting Grease on Friction Surfaces: Even a fingerprint on the rotor or pad face can cause noise and reduced braking performance. Always handle pads by their edges, wear clean gloves, and clean everything with brake cleaner before final assembly. If you accidentally touch or grease the friction surface, clean it immediately.
Skipping the Break-In Procedure: Installing pads and immediately driving normally is a recipe for noise. The pads need that controlled heat cycling to deposit material evenly on the rotor. Take 20 minutes to do the 30-30-30 procedure and you will dramatically reduce the chance of squeal.
Overtightening or Undertightening Bolts: Caliper bolts and slide pin bolts have specific torque specs. Overtightening can warp the bracket or bind the slide pins. Undertightening allows vibration and movement. Always use a torque wrench and follow the manufacturer’s specifications for your vehicle.
Choosing the Right Brake Lubricant
Not all grease works for brakes. The extreme temperatures, constant moisture exposure, and safety requirements of brake systems demand specialized lubricants. Here is what you need to know to choose the right product.
Types of Brake Grease
Silicone-based brake grease is the most common type for general brake lubrication. It handles high temperatures well, resists moisture, and does not damage rubber seals on slide pins. This is what I recommend for most DIYers.
Synthetic brake grease is engineered for even higher temperature ranges and longer service life. It tends to stay in place better than silicone grease and resists washout from rain and car washes. Look for synthetic formulas rated for at least 500 degrees Fahrenheit.
Ceramic brake grease is designed specifically for ceramic brake pad installations. It contains ceramic particles that provide additional dampening to reduce noise. If you are running ceramic pads, a ceramic-compatible grease gives you the best noise reduction.
Why Regular Grease Fails
Standard automotive grease, wheel bearing grease, and multi-purpose grease are not suitable for brake contact points. These greases break down at brake operating temperatures, melt and run off the contact surfaces, and can contaminate the friction material. Some petroleum-based greases also degrade rubber caliper boots and slide pin seals.
Check the label for a temperature rating of at least 500 degrees Fahrenheit and explicit brake system compatibility. If the product does not say it is safe for brakes, do not use it on your brakes.
What to Look For on the Label
The best brake lubricants will clearly state their temperature range, compatibility with rubber and plastic components, and intended use on brake systems. Look for products that mention caliper pins, pad backing, and anti-squeal applications directly on the packaging. A quality brake grease is a small investment that prevents a lot of frustration.
FAQs
How to stop brand new brake pads from squeaking?
To stop brand new brake pads from squeaking, replace the old hardware kit (pad clips, shims, slide pins), apply high-temperature brake grease to the metal contact points on the pad backing and caliper slides, clean everything with brake cleaner, and perform the 30-30-30 break-in procedure. Never put grease on the friction surface of the pad or rotor.
How long does it take for brake pads to stop squeaking after new ones?
New brake pads typically stop squeaking within 200 to 300 miles of driving after a proper break-in procedure. If you performed the 30-30-30 bedding-in process, the squeal should diminish significantly within the first 50 to 100 miles. If squealing persists beyond 500 miles, you likely have a hardware or lubrication issue that needs attention.
What can I spray on my brakes to stop squealing?
You should not spray anything on your brake pads or rotors to stop squealing. Sprays can contaminate the friction surfaces and reduce stopping power. The correct fix is to apply high-temperature brake grease to the metal contact points on the pad backing, caliper slides, and hardware. Brake cleaner spray is safe for cleaning components but provides no lubrication.
Should new brake pads squeal?
Some light squealing during the first few days is normal as new pads bed in against the rotors. However, persistent loud squealing is not normal and usually indicates insufficient lubrication on contact points, worn or missing hardware, or an incomplete break-in procedure. If the squeal does not improve after 300 miles, investigate the hardware and lubrication.
Can I use WD-40 on my brake pads?
No, never use WD-40 on brake pads or any brake component. WD-40 is a penetrating oil that will contaminate the friction material, reduce stopping power, and potentially cause brake failure. Only use brake-specific high-temperature grease on metal contact points and brake cleaner for cleaning.
Why do my brakes still squeal after replacing pads and rotors?
If your brakes squeal after replacing both pads and rotors, the most likely causes are reused old hardware, missing lubrication on the correct contact points, or a skipped break-in procedure. Less commonly, you may have a seized caliper that keeps the pad pressed against the rotor. Check the hardware, lubricate the pad ears and caliper slides, and perform the 30-30-30 bedding-in procedure.
Conclusion
Stopping new brake pads from squealing comes down to three core fixes: replacing worn hardware, applying the right brake grease to the correct contact points, and performing a proper break-in procedure. When you address all three, the vast majority of squeal disappears within the first few hundred miles.
The key things to remember are simple. Always install a new hardware kit with new pads. Apply high-temperature brake grease only to the metal-to-metal contact points, never to the friction surfaces. And take 20 minutes to do the 30-30-30 bedding-in procedure before driving normally.
If you have followed every step in this guide and the noise persists beyond 500 miles, do not keep guessing. Take the car to a qualified mechanic to check for a seized caliper or rotor issue that requires professional attention. Your brakes are the most important safety system on your car, and peace of mind is worth the inspection cost.