
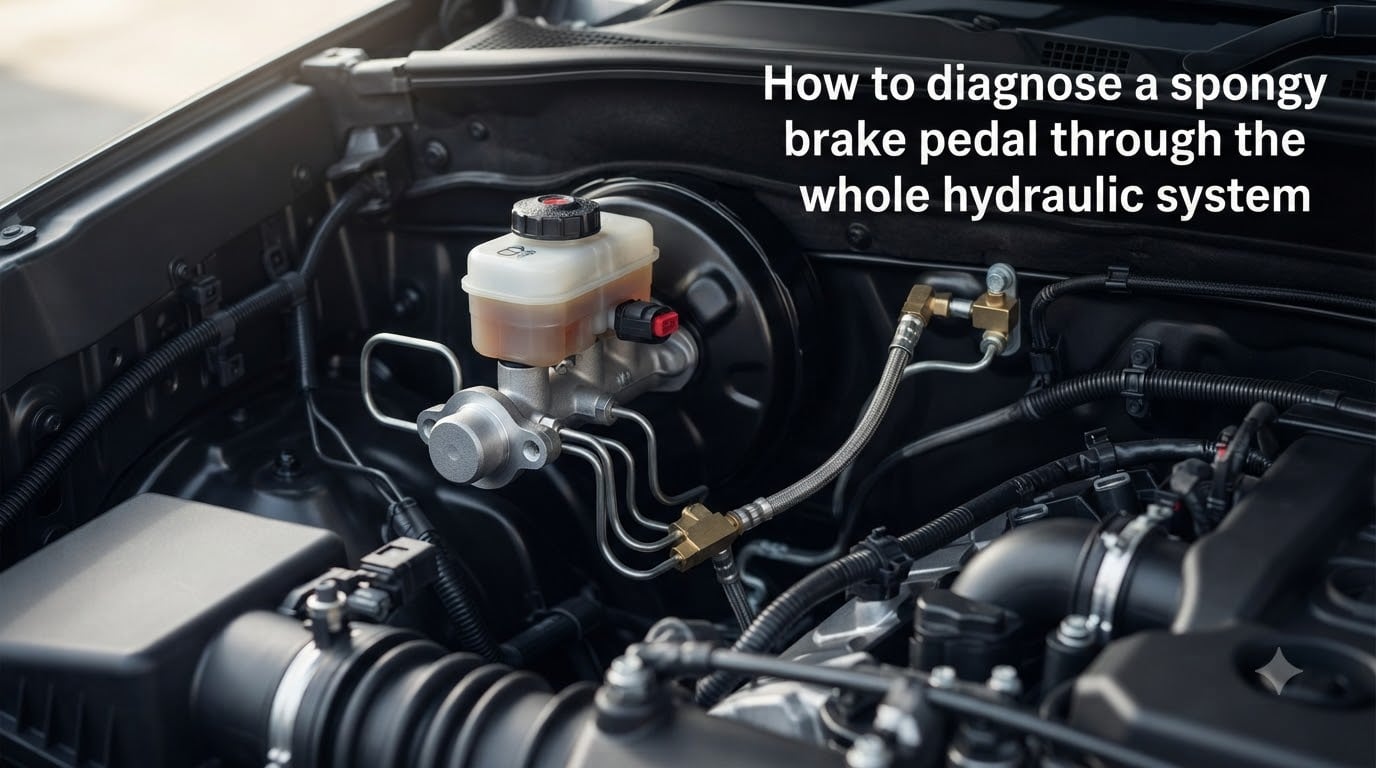
Nothing kills confidence faster than pressing your brake pedal and feeling it sink slowly toward the floor. A spongy brake pedal means something in your hydraulic system has stopped doing its job, and figuring out exactly what component failed is harder than most guides admit. Learning how to diagnose a spongy brake pedal through the whole hydraulic system takes you from a vague worry to a specific answer without guesswork.
I have helped drivers, weekend mechanics, and shop technicians work through this exact symptom on everything from daily commuters to heavy trucks. The pattern is always the same: skip the systematic walkthrough and you end up replacing parts that were not the problem. Follow a proper diagnostic sequence and you isolate the failure in under an hour.
This guide gives you that sequence. You will learn what a spongy pedal feels like, why it is dangerous, how the hydraulic system works, and then walk through a numbered diagnostic procedure that checks every component in the system. By the end, you will know whether you are dealing with air in the lines, a failing master cylinder, a leaking caliper, or something more unusual like an ABS hydraulic unit problem.
If you want the short version: spongy brakes almost always trace back to something that compresses or leaks in a sealed hydraulic circuit. Air compresses, fluid leaks, internal seals bypass. Every diagnostic step below targets one of those three failure types.
Table of Contents
What Does a Spongy Brake Pedal Feel Like?
A spongy brake pedal feels soft, squishy, or mushy when you press it, and it may continue sinking toward the floor after you stop applying pressure. Instead of the firm, predictable resistance you feel during normal braking, the pedal has a cushioned quality like stepping on a wet sponge.
There are a few variations worth learning to recognize because each one points to a different area of the hydraulic system:
Soft but firm after pumping: The pedal sinks on the first press but firms up after two or three pumps. This is the classic signature of air trapped in the brake lines.
Pedal slowly sinks to the floor: You hold steady pressure and the pedal drifts down over several seconds. This usually means the master cylinder is bypassing internally or you have a small external leak.
Low pedal that grabs near the floor: The brakes engage, but only at the bottom of the pedal travel. Often caused by excessive pad clearance, a misadjusted drum brake, or fluid contamination.
Firm with engine off, soft with engine running: This pattern points toward a brake booster or vacuum problem rather than the hydraulic circuit itself.
Excessive travel before any braking: You press a long way before the brakes start to bite. This can mean air, worn components, or a master cylinder low on fluid.
If any of these match what you are feeling, treat it as a real problem. Spongy is not a personality trait of an aging car, it is a symptom of a hydraulic system that can no longer transmit full pedal force to the wheels.
Why Spongy Brakes Are Dangerous and Need Immediate Diagnosis?
Spongy brakes are dangerous for one simple reason: they increase your stopping distance. Every extra inch of pedal travel and every pound of force lost to air or bypass is force that should have gone to the brake pads and rotors. In a panic stop, that lost force is the difference between stopping short of an obstacle and hitting it.
The danger compounds under hard braking. Brake fluid heats up during aggressive stops, and any moisture absorbed by hygroscopic DOT fluid boils at a lower temperature. Boiling fluid creates more vapor bubbles, the pedal gets softer, and you end up with progressively worse braking right when you need it most. This is why spongy brakes that feel manageable on a gentle test drive can become terrifying on a steep mountain descent.
There is also a failure progression to watch for. A small internal master cylinder leak that produces a slightly soft pedal today can become a complete loss of braking tomorrow if a seal lets go entirely. I have seen drivers ignore a “minor” spongy pedal for weeks only to have the pedal go completely to the floor at the next stoplight.
The bottom line: any change in pedal feel warrants diagnosis, not delay. The diagnostic steps below are designed to be safe to perform with the vehicle stationary, so there is no reason to put them off.
How Your Hydraulic Brake System Works?
To diagnose the system you need a mental model of how it works. The brake system is a sealed hydraulic circuit that uses incompressible fluid to multiply and transmit the force from your foot to the wheels.
Here is the path the force takes, in order:
Pedal and pushrod: Your foot presses the pedal, which pushes a rod into the master cylinder. The pedal ratio multiplies your leg force several times.
Brake booster (vacuum or hydraulic): On most vehicles a vacuum booster adds assist force so you do not have to stand on the pedal. Some vehicles use hydro-boost, which uses power steering pressure instead.
Master cylinder: The pushrod moves pistons inside the master cylinder bore. Those pistons force brake fluid out through two separate circuits (front and rear, or diagonally split). The dual-circuit design means a failure in one circuit still leaves you with partial braking.
Brake lines and hoses: Rigid metal lines carry the pressurized fluid from the master cylinder toward each wheel. Flexible rubber hoses bridge the gap to the moving calipers and rear axle.
ABS hydraulic unit: On modern vehicles the fluid passes through an ABS module that can modulate pressure to individual wheels during a skid.
Calipers and wheel cylinders: At each wheel, the pressurized fluid pushes a piston (in a disc brake caliper) or pistons (in a drum brake wheel cylinder). That piston clamps the pads against the rotor or pushes shoes against the drum.
Friction material: Pads or shoes create the friction that slows the wheel.
The entire circuit is sealed and full of incompressible fluid. Because liquids cannot be compressed, the instant you move the master cylinder piston, an equal pressure wave reaches every caliper and wheel cylinder. That instant response is what gives a healthy pedal its firm feel.
Air ruins this. Unlike brake fluid, air is highly compressible. Even a small pocket of air somewhere in the lines absorbs the pressure you apply instead of passing it through. The pedal feels soft because part of your pedal stroke is being wasted compressing that air pocket. That is why “bleeding the air out” is the most common fix, and why most of the diagnostic procedure below is built around finding where air or a leak is entering the sealed system.
Common Causes of a Spongy Brake Pedal
Soft brake pedal causes fall into four broad categories. Knowing which category your symptoms match helps you target the right diagnostic section.
Air in the hydraulic system is the single most common cause. Air gets in after a brake job that opened the system, through a low fluid level that let the master cylinder draw air, or through a bleeder valve that leaked. Any air pocket compresses under pressure and produces that squishy feel.
External fluid leaks reduce the fluid volume available to transmit pressure. Leaks can happen at caliper seals, wheel cylinder cups, brake hose connections, rusted metal lines, or the back of the master cylinder. Even a small weep is enough to soften the pedal.
Internal seal failures are sneakier because they do not leave a puddle. The master cylinder has internal seals that can wear and let fluid bypass from one circuit to the other instead of pushing it out to the wheels. Caliper pistons can also bypass internally on some designs. These failures feel like a soft pedal but show no visible leak.
Fluid problems and component faults round out the list. Old, moisture-saturated DOT fluid boils under hard use and creates vapor bubbles. A failing brake booster can produce a soft pedal with the engine running. ABS hydraulic unit issues can trap air or fail to modulate correctly. Drum brakes with excessive shoe-to-drum clearance can mimic a spongy pedal. Each of these has its own diagnostic step below.
Step-by-Step Diagnostic Procedure Through the Whole Hydraulic System
This is the core of the guide. Work through these steps in order. Each step either confirms a problem or rules out a section of the hydraulic system, so do not skip ahead. You will need basic hand tools, a clean rag, fresh DOT fluid matching your vehicle spec, a clear bleeder hose, and a helper or a one-person bleeder kit.
Step 1: Start With the Static Pedal Test
Before touching anything, perform the engine-off pedal test. With the engine off, pump the pedal several times to deplete any residual vacuum assist. The pedal should feel firm and hold steady when you press hard on it. If it pumps up firm but sinks back down when you hold pressure, you have confirmed a hydraulic problem worth chasing.
Next, hold firm steady pressure on the pedal and start the engine. The pedal should drop slightly as vacuum assist engages, then hold firm. If the pedal sinks significantly or feels dramatically softer with the engine running, suspect the brake booster or vacuum supply rather than the hydraulic circuit. Note this result because it changes where you focus the rest of the diagnosis.
Step 2: Check the Brake Fluid Level and Condition
Open the master cylinder reservoir with a clean rag around the cap to keep dirt out. The fluid should sit between the MIN and MAX lines on both chambers. A low level in one chamber but not the other tells you a specific circuit has a leak or worn pads. A low level in both points to a leak somewhere shared or simply neglected fluid top-offs.
Look at the fluid color. Fresh DOT 3 or DOT 4 fluid is clear to light amber. Dark brown or black fluid is old, contaminated, and almost certainly moisture saturated. That moisture lowers the boiling point and is a leading cause of spongy brakes after hard use. If the fluid looks like coffee, plan on a full system flush regardless of what else you find.
Top off the reservoir with the correct DOT-rated fluid before continuing. Never mix DOT 5 silicone fluid into a system designed for DOT 3, 4, or 5.1 glycol fluid. The two are chemically incompatible and the resulting mess will destroy your hydraulic system.
Step 3: Perform a Thorough Visual Leak Inspection
Start at the master cylinder and work your way to every wheel. Check the back of the master cylinder where it bolts to the booster, looking for dampness that indicates the rear seal is leaking into the booster. Inspect every metal brake line for rust scaling, wet spots, and chafing where lines pass near moving parts. Pay special attention to lines along the frame rails and near suspension mounting points where road debris strikes.
At each wheel, pull back any dust boots on the caliper and look for fluid weeping past the piston seal. Check the flexible rubber hoses for swelling, cracking, and dampness at the crimped metal ends. Drum brake vehicles require removing the drum to inspect the wheel cylinder, so check for dampness on the backing plate first as a telltale sign.
If you find a leak, you have your answer and the next step is repair followed by a full bleed. If everything is dry, move on.
Step 4: Bleed the System Methodically
Bleeding removes trapped air and is the most common fix for a spongy pedal. Follow the sequence recommended for your vehicle, but the general rule is to start at the wheel farthest from the master cylinder and work closer. A typical sequence is right rear, left rear, right front, left front.
The classic two-person method works well: helper presses the pedal, you open the bleeder screw, fluid and air exit through a clear hose into a jar, you close the screw before the helper releases the pedal. Repeat at each wheel until no bubbles appear in the clear hose for several consecutive cycles.
Watch for a subtle trap that shows up in forum discussions: air can be drawn back in through the bleeder screw threads, not just the brake line. Wrap the bleeder threads with Teflon tape or use a bleeder screw with a threaded fitting that seals properly. If you keep getting bubbles that never clear, this is often why.
Keep the master cylinder reservoir topped off during the entire process. Letting it run dry pulls more air into the system and undoes all your progress.
Step 5: Test Pedal Firmness After Bleeding
Once the system is bled, repeat the static pedal test from Step 1. If the pedal is now firm and holds steady under sustained pressure, your problem was air and you are done. If the pedal is still spongy, you have ruled out the most common cause and need to move deeper into the system.
A pedal that pumps up firm but sinks under steady sustained pressure points to an internal master cylinder bypass. A pedal that feels fine at rest but softens dramatically after a few hard stops points to fluid boiling from moisture contamination. These are the patterns the next sections help you confirm.
Step 6: Isolate the Master Cylinder With the Bench Pressure Test
If you suspect the master cylinder, you can test it without removing it. With the brake pedal held under firm steady pressure, watch for any slow creep toward the floor. A healthy master cylinder holds the pedal rock-solid for at least 30 seconds. A pedal that drifts down under steady pressure indicates internal seal bypass.
Another confirmation method is to plug the master cylinder outlet ports temporarily and feel the pedal. If the pedal goes rock hard with the outlets blocked but is soft when connected to the lines, the master cylinder itself is fine and the problem is downstream. This is an advanced test, so if you are not comfortable working with the master cylinder lines, leave it to a professional.
Step 7: Inspect Each Caliper and Wheel Cylinder
A stuck or internally bypassing caliper can produce a soft pedal just like air in the lines. With the wheels off, have a helper press the pedal while you watch each caliper. The pistons should move promptly and the pads should clamp the rotor firmly. A piston that moves slowly, binds, or fails to retract when pressure releases indicates a stuck or internally worn caliper.
On drum brake vehicles, check that the wheel cylinder pistons move evenly when the pedal is pressed. Uneven movement or fluid weeping past the dust boots means the wheel cylinder needs replacement. Also verify drum brake adjustment, because excessive shoe-to-drum clearance creates excessive pedal travel that mimics a spongy pedal.
Step 8: Consider the ABS Hydraulic Unit
Modern vehicles route brake fluid through the ABS hydraulic unit, and a problem here is often overlooked. Trapped air in the ABS module will not bleed out with the standard gravity or two-person method. It requires a scan tool to command the ABS pump and valves to cycle during bleeding, which flushes air out of the accumulator and valve block.
If your pedal is spongy right after a brake job that involved opening lines and the standard bleed does not fix it, suspect trapped ABS air. This is a common frustration for DIY mechanics and usually requires either a capable scan tool or a trip to a shop with one.
Step 9: Road Test and Verify Under Real Conditions
After any repair or bleed, road test the vehicle in a safe area. Start with gentle stops to confirm normal pedal feel, then progress to moderate and finally firm braking. Pay attention to any pull, noise, or return of sponginess. A pedal that feels fine in the driveway but goes soft after a few hard stops confirms fluid boiling from moisture, which means a full flush is needed.
Checking the Master Cylinder and Brake Booster
The master cylinder and brake booster are the two components that confuse DIY mechanics the most, partly because they sit next to each other and partly because their symptoms overlap. Here is how to tell them apart.
A failing master cylinder produces a pedal that drifts down under steady pressure even with the engine off. The internal seals are worn and fluid bypasses from the pressure side back to the reservoir instead of going to the wheels. You may also notice a slow loss of fluid with no visible external leak, because the fluid is leaking past the rear seal into the brake booster. The test is the steady-pressure hold described in Step 6.
A failing brake booster produces different symptoms. With the engine off the pedal feels normal and firm, but with the engine running it becomes excessively soft or drops too far. The booster is supposed to add assist; if its internal diaphragm or check valve is bad, the pedal behavior changes with engine vacuum. A quick test is to pump the pedal with the engine off to deplete vacuum, hold the pedal, and start the engine. A healthy booster pulls the pedal down slightly and holds it. A failed booster either does nothing or makes the pedal feel worse.
Vacuum supply is the third variable. A leaking vacuum hose, bad check valve, or engine running poorly can starve the booster even if the booster itself is fine. Check the vacuum hose for cracks and listen for a hiss at the booster with the engine idling.
The decision point: if the pedal holds firm under steady pressure with the engine off, the master cylinder is fine and the issue is more likely the booster, vacuum supply, or air in the lines. If the pedal sinks with the engine off, focus on the master cylinder or an external leak.
When the Problem Is in the ABS Module or Wheel Components?
Once you have ruled out air, leaks, the master cylinder, and the booster, the remaining suspects live at the wheels or inside the ABS unit.
ABS hydraulic unit failures can trap air that standard bleeding cannot remove, as covered in Step 8. The ABS module can also fail internally with stuck valves or a malfunctioning pump that produces a soft pedal or erratic brake behavior. Symptoms include a soft pedal accompanied by an ABS warning light, unusual pump motor noise, or uneven braking that the standard bleed does not resolve. Proper diagnosis here requires a scan tool that can read ABS codes and command valve and pump operation.
Brake caliper problems include stuck slides, seized pistons, and torn piston seals. A seized caliper may not produce a spongy pedal directly, but if the piston seal is compromised it can draw air back into the system as the piston retracts. Inspect each caliper for smooth piston movement, intact dust boots, and free-sliding guide pins.
Wheel cylinder failures on drum brake vehicles produce similar symptoms to caliper seal failures. Look for fluid weeping past the dust boots, uneven piston movement, and dampness on the backing plate. Wheel cylinders are inexpensive and replacing both rear units at once is standard practice since they wear together.
Brake hose deterioration is an underappreciated cause. A rubber hose with an internal delamination can act as a one-way check valve, trapping pressure at the caliper or preventing full pressure application. A hose that has swollen externally or shows cracks in the rubber should be replaced. An internal fault is harder to spot but shows up as a brake that drags or a pedal that feels different at one wheel.
What to Do If Bleeding Does Not Fix the Spongy Pedal
This is the scenario that drives people to mechanic forums. You bled the brakes, the pedal felt great for a day or a week, and then the sponginess came back. Here is the troubleshooting path.
First, verify you actually removed all the air the first time. Common bleeding mistakes include letting the master cylinder run dry, not following the correct wheel sequence, opening the bleeder too far so air sucks back through the threads, or skipping the ABS bleed procedure on a vehicle that requires it. Re-bleed carefully with thread-sealed bleeder screws and the correct sequence before assuming something deeper is wrong.
If the pedal is firm immediately after bleeding but softens over days or weeks, you almost certainly have a leak that is letting air back in. Recheck every junction, caliper seal, and hose end with the system pressurized. A leak small enough to not drip can still admit air during pedal release as internal pressure drops below atmospheric.
Intermittent sponginess, where the pedal feels fine most of the time but goes soft occasionally, often points to a master cylinder seal that bypasses only under certain pressure or temperature conditions. It can also indicate an ABS unit valve that sticks intermittently. Both are hard to catch without a pressure gauge on the system, and this is a reasonable point to bring in a professional with the right diagnostic equipment.
If the pedal is spongy only after a specific event like a hard stop, suspect moisture-contaminated fluid boiling under heat. The fix is a complete system flush with fresh, sealed DOT fluid and a follow-up road test to confirm the symptom is gone.
When to Seek Professional Help?
Some brake diagnoses are well within reach of a careful DIY mechanic, and some are not. Knowing the difference keeps you safe and saves money on parts you did not need.
Tackle it yourself if you have a firm pedal that suddenly went soft after a brake job, a clear external leak you can see and reach, or air that a proper bleed sequence will remove. These are the common cases and the steps above cover them completely.
Call a professional if the pedal sinks under steady pressure and you cannot confidently isolate the master cylinder, if the ABS warning light is on and you do not have a capable scan tool, if you suspect internal ABS hydraulic unit failure, or if you have re-bled and re-inspected and the problem still defies diagnosis. A shop with a pressure bleeder, a brake pressure gauge set, and an ABS-capable scan tool can isolate problems in a fraction of the time it takes to guess.
Also seek help immediately if the pedal ever goes completely to the floor, if braking performance is noticeably degraded in traffic, or if you smell hot brakes. Those are not diagnostic situations, they are tow-truck situations.
FAQs
Why is my brake pedal so spongy but there are no leaks?
A spongy pedal with no visible leak usually means air trapped in the hydraulic lines, an internal master cylinder seal bypass, or moisture-contaminated brake fluid boiling under pressure. Air is the most common cause and often enters the system after a brake job or through a low fluid level, even when nothing is dripping externally. Bleed the system thoroughly, and if that does not fix it, test the master cylinder with the steady-pressure hold test.
What is the most common cause of a spongy brake pedal?
Air trapped in the brake lines is by far the most common cause of a spongy brake pedal. Air is compressible while brake fluid is not, so any air pocket absorbs pedal force instead of transmitting it to the calipers. This is why bleeding the brakes is the first and most effective fix for a soft pedal.
Can I drive with a spongy brake pedal?
No, driving with a spongy brake pedal is not safe. Spongy brakes increase stopping distance, reduce the force reaching the brake pads, and can progress to complete brake failure. If you notice a change in pedal feel, diagnose and repair it before driving the vehicle again, or have it towed to a shop if braking performance is significantly degraded.
Why does the pedal get firm after pumping but go soft again?
A pedal that firms up after two or three pumps and then goes soft again is the classic signature of air in the brake lines. Pumping pushes the air into smaller pockets and builds temporary pressure, but as soon as you release the pedal the air expands and the softness returns. Proper bleeding at all four wheels, starting with the wheel farthest from the master cylinder, removes the air and fixes the symptom.
Why do my brakes feel spongy after hard braking or pad replacement?
After hard braking, sponginess usually means moisture-contaminated brake fluid boiled from the heat, creating vapor bubbles that compress under pressure. The fix is a full system flush with fresh DOT-rated fluid. After a pad replacement, sponginess typically means air entered the system when a caliper or line was opened, and a proper bleed at all four wheels will restore a firm pedal.
Conclusion
Diagnosing a spongy brake pedal is a process of elimination that follows the hydraulic system from pedal to wheel. Start with the static pedal test, check fluid level and condition, inspect for leaks, bleed the system properly, and then move into master cylinder, booster, ABS, and component-level testing only if the basics do not solve it. The most common answer is trapped air, and a careful bleed in the correct sequence fixes the majority of cases.
The reason most diagnostic attempts fail is not that the problem is mysterious, it is that a step got skipped or rushed. Take the time to work the procedure in order, keep the master cylinder reservoir full during bleeding, and seal the bleeder screw threads so air does not sneak back in. If you follow the steps above and the pedal is still soft, that is your signal to bring in a professional with pressure gauges and an ABS-capable scan tool rather than replacing parts on a hunch.
Your brakes are the one system where guessing is never acceptable. Use this walkthrough, work safely, and when in doubt, tow it.