
Every torque wrench drifts out of calibration eventually. After about 2,500 to 2,800 uses, the internal spring weakens enough that your wrench can be off by several percent.
An out-of-calibration wrench is more than a minor annoyance. Over-tightened lug nuts, stretched head bolts, or stripped threads can ruin a Saturday project and sometimes create real safety problems. Knowing how to check torque wrench calibration at home with a known weight saves you the cost of professional service and gives you confidence before any critical job.
I have tested this method on click-type, beam, and digital wrenches in my own garage over the past three years. This guide walks you through the same procedure I use, with the math, the tolerance ranges, and the pitfalls to avoid.
Table of Contents
What You Need to Check Torque Wrench Calibration at Home?
Gathering your tools before you start keeps the test accurate and repeatable. Here is the short list:
Bench vise or heavy-duty clamp that holds the square drive steady
Known weight (calibrated dumbbells, a hanging scale, or a measured water jug)
Tape measure or ruler with millimeter markings
Fine-tip marker for noting the pivot point
Calculator for the math
Calibrated dumbbells from a gym or home weight set work well because their mass is stamped on them. A 10-pound plate, a 20-pound plate, or a 50-pound plate gives you clean round numbers to work with.
Avoid bathroom scales. Most cheap bathroom scales drift by 2 to 5 pounds and cannot give you the precision you need.
Understanding the Torque Formula and the 20% Rule
Torque is the product of force and distance. When you hang a weight from a wrench handle, the weight pulls down at a known distance from the pivot point, and that creates a known torque value.
The basic formula is simple: Torque = Weight x Distance. If you hang 20 pounds at 12 inches from the square drive, you produce 240 inch-pounds of torque (20 x 12 = 240).
For foot-pounds, divide the distance in inches by 12 first. A 25-pound weight at 12 inches equals 25 foot-pounds (25 x 1 = 25 ft-lb).
Now the part most guides skip. The 20% rule says that torque wrench accuracy is only guaranteed between 20% and 100% of the wrench’s full scale. A 100 ft-lb wrench, for example, is only certified accurate from 20 ft-lb to 100 ft-lb. Below 20%, the spring tension is too low to give consistent results.
That is why you pick a test value somewhere in the upper portion of your wrench’s range, not near the bottom.
How to Check Torque Wrench Calibration at Home With a Known Weight
Here is the procedure I follow every time. It takes about 15 minutes once your vise is set up.
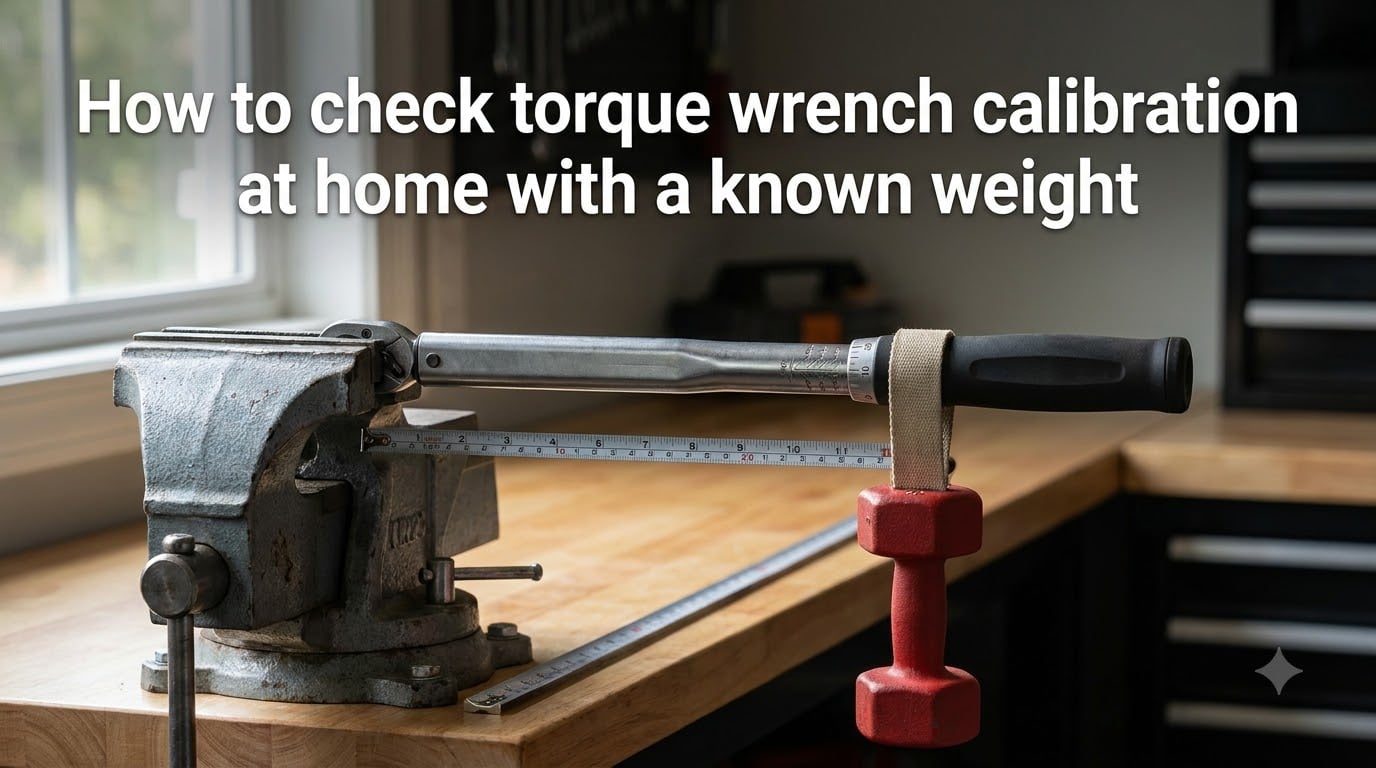
Mount the square drive in the vise. Clamp the square drive horizontally with the handle pointing straight out. The handle must be level so gravity pulls straight down on your weight.
Find or mark the pivot point on the handle. Most wrenches have a small mark or notch where the manufacturer measured during calibration. If you cannot find one, measure from the center of the square drive.
Calculate the hang distance. Use the formula: Distance = Target Torque / Weight. For 50 ft-lb with a 10-pound weight, you need 60 inches (5 ft x 12 in = 60 in). Pick a distance that fits your wrench handle.
Set the wrench to your target torque value. Dial in the test value you calculated for. Lock the setting if your wrench has a lock collar.
Hang the weight at the calculated distance. Use a strap, rope, or S-hook. Make sure the weight can swing freely without touching anything.
Apply force slowly and steadily. Pull straight down on the handle until the wrench clicks. The click should happen as you reach the target value.
Note where the click occurred. If your wrench clicks before the weight applies full force, the wrench is reading high. If you have to push past the marked value to trigger the click, the wrench is reading low.
Repeat three times and average the result. One reading can be off by a percent or two. Three readings give you a reliable average.
If you do not hear a click at all, stop. Something is wrong with your setup or your wrench has lost its click mechanism entirely.
Calculating the Correct Lever Arm Distance
The lever arm distance is the make-or-break detail. Measure from the center of the square drive to the exact point where the weight hangs, not the end of the handle or the edge of the drive.
Many torque wrench manufacturers mark this point on the handle. Look for a small triangle, line, or stamp. If there is no mark, use the centerline of the square drive as your reference.
One thing forum users caught that most guides miss: the wrench itself weighs something. For light test values (under 30 ft-lb), the wrench’s own weight can throw off the result by 1 to 2 ft-lb. You can subtract the handle weight from your hanging weight, or use a heavier test load to make the handle weight negligible.
Interpreting Your Results and Acceptable Tolerance
Once you have your three averaged readings, compare them to the target torque. Here is how to read the result.
A quality click-type wrench should be within plus or minus 4% of the target value. If you set 50 ft-lb, you should see a click somewhere between 48 and 52 ft-lb. Anything inside that range is good to go.
Budget wrenches typically run plus or minus 6%. The reading should fall between 47 and 53 ft-lb for a 50 ft-lb target. Slightly looser tolerance but still acceptable for most home work.
If your wrench reads outside plus or minus 10%, the spring has drifted too far. Either adjust it using the method below or send it for professional service.
For critical applications like cylinder head bolts or aircraft fasteners, even plus or minus 4% is too loose. Those jobs need a calibrated wrench with a current certificate.
Adjusting Your Wrench or Using a Correction Factor
If your wrench reads high or low consistently, you have two options depending on the design.
Click-type wrenches with an adjustment screw can be recalibrated at home. Most have a small screw or hex bolt at the base of the handle, near the square drive. To increase torque reading, turn the screw clockwise (with the wrench unloaded). To decrease it, turn counterclockwise. Make quarter-turn adjustments, then retest.
Beam-style and many digital wrenches cannot be adjusted. For these, calculate a correction factor and apply it during use. If your wrench reads 52 ft-lb when the actual torque is 50 ft-lb, you need to subtract 2 from every setting. Set the wrench to 48 ft-lb to deliver a true 50 ft-lb.
Keep a small label on the wrench with the correction factor. That way you never forget to adjust your readings.
Alternative Methods and When to Seek Professional Calibration
The hanging-weight method works but you are limited to whatever weights you own. Two alternatives solve that.
The water bucket method gives you finer increments. Use a calibrated 5-gallon bucket and add water in measured amounts. Each gallon of water weighs about 8.33 pounds. You can dial in torque values to within a fraction of a foot-pound this way.
The luggage scale method is faster but less precise. Pull sideways on the wrench with a hanging scale attached to the handle. The scale reading multiplied by the handle distance gives you the applied torque. This works well for quick checks but the sideways pull introduces more variables.
Send your wrench for professional calibration if you work on safety-critical applications, aircraft, or large engine builds. Professional calibration typically costs 30 to 80 dollars and includes a printed certificate. For a 50-dollar budget wrench it rarely makes sense, but for a 200-dollar wrench you depend on, the certificate is worth it.
Between calibrations, store your wrench at its lowest setting, in its case, and never use it as a breaker bar. Dropping a torque wrench is one of the fastest ways to ruin its calibration.
FAQs
How to test torque wrench calibration at home?
Mount the square drive in a bench vise with the handle horizontal. Set the wrench to your target torque, then hang a known weight at a calculated distance from the square drive. The distance equals target torque divided by weight. If the wrench clicks when the weight applies full force, it is calibrated. Repeat three times and average the readings.
How to calibrate a torque wrench using weights?
To calibrate using weights, hang a known mass from the wrench handle at a measured distance. The product of weight and distance equals the applied torque. Compare the wrench’s click point to your calculated target value. Most quality wrenches should be within plus or minus 4% of the target.
What is the 20% rule for torque wrenches?
The 20% rule means torque wrench accuracy is only guaranteed between 20% and 100% of the wrench’s full scale. A 100 ft-lb wrench is certified accurate from 20 ft-lb to 100 ft-lb. Below 20% of full scale, the internal spring tension is too low for reliable readings.
How accurate is a torque wrench calibration?
Quality click-type torque wrenches hold plus or minus 4% accuracy when properly calibrated. Budget wrenches typically run plus or minus 6%. Anything beyond plus or minus 10% means the wrench has drifted too far and needs adjustment or professional service.
How often should I check my torque wrench calibration?
Check calibration every 2,500 to 2,800 uses, or once a year for occasional home use. Also check after any drop or impact, after long storage, and before any critical fastener job like head bolts or lug nuts.
Conclusion
Checking torque wrench calibration at home with a known weight is one of those garage skills that pays for itself the first time you use it. Mount the drive in a vise, hang a calibrated weight at the calculated distance, and confirm your wrench clicks within plus or minus 4% of the target value.
Run the test once a year, after any drop, or before critical jobs. Adjust click-type wrenches with their set screw, label beam and digital wrenches with their correction factor, and send safety-critical wrenches for professional service. That is the full cycle, and it takes less time than driving to a calibration shop.