
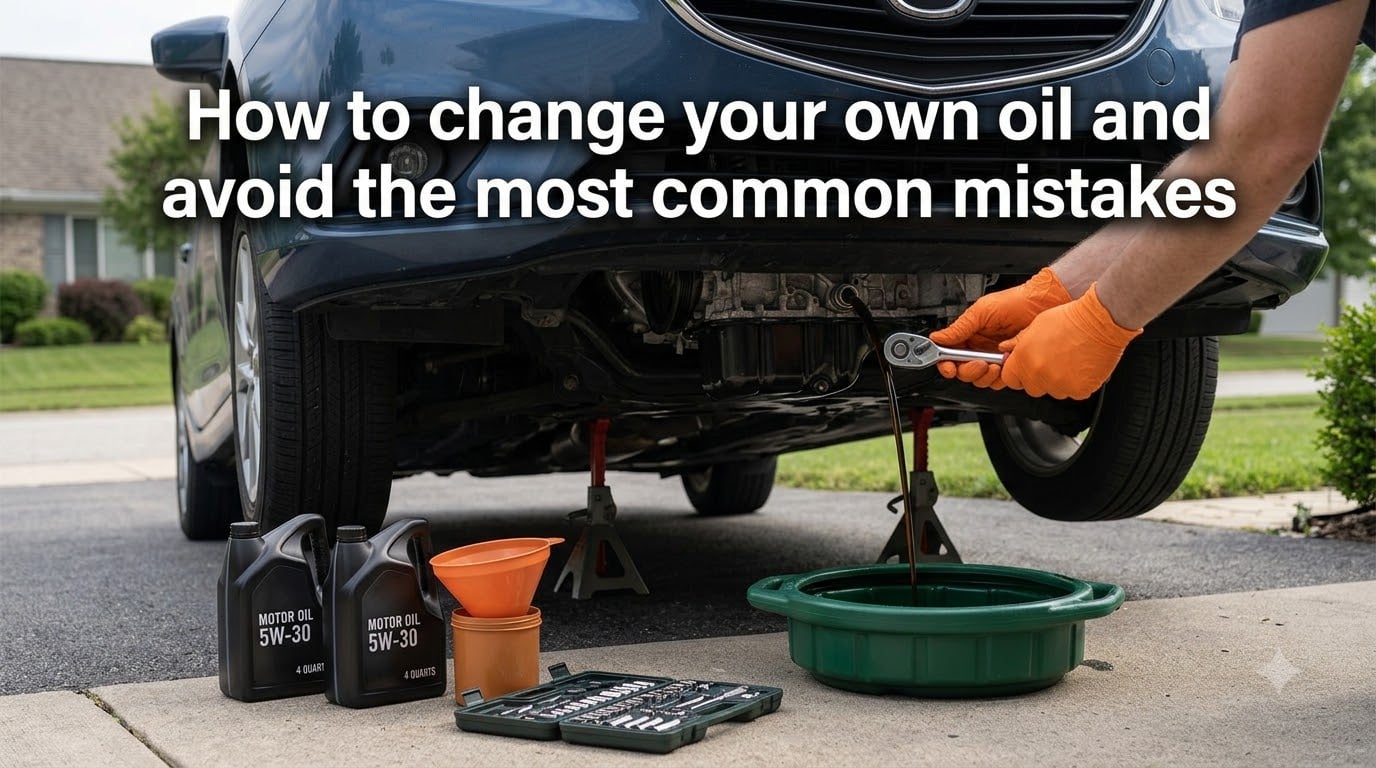
If you have ever watched a mechanic hand you a bill for $80 to $120 for a routine oil change and thought, “I could do this myself,” you are absolutely right. Learning how to change your own oil is one of the most practical DIY car maintenance skills you can pick up, and our team has helped hundreds of first-timers do it without a single drip on the driveway.
Most people pay a shop between $40 and $100 every 3,000 to 5,000 miles for something that takes 30 to 45 minutes at home with a basic socket set and a drain pan. This guide walks you through every step, from picking the right oil viscosity to checking the dipstick, with a special focus on the common mistakes that turn a simple job into a tow-truck story.
By the end, you will know exactly how to change your own oil safely, save money, and avoid the eight errors that account for most failed DIY oil changes.
Table of Contents
Tools and Materials You Need Before You Start
Gathering everything before you start is the single biggest time saver. Nothing kills momentum like lying under a car at 9 p.m. realizing the filter wrench is in the garage. Here is the complete checklist our team uses.
Essential Tools
Socket set with metric and standard sizes (most drain plugs use a 13mm, 15mm, or 17mm socket)
Oil filter wrench (band-style or cap-style, sized to your filter)
Oil drain pan with at least 6-quart capacity
Funnel to pour new oil cleanly into the filler neck
Jack and jack stands or a pair of plastic ramps
Nitrile gloves and old shop rags or paper towels
Safety glasses and a magnetic work light
Oil and Filter Supplies
The correct viscosity motor oil (typically 0W-20, 5W-30, or 10W-30)
A new oil filter matched to your engine
A replacement crush washer or sealing gasket for the drain plug
Optional: a creeper or large piece of cardboard to lie on
An approved container for used oil disposal
Budget around $30 to $60 for oil and a filter for a typical 4-cylinder engine, less than half what most shops charge.
Prepare Your Vehicle and Workspace
Preparation is where beginners either build confidence or get hurt. Take 10 minutes to set up properly and the rest of the job feels easy.
Park on Level Ground and Let the Engine Warm
Park on a flat concrete or asphalt surface, never on grass or gravel. Engage the parking brake firmly. Start the engine and let it idle for 2 to 3 minutes so the oil warms up and drains faster, then shut it off and remove the key.
Warm oil flows about three times faster than cold oil, which means less time waiting under the car. Do not let the engine get hot enough that the oil burns you.
Safety Gear and Emergency Items
Put on nitrile gloves before you touch anything. Have a fire extinguisher within reach in case oil contacts a hot exhaust component. Lay out your tools in the order you will use them.
Warning: never work under a vehicle supported only by a jack. Always use jack stands or drive-up ramps on level ground. The parking brake alone will not hold a car that slips off a jack.
How to Choose the Right Oil for Your Engine?
Putting the wrong oil in your engine is one of the costliest mistakes covered later. The good news is that your owner’s manual already has the answer.
Read the Owner’s Manual First
The manual lists the exact viscosity grade, oil capacity in quarts, and whether your engine needs conventional, synthetic blend, or full synthetic. It also states the oil change interval in miles or months.
If you do not have a paper manual, the same information is usually printed on the underside of the gas cap door or available free on the manufacturer’s website by entering your VIN.
Synthetic vs Conventional vs Blend
Conventional oil is the cheapest option and works fine for older engines with simple designs and higher mileage.
Synthetic blend mixes conventional and synthetic base oils. It costs less than full synthetic and offers better protection than conventional alone.
Full synthetic oil flows better in extreme cold, resists breakdown at high temperatures, and lasts longer between changes. Most cars built after 2015 require synthetic, and many engines with turbochargers will actually be damaged by conventional oil.
Understanding Viscosity Grades (0W-20, 5W-30, 10W-30)
Viscosity is how thick or thin the oil is. The two numbers you see on a bottle describe the oil’s flow at cold temperatures (the “W” stands for winter) and at operating temperature.
A 5W-30 oil flows like a thin 5-weight oil when cold and thickens to a 30-weight when warm. Use the exact grade listed in your manual. Swapping 5W-30 for 10W-30 in an engine that calls for 5W-20 can cause oil starvation in cold weather and increased wear on startup.
How to Change Your Own Oil?
This is the core process. Read through all eight steps once before lifting the car so you understand the full sequence.
Step 1: Warm the Engine Briefly and Shut It Off
Start the car, let it run for 2 to 3 minutes, then turn it off. Warm oil drains faster and carries more sediment out of the pan. Hot oil burns, so let it cool for 5 minutes before draining.
Step 2: Lift the Vehicle Safely
Use a floor jack to lift the front of the car at the manufacturer-specified jacking point, then place jack stands under the frame rails. Never rely on the jack alone.
If your car sits low, plastic ramps are safer and faster. Drive the front wheels onto the ramps until the chassis is level.
Step 3: Locate the Drain Plug and Place the Drain Pan
Slide under the car and find the oil pan at the lowest point of the engine. The drain plug is a single bolt on the side or bottom of the pan. Slide the drain pan directly under the plug, leaving a few inches to spare so you can position your socket.
Step 4: Remove the Drain Plug and Drain the Old Oil
Using the correct socket, turn the plug counterclockwise. The last quarter turn is easier by hand once the plug is loose, so you can control it as oil starts to escape.
Pull the plug away cleanly and let the oil flow into the pan for 5 to 10 minutes. Tilting the drain pan slightly forward helps all the oil pour out without splashing.
Step 5: Remove the Old Oil Filter
Position the drain pan under the oil filter, which usually sits on the side of the engine block. Twist the filter counterclockwise by hand or with an oil filter wrench.
Filters are filled with oil, so expect a small spill as the filter comes loose. Hold it upright and tip it into the drain pan once it is free.
Step 6: Install the New Oil Filter
Dip your finger in fresh oil and rub a thin film around the rubber gasket of the new filter. This lubrication helps the gasket seal properly and prevents it from binding.
Install the new filter hand-tight only, turning it about three-quarters of a turn after the gasket contacts the engine. This is one of the most common mistakes covered below.
Step 7: Reinstall the Drain Plug With a New Crush Washer
Inspect the old crush washer. If it looks flattened or cracked, replace it. Put the plug back in by hand to avoid crossthreading, then torque it to the manufacturer specification, usually between 20 and 30 foot-pounds.
If you do not have a torque wrench, snug the plug until it is just past finger-tight plus a quarter turn with a socket.
Step 8: Add New Oil and Check the Dipstick
Lower the car off the jack stands. Open the hood and remove the oil filler cap on top of the engine. Insert a funnel and pour in about three-quarters of the oil capacity specified in your manual, usually 4 to 5 quarts for a 4-cylinder engine.
Wait 2 minutes for the oil to settle, then pull the dipstick, wipe it clean, reinsert it fully, and pull it again. The oil level should sit between the two indicator marks on the dipstick. Add more oil in small amounts until you hit the full mark.
Oil Filter Selection and Proper Installation
The oil filter traps metal particles, dirt, and combustion byproducts that would otherwise wear down engine bearings. Choosing the right one matters more than most beginners realize.
Buy a filter that matches your engine exactly. Cross-references on auto parts store websites let you confirm fitment using your vehicle’s year, make, model, and engine size. A filter that is the wrong size may not seal properly or may not fit at all.
Premium filters from brands like Mobil 1, Bosch, Mann-Filter, and WIX typically have better anti-drainback valves and finer media than bargain filters. The extra dollar or two per filter is worth it for engines that run synthetic oil.
When installing, always lubricate the gasket with fresh oil. Always check that the old gasket came off with the old filter, since a stuck gasket will leak. Tighten by hand only.
How to Check Your Oil Level the Right Way
Checking the oil level on the dipstick is the easiest way to confirm your oil change worked and to catch small mistakes early.
Park on level ground and shut off the engine. Wait at least 2 minutes to let oil drain back into the pan. Pull the dipstick, wipe it with a clean rag, reinsert it fully, and pull it again to read.
The oil level should fall between the two marks. If it sits above the top mark, you have overfilled. If it sits below the bottom mark, you underfilled or have a leak.
Check the oil color too. Fresh oil is amber or light brown. After a few thousand miles, it darkens to dark brown or black, which is normal. Milky or foamy oil indicates coolant contamination and warrants a mechanic’s inspection.
Used Oil Disposal and Environmental Responsibility
Used motor oil is toxic. One gallon of used oil can contaminate up to one million gallons of water, which is why proper disposal is required by law in every U.S. state.
Pour the used oil from your drain pan into a clean, sealed container like the empty oil bottle. Most auto parts stores, including AutoZone, O’Reilly, and Advance Auto Parts, accept used oil for free and recycle it.
Many municipal recycling centers and quick-lube shops also accept used oil. Never pour oil down a drain, onto the ground, or into a trash bag. Used oil filters should be placed in a plastic bag and dropped off with the used oil.
The Most Common Mistakes DIYers Make (And How to Avoid Them)
This is the section that separates a successful first oil change from a tow-truck ride. Every mistake below comes from real forum threads on r/MechanicAdvice and r/AskMechanics, plus the dozens of first-timers our team has guided.
Forgetting the drain plug or crush washer. It happens more often than you think. People drain the oil, get distracted cleaning up, and forget to thread the plug back in. Always set the drain plug in your pocket or on top of the tire before draining.
Double-gasketing the oil filter. When the old filter sticks to the engine, the rubber gasket peels off and stays on the mounting surface. People install the new filter on top of the old gasket without realizing it, which causes an immediate leak. Always check that the old gasket came off with the old filter.
Overtightening the oil filter or drain plug. Both components are designed to seal with hand pressure plus a partial turn. Overtightening cracks the oil pan, strips the threads, or warps the filter gasket. Snug is enough.
Crossthreading the drain plug. Forcing the plug in at an angle damages the threads on the oil pan, which can cost $300 to $1,500 to repair. Always start the plug by hand and feel for the threads before using a socket.
Using the wrong oil viscosity or type. Substituting 10W-30 for a required 0W-20, or using conventional in an engine that requires synthetic, can void your powertrain warranty and increase engine wear. Read the manual.
Overfilling or underfilling the engine. Overfilling causes oil to foam and reduces lubrication. Underfilling starves the oil pump. Both happen when people skip the dipstick check.
Not lubricating the new filter gasket. A dry gasket binds against the mounting surface, tears on installation, and leaks. A thin coat of fresh oil solves it in five seconds.
Skipping the post-change leak check. Start the engine after the oil change and let it idle for one minute. Look under the car for drips from the drain plug and filter. Check the dipstick again after the engine has circulated the oil.
Troubleshooting After the Oil Change
Even careful DIYers occasionally run into issues after the oil change is done. Here is how to diagnose the most common problems.
Oil dripping from the filter: The most likely cause is a stuck old gasket or a loose filter. Lower the car, remove the new filter, inspect the mounting surface for a leftover gasket, and reinstall the filter hand-tight.
Oil dripping from the drain plug: Either the crush washer is damaged or the plug is loose. Tighten the plug a quarter turn and recheck. If the leak continues, replace the crush washer.
Oil pressure light stays on: This usually means the oil level is low or the engine was started before oil reached the sensor. Shut off the engine, wait 30 seconds, and check the dipstick. Top off oil as needed. If the light persists, do not drive the car.
White smoke from the exhaust on first start: A small puff of white smoke is normal as oil burns off residual fluid in the exhaust system. Continuous white smoke could indicate coolant in the oil and warrants a mechanic.
How Often Should You Actually Change Your Oil?
The old “every 3,000 miles” rule came from a marketing campaign in the 1970s and applies to very few modern engines. Most cars built since 2010 run 7,500 to 10,000 miles between oil changes, especially with full synthetic oil.
Check your owner’s manual for the manufacturer’s interval, then follow the more conservative of the manual’s recommendation and the oil life monitor on your dashboard. Severe driving conditions like frequent short trips, extreme heat or cold, towing, or dusty environments call for shorter intervals.
You cannot go two years between oil changes under any normal circumstances. Oil degrades from heat and combustion byproducts even when the car sits idle. The longest safe interval for most modern synthetic oils is 12 months, even if the mileage is low.
Frequently Asked Questions
What can go wrong with changing your own oil?
The most common DIY oil change mistakes are forgetting to reinstall the drain plug, double-gasketing the oil filter, overtightening the plug or filter, using the wrong oil viscosity, and overfilling or underfilling the engine. Each of these is easily avoided by following the step-by-step process above.
How long does a DIY oil change take?
A first-timer usually takes 60 to 90 minutes from start to cleanup. With practice, most people finish in 30 to 45 minutes. The draining step takes the longest, usually 10 to 15 minutes.
What is the hardest car to do an oil change on?
European luxury cars, mid-engine sports cars, and some hybrids are the hardest because of underbody panels, tight filter access, or special tools required. Most sedans, SUVs, and pickup trucks use a standard layout that beginners can handle in a driveway.
Can I change my own oil and keep my warranty valid?
Yes. Federal law protects your right to perform routine maintenance yourself without voiding the warranty, as long as you follow the manufacturer’s specifications for oil type, viscosity, capacity, and change interval. Keep receipts for the oil and filter as proof of service.
How do I know if I overfilled the oil?
Pull the dipstick after the engine has been off for at least two minutes. If the oil sits above the upper indicator mark on the dipstick, the engine is overfilled. Drain a small amount through the drain plug until the level falls between the two marks.
Is changing your own oil worth it?
For most drivers, yes. A DIY oil change costs $30 to $60 in oil and a filter, compared to $80 to $120 at a quick-lube shop. After two oil changes, the basic tools pay for themselves, and you gain full control over the products used in your engine.
Can you go 2 years without changing oil?
No. Even if you drive very few miles, oil degrades from heat cycles and moisture accumulation. Most manufacturers recommend changing oil at least once every 12 months regardless of mileage, even with full synthetic oil.
Final Thoughts
Learning how to change your own oil is one of the most useful skills a car owner can build. It saves real money, teaches you how your engine actually works, and puts you in control of the products that go into your vehicle. Most first-timers finish the job in under an hour and wonder why they waited so long to try.
The mistakes covered in this guide account for the majority of problems people run into, and every one of them is preventable with a little patience. Read the manual, gather your tools, follow the eight steps in order, and double-check the drain plug and filter before you start the engine.
Your next service appointment can be in your own driveway.