
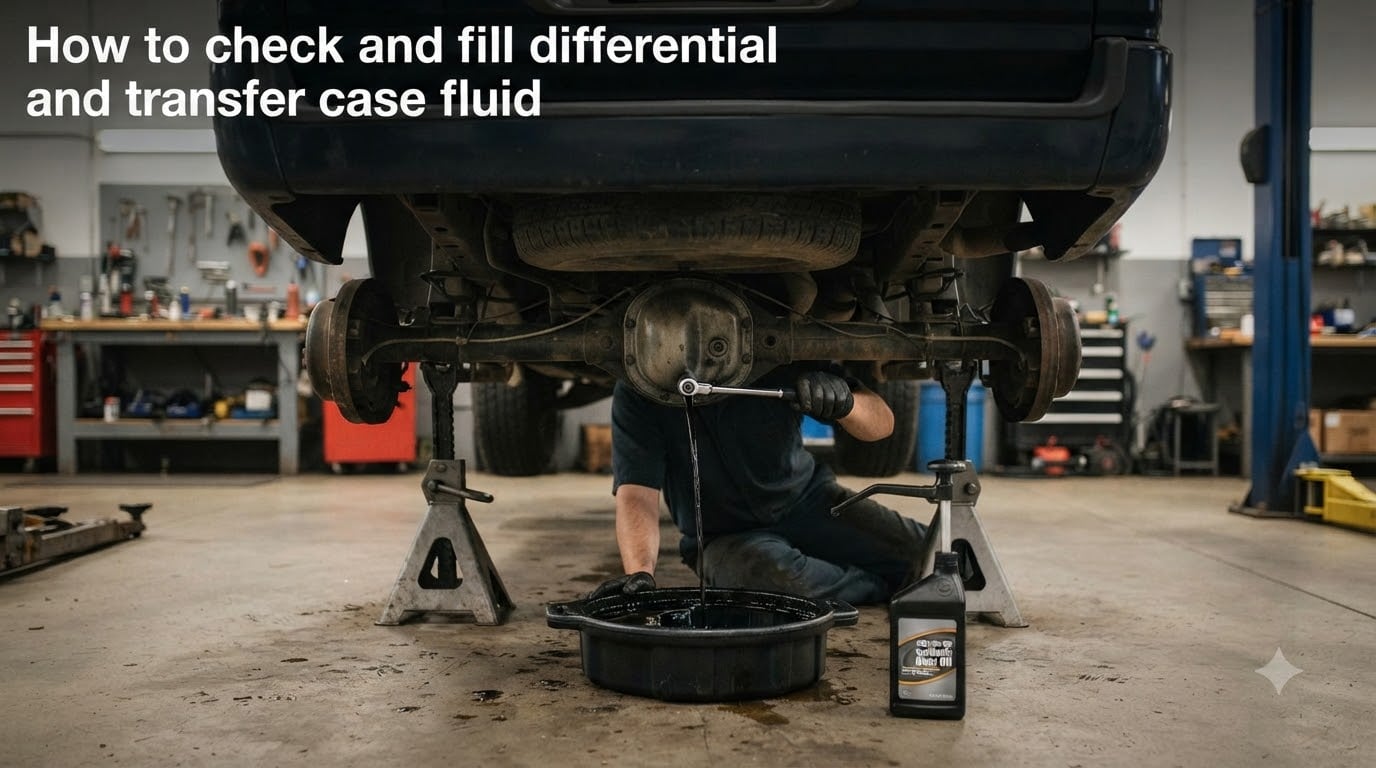
If you drive an AWD or 4WD truck or SUV, your drivetrain has hidden components that most owners never think about until something goes wrong. The differentials and transfer case sit behind the transmission and quietly split power between your axles, but they only do their job when the gear oil inside them is clean and at the correct level. This guide walks you through exactly how to check and fill differential and transfer case fluid the right way, using real shop-tested steps that work on most makes and models.
Our team has spent years servicing 4Runners, Silverados, Tacomas, and WRXs in home garages and shop bays. The procedure below combines what we have learned from forum threads, factory service manuals, and dozens of fluid changes done on jack stands. By the end, you will know when to service these components, what gear oil to buy, and how to do the job without stripping a plug or overfilling the housing.
Table of Contents
What Differentials and Transfer Cases Actually Do?
A differential is a geared housing that lets your drive wheels spin at different speeds when you turn a corner. Most AWD and 4WD vehicles have at least two: a front differential and a rear differential. The gears inside them are bathed in heavy gear oil that lubricates, cools, and protects the ring and pinion from metal-on-metal contact.
A transfer case is a separate gearbox that splits power between the front and rear axles. In part-time 4WD trucks it usually has a low range, and in full-time AWD systems it may include a center clutch or viscous coupling. Both the transfer case and any power transfer unit (PTU) on transverse-mounted engines rely on gear oil for the same reason a differential does.
Because these components are sealed and rarely inspected, they are easy to forget. Skipping fluid service is one of the leading causes of expensive differential failures on high-mileage trucks and SUVs.
When to Check and Change Differential and Transfer Case Fluid?
Factory service intervals vary by manufacturer, but most fall into two ranges. For normal highway driving, plan to service front and rear differential fluid and transfer case fluid every 30,000 to 60,000 miles. For severe duty like towing, hauling, off-roading, or frequent water crossings, cut that interval in half to every 15,000 to 30,000 miles.
You should also check the fluid any time you notice a leak under the vehicle, before a long road trip with a loaded trailer, or when buying a used AWD/4WD vehicle. A quick visual check on the fill plug takes five minutes and can save you from buying someone else’s headache.
Tools and Supplies You Will Need
Gather everything before you lift the vehicle so you are not stuck under a truck with a missing socket. Here is the list our crew uses on every fluid service:
Floor jack and jack stands rated for your vehicle’s weight
Socket set with metric and SAE sockets, plus a breaker bar
Hex or Torx bit matched to your drain and fill plugs (commonly 3/8 inch or 10 mm hex)
Fluid pump, squeeze bottle, or a clean hose and funnel
Drain pan to catch used gear oil
Shop rags, nitrile gloves, and brake cleaner
Correct gear oil: viscosity and spec listed in your owner’s manual (commonly 75W-90 GL-5)
Limited-slip additive if your vehicle has a clutch-type LSD
New crush washers or gaskets for the plugs if required
How to Check Differential and Transfer Case Fluid Level
You check differential and transfer case fluid the same way for both components: through the fill hole on the side or back of the housing. There is no dipstick on most differentials or transfer cases, so the fill plug is your access point. Here is the procedure our team runs every time.
Step 1: Warm the Fluid Slightly
Drive the vehicle for 10 to 15 minutes so the gear oil reaches operating temperature. Warm fluid flows faster and gives a more accurate level reading. Some manufacturers specify checking cold; if your owner’s manual says cold, follow that instead.
Step 2: Position the Vehicle on Level Ground
Park on flat concrete, set the parking brake, and chock the wheels. Lift with a floor jack and support on jack stands. Never work under a vehicle held up by a jack alone.
Step 3: Clean Around the Fill Plug
The fill plug is usually on the front or rear face of the differential housing, often near the top. Spray brake cleaner around it and wipe away all dirt and road grime so nothing falls into the housing when you remove the plug.
Step 4: Remove the Fill Plug First
This is the most important safety step. Always remove the fill plug before you remove the drain plug. If the fill plug is stuck or damaged, you will know before the housing is empty, and you can still drive the vehicle to a shop for help.
Step 5: Check the Fluid Level
Stick a clean finger into the fill hole. The fluid should reach the bottom of the opening. If you can feel oil with your fingertip but cannot dip into it, the level is correct. If the opening is dry, the fluid is low and you need to add some before doing any further driving.
Step 6: Inspect the Fluid Condition
Dip a small amount onto a clean rag. Healthy gear oil is amber to light brown and clear. Dark brown, black, or gritty fluid that feels sandy means the fluid is burned out and should be replaced. A strong burnt smell is another red flag.
How to Fill Differential and Transfer Case Fluid
Filling is the flip side of the same job. The golden rule from old-school mechanics and forum regulars alike: keep adding oil until it starts to overflow out of the fill hole. That gives you a perfect level without a dipstick. Here is the full sequence.
Step 1: Remove the Fill Plug
Clean and remove the fill plug on each housing you plan to service. Set the plug aside in a clean spot.
Step 2: Remove the Drain Plug
Place your drain pan underneath and remove the drain plug from the bottom of the housing. Allow all the old fluid to drain while you prepare your pump and fresh oil.
Step 3: Clean the Magnetic Drain Plug
Wipe the drain plug clean and inspect the magnet. A light dusting of fine metal particles is expected. Large chunks or shards indicate internal damage and warrant a closer look by a specialist.
Step 4: Reinstall the Drain Plug
Replace the crush washer if your plug uses one, then thread the drain plug back in by hand to avoid cross-threading. Torque it to the factory specification, typically 25 to 35 foot-pounds on most light trucks and SUVs.
Step 5: Pump in Fresh Gear Oil
Attach your hose or pump to the bottle of fresh gear oil. Pump oil into the fill hole until fluid starts to seep back out of the opening. That overflow means the housing is full to the correct level.
Step 6: Reinstall the Fill Plug
Wipe the area clean, thread the fill plug back in by hand, and torque it to spec. Clean up any spilled oil from the housing and underbody. Repeat the same steps for the front differential, rear differential, and transfer case if your vehicle has all three.
Choosing the Right Gear Oil for Your AWD or 4WD
Your owner’s manual is the final word on fluid specification, but the most common ratings are 75W-90, 80W-90, or 75W-140 GL-5 gear oil. The “GL-5” rating covers most hypoid gear sets used in modern differentials. For limited-slip differentials, look for fluids that already include an LSD additive or add the specified friction modifier separately.
Synthetic gear oil flows better in cold weather, runs cooler under load, and lasts longer than conventional oil. For most daily-driven AWD and 4WD vehicles, a full-synthetic 75W-90 GL-5 is the safest all-around pick. For heavy towing or extreme off-road use, thicker 75W-140 can give extra protection at the cost of slightly higher cold-weather drag.
Do not mix different brands or chemistries unless the manual explicitly allows it. Some additives fight each other and can damage clutch plates inside a limited-slip differential.
Warning Signs of Low or Bad Differential and Transfer Case Fluid
If you cannot get under the vehicle right away, your truck or SUV will usually tell you something is wrong. Watch for these symptoms and act quickly when you spot them:
A humming or whining noise that changes with vehicle speed, especially when coasting
A howl that gets louder during turns, which can indicate low rear differential fluid
Clunking when shifting between 2WD and 4WD modes
Visible leaks at the pinion seal, axle seals, or housing gasket
Burning smell after long highway drives or towing
Fluid drips under the vehicle that are oily and dark instead of clear
Cost of a Differential or Transfer Case Fluid Change
A DIY fluid change usually runs between $50 and $100 in fresh gear oil, a bottle of limited-slip additive if needed, and a few dollars for shop supplies. Most rear diffs hold 2 to 3 quarts, front diffs around 1.5 to 2 quarts, and transfer cases 1 to 2 quarts, depending on the vehicle.
A shop service typically runs $150 to $300 per unit, with all three units (front diff, rear diff, transfer case) landing between $400 and $900 on most trucks and SUVs. Independent shops usually beat dealer prices, and the dealer is the safest choice if your vehicle is still under warranty.
Frequently Asked Questions
How do I know if my rear differential is low on fluid?
A humming or whining noise that changes with vehicle speed, especially when coasting or turning, is the most common sign. You can also check by removing the fill plug on the rear differential housing. If your finger comes out dry, the fluid is low and needs to be topped up before further driving.
How do I know if my transfer case needs fluid?
Look for fluid drips under the center of the vehicle, difficulty shifting between 2WD and 4WD, or a whining noise that changes with speed. Removing the transfer case fill plug and checking the level by finger is the most accurate test. Healthy fluid should reach the bottom of the fill hole and look amber to light brown.
How much should a rear diff fluid change cost?
A DIY rear differential fluid change typically costs $50 to $100 in gear oil and supplies. A shop service usually runs $150 to $300 per differential, with all three units (front, rear, and transfer case) landing between $400 and $900 on most trucks and SUVs.
How full do you fill a rear differential?
Fill the rear differential until fresh gear oil starts to overflow out of the fill hole. That overflow level is the correct fill point because there is no dipstick. Wipe the housing clean and reinstall the fill plug to spec once fluid begins to seep out.
Do you check differential fluid hot or cold?
Most manufacturers recommend checking differential fluid when it is warm, after 10 to 15 minutes of driving. Warm fluid flows evenly and gives an accurate level reading. Always follow your specific owner’s manual, because a few vehicles require a cold check.
Can you just add differential fluid without draining?
Yes, you can top off a differential if the level is low, using the fill plug as your access point. However, adding fresh fluid does not remove contaminated old fluid, so a full drain and fill is the better service whenever the fluid is dark, gritty, or burnt.
How long does 75W-90 gear oil last?
Conventional 75W-90 gear oil typically lasts 30,000 to 60,000 miles under normal driving. Full synthetic 75W-90 can last 60,000 to 100,000 miles. Severe duty like towing, off-roading, or water crossings cuts those intervals roughly in half.
Final Thoughts
Knowing how to check and fill differential and transfer case fluid gives you a real edge as an AWD or 4WD owner. Most people wait for a noise or a leak, but a 30 minute service every couple of years keeps the gears cool, the bearings happy, and the repair bills away. Block out a Saturday, grab the right gear oil, and run through the steps on your own truck or SUV.
Start by checking the level on each housing, then decide whether a top-off or a full drain and fill makes more sense. Your owner’s manual, a torque wrench, and a clean drain pan are all you really need to keep these hidden gearboxes running for another hundred thousand miles.