
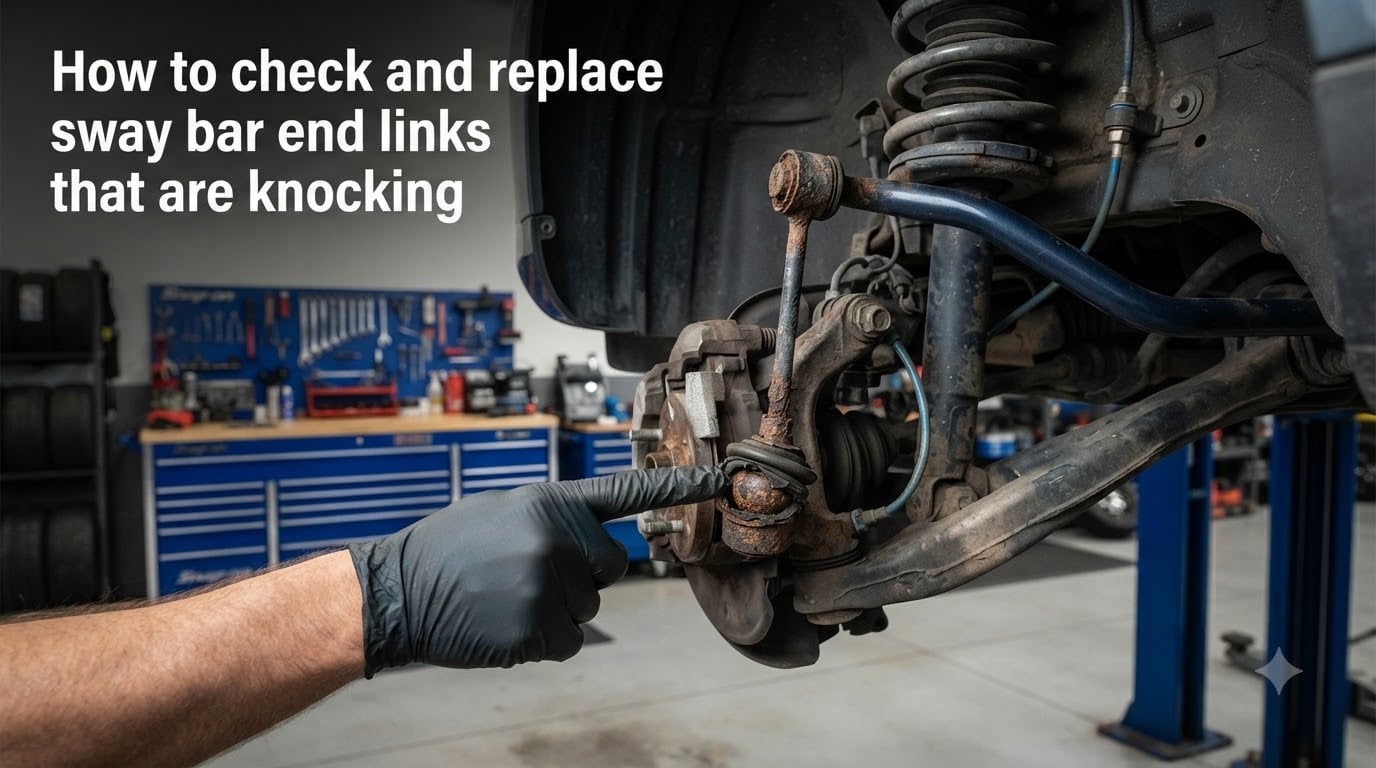
If you hear a rhythmic knocking or clunking when you drive over bumps, your sway bar end links are likely the culprit. We have helped countless vehicle owners track down these stubborn suspension noises, and the good news is that sway bar end links are one of the most DIY-friendly suspension components to replace.
In this guide, I will walk you through everything you need to know about checking and replacing sway bar end links that are knocking. You will learn how to tell them apart from other suspension noises, the exact diagnosis steps our team uses, and the tightening technique that prevents the dreaded “replaced the links but still clunking” complaint we see in mechanic forums every week.
Table of Contents
Symptoms of Bad Sway Bar End Links
Bad sway bar end links cause some of the most recognizable noises in your suspension. The sounds usually show up as a metallic knocking, clunking, or rattling that intensifies when you hit bumps, drive over rough roads, or make turns at low speeds. Many drivers describe the noise as similar to someone tapping a wrench against the frame.
Beyond the noise, you may notice looser handling. The vehicle might feel like it leans more than usual during turns, or the steering response may become vague. Some drivers report a slight wandering sensation on the highway, especially when crosswinds hit the side of the vehicle.
Sway Bar Link Noise vs Sway Bar Bushing Noise
One of the biggest diagnostic mistakes we see is confusing bad end links with worn sway bar bushings. Both are sway bar components, but they sound different and fail differently.
Sway bar end link noise sounds sharp and metallic, like a wrench tapping metal. It usually gets louder as the suspension moves through its travel. The noise changes with road speed and surface texture.
Sway bar bushing noise tends to sound more like a creak, squeak, or groan, especially at lower speeds. It often happens when the body rolls, such as during slow-speed turns in parking lots. Bad bushings also tend to be temperature-sensitive, getting louder when the vehicle is cold or humid.
Our team has diagnosed hundreds of these cases, and here is a simple test: if the noise is loudest when hitting a bump at low speed, suspect the end links. If it is loudest when the vehicle is rocking side to side at low speeds, suspect the bushings first.
Common Causes of Sway Bar End Link Failure
Sway bar end links fail for predictable reasons. Understanding the cause helps you prevent premature failure on the new parts.
Normal wear is the most common cause. The ball joints or bushings inside the links have a limited service life, typically 50k to 100k miles depending on driving conditions. Once the grease wears out or the joint develops play, knocking starts.
Corrosion is the second biggest cause, especially in regions that use road salt. Rust gets into the ball joints and locks them up, which causes the rubber boot to tear and allows contaminants in.
Impact damage can also cause sudden failure. Hitting a large pothole, curb, or speed bump at an angle can bend or break a link instantly. Aftermarket lowering springs and aggressive alignment settings put extra stress on end links and shorten their life significantly.
Seized or over-tightened studs are another common issue. When mechanics over-torque the original hardware, or when corrosion locks the studs into place, removal becomes difficult and parts can be damaged during service.
How to Diagnose Sway Bar End Links?
Diagnosing sway bar end links is straightforward, and you can usually do it in your driveway with basic tools. Here is the process our team follows every time.
Step 1: Visual Inspection
Start by looking at the end links. They are typically the metal rods that run vertically between the sway bar and the lower control arm or strut assembly. Each end of the link has a bushing or ball joint with a bolt through it.
Look for torn rubber boots, visible rust streaks, bent rods, or loose mounting hardware. If the boots are torn, the joint is already failing even if the noise has not started yet.
You can usually see the front end links by turning the steering wheel all the way to one side and looking behind the wheel. Rear end links are visible from underneath the vehicle.
Step 2: The Movement Test
This is where you confirm what your eyes suspect. With the vehicle safely supported on jack stands and the wheels off the ground, grab the end link and try to move it by hand.
A good end link should have very little play, maybe a fraction of a millimeter at each joint. A bad end link will have visible up-and-down or side-to-side movement at the ball joints.
If you do not have jack stands, you can perform a version of this test with the vehicle on the ground. Push down hard on the corner of the vehicle and release, or have someone rock the steering back and forth while you watch the links for movement.
Step 3: The Road Test
Take the vehicle for a slow drive over a road with speed bumps or rough pavement. Listen carefully and try to localize the noise. A helper sitting outside the vehicle while you drive slowly past them can help you identify which corner the noise is coming from.
For a final confirmation test, drive in a tight circle in a parking lot at low speed. If the knocking happens only during turning, the end links are very likely bad.
Tools and Safety Precautions You Need
Replacing sway bar end links takes about 30 to 60 minutes per side for a first-timer. Here is what you need to gather before you start.
For tools, you will need a socket set with metric sizes (typically 14mm to 19mm), a torque wrench, a breaker bar or impact wrench for stubborn bolts, penetrating oil like PB Blaster, and a jack with jack stands. Do not work under a vehicle supported only by a jack.
For parts, you will need the replacement end links matched to your vehicle (check the existing part number). Some manufacturers sell links in pairs, which is what I recommend.
For safety, always wear safety glasses and work gloves. Penetrating oil on the link studs makes removal dramatically easier and prevents rounding off bolts. Keep a fire extinguisher nearby and never smoke while working on or under a vehicle.
How to Replace Sway Bar End Links Step by Step?
Replacing sway bar end links is one of the more accessible suspension jobs. Here is the exact procedure I follow.
Step 1: Loosen the Wheels and Lift the Vehicle
Loosen the lug nuts on the affected corner while the vehicle is on the ground. Then raise the vehicle with a jack and secure it on jack stands. Remove the wheel to access the end link.
Step 2: Spray Penetrating Oil on the Link Studs
Spray the upper and lower mounting bolts heavily with penetrating oil at least 15 minutes before you try to remove them. If the studs are visibly rusty, spray them again 5 minutes before you start turning the wrench.
This step is the difference between a 30-minute job and a 3-hour struggle. We have seen too many DIYers skip this and end up rounding off bolts or breaking studs.
Step 3: Remove the Old End Link
Hold the link stud with a wrench to keep it from spinning, then loosen the nut on the opposite side. Most end links have a hex or Torx feature on the stud itself so a second wrench can stop it from rotating.
Once both nuts are off, the link should come free. If it does not budge, do not pry it. Spray more penetrant, let it soak, and try again. Forcing a stuck link can damage the sway bar or the mounting bracket.
Step 4: Install the New End Link
Compare the new link to the old one to confirm they match in length and orientation. Hand-thread the new mounting bolts to avoid cross-threading.
Snug the bolts down but do not fully tighten them yet. You want to leave some movement for the tightening-under-load step below.
Step 5: The Tighten Under Load Technique
This is the part most guides skip, and it is the most common reason the clunking persists after replacement. The trick is to torque the link bolts with the vehicle’s weight on the suspension, not with the wheel hanging free.
To do this correctly, you have two options. Option one: reinstall the wheel, lower the vehicle off the jack stands, and then torque the link bolts with the suspension at normal ride height. Option two: use a jack to support the lower control arm at the same height it sits at when the vehicle is on the ground.
Check your vehicle’s service manual for the exact torque spec. Typical values are 35 to 60 ft-lbs for the link-to-sway-bar side and 40 to 75 ft-lbs for the link-to-strut side. Under-torquing causes clunking, while over-torquing will damage the new joints.
This single technique eliminates the most common post-replacement complaint we see on Reddit and car forums.
Step 6: Reinstall the Wheel and Test
Put the wheel back on, torque the lug nuts to spec, and lower the vehicle. Take it for a test drive over the same road where you heard the original noise. The knocking should be gone.
Why Clunking Might Persist After Replacement
If you replaced the sway bar end links and the knocking is still there, you are not alone. This is one of the most common complaints in online car forums, and it almost always comes down to one of three causes.
First, you may have tightened the new links with the suspension hanging. This puts the joints in an unnatural position. The tighten-under-load technique above fixes this.
Second, the noise may be coming from a different component entirely. Common culprits include worn sway bar bushings, worn strut top mounts, loose strut bolts, or even a loose exhaust heat shield that knocks against the chassis.
Third, the noise may come from another joint entirely, such as a worn control arm bushing, ball joint, or tie rod end. These parts can sound remarkably similar to bad end links, especially over rough roads.
If the noise persists after tightening properly, recheck the sway bar bushings and inspect the strut mounts before assuming the new links are bad.
Should You Replace Both Sides at Once?
Yes, replace both sway bar end links on the same axle at the same time. They wear at similar rates, and the labor to do both sides is almost identical to doing just one. Aftermarket and OEM parts are typically sold in pairs for exactly this reason.
Replacing only one side means the other side will likely fail shortly after, putting you back in the driveway within a few months. Our team’s rule of thumb is simple: if one end link is knocking, the other one is not far behind.
When to Seek Professional Help
If your diagnosis is unclear, if the bolts are severely seized, or if you do not have jack stands, take the vehicle to a mechanic. Suspension work under an improperly supported vehicle is one of the most dangerous DIY jobs you can attempt. The cost of a professional sway bar end link replacement is modest, and the peace of mind is worth it if you are not confident in your setup.
Frequently Asked Questions
Can bad sway bar links cause knocking?
Yes, bad sway bar end links are one of the most common causes of knocking or clunking noises in a vehicle’s suspension. The noise typically gets louder over bumps and during low-speed turns. The knocking happens because worn ball joints or bushings inside the link have play, allowing metal to contact metal as the suspension moves.
How do I know if my sway bar end links are bad?
You can usually tell by listening for metallic knocking over bumps, feeling looser handling or excessive body roll during turns, and physically checking for play in the link joints. With the vehicle safely supported on jack stands, grab the link and try to move it by hand. Any visible movement at the ball joints indicates the link is worn.
Can sway bar end links creak?
Yes, sway bar end links can creak, especially when the rubber bushings inside them harden with age or when the joints are low on grease. Creaking is more common at low speeds and during slow turns. If the creaking is louder when the vehicle rocks side to side, the sway bar bushings may also be worn.
Can you check sway bar links without lifting the vehicle?
You can perform a basic visual inspection without lifting the vehicle by turning the steering wheel fully and looking behind the front wheels. You can also have someone rock the steering back and forth while you watch the links. However, a definitive movement test requires the vehicle to be safely lifted on jack stands so you can grab and shake each link.
Is it safe to drive with bad sway bar end links?
Driving with bad sway bar end links is generally safe for short distances at low speeds, but the vehicle will handle poorly in turns and the noise will get worse. Worst case, a link can break completely, which removes the anti-roll function on that corner. We recommend replacement within a few days of identifying the problem.
Final Thoughts on Fixing Knocking Sway Bar End Links
Knocking sway bar end links are annoying, but they are also one of the most satisfying suspension problems to fix yourself. Diagnose carefully, use penetrating oil, replace both sides together, and remember the tighten-under-load technique. These four steps cover everything our team has learned from years of dealing with this common issue.
If your sway bar end links are still under warranty or if the vehicle is still under a service contract, take it to the dealer first. Otherwise, a quality aftermarket pair of sway bar end links and an hour of your time is all it takes to bring your suspension back to quiet, predictable handling.