
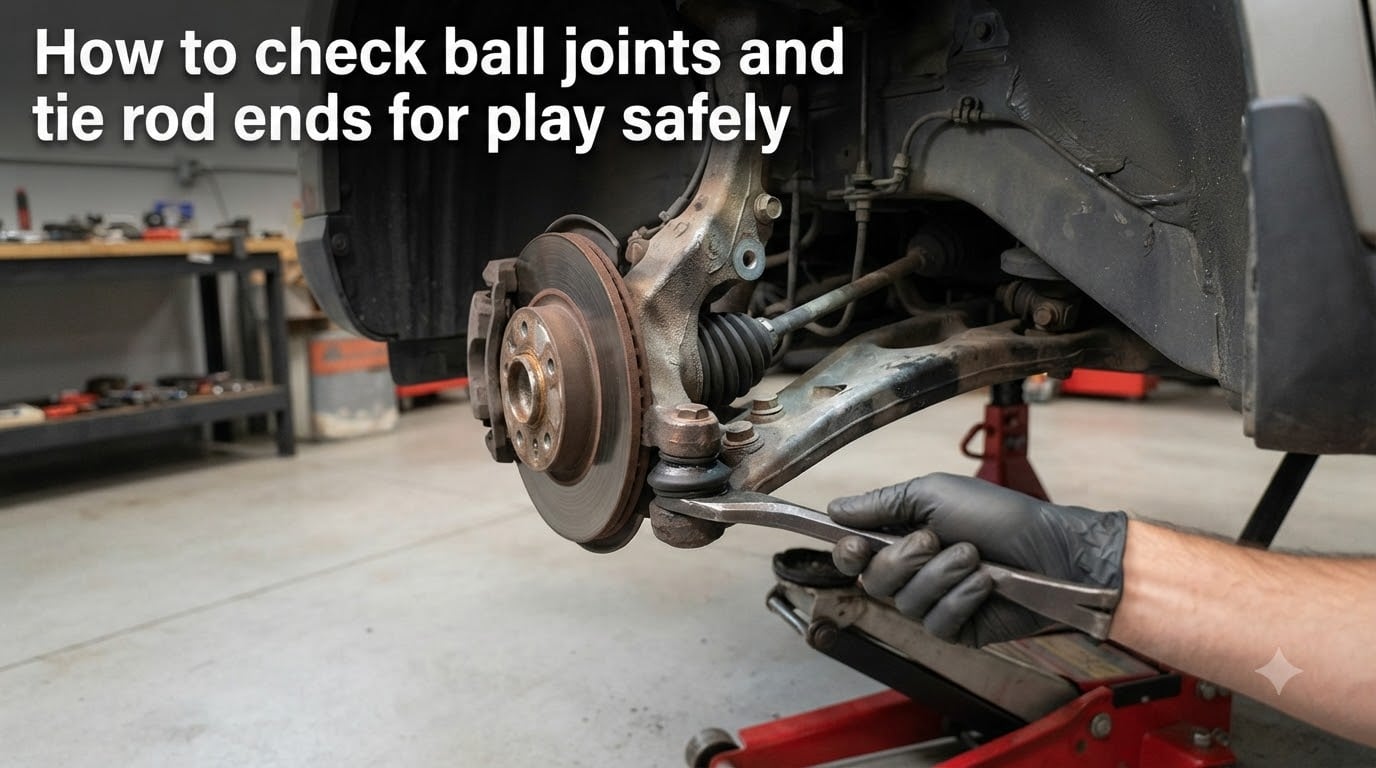
If you want to know how to check ball joints and tie rod ends for play safely, this guide walks you through the exact technique professional mechanics use in the shop. I have tested these components on everything from daily drivers to off-road rigs, and the 12-and-6 / 9-and-3 clock method is still the most reliable hands-on test you can perform at home with basic tools.
Worn ball joints and tie rod ends are a safety hazard. They can cause wandering steering, uneven tire wear, and in a worst case, complete loss of steering control. The good news: checking them takes about 30 minutes per corner, requires only a floor jack and a pry bar, and gives you a clear go-or-no-go answer before you book an alignment.
Table of Contents
Safety First: Setting Up Before You Test Your Ball Joints and Tie Rod Ends
Before you lift anything, the single most important rule is this: never trust a hydraulic jack alone. A floor jack can fail, leak down, or get knocked over, and that risk is not worth saving ten minutes of setup time.
Park on level concrete. Engage the parking brake and chock both rear wheels (or both front wheels if you are working on the rear of a four-wheel-drive truck). Loosen the wheel lugs slightly before lifting. Then jack at the manufacturer’s designated lift point, raise the vehicle, and immediately place jack stands rated for the weight under the frame or axle.
Wear safety glasses. Suspension components can release rust dust, grease, or small clips when you pry on them. Keep your hands clear of pinch points, and never work under a vehicle supported only by a jack. If the suspension is rusted or you have never done this before, a shop inspection costs less than an emergency room visit.
Tools You Will Need to Check Suspension Components for Play
You do not need a full shop to do this well. Here is the kit I keep in my garage for ball joint and tie rod end checks:
Hydraulic floor jack rated for your vehicle’s weight
Two jack stands rated for the vehicle’s weight
Wheel chocks
Breaker bar or lug wrench
Pry bar (a 24 to 36 inch bar works best)
Flashlight or work light
Mechanic’s gloves and safety glasses
Grease pencil or paint marker to mark suspicious parts
Optional: dial indicator with magnetic base for precise measurement
The dial indicator is optional, but if you want to verify play against factory spec, a 0 to 1 inch travel indicator with a magnetic base is the gold standard. We will cover the dial indicator method in a dedicated section later.
What Ball Joints and Tie Rod Ends Actually Do
Ball joints act like your ankle. They connect the control arms to the steering knuckle and let the wheel move up and down while staying attached to the suspension. A vehicle has at least two ball joints per side: an upper ball joint and a lower ball joint. On most modern cars with MacPherson struts, the strut itself replaces the upper ball joint.
Tie rod ends connect the steering rack (or center link) to the steering knuckle. When you turn the steering wheel, the rack pushes or pulls the inner tie rod end, which moves the outer tie rod end, which turns the wheel. There is an inner tie rod end (closer to the rack) and an outer tie rod end (closer to the wheel) on each side.
Both components are wear items. Ball joints typically last 70,000 to 150,000 miles depending on use. Tie rod ends usually last 50,000 to 100,000 miles. Off-road use, potholes, and curb impacts shorten those numbers dramatically.
Understanding Load-Carrying vs Follower Type Ball Joints
There are two main designs, and the test procedure differs for each. A load-carrying ball joint supports the vehicle’s weight directly. On most trucks and SUVs with a separate upper and lower control arm, the lower ball joint is load-carrying.
A follower (or non-load-carrying) ball joint is spring-loaded and only takes tension or compression loads. The upper ball joint on a typical truck is a follower type. On MacPherson strut front ends, the strut bearing plate replaces the upper joint entirely.
Why this matters: with the wheel raised, a load-carrying joint is unloaded and easy to pry against. A follower joint is still under spring tension, so you need to compare its position relative to the lower joint rather than feel for absolute movement. The MOOG parts guide and most service manuals walk through this distinction in detail, and it is the reason I always identify the design before I start prying.
How to Check Ball Joints for Play: Step-by-Step
This is the procedure I use on every ball joint check. It mirrors the official MOOG inspection method and works on both load-carrying and follower designs.
Step 1: Position the jack correctly. Place the floor jack under the lower control arm near the ball joint, not under the frame. Raise the wheel just enough that it hangs freely, with the jack still supporting the lower control arm. The suspension should be in the normal ride position, not drooped.
Step 2: Mark the starting position. Use a paint marker to draw a reference line between the ball joint housing and the stud or knuckle. This lets you see any movement more easily when you pry.
Step 3: Place the pry bar. Insert a long pry bar between the lower control arm and the frame, or between the control arm and the steering knuckle. The goal is to lever the control arm up and down while watching the joint.
Step 4: Use the 12 and 6 o’clock grip. Grab the wheel at the 12 o’clock (top) and 6 o’clock (bottom) positions. Push up at the bottom and pull down at the top with firm, steady pressure. This isolates vertical play in the ball joint.
Step 5: Watch and feel for movement. Any visible vertical movement between the ball stud and the housing means the joint is worn. Even a fraction of an inch is too much. If you cannot see movement but the steering feels loose, move to the dial indicator method.
Step 6: Test both joints. For trucks with separate upper and lower joints, repeat the pry test with the bar repositioned to load each joint independently. For MacPherson strut setups, test the lower ball joint only.
Step 7: Repeat on the other side. Always check both sides of the vehicle. Worn parts rarely wear at exactly the same rate, and an alignment can only be done correctly if you know the condition of every joint on both ends.
How to Check Tie Rod Ends for Play: Step-by-Step
Tie rod testing is faster and uses a different hand position. Here is the method I trust, which matches what Sidem and JustAnswer mechanics describe.
Step 1: Confirm the suspension is loaded correctly. Same setup as the ball joint test: wheel off the ground, jack supporting the lower control arm, vehicle on jack stands.
Step 2: Use the 9 and 3 o’clock grip. Grab the tire at the 9 o’clock (left) and 3 o’clock (right) positions. Wiggle the wheel in and out, left and right, with firm pressure.
Step 3: Watch the outer tie rod end first. Have a helper shine a light on the outer tie rod end while you wiggle the wheel. Any movement in the joint itself is excessive. Look for grease around the boot, which signals a torn dust cover.
Step 4: Check the inner tie rod end. The inner joint is harder to see. Place your hand on the rubber boot where it meets the steering rack. Wiggle the wheel again. If you feel a pop, clunk, or any movement that does not match the outer joint, the inner tie rod is worn.
Step 5: Distinguish from wheel bearing play. Wheel bearings also produce side-to-side play. The difference: wheel bearing play usually stays consistent as you rotate the wheel, while tie rod play will feel and sound like a distinct clunk at a specific wheel position. If you are unsure, rock the wheel slowly and listen.
Step 6: Check the dust boots. Cracked or torn boots mean water and grit have entered the joint. Even if there is no measurable play yet, a torn boot is grounds for replacement before the joint fails.
Step 7: Repeat on the other side. Always. An alignment tech needs to know the condition of both outer and both inner tie rod ends before they touch your steering.
Ball Joint vs Tie Rod End Testing: Side-by-Side Comparison
Here is the cheat sheet I use to keep the two tests straight when I am working a car for the first time:
| Test Parameter | Ball Joint | Tie Rod End |
|---|---|---|
| Hand position | 12 and 6 o’clock (top and bottom) | 9 and 3 o’clock (left and right) |
| Motion direction | Vertical push and pull | Horizontal in and out |
| Pry bar placement | Between control arm and frame | Between tierod and knuckle (light pressure) |
| What play indicates | Worn ball joint or bearing plate | Worn tie rod end or steering issue |
| Acceptable movement | None visible | None visible |
| Dust cover to inspect | Ball joint dust boot | Tie rod end boot and inner rack boot |
| Typical replacement interval | 70k to 150k miles | 50k to 100k miles |
Print this table or save it on your phone. It is the single most useful reference when you have a flashlight in one hand and a pry bar in the other.
How Much Play Is Too Much in a Ball Joint or Tie Rod?
Here is the part most home mechanics get wrong. They think some play is acceptable. For tie rod ends, none is.
Any horizontal movement in a tie rod end, no matter how small, is grounds for replacement. Tie rods control your steering alignment directly, and even 1 mm of slop shows up as wandering on the highway and rapid tire wear. Mechanics on forums like r/MechanicAdvice consistently recommend replacement at the first sign of play, because the cost of a tie rod end is far less than the cost of an alignment-destroying tire failure or a steering incident.
For ball joints, the threshold is set by the manufacturer. Most OEM specs allow between 0.0 and 0.030 inches of vertical movement, measured with a dial indicator. In practice, if you can see vertical movement by eye during the pry test, the joint is past its service limit. If you cannot see movement but you can feel it, measure with a dial indicator and compare to the spec for your vehicle.
Off-road vehicles and work trucks have looser tolerances because the suspension articulates more. Even so, the rule of thumb I follow is: if the joint moves when you pry on it, replace it. I have never regretted replacing a marginal joint, but I have regretted leaving one in.
Optional: Using a Dial Indicator for Precise Measurement
A dial indicator takes the guesswork out. This is the method MOOG uses in their official technical bulletin, and it works on most vehicles with a steering knuckle or brake rotor you can mount a magnetic base to.
Step 1: Mount the magnetic base. Attach the dial indicator’s magnetic base to a clean, flat spot on the brake rotor or the steering knuckle, as close to the ball joint or tie rod as you can get it.
Step 2: Position the plunger. Place the indicator’s plunger perpendicular to the joint, resting against the ball joint housing or tie rod body. Zero the indicator.
Step 3: Apply leverage. Pry the suspension up and down (ball joint) or in and out (tie rod) just like in the manual test. Watch the dial.
Step 4: Read the total movement. The total excursion on the dial is your play. Compare to the factory spec. For most ball joints, anything above 0.030 inch means replacement. For tie rods, anything above 0.020 inch is suspect.
The dial indicator method is also how you check MacPherson strut upper bearing plates, where play can be subtle but still dangerous. The cost of an inexpensive dial indicator is far less than the cost of a single alignment or a tire.
Driving Signs of Worn Ball Joints or Tie Rods
You do not always have to jack the car up to suspect a problem. The first warning signs usually show up on the road. Watch for these symptoms and confirm with a hands-on check before something fails at speed.
Clunking or knocking on bumps: Usually a worn lower ball joint or a loose tie rod end.
Wandering steering on the highway: Classic outer tie rod end symptom; the wheels are not pointing in the same direction.
Uneven tire wear, especially on the inner or outer edges: Tie rod wear pulls the toe setting out of spec and scrubs the tires.
Steering wheel does not return to center: Often a binding ball joint or a failing strut bearing.
Squeaks over slow speed turns: Dry or worn ball joint, sometimes a dry tie rod boot.
If you notice any of these, do not wait. Pull over, do the inspection this guide describes, and replace the parts before they fail completely. Mechanics on r/AskAMechanic and r/MechanicAdvice repeatedly warn that waiting for a tie rod to fail completely is gambling with the steering.
Visual Inspection of Rubber Dust Covers and Boots
Before you even jack the car up, look. A two-minute visual check can catch a failing part before it has any play at all.
Crouch beside each front wheel and look at the tie rod end boot, the inner rack boot, and the ball joint dust cover (where present). If you see any of these, the joint is on borrowed time:
Tears, cracks, or holes in the rubber
Grease splattered around the boot
Boot pulled away from the housing
Visible rust or pitting on the ball stud
A torn boot lets water, salt, and grit into the joint. Once contamination starts, wear accelerates. Replacing a $20 tie rod end with a torn boot now beats replacing a control arm later.
When to Replace vs When Play Is Within Spec
Not every suspicion of play means the part has to come out today. Here is the decision tree I follow.
If you see any horizontal play in a tie rod end, replace it. There is no acceptable slop here, regardless of age or mileage. If you find a torn tie rod boot but no play, schedule replacement soon but it is not urgent.
If the dial indicator shows ball joint movement below the OEM spec (typically under 0.030 inch), the joint is serviceable. Recheck at the next oil change. If the dial reads above spec or you can see vertical movement during the pry test, replace the joint.
For load-carrying lower ball joints, replacement is non-negotiable the moment they show movement. These joints hold the weight of the vehicle and failure can cause the wheel to tuck under. Follower type upper joints can be slightly more forgiving, but a worn upper joint can let the wheel camber change dramatically under braking.
After any replacement, always get a four-wheel alignment. Even small changes in joint position affect toe and camber, and an alignment is far cheaper than the tires you would otherwise burn through.
Frequently Asked Questions
How to tell if ball joints or tie rods need replacing?
Listen for clunking on bumps, watch for wandering steering, and check for uneven tire wear on the inner or outer edges. Then do the hands-on test: pry the wheel at 12 and 6 o’clock for ball joints, 9 and 3 o’clock for tie rods. Any visible movement means replacement.
How to check tie rod ends for play?
With the wheel off the ground and supported on jack stands, grab the tire at 9 and 3 o’clock and wiggle side to side. Watch the outer tie rod end for any movement between the stud and the housing. Place your hand on the inner rack boot and feel for a clunk. Any play at all means replacement.
How to tell if ball joints have play?
Raise the vehicle so the wheel hangs free, with the jack still under the lower control arm. Place a pry bar between the control arm and frame, then push up and down on the tire at 12 and 6 o’clock. Any vertical movement between the ball stud and housing means the joint is worn.
How much play is too much in a ball joint?
Most OEM specs allow 0.0 to 0.030 inches of vertical movement, measured with a dial indicator. If you can see movement during a pry bar test, the joint is past its service limit. Off-road trucks and work vehicles tolerate slightly more but should still be replaced at the first sign of visible slop.
Can you drive with bad ball joints?
You can, but it is risky and not recommended. Worn ball joints cause wandering, uneven tire wear, and in extreme cases, complete wheel separation under braking. If you must drive a short distance to a shop, go slowly, avoid highway speeds, and avoid heavy braking. Schedule replacement as soon as possible.
Putting It All Together
Learning how to check ball joints and tie rod ends for play safely is one of the most useful skills a DIY mechanic can build. With a floor jack, jack stands, and a pry bar, you can confirm the condition of your steering and suspension in under an hour.
Remember the two grip positions: 12 and 6 o’clock for ball joints, 9 and 3 o’clock for tie rods. Remember the safety rule: never under a vehicle supported only by a jack. And remember the threshold: any visible play means replacement, especially on tie rods. After any parts replacement, get a four-wheel alignment to bring the toe and camber back to factory spec. Your tires and your steering will thank you.