
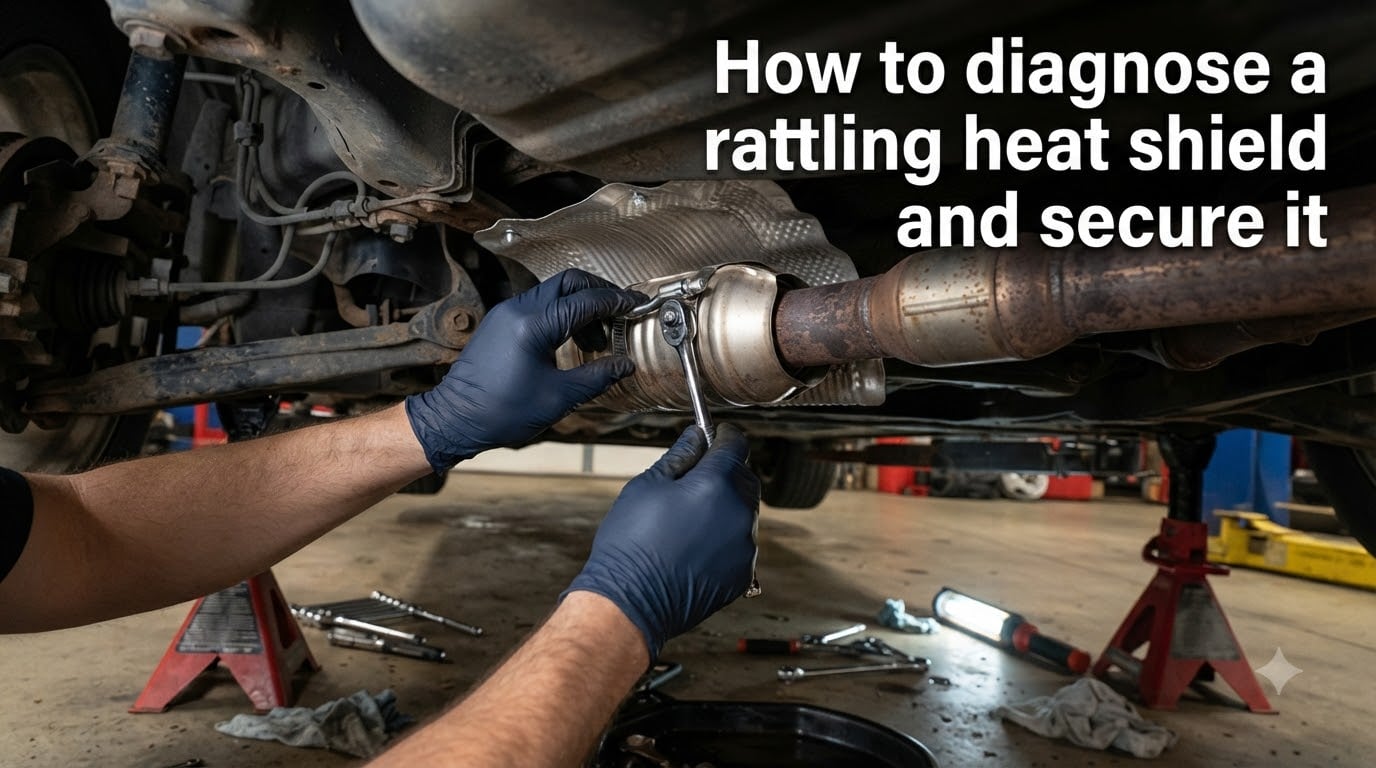
That tinny, metallic rattle coming from under your car is annoying, and it usually points to one culprit: a loose exhaust heat shield. The good news is that diagnosing and fixing this problem is well within reach for most DIYers. In this guide, I will walk you through exactly how to diagnose a rattling heat shield and secure it, step by step.
Heat shield rattles are among the most common exhaust-related complaints that drivers bring to forums and shops. Our team has dug through hundreds of mechanic discussions, shop experiences, and real-world fixes to put together a guide that actually answers the questions people ask. By the end, you will know what is making the noise, how to confirm it, and how to secure it properly.
Whether you want a 10-minute temporary fix or a permanent repair, the steps below cover both. I will also explain why you should never simply rip the shield off and drive away, even though that is a shortcut some people take.
Table of Contents
What Is a Heat Shield and Why Does It Matter?
A heat shield is a thin metal plate installed around exhaust components to protect nearby parts from extreme exhaust temperatures. Think of it as a radiant heat barrier between the glowing-hot exhaust system and the sensitive components around it.
Heat shields reflect radiant heat away from fuel lines, brake lines, wiring harnesses, rubber hoses, and the underside of the vehicle floor. Without them, exhaust heat that regularly exceeds 1,000 degrees Fahrenheit would slowly cook everything nearby.
Most vehicles have multiple heat shields. The most common locations are around the exhaust manifold, the catalytic converter, the muffler, and along the exhaust pipe runs. The catalytic converter heat shield is the one that most frequently develops a rattle because it sits in the middle of the exhaust system and endures the most heat cycling.
It is worth distinguishing the catalytic converter shield from the main exhaust heat shield. The catalytic converter runs hotter than the rest of the exhaust, so its shield takes more abuse and its mounting points corrode faster. If you hear a rattle from roughly the center of the car, the catalytic converter shield is the likely suspect.
Signs of a Loose or Rattling Heat Shield
Recognizing the symptoms early can save you from a bigger repair later. The noise patterns below are the most common signs forum users report before they dig in and find a loose shield.
Metallic Rattle on Cold Start
A loose heat shield often produces a tinny, metallic rattling sound when you first start the engine cold. Many drivers describe it as a buzzing or vibrating noise that smooths out once the engine warms up. The rattle appears on cold start because exhaust components have not yet expanded from heat, leaving more clearance for the loose shield to vibrate.
Rattle When Accelerating
If the rattling gets louder or changes pitch when you press the gas pedal, a loose exhaust shield is a prime suspect. Acceleration increases exhaust flow and engine vibration, both of which amplify the shield’s movement.
Rattle Over Bumps
A heat shield that has partially separated will bounce against the exhaust pipe or floor pan when you hit a bump or rough patch of road. If the noise comes and goes with road conditions rather than engine speed, check for a shield that has come loose at one or more mounting points.
Rattle When Shifting Between Drive and Reverse
One pattern that shows up repeatedly on mechanic forums is a rattle that occurs when shifting between drive, park, and reverse. The engine torques slightly on its mounts during gear changes, which shifts the exhaust system enough to make a loose shield knock against surrounding metal.
If you notice any combination of these symptoms, it is time to confirm the diagnosis before the shield gets worse or falls off entirely.
Common Causes of Heat Shield Failure
Heat shields do not fail randomly. They loosen up for a few predictable reasons, and understanding the cause helps you choose the right fix.
Corrosion is the number one cause. Heat shields are typically made of thin stamped steel or aluminum, and the mounting bolts and clips rust over years of exposure to moisture, road salt, and temperature swings. Once a bolt rusts through or a spot weld breaks, the shield has nothing holding it tight.
Heat cycling weakens the metal over time. Every drive cycle heats the shield up and cools it back down, hundreds of times per year. This constant expansion and contraction fatigues the metal and eventually cracks mounting tabs.
Vibration from the engine and exhaust gradually works fasteners loose, especially if the original hardware was not torqued properly or has degraded. A shield that is slightly loose today will be more loose next month.
Rusted bolts are a practical problem during repair. Many DIYers discover that the mounting bolts snap off when they try to remove them, because corrosion has fused the threads. Plan for broken hardware and have replacement bolts ready.
How to Diagnose a Rattling Heat Shield?
Diagnosing the rattle correctly saves you from chasing the wrong noise. The procedure below is safe and does not require special tools.
Step 1: Listen and Locate
Start the engine cold and listen carefully from outside the vehicle. Try to pinpoint whether the rattle is coming from the front (manifold area), the center (catalytic converter), or the rear (muffler). Having a helper rev the engine lightly while you listen can help narrow down the location.
Step 2: Raise the Vehicle Safely
Once the car has cooled completely, raise it on jack stands or a lift. Never get under a car supported only by a hydraulic jack. Make sure the parking brake is set and the car is in park or in gear on level ground.
Step 3: Visually Inspect the Shields
Use a flashlight to examine each heat shield along the exhaust system. Look for shields that are visibly separated from the exhaust pipe, bent away from their mounting points, or hanging lower than they should. Check for cracked spot welds, missing bolts, and heavy rust around mounting points.
Step 4: Tap Each Shield
Use a rubber mallet or the handle of a screwdriver to gently tap each shield. A secure shield will produce a solid thud. A loose shield will produce the same metallic ringing or buzzing sound you hear while driving. The shield that matches your rattle is the problem.
Step 5: Test by Hand
Try wiggling each shield by hand. Any shield that moves more than a fraction of an inch is too loose. Pay attention to which mounting points have failed so you know exactly where to focus your repair.
Step 6: Rule Out Other Exhaust Noises
Before concluding it is the heat shield, check for other sources of exhaust noise. A cracked exhaust pipe, a leaking exhaust gasket, or a broken hanger can produce similar sounds. If the noise changes with exhaust pressure rather than vibration, suspect a leak rather than a shield rattle.
Tools and Materials You Will Need
Gather your tools before starting the repair so you do not end up making a parts run halfway through. Here is what you need:
Jack and jack stands (or a vehicle lift)
Flashlight or work light
Rubber mallet or screwdriver handle for tapping
Socket set and ratchet (metric, to match your vehicle’s hardware)
Wrench set
Pliers
Stainless steel hose clamps (size depends on your exhaust diameter)
Replacement bolts, nuts, and washers (stainless steel)
Penetrating oil (for rusted bolts)
Heat-resistant zip ties (for temporary fixes)
Safety glasses and gloves
If you plan to use the bronze wool technique, add a small amount of bronze wool to your list. Stainless hardware is worth the small extra cost because it will not rust and leave you with the same problem in two years.
How to Secure a Rattling Heat Shield?
Once you have confirmed which shield is loose and how it is mounted, you can secure it permanently. The right method depends on what has failed.
Method 1: Replace Rusted Bolts and Hardware
If the mounting bolts are rusted or missing, this is the cleanest fix. Spray penetrating oil on the old bolts and let it soak for 15 to 20 minutes. Remove the old hardware carefully, expecting some bolts to snap. Clean the mounting holes with a wire brush, then install new stainless steel bolts with washers and nuts. Torque them snug, but do not overtighten and crack the thin shield metal.
Method 2: Use Stainless Hose Clamps
When mounting tabs have broken off or the shield is otherwise intact but loose, stainless steel hose clamps are the most popular DIY fix on mechanic forums. Wrap a large worm-gear hose clamp around the exhaust pipe and the shield, positioning the clamp over the loose section. Tighten it until the shield is firmly held against the pipe. This method costs under ten dollars and takes about 10 minutes per shield.
Method 3: Reweld Broken Tabs
For a permanent factory-style repair, broken spot welds can be rewelded. This requires a welder and some skill, so it is not a beginner DIY job. Many shops will tack-weld a loose shield for a modest labor charge if you bring the car in already diagnosed. Welding produces the most durable result but is not practical for everyone.
Method 4: Bronze Wool Dampening
A technique that comes up repeatedly in forum discussions is stuffing bronze wool between the shield and the exhaust pipe. Bronze wool will not burn or rust, and it dampens the vibration that causes the rattle. Pack small amounts of bronze wool into the gap where the shield vibrates against the pipe. This works best as a complement to a clamp or bolt fix, not as a standalone solution.
Temporary Fix Options
Sometimes you need to silence the rattle today and do the proper repair later. These temporary fixes will buy you time.
Heat-resistant zip ties can hold a loose shield in place for weeks or even months. Use high-temperature rated zip ties designed for engine compartments, as standard nylon ties will melt. Thread them through existing holes or around the pipe to pull the shield tight.
Exhaust clamps designed for joining exhaust pipes can also pinch a loose shield against the pipe. These are more rigid than hose clamps and hold up well to heat.
Large hose clamps linked together can wrap around larger diameter pipes where a single clamp is too short. Connect two or three clamps end to end to reach around the pipe and shield.
Keep in mind that temporary fixes are just that. Plan to do a permanent repair within a few weeks so you are not relying on a clamp that could eventually loosen.
Repair vs Replace: Which Makes Sense?
Most rattling heat shields can be repaired rather than replaced. If the shield metal itself is still solid and only the mounting points have failed, repair is the way to go. Hose clamps and new bolts will restore full function at a fraction of replacement cost.
If the shield is heavily rusted, cracked, or partially missing, replace it. A shield that is falling apart cannot be clamped back together reliably, and loose pieces can drop onto the road or contact moving parts.
Cost-wise, a DIY repair using hose clamps and hardware typically runs under $20. Having a shop reattach a shield runs roughly $50 to $150 in labor depending on access. Replacing a shield entirely, including parts, ranges from about $100 to $300 depending on the vehicle and which shield needs replacing. These ranges vary by region and shop, so call around for quotes.
Many drivers report that a simple hose clamp repair has lasted for years with no recurrence. The key is using stainless hardware so corrosion does not bring the rattle back.
Why You Should Never Just Remove the Heat Shield?
When a heat shield starts rattling, some people’s first instinct is to remove it entirely. This is a bad idea for several reasons, and every reputable source on the topic agrees.
Without the heat shield, exhaust heat radiates directly onto nearby components. Fuel lines, brake lines, wiring insulation, rubber hoses, and the floor pan are all designed with the assumption that a shield is in place. Removing the shield can cause wiring to melt, rubber to degrade, and in worst cases, create a fire hazard.
The floor pan inside the cabin can also get hot enough to be uncomfortable or even unsafe. In dry conditions, a red-hot catalytic converter without its shield can ignite dry grass or debris under a parked vehicle, which is a real wildfire risk in some regions.
Securing the shield rather than removing it preserves the thermal protection your vehicle was designed with. Spend the 10 minutes and a few dollars to fix it properly.
Conclusion
Knowing how to diagnose a rattling heat shield and secure it gives you a cheap, practical fix for one of the most annoying noises a car can make. The diagnosis comes down to listening, locating, and tapping each shield until you find the one that buzzes. The fix is usually as simple as a hose clamp, new stainless hardware, or a small amount of bronze wool.
Do not ignore the rattle and do not remove the shield. A few dollars and an afternoon under the car will silence the noise and keep your vehicle’s heat protection intact. If the shield is too far gone with rust, replace it rather than driving without one.
FAQs
How do you diagnose a heat shield rattle?
Start the engine cold and listen for a metallic buzzing or rattling sound from under the car. Then raise the vehicle safely, visually inspect each shield along the exhaust, and tap each one with a rubber mallet. A loose shield will produce the same tinny ringing noise you hear while driving. Confirm by trying to wiggle each shield by hand.
How to secure a rattling heat shield?
The most common DIY method is wrapping a stainless steel hose clamp around the exhaust pipe and the loose shield, then tightening it until the shield is firm. For broken mounting bolts, replace them with new stainless hardware. For a more permanent fix, broken spot welds can be rewelded by a shop. Bronze wool stuffed between the shield and pipe adds vibration dampening.
Is it okay to drive with a rattling heat shield?
You can drive short distances with a rattling heat shield, but you should fix it as soon as possible. A loose shield can eventually fall off entirely, which creates a road hazard and exposes nearby components to exhaust heat. Driving without a functioning shield risks heat damage to fuel lines, wiring, and rubber parts.
How expensive is it to fix a rattling heat shield?
A DIY hose clamp repair costs under $20 in parts. Having a shop reattach a loose shield typically runs $50 to $150 in labor. Replacing a heat shield entirely, including parts and labor, ranges from about $100 to $300 depending on the vehicle and which shield needs replacing. Costs vary by region and shop.
Can I just remove my heat shield?
No, removing the heat shield is not recommended. Without it, exhaust heat radiates onto fuel lines, wiring, rubber hoses, and the floor pan, potentially causing damage or a fire hazard. A red-hot catalytic converter without its shield can also ignite dry debris under a parked vehicle. Secure or replace the shield instead of removing it.
How long does a heat shield repair last?
A hose clamp repair using stainless steel hardware can last for years with no recurrence. Bolt and washer replacements using stainless parts are similarly durable. Welded repairs are the most permanent. Avoid using standard steel hardware, which will rust and bring the rattle back within a year or two.