
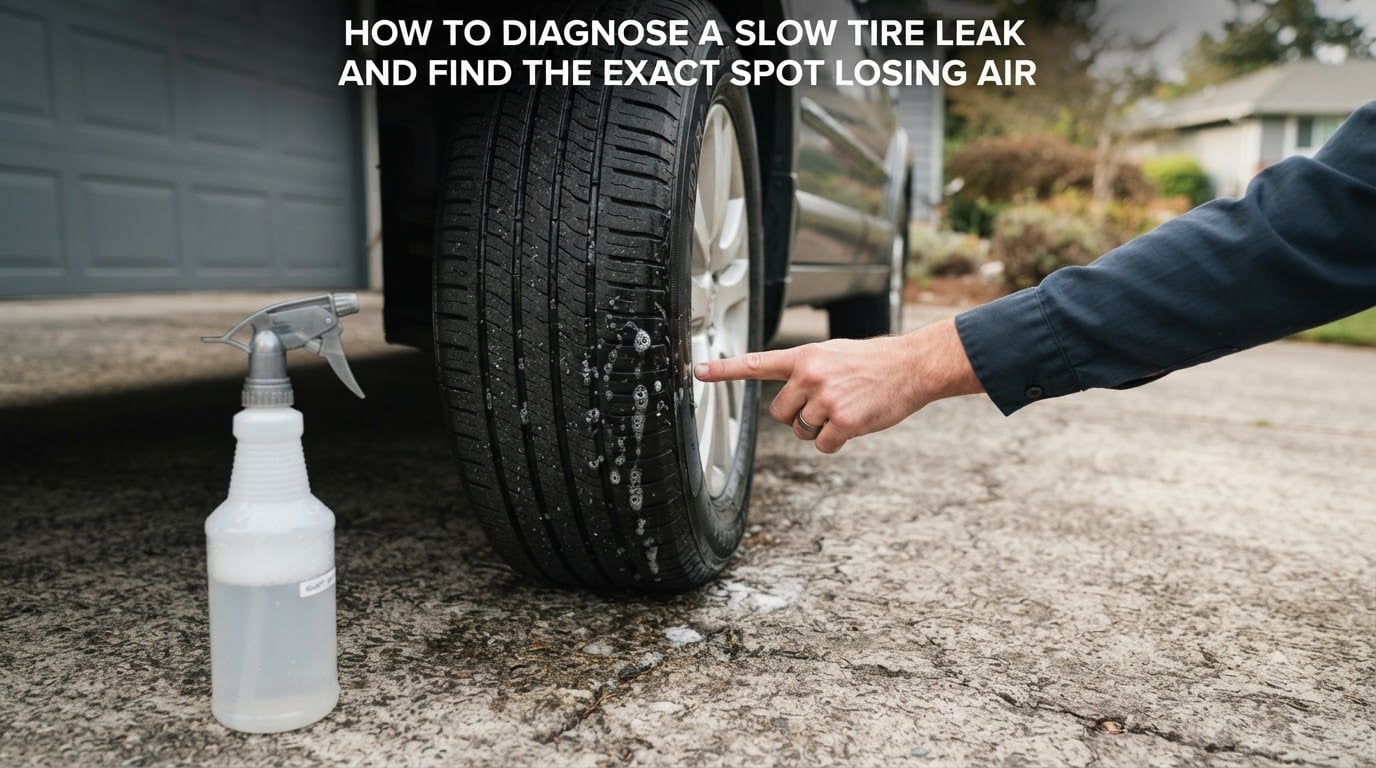
Last month I came out to my truck and found the driver’s side tire 4 PSI lower than the others. By the next morning, it had dropped another 3 PSI. That’s a classic slow tire leak, and finding the exact spot losing air is the only way to fix it properly. After spending a weekend chasing that leak around my own tire, I figured out which methods actually work and which ones waste your time.
This guide walks through the exact diagnostic process I use now, starting with the easiest techniques and ending with the nuclear option for stubborn leaks that refuse to show up. Whether your tire loses air overnight or just gradually over a week, the steps below will help you find it.
Table of Contents
What a Slow Tire Leak Actually Looks Like
A slow tire leak is a gradual loss of air pressure that happens over hours or days, often without any obvious damage visible to the naked eye. Unlike a flat from a nail you can spot at 20 feet, slow leaks usually come from pinhole-sized openings, slow seepage around the valve, or a tiny gap in the tire bead seal.
The most common sign is a tire pressure monitoring system (TPMS) light that keeps coming back after you fill the tire. You might also notice one tire that consistently runs a few PSI lower than the others, even after airing up. Normal pressure loss from temperature changes runs about 1 PSI per 10 degrees Fahrenheit, so anything beyond that points to an actual leak.
Tools You Need Before You Start
Before you start hunting for the leak, gather your gear. Most of these are probably already in your garage.
A reliable tire pressure gauge (digital or dial, not the stick type)
A spray bottle or small bucket
Dish soap (Dawn or any grease-cutting variety works best)
A valve core tool or small adjustable wrench
An air compressor or portable tire inflator
A flashlight for close inspection
Paper towels and a notepad to track your findings
If you plan to try the submersion method later, you’ll also need a large basin or tub big enough to fit the entire wheel. A plastic storage tote works great for this.
How to Diagnose a Slow Tire Leak with the Soapy Water Test?
The soapy water test is the first method I reach for, and it solves the problem about 70% of the time. The idea is simple: soapy water forms bubbles anywhere air is escaping, even from leaks too small to hear or feel.
Inflate the tire to the recommended pressure printed on your door jamb sticker. Higher pressure actually makes bubbles easier to spot.
Mix a solution of about 1 part dish soap to 3 parts water in your spray bottle. You want it sudsy but not foamy.
Spray the entire tire generously, starting at the tread and working your way around the sidewalls.
Pay special attention to the valve stem area and the bead where the tire meets the rim.
Watch for bubbles forming and growing. Even tiny leaks will produce slow-growing bubbles within 1 to 2 minutes.
Mark the spot with chalk or a piece of tape so you don’t lose it.
If you’re hunting a really stubborn leak, give it 10 minutes. I once waited 12 minutes before a single bubble appeared around a screw head. Slow leaks need patience.
Visual Inspection Guide for Punctures and Foreign Objects
Before spraying anything, do a careful visual walk-around of the tire. Run your hand (carefully) across the tread to feel for anything sticking out. Nails, screws, and wire often embed themselves just deep enough to hold air but stick out enough to spot.
Check the tread grooves for shiny metal, unusual rubber discoloration, or small cuts. Look at the sidewalls for bulges, cracks, or scuffs from curbs. Slow leaks from the sidewall almost always mean a damaged tire that needs replacement rather than repair.
Don’t forget to inspect both the inside and outside of the tire if you’ve already removed it. I once found a thumbtack on the inner sidewall that only showed up after the tire came off the rim.
How to Check the Valve Stem for Leaks?
Valve stem issues account for a huge percentage of slow leaks, and they’re the easiest to fix. The valve has three potential leak points: the core, the base where it meets the rim, and the cap threads.
Spray soapy water directly on the valve stem while the tire is inflated.
Watch for bubbles around the cap, the threaded stem, and especially the base.
If bubbles form at the cap, tighten the cap or replace the rubber gasket inside it.
If bubbles form at the base of the stem, the valve core is likely loose. Use a valve core tool to tighten it snug.
If bubbles still appear after tightening, replace the entire valve stem. This requires removing the tire from the rim.
A hissing sound when you remove the valve cap is a dead giveaway that the core isn’t sealing properly. Sometimes just snugging the core with the right tool fixes it without any parts needed.
Inspecting the Tire Bead and Wheel Rim
The bead is the rubber edge of the tire that seals against the rim. When this seal fails, air escapes around the circumference of the wheel rather than through the tire itself. This is where chrome wheels and steel rims cause different problems.
Chrome wheels commonly develop flaking along the rim edge where the tire seats. These flakes prevent a proper seal and cause slow leaks that the soapy water test reveals as bubbles running along the rim line. Steel rims develop a different issue: pinhole rust spots that seep air invisibly until pressure drops noticeably.
Spray the bead area thoroughly and check both the inside and outside edges where the tire meets the metal. If bubbles appear along the entire circumference, the tire likely wasn’t seated properly during mounting. If bubbles appear in one specific spot on the rim, you have corrosion or damage at that point.
The Overinflation Trick for Stubborn Slow Leaks
Here’s the technique most articles skip over but mechanics swear by. If your soapy water test comes up clean and you still suspect a leak, overinflate the tire to 50 to 60 PSI. This higher pressure forces more air through tiny openings, making bubbles larger and easier to spot.
I learned this from a Reddit thread where users kept complaining that the soapy water method failed them. The trick isn’t that soapy water doesn’t work. It’s that some leaks are so slow at normal pressure that they don’t produce visible bubbles. Push the pressure up and the same leak produces obvious bubbles within seconds.
Don’t leave the tire at high pressure for more than a few minutes. Spray the suspect areas at elevated pressure, mark the spot, then release air back to normal. This method is especially good for finding slow leaks along the bead and at the valve base.
Submersion Test When Nothing Else Works
When spray methods fail completely, the submersion test is your last DIY option. Removing the tire from the rim and dunking sections in water reveals leaks the spray method simply cannot detect.
Fill a large basin or tub with water. Inflate the tire to normal pressure (or slightly above). Submerge one section at a time and watch for bubbles rising to the surface. Work your way around the entire tire, checking the tread, sidewalls, and especially the bead area on both sides.
This method takes longer but it’s more reliable for finding the exact spot. Mechanics use a professional dunk tank for this reason. The slow leaks that show up as a tiny stream of bubbles every 10 seconds are easy to miss with spray but impossible to miss underwater.
When to Call a Professional Mechanic
If you’ve tried all of the above and still can’t find the leak, it’s time to visit a tire shop. Professional shops have commercial dunk tanks, bead seating equipment, and experience spotting the kind of leaks that hide from DIY methods.
You should also head to a shop if you find damage on the sidewall, large punctures over a quarter inch, or repeated leaks in the same tire after repair. Sidewall damage and large holes cannot be safely repaired with a plug or patch and the tire needs replacement.
Preventing Slow Leaks Before They Start
Check your tire pressure monthly, not just when the TPMS light comes on. Catching a slow leak early means a smaller repair and less risk of driving on an underinflated tire. Rotate your tires every 5,000 to 7,500 miles to catch uneven wear patterns that can lead to slow leaks along damaged sections.
Keep an eye on your wheels, especially if you have chrome rims. Address curb damage and rim corrosion before they become leak points. Replace valve stems whenever you get new tires. The few extra dollars for new valves prevent the most common source of slow leaks down the road.
Frequently Asked Questions
How do you find an extremely slow tire leak?
For extremely slow tire leaks, try the overinflation trick first. Inflate the tire to 50 to 60 PSI and spray soapy water across the tread, sidewalls, valve stem, and bead area. The higher pressure forces more air through tiny openings, making bubbles visible. If that fails, remove the tire and use the submersion test in a water basin.
Why is my tire losing air but I can’t find a leak?
If your tire is losing air but no leak is visible, the problem is usually a pinhole puncture, a loose valve core, or a failed bead seal. Soapy water reveals these by forming bubbles at the leak point. Rim corrosion on steel wheels and chrome wheel flaking are common hidden culprits. Temperature drops can also cause pressure loss that mimics a leak.
How long can I drive with a slow tire leak?
You can drive short distances with a slow tire leak as long as you keep the tire inflated to spec. Check pressure daily and refill as needed. Do not drive on a severely underinflated tire or at highway speeds with a known leak. A blowout from low pressure is far more dangerous than the inconvenience of stopping to repair the tire.
Can a slow leak in a car tire be fixed?
Yes, most slow leaks can be fixed permanently. Punctures in the tread area can be plugged or patched. Valve stem leaks are fixed by tightening the core or replacing the valve. Bead seal failures usually require removing the tire, cleaning the rim, and remounting with fresh sealant. Sidewall damage generally cannot be repaired and requires tire replacement.
How can I tell if my tire valve is leaking?
Spray soapy water on the valve stem while the tire is inflated. Bubbles forming at the cap, threaded stem, or base indicate a leak. A hissing sound when removing the cap means the valve core is not sealing. Tighten the core with a valve tool, and if bubbles persist, replace the entire valve stem.
Final Thoughts on Diagnosing a Slow Tire Leak
Finding a slow tire leak takes patience more than anything else. Start with the soapy water test, then move to visual inspection, valve stem checks, and bead inspection. For stubborn leaks that refuse to show up, the overinflation trick and submersion test catch what other methods miss.
If you follow these steps, you’ll diagnose almost any slow tire leak yourself and save the cost of a shop visit. And once you find it, you’ll know exactly what repair you need instead of guessing.