
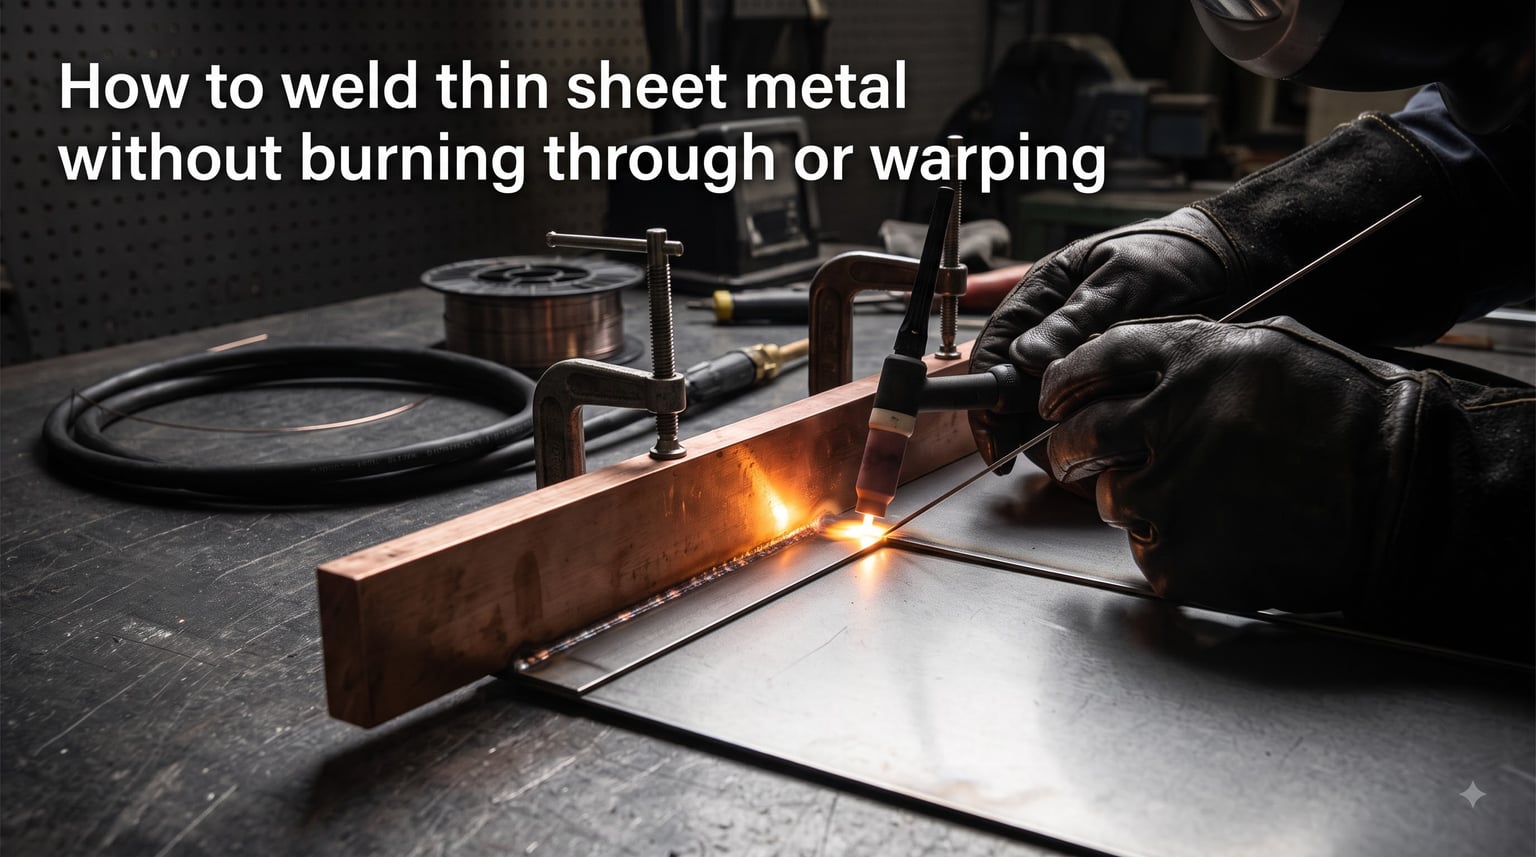
To weld thin sheet metal without burning through or warping, run the lowest amperage that still penetrates, keep a tight fit-up with no gaps, use small-diameter filler, travel faster than you would on thick stock, and lay the bead in short skip or stitch segments with tack welds between them. Add a copper backing bar where you can reach the back of the joint, and let each segment cool before adding the next.
If you have ever tried to patch a rusted quarter panel or join two pieces of 20 gauge steel, you already know the two enemies: a hole where the bead should be, and a panel that waves like a potato chip. I have burned through more sheet metal than I care to admit, and so has every welder I know. The fix is rarely a fancier machine — it is technique, sequence, and heat management.
This guide breaks down exactly how to weld thin sheet metal without burning through or warping using MIG, TIG, and stick. You will get specific amperage numbers, wire sizes, gas mixes, travel speeds, and the order in which to lay beads. Everything here comes from the shop floor and from welders on forums like r/Welding and Garage Journal who fight this battle every day.
Table of Contents
Why Is Welding Thin Sheet Metal So Hard?
Thin sheet metal — typically anything under 1/8 inch, or about 18 gauge and thinner — has almost no mass to absorb heat. The arc dumps energy in faster than the metal can spread it out, so the heat-affected zone (HAZ) stays small and concentrated. That is why a bead that looks fine on 1/4 inch plate will blow a hole through 20 gauge in half a second.
Two failure modes account for almost every ruined panel. The first is burn-through, where the puddle collapses and you get a hole instead of a weld. The second is warping or distortion, where uneven heating makes the panel expand and then shrink unevenly, leaving waves, buckles, and a twist you cannot hammer out easily.
Thinner metals also conduct heat away more slowly in proportion to how much heat you put in. Aluminum is the extreme case — it sucks heat fast but also melts at a low temperature, so the window between “cold lap” and “hole” is razor thin. Mild steel is more forgiving, and stainless falls in between but has a higher coefficient of thermal expansion, meaning it warps more than carbon steel at the same heat input.
Finally, fit-up matters more on thin stock than anywhere else. A 1/16 inch gap on 1/4 inch plate is nothing. The same gap on 22 gauge sheet is an open invitation to burn-through, because the puddle has nothing to bridge and gravity pulls it through.
The 1-For-1 Rule and How to Set Your Amperage
The single most useful formula for thin metal work is the 1-for-1 rule: roughly 1 amp of welding current per 0.001 inch of metal thickness. So for 0.035 inch (about 20 gauge) steel, you start around 35 amps. For 0.060 inch (16 gauge), you start around 60 amps. These are starting points, not gospel — fine-tune by 5 amps at a time based on penetration.
For MIG welding, you control heat indirectly through wire feed speed and voltage. Faster wire feed means more current; higher voltage means a longer, hotter arc. For thin metal, run the low end of the voltage range and a wire feed speed that gives you a steady, controlled crackle — not the aggressive sizzle you want on thick plate.
Travel speed is the third heat lever, and it is the one most beginners underuse. Moving faster reduces the heat put into any one spot, which is exactly what thin metal needs. A good test: if your puddle wants to fall through, your travel speed is too slow or your amperage is too high — usually both.
One real-world reference from a forum welder: pulse TIG on 0.4mm (about 28 gauge) steel at just 11 amps with a tight pulse. That is how little current thin material actually needs.
How to MIG Weld Thin Sheet Metal Without Burning Through?
MIG (GMAW) is the most popular process for thin sheet metal because it is fast and forgiving once dialed in. The trick is using the smallest wire and the gentlest gas mix your machine will run cleanly on.
Wire diameter: Use 0.023 inch (0.6mm) ER70S-6 wire for anything 18 gauge and thinner. Step up to 0.030 inch only on 16 gauge and heavier. The thinner wire feeds a smaller droplet per pulse of current, which means less heat per unit of filler. Flux-cored wire also works, but it runs hotter — drop down to 0.030 inch max and expect more spatter.
Shielding gas: A 75% argon / 25% CO2 mix (C25) is the gold standard for thin mild steel. The argon stabilizes the arc and lets you run lower voltage without stubbing. Straight CO2 is cheaper but runs hotter and more aggressively, which is the last thing you want on 22 gauge.
Settings starting point for 20 gauge mild steel: roughly 15-17 volts, wire feed around 150-200 IPM, and a travel speed that keeps the puddle small and slightly trailing the wire. Listen for a smooth crackle, like frying bacon, not the angry pop of too much wire or the hiss of too much voltage.
Technique: Push the gun, do not drag — pushing gives a wider, shallower puddle and a better view of the joint. Use straight stringer beads, no weave. Weaving widens the heat-affected zone and almost guarantees warping on thin panels.
Backing bar: Whenever you can reach the back of the joint, clamp a piece of copper or brass behind it. Copper will not fuse to steel, so it acts as a chill plate and a temporary backer that supports the puddle. This single trick eliminates most burn-through on auto body patches.
How to TIG Weld Thin Sheet Metal for Cleanest Results
TIG (GTAW) gives you the tightest heat control of any process, which is why it is the first choice for thin stainless, aluminum, and cosmetic work. The foot pedal lets you feather the amperage in real time, which is impossible on a standard MIG setup.
Tungsten electrode: Grind a 1.0mm or 1.6mm (0.040 or 1/16 inch) 2% lanthanated or ceriated tungsten to a sharp point. A sharp, small tungsten concentrates the arc into a tiny spot, which means less total heat spread. Thoriated tungsten works too but requires more care due to the thorium.
Filler rod: Match the base metal. ER70S-2 for mild steel, ER308L for 304 stainless, ER4043 for aluminum. Use the smallest rod that still feeds — 1/16 inch (1.6mm) for sheet work. For very thin material, you can run autogenous (no filler) and just fuse the edges together, which adds almost no heat beyond what the arc itself delivers.
Pulse TIG: If your machine has pulse, use it. Pulse alternates between a high peak current (which melts the puddle) and a low background current (which lets it cool). On thin metal, try a peak around 30-50 amps, background around 10 amps, and a pulse rate of 1-2 pulses per second. The result is a row of overlapping spot welds rather than one continuous hot puddle.
Gas lens and cup: A gas lens and a number 6 or 7 cup give a tighter, longer shielding gas envelope, which matters on thin metal where you are running low flow and a small tungsten. Argon at 15-20 CFH is plenty for steel and stainless; bump to 20-25 CFH for aluminum.
Foot pedal discipline: Start the arc with the pedal barely depressed, ramp up to form the puddle, then back off as you add filler. This is the skill that separates clean TIG work from burned-through panels. Practice on scrap until the pedal feels like a gas pedal in stop-and-go traffic.
Can You Stick Weld Thin Sheet Metal? (And Why It Is Hard)
Stick (SMAW) is the worst process for thin sheet metal, but it is not impossible. If stick is all you have, you can weld down to about 16 gauge with care, and skilled welders push it further.
The problem is that stick runs hot and has no fine heat control. You cannot feather the amperage mid-beed the way you can with a TIG foot pedal. The arc also has to strike hard to ignite, which is the exact moment most thin-metal burn-through happens.
Electrode choice: E6013 is the friendliest rod for thin steel because it runs on a soft arc and produces a shallow, controllable puddle. Some welders use E7018 for cleaner appearance, but it needs more heat and is harder to control under 1/8 inch. Stay at 1/16 or 3/32 inch diameter.
Polarity: One forum tip that comes up over and over: swap your leads and run DCEN (Direct Current Electrode Negative), also called straight polarity. This puts about 70% of the heat into the workpiece and 30% into the electrode, which is the opposite of the DCEP most stick welding uses. The result is less heat in the sheet metal and a better chance of getting a bead down without a hole.
Technique: Use a very short arc — almost touching the plate — and a fast, steady travel speed. Lay short stitch beads no longer than an inch, then move to a different part of the joint. Do not try to run a long continuous bead; you will warp the panel and probably burn through.
How to Prevent Burn-Through When Welding Thin Metal
Burn-through happens when you put more heat into a spot than the metal can carry away, and the puddle collapses through the back. Preventing it comes down to lowering heat input, shortening dwell time, and supporting the back of the joint.
Here is the short list that works across all three processes:
1. Drop the amperage first. Use the 1-for-1 rule as your starting point and tune from there. If you are burning through, you are almost always too hot.
2. Travel faster. Slowing down to “fill the gap” is a trap. Faster travel puts less heat into any one spot, which is exactly what thin metal needs.
3. Fix your fit-up. Gaps cause burn-through more than any other single factor. Clamp, hammer, and fit the pieces until they touch with zero visible gap before you strike an arc.
4. Use a backing bar. A copper or brass bar clamped behind the joint absorbs heat and supports the puddle. This is the single most effective burn-through fix on auto body work.
5. Tack first, weld later. Tack every inch or two before running any continuous bead. Tacks hold the fit-up tight and stop the joint from opening up as heat builds.
6. Run skip or stitch beads. Weld an inch, move three inches down the joint, weld another inch, and come back to fill the gaps once everything has cooled. This is covered in detail in the warping section below.
7. Switch polarity on MIG. Some welders report that running DCEN on MIG with flux-cored wire cuts heat input enough to rescue marginal thin-metal work, though this is a workaround, not a default setting.
How to Prevent Warping and Distortion in Thin Sheet Metal?
Warping is the other side of the thin-metal coin. The base metal does not melt, but uneven heating and cooling makes it expand and shrink in a way that leaves the panel wavy or twisted. Fixing it after the fact usually means hammer-and-dolly work or cutting the weld out and starting over.
The fix is all about controlling where and when heat goes into the panel. Here is what works:
1. Tack weld the entire joint first. Place a tack every 1-2 inches along the seam before laying any continuous bead. This locks the panel in place so it cannot pull out of alignment as the bead shrinks.
2. Use the skip welding (also called stitch or backstep) sequence. Instead of welding from one end to the other, weld a short bead in the middle, jump a few inches, weld another short bead, and keep jumping around. Each bead shrinks as it cools, but because they are scattered, the shrinkage averages out instead of accumulating in one direction.
3. Weld symmetrically. If you are welding a patch into a panel, weld a bead on one side, then immediately weld the opposite side. Balancing heat input across the panel keeps distortion even.
4. Clamp everything. Use C-clamps, locking pliers, or a jig to hold the panel flat against a stout backing surface. The clamps fight the shrinkage forces that would otherwise curl the metal.
5. Use heat sinks. A copper or aluminum backing bar doubles as a heat sink, pulling heat out of the panel faster so the heat-affected zone stays smaller. Wet rags on either side of the weld (not under it) also help, though they can cause contamination if you are not careful.
6. Keep beads short and let them cool. A 1-inch bead is plenty on thin stock. After each bead, wait until the metal is warm to the touch, not hot, before laying the next one. Patience here is what separates a flat panel from a wavy one.
7. Plan your weld sequence before you start. Sketch the order of beads on a piece of paper so you are not improvising under the hood. A planned sequence is the cheapest warp prevention there is.
Welding Different Metals: Steel, Stainless, and Aluminum Compared
Different base metals behave very differently at thin gauges. What works on mild steel will burn through aluminum, and stainless has its own quirks.
Mild steel is the most forgiving of the three. It melts around 2500F, conducts heat moderately, and warps less than stainless at the same thickness. ER70S-6 wire for MIG, ER70S-2 rod for TIG, and E6013 for stick cover most jobs. C25 gas for MIG, straight argon for TIG.
Stainless steel (304 is the most common) has a higher coefficient of thermal expansion, meaning it warps more than mild steel at the same heat input. It also conducts heat more slowly, so the heat-affected zone stays concentrated and the burn-through window is narrower. Use ER308L filler, a 75/25 argon/CO2 mix for MIG (or a tri-mix of argon/CO2/helium for best results), and pure argon for TIG. Skip welding and tight tack spacing matter even more on stainless than on carbon steel.
Aluminum is the hardest of the three because it conducts heat away almost instantly but also melts at only around 1200F. The window between “the puddle has not formed yet” and “you have a hole” is seconds, not minutes. TIG with AC current and a foot pedal is the right tool. Use ER4043 or ER5356 filler, 100% argon shielding, and a larger tungsten (3/32 inch) because aluminum needs more current to start the puddle. MIG with a spool gun works on 16 gauge and thicker; below that, TIG is the only realistic option.
Common Mistakes to Avoid When Welding Thin Sheet Metal
Most thin-metal failures come from the same handful of mistakes. Here is what to watch for, drawn from welders who have made every one of them.
Running too hot. If your machine has a chart, ignore the high end for thin stock. Start at the lowest setting that will strike a stable arc and work up only if you get cold lap.
Traveling too slow. The instinct on thin metal is to slow down to “be careful,” but slow travel piles heat into one spot and burns through. Move with purpose.
Leaving gaps in the fit-up. A gap you can see light through is a gap that will become a hole. Spend the time to fit and clamp before welding.
Using the wrong gas mix. Straight CO2 on thin MIG work runs too hot. Switch to C25 and the difference is immediate.
Using wire that is too thick. 0.035 inch wire on 20 gauge is asking for burn-through. Drop to 0.023 inch and the puddle becomes controllable.
Weaving the bead. Weaving is for thick plate where you need to fill a wide groove. On sheet metal, a weave just spreads the heat-affected zone and warps the panel. Run straight stringers.
Skipping the tacks. Welding a long seam with no tacks is how you end up with a panel that looks like a pringle. Tack, then weld.
FAQs
How to weld sheet metal without burning through?
Use the lowest amperage that still penetrates (about 1 amp per 0.001 inch of thickness), keep a tight fit-up with no gaps, travel faster than you would on thick stock, run small-diameter filler, and clamp a copper backing bar behind the joint when possible. Lay short skip beads with tack welds between them rather than one long continuous weld.
Why am I burning through metal when welding?
You are putting more heat into the spot than the metal can carry away. The usual causes are amperage set too high, travel speed too slow, gaps in the fit-up, wire or electrode too thick, or welding one continuous bead instead of short skip welds. Drop the heat, speed up, and fix the fit-up first.
How do I prevent warping thin metals?
Tack weld the entire joint every 1-2 inches before laying any beads, then weld in a skip or backstep sequence (short beads scattered along the joint rather than one long pass). Clamp the panel flat, use a copper or aluminum heat sink behind the weld, weld symmetrically, and let each bead cool to warm-to-the-touch before the next one.
How to keep metal from warping while welding?
Control heat input and distribution: keep beads short (about 1 inch on thin stock), jump around the joint in a skip-weld pattern so shrinkage averages out, clamp everything tight, use backing bars as heat sinks, and never weld continuously from one end of a seam to the other. Plan your bead sequence on paper before you strike an arc.
Final Thoughts
Learning how to weld thin sheet metal without burning through or warping is mostly a matter of discipline rather than equipment. Use the 1-for-1 amperage rule, fit the joint tight, tack before you weld, lay short skip beads, and let the metal cool between passes. Back the joint with copper whenever you can, and resist the urge to slow down or weave — both will burn you through faster than anything else.
Pick one process — MIG is the easiest starting point — and practice on scrap of the same gauge before touching your real project. Once the techniques click, you will be patching panels and joining thin stock without the holes and waves that used to drive you crazy.