
I remember the first time I tried to check my car’s alignment after installing coilovers. I drove to a shop, waited three hours, and paid close to $200 for what turned out to be a number off by a full degree.
That frustration is exactly why so many enthusiasts learn how to check toe and camber at home with basic tools. You can get within 0.1 to 0.2 degrees of a shop’s results for a fraction of the price, and you can recheck after every modification without leaving the driveway.
This guide walks through the exact process I have used on three different project cars. We will cover what each angle actually means, the tools you need, and a full step-by-step procedure for both camber and toe. Whether you drive a lowered daily, a weekend track car, or just want to understand your suspension better, you will find what you need here.
Table of Contents
What Are Toe, Camber, and Caster?
Before you measure anything, you need a clear picture of the three angles that define your wheel alignment. Each one affects how the tire contacts the road, how the car handles, and how quickly your tires wear out.
Toe Angle: The Horizontal View
Toe is the angle of your wheels when viewed from above the car. If your front wheels point toward each other like a pigeon toe, that is called toe-in. If they point outward like Charlie Chaplin feet, that is toe-out. Most factory specs call for a tiny amount of toe-in, typically between 0 and 0.2 degrees on the front of a rear-wheel-drive car.
Toe has the biggest impact on tire wear of the three angles. Even a small error shows up fast as feathering on the tread. It also directly affects straight-line stability and steering feel.
Camber Angle: The Front View
Camber is the vertical tilt of your wheel when viewed from the front of the car. If the top of the tire tilts toward the fender, you have negative camber. If it tilts toward the engine, you have positive camber. Most modern cars run slightly negative camber for better cornering grip.
A typical factory spec is between -0.5 and -1.5 degrees. Modified or track-driven cars often push into the -2 to -3.5 degree range to keep the tire flat during hard cornering.
Caster Angle: The Side View
Caster is the tilt of the steering axis when viewed from the side. Positive caster means the upper steering pivot leans toward the rear of the car, like the forks on a bicycle. This is what gives your steering wheel that self-centering feel after a turn.
Caster is the hardest angle to measure at home because it requires referencing the steering axis rather than the wheel itself. We will touch on it but focus on toe and camber for this guide.
Why Check Wheel Alignment at Home?
The shop is not always the right answer. Here is when doing it yourself makes sense.
Cost Savings Add Up Fast
A professional four-wheel alignment runs anywhere from $80 to $200 depending on your vehicle and location. If you lower your car, change suspension components, or track it regularly, you might need alignments every few months. A $50 to $80 investment in basic tools pays for itself within two uses.
Faster Turnaround for Modifications
When I installed camber plates on my project car, I had to adjust the camber four separate times to find the sweet spot. Doing that at home let me tweak, drive, measure, and tweak again in the same afternoon. A shop visit for each iteration would have eaten an entire weekend.
Understand What Your Car Actually Needs
Once you measure your own alignment, you start to see how each angle affects handling. You learn what your car likes and what it does not. That knowledge is hard to put a price on.
Tools You Need for DIY Alignment
You do not need a $5,000 alignment rack. Here is the basic kit that covers most home mechanics.
Camber Gauge Options
You have three main choices for measuring camber at home. Bubble camber gauges cost around $20 to $40 and mount to the wheel hub. They are accurate to about 0.5 degrees, which is plenty for street use.
Digital inclinometers cost $30 to $80 and give you a reading to 0.1 degree. Most have magnetic bases that attach directly to the rotor or wheel hub. These are my personal favorite for the balance of price and precision.
Commercial caster-camber gauges run $150 to $400 and offer the best accuracy. If you are setting up a track car and need consistency, this is the upgrade path.
Toe Plates or String Box
Toe plates are flat boards or plastic plates that sit against each tire and have pointers or scales for measuring how the wheels are angled. A basic set runs $60 to $100.
You can also build a string setup for less than $20. A string box uses string stretched along both sides of the car, measured against the wheels. We will cover both methods in detail below.
Other Essentials
You will also need a floor jack and four jack stands, a tape measure, a 4-foot level, and a flat work surface. A notepad and pen for recording measurements is essential. A torque wrench for tightening adjustments to spec saves headaches later.
How to Prepare a Level Surface for Alignment
An unlevel surface will throw off every measurement you take. Even a 1-degree slope adds roughly 1 degree of false camber reading.
Testing Your Floor
Place your 4-foot level on the garage floor in several spots, both side-to-side and front-to-back. If the bubble drifts off center, your floor is not level. You can shim under the low tires with thin plywood to compensate, or move to a different spot.
Some folks use empty parking lots at big-box stores on early mornings. Asphalt is typically more level than residential driveways, and you have room to walk around the car.
Vehicle Weight Distribution
Measure with the car at normal ride height, not on jack stands. The suspension geometry changes once the wheels hang free. Bounce each corner of the car to settle the suspension before measuring.
Tire Pressure Checks
Check and equalize tire pressure on all four corners. Pressure differences create uneven contact patches that distort your readings. Set cold pressure to the spec on your door jamb sticker.
How to Check Camber at Home
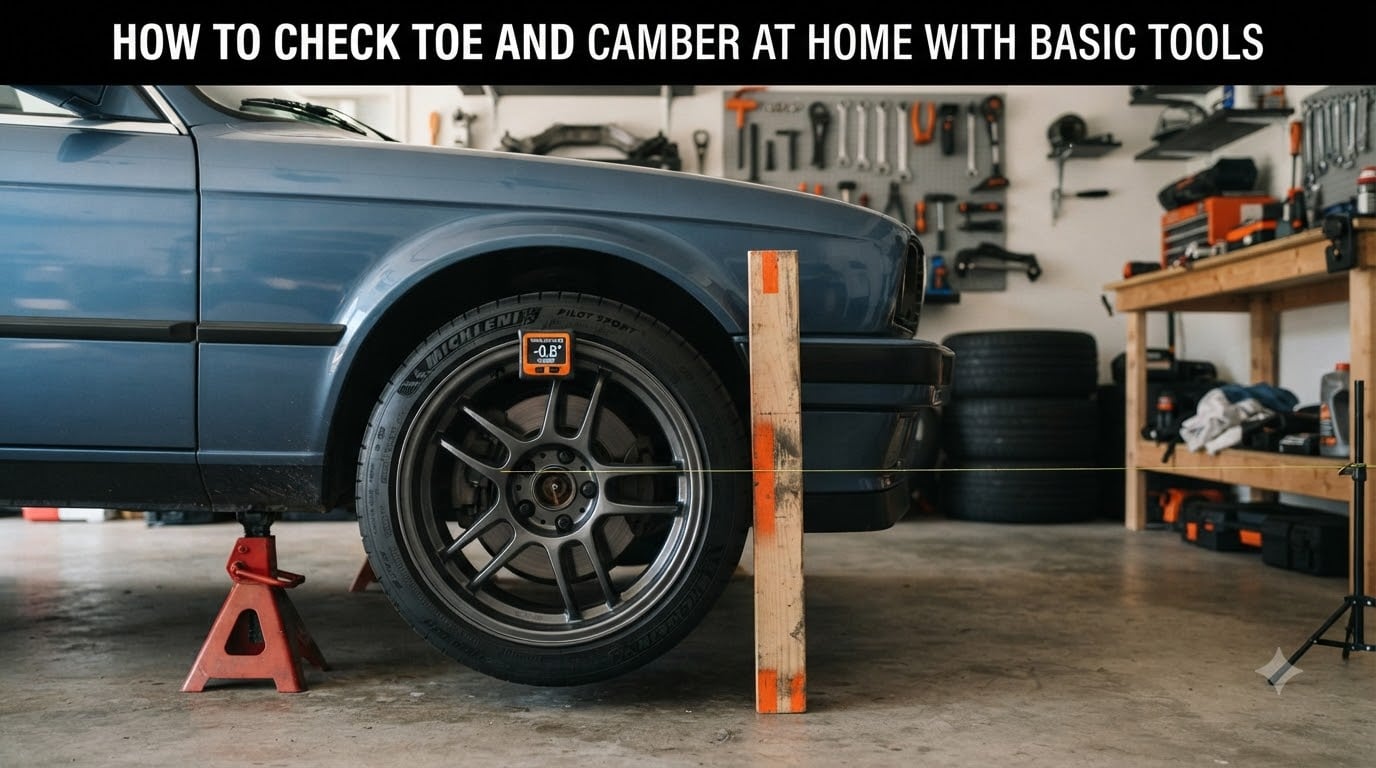
Once your car is parked on a level surface with the wheels straight, you are ready to measure camber. Here is the procedure I use with a digital inclinometer.
Step 1: Attach the Gauge
Clean the hub face or rotor surface with a rag to remove brake dust and grease. Place the magnetic base of your inclinometer against the flat machined surface of the rotor hat or hub. Make sure it sits flat and reads zero before continuing.
Step 2: Zero the Gauge
With the car on the ground and the wheels pointed straight ahead, zero the inclinometer while it is attached to the wheel hub. This removes any error from the surface you mounted it to.
Step 3: Read Each Wheel
Record the reading for each wheel. A typical passenger car reads between -0.5 and -1.5 degrees on the front, with the rear closer to zero. Side-to-side numbers should usually match within 0.2 to 0.5 degrees for balanced handling.
Step 4: Use a Bubble Gauge Instead
If you are using a bubble camber gauge, the procedure is similar but you read the angle off a printed scale. Some bubble gauges mount to the wheel itself with a cone-center adapter. They are slower to use but easier for beginners.
Step 5: Document Everything
Write down each corner reading before you make any adjustments. Compare against your factory spec or target alignment. Now you know exactly what needs to change.
How to Check Toe at Home
Toe measurement takes a bit more setup than camber, but it is straightforward once you understand the basic principle.
Using Toe Plates
Slide a toe plate against the rear of each front tire at hub height. The plate should rest flat against the tread with the pointer aimed forward. Measure the distance from the pointer to a fixed reference, like the wheel lip or a mark on the floor.
Roll the car forward about half a wheel rotation so the plates are now at the front of the tires. Re-measure. If the front measurement is smaller than the rear, you have toe-in. If larger, you have toe-out. The difference divided by the tire diameter gives you your toe angle in degrees.
Using the String Method
For a string setup, anchor two strings at hub height running along both sides of the car, parallel to the chassis. Each string should clear the tires by about half an inch. Measure from the string to the front and rear of each tire at hub height.
The same logic applies: front minus rear measurements reveal toe. This method is slower but more accurate for experienced users.
Converting to Degrees
A simple rule: 1/16 inch difference across a typical tire equals about 0.1 degree of toe. So if your front measurement is 1/8 inch smaller than the rear at hub height, you have approximately 0.2 degrees of toe-in. Online conversion calculators make this easier if math is not your thing.
DIY String Alignment Method
The string method is the gold standard for at-home alignment. It is what race teams use in the paddock when they do not have access to a laser alignment rack.
Setting Up the String Box
Anchor your strings at axle height, one on each side of the car. Use heavy weights or bungee cords to keep tension. The strings must be parallel to the car’s centerline, which you can verify by measuring equal distances from each string to the rear wheel hubs.
Measuring Thrust Angle First
Before you measure toe, check your thrust angle. This is the angle of the rear axle relative to the car’s centerline. Measure from each string to the rear wheel hubs at the same point front and rear. If the measurements match, your thrust angle is zero. If they differ, the rear axle is off-center and will affect toe readings.
Setting Toe with Strings
With the thrust angle verified, measure from each string to the front tire at hub height, front and rear of the tire. Compare front-to-rear measurements to determine toe. Adjust tie rods until your numbers match your target spec. Re-measure after each adjustment to confirm.
Making Your Own Alignment Tools on a Budget
You can get started without buying much of anything.
Homemade Camber Gauge
A small bubble level taped to a flat piece of metal works in a pinch. Mount it perpendicular to the wheel face, and you have a basic camber indicator accurate to roughly 1 degree. A smartphone level app can work similarly if you calibrate it carefully.
DIY Toe Plates
Cut two pieces of plywood about 12 inches square. Attach a small pointer or nail at the front edge of each. Slide them against the tires and measure from a fixed reference. The plywood method is not as precise as commercial plates, but it works for getting close.
Budget String Setup
Masking tape, fishing line, and a couple of C-clamps or sandbags give you a complete string alignment kit for under $10. It is the same equipment a $200 string box provides, just rougher around the edges.
Common Mistakes to Avoid
I made all of these on my first attempt, so learn from my mistakes.
Measuring on Jack Stands
Always measure with the car on the ground at ride height. The suspension geometry changes once the wheels hang free, and your readings will be completely wrong.
Skipping the Level Check
An unlevel floor adds false camber to every reading. If you do not verify level first, you will chase your tail on adjustments that do not actually fix anything.
Adjusting in the Wrong Order
If your car has adjustable caster, set caster first. Then adjust camber. Finally, set toe last. Doing toe first means every other adjustment moves your toe readings.
Forgetting to Center the Steering Wheel
After you set toe, your steering wheel will likely be off-center. Drive slowly in a parking lot and confirm the wheel returns to center properly. If it does not, slightly unequal toe adjustments between left and right will fix it.
When to Use Professional Alignment Instead
DIY alignment is not always the right call.
Limitations of Home Precision
Most home setups are accurate to 0.1 to 0.3 degrees. That is plenty for street driving and most amateur track use. For professional racing or unusual vehicles, you may want 0.05-degree accuracy, which requires laser alignment equipment.
Vehicles Needing Specialist Equipment
Some cars have non-standard suspension geometry, hidden adjustments, or require specific procedures. Luxury vehicles with air suspension, exotic cars, and some trucks with solid axles fall into this category.
Insurance and Warranty Considerations
If your car is under warranty, a dealer may require professional alignment documentation. After an accident or suspension repair, a shop alignment provides a record that protects you if something goes wrong later.
Tips for Accuracy and Repeatability
Small habits make a big difference in your results.
Take Multiple Readings
Always measure twice, sometimes three times. Take the average and discard outliers. This catches errors from loose equipment or shifted strings.
Document Your Numbers
Keep a log of every alignment you perform, including ride height, tire pressure, and any modifications. When something feels off later, you can compare against your baseline.
Verify With a Shop Check
After your first home alignment, take the car to a shop for a verification printout. Compare their numbers to yours. Most home setups are within 0.2 degrees of professional equipment, but the shop check confirms your technique.
Recalibrate After Big Changes
Any time you change ride height, install new control arms, or hit a big pothole, recheck your alignment. The geometry shifts more than most people realize, and your handling suffers silently until tires start wearing unevenly.
FAQs
How to measure camber and toe at home?
Park on a level surface with tires straight and steering centered. Use a digital inclinometer or bubble gauge against the wheel hub or rotor for camber readings. For toe, use toe plates or a string setup, measure front and rear of each tire at hub height, and compare the differences to calculate angle.
How to check camber DIY?
Mount a digital inclinometer or bubble camber gauge against the wheel hub with the car on level ground. Zero the gauge, then read each wheel. Negative numbers mean the top tilts inward. Compare readings to your target spec and adjust camber plates or bolts as needed.
How to adjust camber without a tool?
You can get a rough estimate using a smartphone level app or a bubble level taped to a flat surface against the wheel. Adjustments still require camber plates, bolts, or arms. A precise angle reading needs a real camber gauge for accuracy within 0.1 degree.
What tool is used to measure camber?
Three main tools measure camber at home: bubble camber gauges, digital inclinometers with magnetic bases, and commercial caster-camber gauges. Bubble gauges cost around $30 and work well for street use. Digital inclinometers run $50 to $80 and offer 0.1-degree precision.
Final Thoughts on Checking Toe and Camber at Home
Learning how to check toe and camber at home with basic tools puts you in control of your suspension setup. You will save money, learn how your car responds to changes, and make smarter decisions about future modifications.
Start with a level surface, a simple digital inclinometer, and a set of toe plates. Measure, adjust, and verify. Within a few sessions you will be making alignment changes in your driveway that rival what a shop charges hundreds of dollars to provide.