
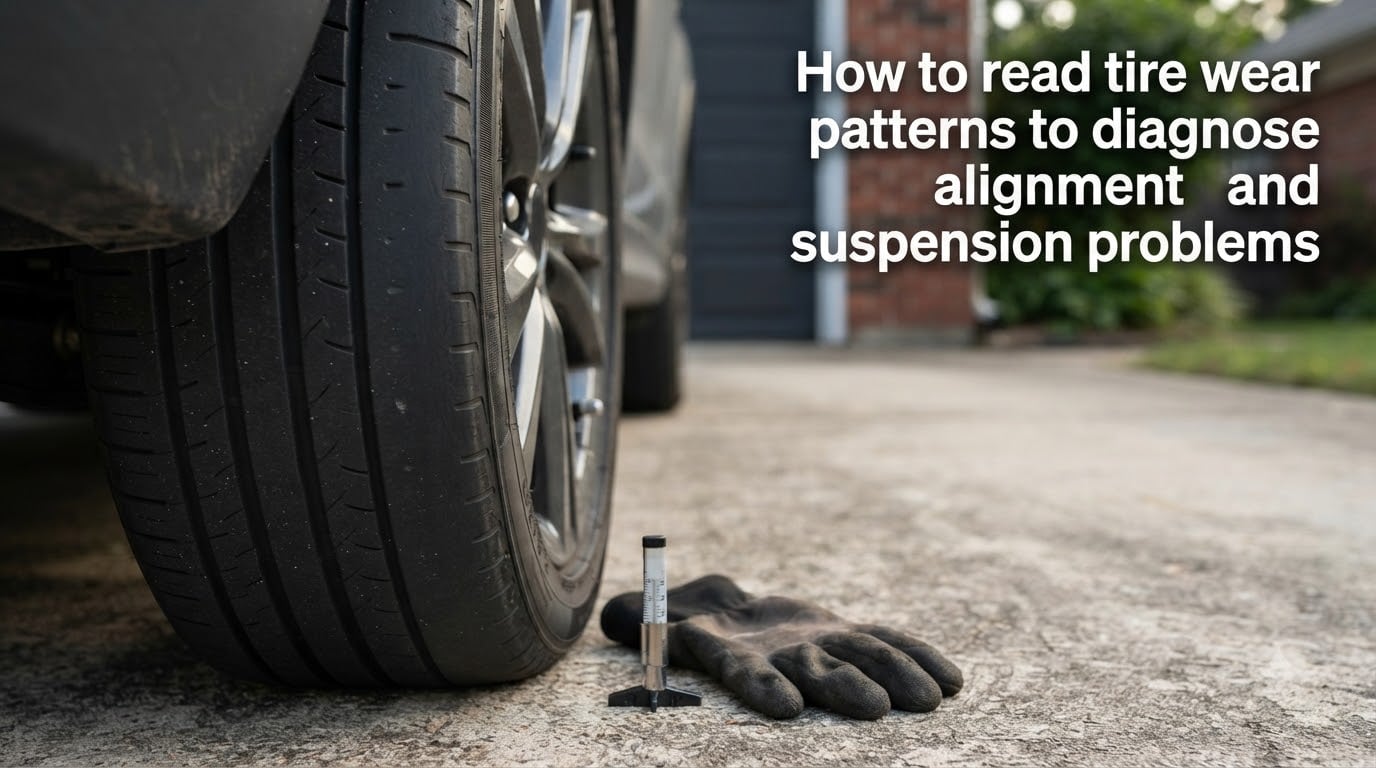
Your tires are talking. Every scuff, dip, and bald patch on that rubber tells a story about what is happening underneath your vehicle. Learning how to read tire wear patterns to diagnose alignment and suspension problems can save you hundreds of dollars, prevent dangerous blowouts, and extend the life of your tires by thousands of miles.
I have spent years helping drivers decode what their tires are telling them. The good news is that you do not need a mechanic’s certification to spot the warning signs. Most tire wear patterns follow predictable shapes, and once you know what to look for, the diagnosis becomes almost second nature.
Here is why this matters right now. A single set of tires costs between $400 and $800 for most passenger vehicles. Premature replacement because of an undiagnosed alignment issue is like throwing money out the window every time you drive. Worse, worn suspension components that cause cupping or scalloping can compromise your ability to stop safely in an emergency.
In this guide, I will walk you through seven distinct tire wear patterns, what each one means, and exactly how to fix the underlying problem. You will also get a quick-reference diagnosis chart, a hands-on inspection routine you can do in your driveway, and answers to the most common questions drivers ask about tire wear and alignment.
Table of Contents
Tire Wear Patterns Quick Reference Chart
Use this chart as your fast-lookup tool. Each pattern maps to a specific root cause, and I have included the most common fix for each one. If you want to dive deeper into any pattern, each one has a detailed section below.
| Wear Pattern | Where It Appears | Likely Cause | Common Fix |
|---|---|---|---|
| Center Wear | Middle of tread, both edges still good | Overinflation (excess PSI) | Reduce pressure to spec |
| Inner Edge Wear | Inside shoulder only | Negative camber or toe-out | Four-wheel alignment |
| Outer Edge Wear | Outside shoulder only | Positive camber or toe-in | Four-wheel alignment |
| Feathering | Tread blocks worn at an angle, one side sharp | Toe misalignment (in or out) | Toe angle alignment |
| Cupping / Scalloping | Random dips and bald patches around the tire | Worn shocks or struts | Replace suspension components |
| Diagonal Wear | Angled bald stripes across the tread face | Tire imbalance or drivetrain fault | Balance, rotate, or replace |
| Flat Spots | One flat worn section per tire | Hard braking or locked brakes | Replace if severe |
Keep this chart handy during your inspections. It covers roughly 95 percent of the abnormal wear patterns you will encounter on a passenger vehicle, truck, or SUV.
Center Wear: The Overinflation Tell
Center wear is the easiest pattern to spot and the simplest to fix. The center of your tread wears down faster than both shoulders, leaving the middle of the tire visibly bald while the outer edges still look nearly new. This happens because excess air pressure balloons the tire outward, concentrating the entire weight of the vehicle on a narrow strip of rubber down the middle.
The contact patch shrinks to a thin line. You get less grip in corners, longer stopping distances in the wet, and a harsher ride because there is less sidewall flex absorbing road imperfections. Some drivers overinflate intentionally, thinking they will get better fuel economy. The savings are negligible, and the tire replacement cost wipes out any gain.
How to Confirm Overinflation
Check your tire pressure with a reliable gauge when the tires are cold. Compare the reading to the manufacturer’s recommended PSI, which you will find on a sticker inside the driver’s door jamb. Do not use the max pressure printed on the tire sidewall. That number is the tire’s maximum safe pressure, not the recommended daily pressure for your specific vehicle.
If your gauge reads 38 PSI and the door sticker says 32 PSI, you have found your problem. Bleed air out until you hit the correct number. If the center wear is already deep, the tire may need replacement, but correcting the pressure will stop further damage immediately.
Fixing Center Wear
Adjust your tire pressure to the manufacturer specification. Check it monthly, because tires naturally lose 1 to 2 PSI per month. Invest in a quality digital tire pressure gauge. The pencil-style gauges at gas station air pumps are notoriously inaccurate and can give readings off by 5 PSI or more.
One thing to watch for: if only one tire shows center wear and the others look fine, suspect a faulty tire pressure monitoring sensor or a previous owner who overinflated just that corner. Check all four tires individually.
Inner Edge Wear: Negative Camber and Toe-Out
Inner edge wear means the inside shoulder of your tire is wearing away faster than the rest of the tread. The top of the wheel is tilted inward toward the vehicle. This is called negative camber. The tire is riding on its inner edge instead of sitting flat on the road.
Some negative camber is normal and even desirable on performance cars. It improves cornering grip by keeping the contact patch flat during hard turns. But when the camber angle goes past the factory spec, the inner edge starts eating itself. You will see the inside shoulder go bald while the outer edge and center look perfectly healthy.
Toe-out makes this worse. Toe refers to whether your front tires point inward (toe-in) or outward (toe-out) when viewed from above. Toe-out pushes the inner edges of the tires against the road surface as you drive straight, accelerating inner shoulder wear dramatically.
Common Causes of Inner Edge Wear
Lowered vehicles are the most common culprit. Lowering springs change the suspension geometry and increase negative camber beyond factory settings. Worn control arm bushings, bent control arms from hitting a pothole or curb, and sagging rear springs on older vehicles can all produce the same effect.
I see this pattern constantly on forum posts from the off-road community. Lifted trucks and SUVs with aggressive suspension modifications frequently show inner edge wear on their front tires because the lift kit altered the camber curve without a matching alignment adjustment.
What to Do About It
Get a four-wheel alignment from a shop that uses modern digital equipment. The technician will adjust camber and toe back to factory specifications. If your vehicle has worn bushings or bent control arms, those parts need replacement first. An alignment on worn suspension components will not hold.
Do not delay this repair. Inner edge wear can wear through to the cords faster than you think because it concentrates all the wear on a narrow strip of rubber. Once the cords are exposed, the tire is unsafe at any speed.
Outer Edge Wear: Positive Camber and Toe-In
Outer edge wear is the mirror image of inner edge wear. The outside shoulder of the tire wears down while the center and inner edge remain healthy. The top of the wheel tilts outward, away from the vehicle. This is positive camber, and it puts all the load on the outer edge of the tread.
This pattern is less common on modern vehicles because factory alignment specs typically call for slight negative camber. But it shows up frequently on older cars with sagging suspension, vehicles that have been in accidents, or after a cheap alignment job where the technician did not properly calibrate the camber angle.
Why Outer Edge Wear Is Dangerous
Outer edge wear reduces your tire’s ability to channel water away in rainy conditions. The outer shoulder is where your tire needs the most tread depth for cornering grip on wet roads. When that shoulder goes bald, you are at serious risk of hydroplaning even at moderate speeds.
Toe-in accelerates this pattern. When both front tires point slightly inward, the outer edges scrub against the road surface constantly as you drive straight. You are essentially dragging the outer shoulders of your tires along the pavement with every mile.
Fixing Outer Edge Wear
A professional alignment is the fix. The technician will correct the camber and toe angles to factory spec. If your vehicle has been in a collision, even a minor one, insist on a frame inspection. A slightly bent strut tower or subframe can make it impossible to achieve proper camber without structural repair.
Check your alignment at least once a year or any time you hit a major pothole, curb, or road debris. Most alignment problems develop gradually, and catching them early means you save the tire instead of replacing it.
Feathering: Toe Misalignment Detection
Feathering is one of the most common alignment-related wear patterns, and it is also the one most drivers miss by sight alone. The tread blocks wear down at an angle instead of evenly, creating a sawtooth pattern across the tire. One side of each tread block stays sharp and raised while the opposite side becomes smooth and worn.
This pattern develops when your toe angle is off. The tire is being dragged slightly sideways as it rolls forward, scraping one edge of each tread block against the road. Over thousands of miles, this sideways scrub creates the feathered texture.
The Hand-Feel Technique (Most Drivers Miss This)
You cannot always see feathering. But you can feel it. This is the technique that separates experienced diagnosticians from everyone else, and almost no competitor covers it in detail.
Here is exactly how to do it. Kneel next to your tire. Place your palm flat against the tread face. Starting from the outside shoulder, slowly slide your hand across the tread toward the inner shoulder. Pay attention to how the tread blocks feel under your hand.
If the tread blocks feel sharp and raised as your hand moves in one direction but smooth as you move the other way, your tire is feathered. The direction of the sharp edges tells you whether you have toe-in or toe-out. Sharp edges catching your hand when moving from outside to inside indicates toe-in. The reverse indicates toe-out.
Always wear a clean work glove. Bare hands on rubber will pick up grit and debris, and you want consistent feedback from the tread surface.
Fixing Feathering
Feathering means your toe angle is out of spec. A professional toe alignment will stop the pattern from getting worse. However, moderately feathered tires can often be salvaged by having them shaved or shaved down at a tire shop. Deeply feathered tires need replacement.
If you catch feathering early, an alignment plus tire rotation may be all you need. The rotated position changes the load pattern and can help even out mild feathering over the next few thousand miles.
Cupping and Scalloping: Worn Suspension Components
Cupping, also called scalloping, produces random bald dips and patches scattered around the circumference of the tire. Instead of a consistent wear pattern across the tread face, you get smooth bowl-shaped depressions alternating with sections of normal tread depth. Running your hand over the surface feels like touching a washboard.
This pattern almost always points to worn suspension components. Specifically, the shock absorbers or struts have lost their ability to keep the tire pressed firmly against the road surface. The tire bounces as you drive, and each bounce creates a small bald spot where the tire impacts the pavement.
Audio Clue: The Humming Sound
Here is a diagnostic tip that almost no guide mentions. Cupped tires often produce a distinctive humming or rumbling noise that gets louder as you increase speed. Drivers frequently mistake this for a wheel bearing problem. If you hear a rhythmic thumping or humming that changes pitch with vehicle speed, inspect your tires for cupping before chasing electrical or bearing issues.
The noise happens because the cupped tread blocks slap the road surface unevenly as the tire rotates. The deeper the cups, the louder the noise. At highway speeds, severely cupped tires can sound like a small aircraft is following you.
What Causes Cupping Beyond Shocks
While worn shocks and struts are the primary cause, other suspension components can contribute. Worn control arm bushings allow excessive wheel movement. Loose ball joints create play in the suspension. Even unbalanced tires can produce a mild form of cupping if left uncorrected for extended periods.
On trucks and SUVs with heavy duty suspension, cupping on the rear tires often indicates overloaded springs or air bags that have lost pressure. Check your load rating and make sure you are not exceeding the vehicle’s payload capacity.
Fixing Cupping and Scalloping
This is one repair you should not delay. Worn suspension components do not just ruin tires. They compromise your ability to control the vehicle in emergency maneuvers. A car with bad shocks takes significantly longer to stop, especially on rough or wet roads.
Replace the worn shocks or struts. Have the suspension inspected for worn bushings, ball joints, and tie rod ends at the same time. Once the suspension is rebuilt, get an alignment. Unfortunately, tires that are already deeply cupped usually need replacement because the cupped tread blocks will not wear back to normal.
Diagonal Wear: Drivetrain and Tire Imbalance
Diagonal wear is a less common but distinctive pattern. Instead of wear running straight across the tread, you see angled bald stripes that cross the tire at roughly 45 degrees. The pattern repeats at regular intervals around the circumference, creating a series of diagonal worn bands.
This pattern typically indicates tire imbalance combined with a drivetrain issue. The tire is bouncing slightly as it rotates, but the bouncing is not random like cupping. Instead, it follows a regular rhythm that creates the repeating diagonal pattern.
Common Causes of Diagonal Wear
The most frequent cause is a tire that has lost its internal balance weight combined with worn suspension bushings that allow the wheel to move in ways it should not. You may also see diagonal wear on vehicles with a failing wheel bearing that allows the hub to wobble under load.
On front-wheel-drive vehicles, a worn constant velocity (CV) joint can create vibrations that produce diagonal wear on the front tires. On rear-wheel-drive and four-wheel-drive vehicles, a worn universal joint or driveshaft carrier bearing can produce a similar effect on the rear tires.
Fixing Diagonal Wear
Start with a tire balance and rotation. If the pattern is mild and caught early, balancing may correct the vibration source and allow the tire to wear more evenly in its new position. Have a mechanic inspect the wheel bearings, CV joints, and suspension bushings for excessive play.
If the diagonal wear is deep and the tread depth varies significantly between the worn bands and the unworn sections, the tire needs replacement. Driving on a tire with deep diagonal wear produces noticeable vibration and can be unsafe at highway speeds.
Flat Spots: Brake and Driving Habits
Flat spots appear as a single localized bald patch on the tire where one section has worn down significantly more than the rest. There are two distinct types, and they have completely different causes and fixes.
Skid Flat Spots from Hard Braking
The first type comes from locking the brakes. If you slam on the brakes hard enough to lock the wheels (or if your ABS system is malfunctioning), the tire skids along the pavement in one position. That skidding grinds a flat spot into the tread in seconds.
You will feel this immediately while driving. The tire produces a loud thumping noise that matches the rotation speed of the wheel. The steering wheel may shake. The flat spot is permanent, and the tire needs replacement because the structural integrity of the tread has been compromised at that point.
Drivers of older vehicles without ABS are most at risk. But even modern vehicles can develop skid flat spots if the ABS module fails or if you brake hard enough on loose gravel or dirt where the ABS cannot prevent wheel lock entirely.
Parking Flat Spots
The second type develops when a vehicle sits stationary for long periods. The weight of the vehicle presses down on one spot of each tire continuously. Over weeks or months, that section of rubber flattens and hardens. This is common on stored vehicles, RVs, and trailers.
Parking flat spots usually produce a vibration that gradually disappears after 10 to 15 minutes of driving as the tire warms up and the rubber regains its shape. However, if the vehicle sits for months, the flat spot can become permanent.
Preventing Flat Spots
If you store a vehicle for more than a month, inflate the tires to the maximum pressure listed on the sidewall. Better yet, put the vehicle on jack stands to take the weight off the tires entirely. Move the vehicle a few inches every couple of weeks if jack stands are not practical.
For skid flat spots, the only fix is replacement. Have your braking system inspected if the flat spot happened under normal braking conditions. Your brake calipers may be sticking, or your ABS system may need service.
DIY Tire Inspection Guide: Step by Step
You do not need a lift or expensive tools to inspect your tires. Here is a five-step routine you can do in your driveway in about fifteen minutes. I recommend doing this once a month and before any long road trip.
Step 1: Gather Your Tools
You need three things: a tread depth gauge (digital ones cost under $15), a tire pressure gauge, and a clean work glove. A penny works as a emergency tread depth gauge in a pinch. Insert Lincoln’s head upside down into the tread groove. If you can see the top of his head, your tread is below 2/32 of an inch and the tire is legally worn out.
Step 2: Measure Tread Depth at Three Points
For each tire, measure tread depth at three locations: the outer shoulder, the center rib, and the inner shoulder. Write down the numbers. If the center reading is significantly lower than both shoulders, you have center wear from overinflation. If one shoulder is lower than the other, you have a camber problem. All three numbers should be within 1/32 of an inch of each other on a healthy tire.
Step 3: The Hand-Feel Test
Put on your glove and slide your hand across each tire in both directions. Feel for feathering, where one direction feels smooth and the other feels sharp and jagged. This tactile test catches toe misalignment that you would miss by looking alone. Do this on all four tires.
Step 4: Visual Cupping Check
Crouch down and look across the tread face of each tire from a low angle. This perspective makes cupping and scalloping much easier to see. You are looking for random dips, bald patches, or a washboard texture. Check for diagonal wear bands at the same time.
Step 5: Check Tire Pressure
Check all four tires with your pressure gauge when they are cold. Compare each reading to the spec on your door jamb sticker. Also check your spare tire if you have one. Many drivers forget the spare until they need it, only to find it is flat.
When to Call a Professional
If you find any abnormal wear pattern, note the severity. Minor feathering or slight camber wear caught early usually just needs an alignment. Deep cupping, exposed cords, or flat spots mean the tire needs replacement. If you see steel belts or fabric cords through the worn area, the tire is unsafe and should not be driven on.
When in doubt, take a photo and show it to a trusted mechanic. Most shops will give you a quick assessment at no charge, especially if you are already there for an alignment or rotation.
How to Prevent Uneven Tire Wear
Preventing tire wear problems is far cheaper than fixing them. These five habits will keep your tires wearing evenly and lasting their full rated mileage.
1. Rotate Every 5,000 to 7,000 Miles
Tire rotation is the single most effective thing you can do to prevent uneven wear. Front tires carry different loads than rear tires, especially on front-wheel-drive vehicles where the front tires handle acceleration, steering, and 70 percent of braking. Rotating positions every 5,000 to 7,000 miles spreads the wear across all four tires evenly.
2. Check Pressure Monthly
Tires lose pressure naturally over time. Check all four tires once a month with a quality gauge. Do it in the morning before driving when the tires are cold. Hot tires give falsely high readings because the air inside expands with heat.
3. Align Once a Year
Even if you have not hit anything, your alignment drifts over time from normal driving. Potholes, railroad tracks, and road construction gradually knock the angles out of spec. An annual alignment costs a fraction of what a new set of tires costs, and it catches problems before they destroy your rubber.
4. Replace Shocks and Struts at 50,000 to 80,000 Miles
Worn suspension components are the leading cause of cupping. Shocks and struts degrade gradually, so you may not notice the decline in ride quality. By the time you feel the bouncing, the tires have already started cupping. Replace them proactively at the manufacturer’s recommended interval.
5. Drive Smoothly
Hard acceleration, aggressive cornering, and slamming brakes all accelerate tire wear. Avoid potholes and curbs whenever possible. Slow down for speed bumps. These seem like minor adjustments, but over the life of a tire, gentle driving habits add up to thousands of additional miles.
FAQs
What is bad alignment wear pattern?
Bad alignment wear shows up as uneven tread loss on either the inner or outer edge of the tire. Inner edge wear indicates negative camber or toe-out, while outer edge wear points to positive camber or toe-in. Feathering, where tread blocks wear at an angle creating a sawtooth texture, is another classic sign of toe misalignment.
What is the 3 tire rule?
The 3 tire rule refers to rotating tires every 3,000 miles or at every other oil change. Some mechanics phrase it as rotating the three visible tires plus the spare. The principle is the same: frequent rotation prevents uneven wear by changing which tires carry the steering, braking, and driving loads.
How to read tire wear for alignment?
Look at where the tread is wearing unevenly. Inner edge wear means negative camber. Outer edge wear means positive camber. Feathering, detected by running your hand across the tread, means toe misalignment. Measure tread depth at the inner shoulder, center, and outer shoulder. Differences greater than 1/32 inch between these points indicate an alignment problem.
What is the 7 7 rule for tires?
The 7 7 rule for tires means visually inspecting your tires every 7 days and checking tire pressure every 7 days. Some versions reference rotating every 7,000 miles. The core idea is consistent: frequent inspections catch wear patterns early before they destroy the tire and lead to costly replacement.
Can bad alignment cause cupping on tires?
Bad alignment alone rarely causes cupping. Cupping is primarily caused by worn shocks, struts, or suspension bushings that allow the tire to bounce as you drive. However, severe toe misalignment combined with worn suspension can accelerate cupping. If you see cupping, inspect the suspension components first before getting an alignment.
How often should I check my tire wear?
Visually inspect your tires once a month and before any long trip. Do a full hands-on inspection with a tread depth gauge every 3,000 miles or at each oil change. Check tire pressure monthly when the tires are cold. Get a professional alignment once a year or any time you hit a pothole, curb, or road debris hard enough to feel it in the steering wheel.
Reading Your Tires Saves Money and Lives
Understanding how to read tire wear patterns to diagnose alignment and suspension problems is one of the most practical skills any driver can develop. Your tires are the only four contact points between your vehicle and the road, and they record every issue your suspension and alignment system experiences.
Center wear means overinflation. Inner and outer edge wear point to camber and toe alignment problems. Feathering indicates toe misalignment you can feel with your hand. Cupping means your shocks or struts are worn out. Diagonal wear suggests imbalance or drivetrain issues. Flat spots come from hard braking or extended parking.
Check your tires this weekend. Grab a gauge, slip on a glove, and run your hands across all four treads. Fifteen minutes of inspection can catch a problem before it turns into a $600 tire replacement or a dangerous highway blowout. Your tires are already telling you what is wrong. All you have to do is read them.