
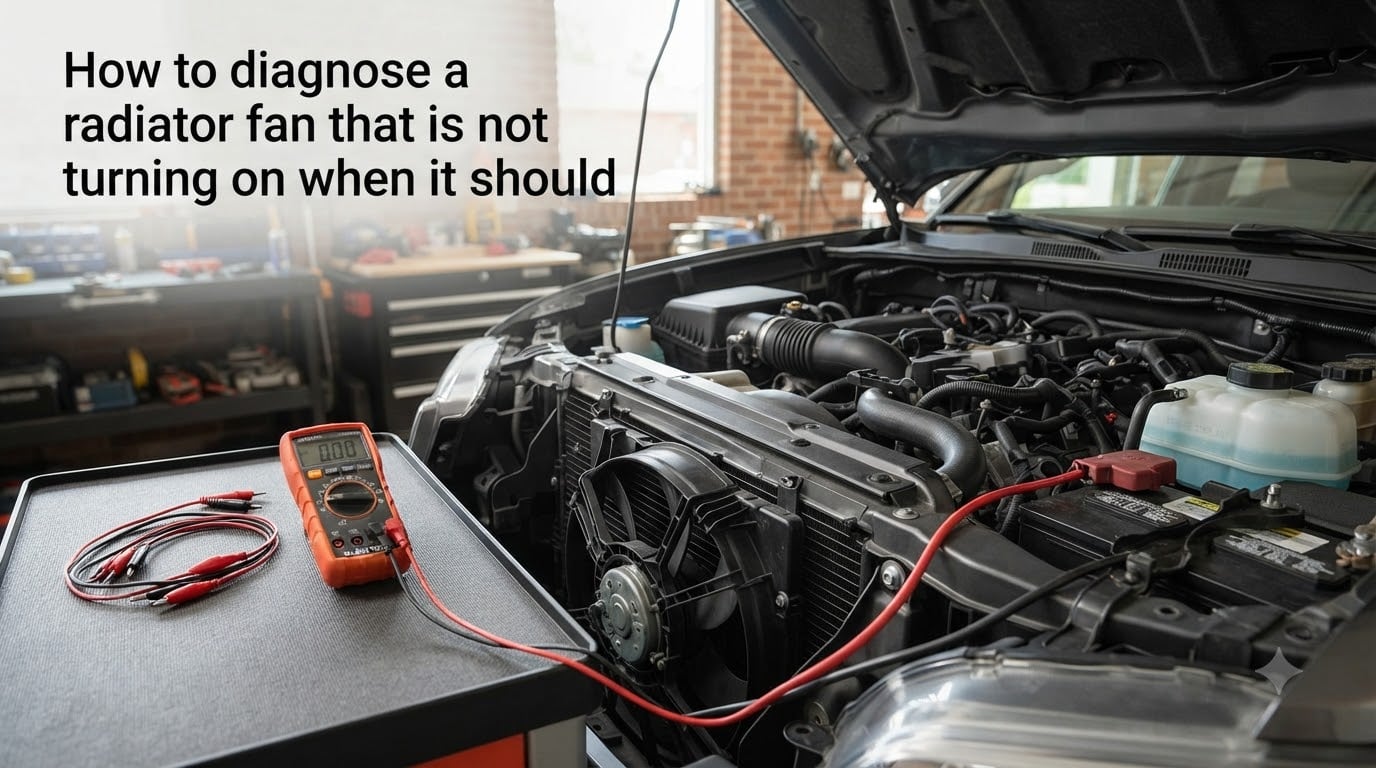
If your engine temperature gauge starts climbing past the halfway mark while you sit at a red light, a failing radiator fan is one of the first suspects. When you need to know how to diagnose a radiator fan that is not turning on when it should, the process is actually straightforward once you understand what each component does. Most drivers assume the fan motor is bad, but in my experience the problem is more often a blown fuse, a dead relay, or a faulty coolant temperature sensor that never tells the fan to start.
The radiator fan pulls outside air through the radiator fins to dissipate heat from the coolant. At highway speeds, natural airflow handles this job. But at idle, in stop-and-go traffic, or when the air conditioner is running, the electric fan becomes essential. Without it, coolant temperature rises rapidly and can warp cylinder heads, blow head gaskets, or seize the engine entirely.
I have diagnosed dozens of cooling fan failures over the years, from a ten-cent fuse replacement to a full fan assembly swap. The key is working through the system logically. Start with the simplest, cheapest checks before touching the fan motor itself. This guide walks you through every step in the right order, including specific fuse locations, relay testing with a multimeter, direct battery testing, and reading OBD-II codes that point to fan circuit problems.
By the end, you will know exactly which component has failed, what it costs to fix, and whether you can handle the repair yourself or need a shop.
Table of Contents
Understanding Electric vs Mechanical Radiator Fans
Before diagnosing anything, you need to know which type of fan your vehicle uses. The diagnostic process differs significantly between the two.
Electric Radiator Fans
Most modern vehicles use electric fans controlled by the engine computer (ECU). The ECU monitors coolant temperature through the engine coolant temperature (ECT) sensor. When coolant reaches a preset threshold, usually between 200 and 230 degrees Fahrenheit, the ECU sends a signal to the fan relay. The relay closes and sends 12-volt power to the fan motor.
Electric fans also activate when the air conditioning system runs, because the A/C condenser needs additional airflow to dissipate heat. The A/C pressure switch signals the ECU to turn the fan on regardless of engine temperature.
This means an electric fan that will not turn on could have a problem anywhere in that chain: the ECT sensor, the relay, the fuse, the wiring, the ECU, or the motor itself.
Mechanical Fans and Fan Clutches
Older vehicles, many trucks, and some rear-wheel-drive cars use a mechanical fan bolted to the water pump pulley. A fan clutch sits between the pulley and the blade assembly. The clutch engages when air temperature from the radiator rises, locking the fan to the pulley speed.
When a mechanical fan clutch fails, it usually starts freewheeling permanently. The fan spins freely even when the engine is hot, providing almost no airflow. Diagnosis is different here: you test the clutch by spinning the blade by hand with the engine off. If it spins more than one or two full turns with no resistance, the clutch is bad.
This guide focuses on electric fan diagnosis, since that is what the majority of drivers encounter today. If your vehicle has a mechanical fan and the clutch fails, replacement is straightforward and typically costs $80 to $200 for the part.
Safety Precautions Before You Start
Working around a cooling system involves hot coolant, moving belts, and electrical current. Take these precautions seriously.
Never open a hot radiator cap. Pressurized coolant at operating temperature can spray out and cause severe burns. Wait at least 30 minutes after the engine has been running before touching any cooling system components.
Keep loose clothing, jewelry, and hair away from belts and fan blades. If you test the fan motor while the engine is running, the blade can start without warning. The fan draws 30 to 50 amps when running, and accidental shorts can cause sparks or damage wiring.
Disconnect the negative battery terminal before performing any direct wiring tests or component swaps. This prevents accidental shorts and protects the ECU from voltage spikes.
Work on a cool engine whenever possible. Use gloves and safety glasses. Have a fire extinguisher nearby if you are using jumper wires directly from the battery.
Tools You Will Need for Diagnosis
You do not need a shop full of equipment to diagnose a cooling fan problem. Here is what to gather before you start.
The essentials are a digital multimeter, a set of jumper wires with alligator clips, and a 12-volt test light. A multimeter lets you check voltage, resistance, and continuity. Jumper wires let you bypass relays and test the fan motor directly. A test light provides a quick way to confirm power at the fuse and relay.
Helpful additions include a fuse puller or needle-nose pliers, a wiring diagram for your specific vehicle (search for your make, model, and year), an OBD-II scanner if your Check Engine Light is on, and the replacement relay of the same part number for swap testing.
If you do not own a multimeter, you can still diagnose most fan problems using the relay swap method and direct battery testing described below. But a $20 multimeter makes the process much faster and more accurate.
How to Diagnose a Radiator Fan That Is Not Turning On: Step-by-Step
Work through these steps in order. Each one eliminates a possible cause and moves you closer to the problem. Most failed cooling fans I have diagnosed were resolved by step 2 or 3. The fan motor is often the last thing that fails.
Step 1: Listen and Look for Warning Signs
Start the engine and let it idle with the hood open. Turn the A/C on to its maximum setting, since on most vehicles this forces the radiator fan to activate regardless of engine temperature.
If the fan turns on with the A/C but not when the engine warms up, the problem is likely the ECT sensor or its circuit, not the fan motor itself. The fan is clearly capable of running. If the fan does not turn on with the A/C either, move to checking the fuse and relay.
Listen for a clicking sound from the fuse box when the fan should be engaging. The fan relay makes an audible click when the ECU commands it on. No click means the relay is not receiving a signal, pointing to the ECT sensor, wiring, or ECU.
Watch the temperature gauge. If the gauge climbs past the normal range and the fan never starts, confirm the gauge is accurate by checking actual coolant temperature with an infrared thermometer at the upper radiator hose. A gauge reading that does not match actual temperature means the ECT sensor may be giving the ECU bad data.
Step 2: Check the Cooling Fan Fuse
This is the simplest and most common fix. Locate the fuse box under the hood. The lid usually has a diagram listing each fuse. Find the one labeled for the radiator fan, cooling fan, or condenser fan.
Pull the fuse and inspect it. A blown fuse has a visible gap in the metal strip inside. If you are unsure, check continuity across the two blades with your multimeter set to resistance. A good fuse reads near zero ohms. A blown fuse reads open, showing no connection.
If the fuse is blown, replace it with one of the same amperage. Cooling fan fuses are typically 30 to 40 amps. Never install a higher-amperage fuse, as this bypasses the protection the fuse provides and can melt wiring or start a fire.
If the new fuse blows immediately when you start the engine, the fan motor or wiring has a short circuit. Do not keep replacing fuses. Move to testing the fan motor directly.
On some vehicles the fan fuse is inside the cabin fuse panel rather than the under-hood box. Check your owner’s manual if you cannot find it.
Step 3: Test the Radiator Fan Relay
The relay is an electromagnetic switch that carries the heavy current the fan motor needs. The ECU sends a low-current signal to the relay coil, which closes the high-current contacts and sends 12-volt power to the fan.
The fastest relay test requires no tools at all. Find a relay in the same fuse box with an identical part number. The horn relay or A/C compressor relay often matches. Swap the two relays. If the fan now works and the horn or A/C compressor does not, the relay was bad.
Relays typically cost $15 to $40. This is one of the cheapest components to replace and one of the most common failure points.
If the swap test does not help, test the relay socket with your multimeter. With the engine running and the A/C on (to command the fan), you should have 12 volts at the power feed terminal and ground at the control terminal. If power is present but the relay never clicks, the relay coil is open. Replace the relay.
If no power is present at the relay socket, the fuse or the wiring between the fuse and relay is the problem. If there is no ground signal at the control terminal, the ECU is not commanding the fan, which points to the ECT sensor or the ECU itself.
Step 4: Test the Fan Motor Directly with 12-Volt Power
This step confirms whether the fan motor itself is good or bad. It bypasses every other component in the system.
Disconnect the fan motor connector at the radiator. Using jumper wires, connect the positive terminal of the battery to the positive pin on the fan motor and the negative terminal to the negative pin. Most fan motors run on 12 volts and draw 15 to 30 amps at normal running speed, with a brief startup surge.
If the fan spins up immediately and runs smoothly, the motor is good. Your problem is upstream in the relay, sensor, or wiring. If the fan does not spin or makes a grinding, buzzing, or scraping noise, the motor is bad and the fan assembly needs replacement.
Be careful with polarity. On many fans, reversing the connections makes the blade spin backward, which pulls air in the wrong direction. Check a wiring diagram for correct pin assignments if you are unsure.
A common issue forum users report is a dead spot in the fan motor commutator. The fan works when you tap it or spin it by hand but fails to start on its own. This intermittent failure is hard to catch. If your fan sometimes works and sometimes does not, and the relay and sensor test fine, suspect a motor with worn brushes or a dead spot. Replace the fan motor.
Replacement fan assemblies range from $50 for a basic aftermarket unit to $300 or more for OEM-quality parts. Forum users frequently report that cheap aftermarket fans fail within a year. If you are replacing the motor, spending a bit more on a quality brand usually pays off.
Step 5: Inspect the Coolant Temperature Sensor (ECT)
The ECT sensor tells the ECU the engine temperature. If the sensor fails and reports a cold engine, the ECU never commands the fan to start. This is one of the most commonly misdiagnosed problems because the fan motor and relay can test perfectly while the fan still never activates.
With the engine cold, measure the resistance across the ECT sensor terminals with your multimeter. Typical readings are 2,000 to 3,000 ohms at room temperature. As the engine warms up, resistance drops steadily. By operating temperature around 200 degrees Fahrenheit, resistance should be around 200 to 300 ohms.
If the resistance does not change as the engine warms, or if the reading is open (infinite resistance) or shorted (near zero ohms), the sensor is bad. Replacement is simple and the part costs $15 to $50.
You can confirm a bad ECT sensor by watching the live data on an OBD-II scanner. The coolant temperature reading should climb steadily as the engine warms and reach 200 to 230 degrees. If the scanner shows a stuck or erratic reading, replace the sensor.
Some vehicles use a separate coolant temperature sending unit for the dashboard gauge. The gauge sensor and the ECT sensor for the ECU may be different components. Make sure you are testing the correct one. The ECT sensor for the ECU usually has a two-wire connector, while the gauge sender often has a single wire.
Step 6: Examine Wiring, Connectors, and Ground
If the fuse, relay, sensor, and motor all test good, the problem is in the wiring. This is less common but does happen, especially on older vehicles where heat and vibration take a toll on wiring harnesses.
Start with a visual inspection. Look for melted insulation, corroded connectors, broken wires, or loose ground connections near the radiator. The fan circuit carries high current, and corroded connections create resistance that reduces voltage at the motor. A fan receiving only 9 or 10 volts instead of 12 may not start reliably.
Use your multimeter to perform a voltage drop test across the fan connector while the engine is running and the fan should be on. Connect the positive lead to the battery positive terminal and the negative lead to the positive wire at the fan connector. A reading above 0.5 volts indicates excessive resistance in the power feed wiring.
Check the ground side the same way: positive lead to the negative wire at the fan connector, negative lead to the battery negative terminal. Any reading above 0.3 volts means a poor ground connection. Clean and tighten all ground connections in the circuit.
Connector corrosion is a frequent culprit on vehicles driven in areas with road salt. Unplug every connector in the fan circuit and look for green or white corrosion on the pins. Clean with electrical contact cleaner and a small wire brush. If pins are damaged or loose, replace the connector.
Reading OBD-II Codes for Fan Circuit Issues
If your Check Engine Light is on, scan for codes before doing any physical diagnosis. Specific OBD-II codes point directly to fan circuit problems and can save you significant diagnostic time.
Code P0480 indicates a malfunction in the cooling fan control circuit, specifically fan 1 or the primary fan relay circuit. Code P0481 points to fan 2 or the secondary fan relay circuit. Code P0482 covers fan 3. These codes confirm that the ECU attempted to command the fan and detected a problem in the response.
P0480 most commonly means the relay is not activating when the ECU sends the signal. The cause could be a blown fuse, bad relay, broken wire between the ECU and relay, or a failed relay coil. P0481 on vehicles with dual fans typically points to the high-speed relay or the second fan motor.
Other related codes include P0115 through P0118, which indicate ECT sensor circuit malfunctions. If the ECU cannot read coolant temperature, it may default to a safe mode that keeps the fan running constantly, or it may never command the fan at all depending on the failure mode.
P0645 through P0649 relate to A/C compressor clutch circuits, which interact with the fan system. If the A/C pressure switch fails, the ECU may not activate the fan even when engine temperature is high enough. This is worth checking if your fan works during normal driving but not when the A/C is on, or vice versa.
An inexpensive OBD-II scanner costing $25 to $40 reads these codes. Many auto parts stores will scan codes for free in their parking lot.
Understanding Low-Speed and High-Speed Fan Circuits
Many vehicles have a two-speed or variable-speed fan system. Understanding how these circuits work helps you diagnose intermittent or partial failures.
In a two-speed system, the fan runs at low speed for normal engine cooling and switches to high speed when coolant temperature rises further or when the A/C pressure is high. Separate relays control each speed, and some vehicles use dropping resistors to reduce voltage for low-speed operation.
If your fan runs only at high speed or only at low speed, one of the relays or the dropping resistor has failed. The dropping resistor is usually mounted near the fan shroud and looks like a small ceramic block with two wire connectors. Measure its resistance: typically 0.2 to 0.5 ohms. An open reading means a failed resistor, and the fan will only run at high speed or not at all.
Some modern vehicles use pulse-width modulation (PWM) to control fan speed. The ECU varies the duty cycle of the power signal to achieve precise speed control. PWM-controlled fans do not use dropping resistors but instead rely on a solid-state fan control module. If this module fails, the fan may not run at all or may run only at full speed.
How to Test the Fan Control Module
Testing the fan control module requires understanding the specific module on your vehicle. Most modules receive a signal from the ECU and switch power to the fan. On many cars, the module is integrated into the fuse box or mounted on the fan shroud.
To test a basic solid-state module, check for 12-volt input power from the battery with the key on, a signal input from the ECU when the fan should be running, and a ground connection. If input power and signal are present but no power reaches the fan output terminal, the module has failed.
Module replacement costs $80 to $300 depending on the vehicle. Because modules can be difficult to diagnose without advanced tools, many shops swap the module with a known-good unit as the definitive test. If you suspect the module and have ruled out everything else, this is a reasonable approach.
Forum users report that fan control module failures are most common on European vehicles, particularly Volkswagen, Audi, and BMW models from the early 2000s. If you own one of these vehicles and the fan circuit has power and signal but the fan does not run, the module is a strong suspect.
Real Cost Estimates for Common Repairs
Knowing what repairs typically cost helps you decide between a DIY fix and a shop visit. Here is what drivers report paying across different failure points.
A blown fuse costs under $5 if you do it yourself. Shops may charge $50 to $100 because of the diagnostic time involved. A faulty relay costs $15 to $40 for the part and takes five minutes to swap. An ECT sensor runs $15 to $50 for the part, and installation is usually a ten-minute job.
Wiring repairs vary widely depending on the location and extent of the damage. A corroded connector cleanup costs nothing if you do it yourself. A damaged wiring harness repair at a shop typically runs $100 to $300.
Replacing the fan motor or complete fan assembly is the most expensive common repair. Parts cost $50 to $300 for aftermarket units and $150 to $500 for OEM. Shop labor adds $100 to $250. Total cost at a shop for a complete fan assembly replacement typically falls between $200 and $500, matching what AutoZone reports.
The fan control module is the priciest component at $80 to $300 for the part, with labor adding $80 to $200 depending on accessibility.
When to Seek Professional Help
If you have worked through all six diagnostic steps and still cannot identify the problem, or if your vehicle uses a complex PWM-controlled fan system with a dedicated control module, it may be time to consult a professional.
Also seek professional help if you are uncomfortable working with electrical systems, if the problem is intermittent and difficult to reproduce, or if your vehicle has multiple fans with separate circuits that interact in ways you cannot trace with a basic multimeter.
If the engine overheats despite your diagnosis attempts, do not keep driving. Towing is cheaper than a head gasket replacement, which can run $1,500 to $3,000 or more depending on the vehicle.
FAQs
What causes a radiator fan to not turn on?
The most common causes are a blown fuse, a failed relay, a faulty coolant temperature sensor, damaged wiring, or a burned-out fan motor. Always check the fuse first since it is the cheapest and easiest fix, then test the relay by swapping it with an identical one from the same fuse box.
How do you test a radiator fan on a car?
Disconnect the fan motor connector and connect jumper wires from the battery positive to the fan positive pin and battery negative to the fan negative pin. If the fan spins, the motor is good and the problem is in the relay, fuse, sensor, or wiring. If it does not spin, the motor is bad.
Can I drive with the radiator fan not working?
You can drive short distances at highway speeds where natural airflow cools the radiator, but avoid idling, stop-and-go traffic, and using the air conditioner. Watch the temperature gauge closely. If it climbs above normal, pull over immediately to prevent engine damage from overheating.
How do you force a radiator fan to turn on?
Turn the air conditioner on to maximum with the engine running. On most vehicles the A/C pressure switch signals the ECU to activate the radiator fan regardless of engine temperature. This is the quickest way to test if the fan motor and its primary circuit are functional.
How do you know if your radiator fan module is bad?
If the fuse, relay, sensor, and motor all test good but the fan still does not run, the fan control module is the likely culprit. Test by confirming 12-volt input power and an ECU signal at the module with no power reaching the fan output terminal. Module failure is most common on European vehicles from the early 2000s.
What is the life expectancy of a radiator fan?
An electric radiator fan typically lasts 8 to 15 years or 100,000 to 150,000 miles. Fan motors wear out gradually as brushes and bearings degrade. Relay contacts also degrade over time. Regular cooling system maintenance, including clean coolant and intact wiring, helps extend fan life.
Conclusion
Diagnosing a radiator fan that is not turning on when it should comes down to working through the system in the right order. Start with the fuse, then the relay, then test the motor directly, then check the ECT sensor, and finally inspect the wiring. Most failures are resolved by step 2 or 3, and you can complete the entire diagnosis with a $20 multimeter and a set of jumper wires. Follow each step methodically and you will pinpoint the problem without guessing.