
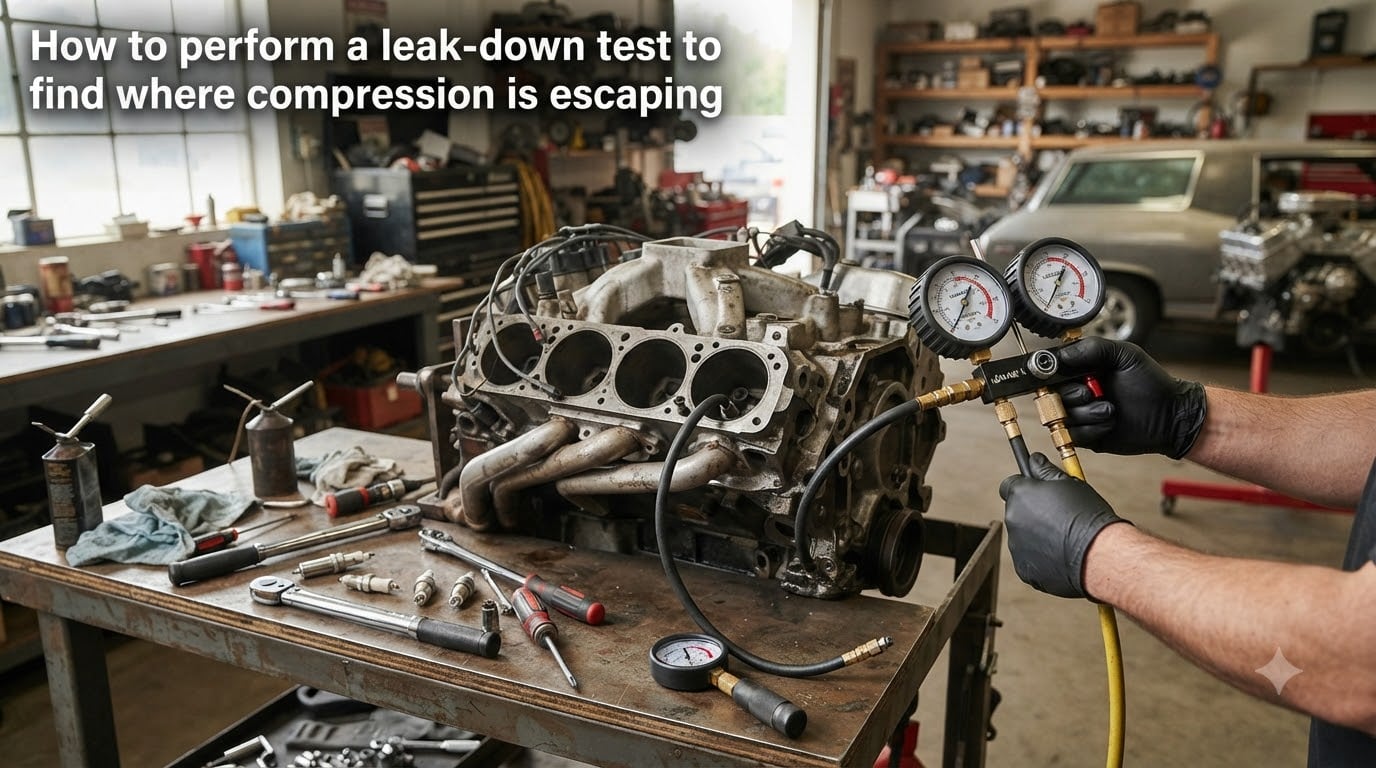
If your engine is losing power, burning oil, or running rough, the problem usually traces back to compression escaping somewhere it shouldn’t. A leak down test is the most reliable way to pinpoint exactly where that compression is going, whether it’s past worn piston rings, a bad head gasket, or a leaking valve.
I’ve run leak down tests on everything from a high-mileage BMW E36 to small-block Chevys, and I’ll walk you through the exact procedure I use. By the end of this guide, you’ll know how to perform a leak down test, interpret the percentage readings, and diagnose where compression is escaping based on what you hear.
Table of Contents
What Is a Leak Down Test and Why It Matters?
A leak down test measures the percentage of compressed air that escapes from a cylinder over a set period. You introduce air at a fixed pressure (usually 100 psi) into the cylinder and watch how much bleeds off. The reading tells you how healthy the seals are inside that combustion chamber.
What makes a leak down test so valuable is its diagnostic precision. A standard compression test only tells you IF you have a problem. A leak down test tells you WHERE the problem is, by listening and looking at where air escapes. That’s the difference between guessing and knowing.
When I diagnosed a BMW E36 with a rough idle, the compression test looked marginal across all cylinders. The leak down test pinpointed cylinder 3 with 18% leakage, with air whistling out of the oil filler cap. That was worn piston rings, not valves, saving a wasted head gasket job.
Leak Down Test vs Compression Test: Key Differences
Many DIYers wonder whether they should run a compression test or a leak down test first. Both have their place, and understanding the difference saves time.
A compression test measures the maximum pressure a cylinder builds during the compression stroke. It uses the starter motor to crank the engine and reads peak pressure. A leak down test holds the piston at top dead center (TDC) and pressurizes the cylinder from outside, measuring how much escapes.
The compression test is quicker and tells you if a cylinder is weak. The leak down test is slower but tells you why it’s weak. My usual workflow is compression test first as a screening tool, then leak down on any cylinder that reads low to identify the exact failure point.
Compression tests can mask problems when multiple cylinders are worn evenly. Leak down percentages expose those borderline cases that compression numbers might miss.
Tools and Equipment You Need
You don’t need a full shop to perform a leak down test, but you do need specific tools. Here’s what I keep on the bench:
Leak down tester with regulator and dual gauges (input and cylinder)
Air compressor capable of delivering 100+ psi consistently
Spark plug socket and ratchet
Breaker bar for rotating the crankshaft
10mm socket or wrench for crank pulley bolt
Mechanic’s stethoscope (optional but helpful for valve diagnosis)
Flashlight for inspecting leak points
Compressed air hose with proper fittings
Shop towels and a notepad for recording cylinder-by-cylinder readings
The leak down tester itself is the only specialty item. Good units run from basic single-gauge models up to professional dual-gauge kits with quick-connect couplers. I’ve used both, and the dual-gauge version makes interpretation easier since you can see input pressure drop versus cylinder pressure.
Safety Precautions Before You Start
A leak down test pushes compressed air into a sealed cylinder. Done wrong, it can spin the crankshaft unexpectedly or launch small parts across the garage. Take these precautions:
Disconnect the fuel pump relay or inertia switch so the engine cannot start
Remove all spark plugs so compression is not built up by starter cranking
Verify the transmission is in park or neutral with the parking brake set
Wear safety glasses, especially when listening near the exhaust
Keep hands clear of rotating components when applying air pressure
I’ve seen a starter kick over during a careless test because someone left the ignition wired hot. Treat the engine as ready-to-start until you’ve confirmed the fuel and ignition systems are disabled.
How to Find Top Dead Center (TDC) Without a Dial Indicator?
Top dead center is the position where the piston reaches the very top of its travel on the compression stroke. The leak down test must be performed at TDC, otherwise the valves may be partially open and you’ll get false readings.
The most accurate method uses a dial indicator dropped into the spark plug hole. But if you don’t have one, the finger-over-spark-plug-hole method works for most engines. With the plug removed, place your thumb over the hole and slowly rotate the engine by hand using a breaker bar on the crankshaft pulley bolt. You’ll feel pressure building against your thumb as the piston rises, peaking at TDC.
Mark the position by aligning a specific mark on the crank pulley with a fixed pointer. For most engines, the TDC mark is “0” on the timing tab. Once you see pressure peak and the timing mark line up, stop rotating. You’re at TDC for that cylinder.
For inline 4-cylinder engines, cylinder 1 and cylinder 4 share TDC at the same crankshaft position. Cylinders 2 and 3 also share TDC. Rotate 180 degrees to test the paired cylinder.
Step-by-Step Leak Down Test Procedure
Follow this numbered procedure for accurate results. The format mirrors what earns featured snippets in search results.
Step 1: Prepare the engine. Bring the engine to operating temperature, then remove all spark plugs. Disable the fuel and ignition systems so the engine cannot start during the test.
Step 2: Set cylinder 1 to TDC. Use the finger method or dial indicator to position cylinder 1 at top dead center on the compression stroke. Verify the timing mark on the crank pulley reads 0 degrees.
Step 3: Connect the leak down tester. Install the tester adapter in the spark plug hole for cylinder 1. Connect the air supply hose and adjust the regulator to deliver 100 psi to the tester input.
Step 4: Apply air and observe. Open the inlet valve on the leak down tester and watch the cylinder-side gauge. Note the reading after 5 to 10 seconds once it stabilizes.
Step 5: Listen and look for leaks. With air flowing into the cylinder, listen at the intake, exhaust, oil filler, and radiator neck. Note any whistling, hissing, or bubbling. Each location points to a specific failure.
Step 6: Record the percentage. Calculate leak percentage by comparing cylinder pressure to input pressure. A reading of 90 psi on the cylinder gauge with 100 psi input means 10% leakage.
Step 7: Repeat for each cylinder. Rotate the engine to TDC for each remaining cylinder and repeat steps 3 through 6. Record all four (or more) readings on a notepad for comparison.
How to Read and Interpret Leak Down Test Results
Once you have percentages for every cylinder, the next step is interpretation. Use these thresholds I rely on after years of testing:
0-5% leak: Excellent. Cylinder is in like-new condition with healthy rings, valves, and seals.
5-10% leak: Good. Normal wear for a higher-mileage engine. No repair needed.
10-20% leak: Fair. Worn components present. Monitor and investigate the source of escaping air.
20-30% leak: Poor. Significant wear or damage. Repair should be planned.
Over 30% leak: Failed. Major mechanical fault. Engine teardown or replacement likely required.
Don’t panic if all four cylinders read between 8-12%. That’s typical for an engine with 150k+ miles. The bigger concern is when one cylinder reads dramatically higher than the others, indicating a localized problem.
Diagnosing Where Compression Is Escaping: By Sound and Location
The percentage tells you there’s a problem. The sound tells you where. Here’s my audio-based diagnostic guide:
Whistling from the intake: An intake valve is leaking. Air pressurizes the cylinder and escapes backward through the intake manifold. Check the throttle body, individual intake runners, or vacuum lines for the source.
Hissing from the exhaust: An exhaust valve is leaking. Air travels out through the exhaust port. Listen at the tailpipe or directly at the exhaust manifold gasket for confirmation.
Air from the oil filler cap or dipstick tube: Piston rings are worn or stuck. Air pushes past the rings into the crankcase. This is the most common finding on high-mileage engines.
Bubbling in the radiator: Head gasket failure between the combustion chamber and a coolant passage. This is serious and often accompanied by white exhaust smoke and coolant loss.
Air bubbles in the coolant overflow tank: Same as radiator bubbling. Confirms combustion gases entering the cooling system from a compromised head gasket.
Whistling at the PCV valve or breather hose: Usually rings, sometimes combined with intake valve leakage. Air is finding its way into the crankcase ventilation system.
Leak Symptom to Problem Diagnosis Chart
Match what you hear and see to the most likely failure:
Intake whistle + 10-20% leak: Intake valve seal or guide wear
Exhaust hiss + 15-25% leak: Exhaust valve seat damage or burnt valve
Oil filler air pulse + 15-30% leak: Worn or stuck piston rings
Coolant bubbling + over 20% leak: Head gasket failure at combustion chamber
Multiple symptoms + over 30% leak: Severe engine damage, likely needs rebuild
Whistling at dipstick only + under 10% leak: Normal blowby for mileage
Diesel Engine Leak Down Test Considerations
Diesel engines use higher compression ratios, often 18:1 or more, which changes the leak down test slightly. The procedure is identical, but you typically run input pressure at 100 psi just like gasoline engines.
For diesels, glow plugs replace spark plugs as the access point. Remove all glow plugs and use the appropriate adapter for your engine. Be aware that diesel engines with worn rings often show slightly higher leak percentages than gas engines because of the higher compression loads on the ring pack.
A 7-10% leak on a gasoline engine is normal, but on a diesel with over 200k miles, 10-15% may be acceptable ring wear. Always compare cylinder-to-cylinder on the same engine rather than against an absolute number.
Common Mistakes to Avoid
I’ve watched several DIYers get bad data from these avoidable errors. Watch for them:
Not at TDC: Testing with valves partially open produces 50%+ leak readings that aren’t real. Always confirm timing mark alignment.
Cold engine: Cold cylinders give different readings than warm. Always test at operating temperature for consistent comparison.
Wrong input pressure: More than 100 psi can damage sensors or push coolant past the head gasket. Stick to 100 psi input.
Skipping the listening step: A 12% leak from rings is very different from a 12% leak from a burnt valve. Always listen for the source.
Testing only one cylinder: You need comparison data. Test every cylinder to identify outliers.
FAQs
How much PSI do I use for a leak down test?
Most manufacturers and shops recommend 100 psi input pressure for a leak down test. This is enough to detect leaks without risking damage to sensors, seals, or the head gasket. Some diesel mechanics use slightly higher pressure, but 100 psi is the industry standard.
Can I do a leak down test without removing the spark plugs?
No. The spark plugs must be removed so the tester adapter can be threaded into the spark plug hole. This also prevents the ignition system from firing during the test. The same rule applies to glow plugs on diesel engines.
What is a normal leak down percentage?
A healthy engine shows 0-5% leakage. 5-10% is acceptable for higher-mileage engines. Readings above 10% indicate wear or damage that should be investigated. Above 20% signals a significant problem requiring repair.
Is a leak down test better than a compression test?
Both tests serve different purposes. A compression test is faster and screens for weak cylinders. A leak down test takes longer but pinpoints exactly where compression is escaping. Most mechanics run a compression test first, then a leak down test on any cylinder that shows low compression.
Can a leak down test damage my engine?
When performed correctly at 100 psi, a leak down test will not damage a healthy engine. The risk comes from testing at excessive pressure, testing with the engine wired to start, or testing on a severely damaged cylinder that cannot hold pressure. Follow safety precautions and the standard 100 psi input.
How do I know if it’s rings or valves leaking?
Listen for where the air escapes. Air coming from the oil filler cap or dipstick tube indicates worn piston rings. Air whistling from the intake points to an intake valve leak. Air hissing from the exhaust indicates an exhaust valve leak. Bubbling in the radiator signals a head gasket failure.
Conclusion
Learning how to perform a leak down test to find where compression is escaping is one of the most valuable diagnostic skills any DIY mechanic can develop. The test takes under an hour once you’ve done it a few times, and it removes the guesswork from engine diagnosis.
Run a compression test first to identify weak cylinders, then perform a leak down test on those specific cylinders to find the exact source of the leak. Listen as much as you read the gauge. The combination of percentage and audio cues gives you a complete picture of engine health.
If you found this guide useful, bookmark it for the next time your engine acts up. A 30-minute leak down test can save thousands in misdiagnosed repairs.