
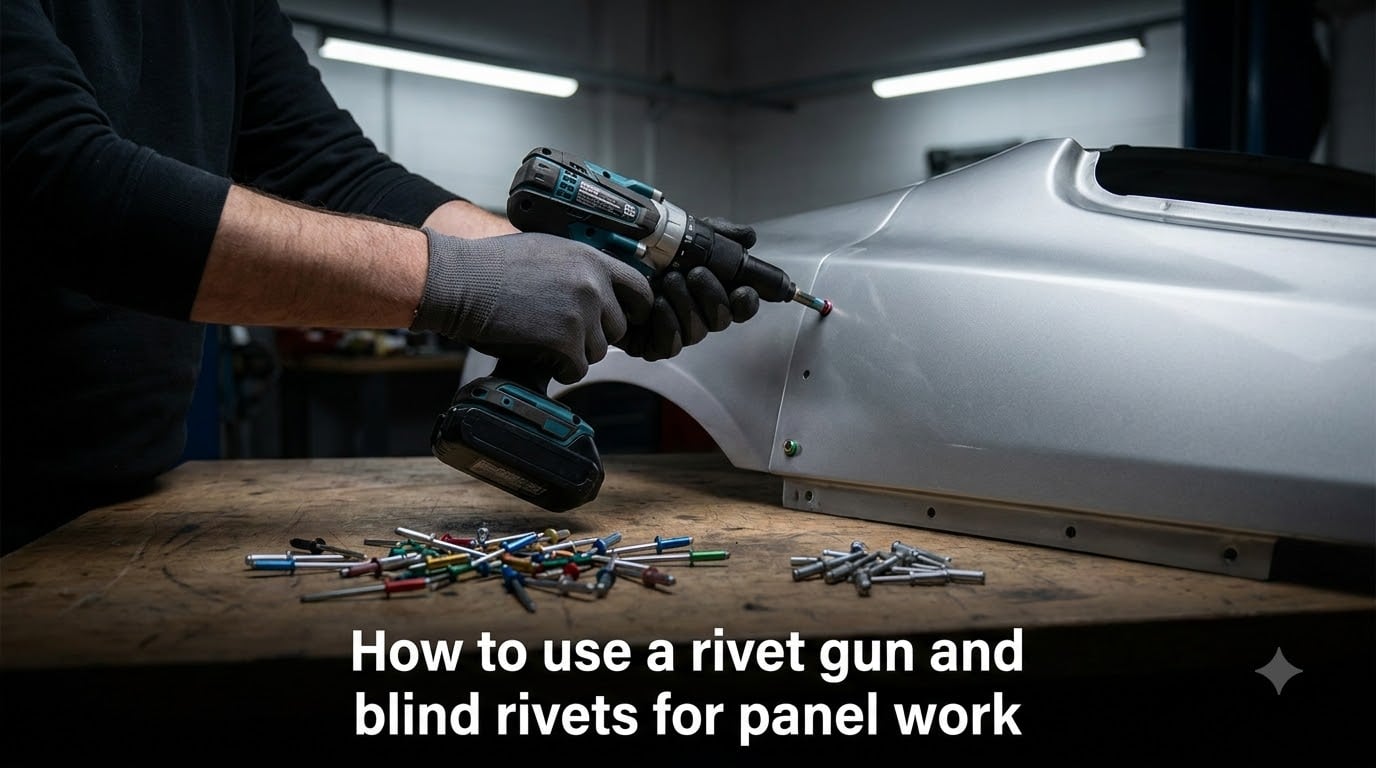
I remember the first time I tried to reattach a loose inner fender on my old Jeep. I had a bag of blind rivets, a cheap hand riveter from the local hardware store, and absolutely no idea what I was doing. Half the rivets set crooked, two snapped before the joint was tight, and one punched straight through the thin sheet metal like a hole punch.
That project cost me an entire weekend and taught me more about riveting than any video could. Since then I’ve repaired aluminum body panels on a classic Mustang, re-skinned a cargo van conversion, and helped a buddy rivet patch panels onto his pickup truck bed. Every job made me sharper at one specific skill: how to use a rivet gun and blind rivets for panel work the right way.
This guide is everything I’ve learned rolled into one place. I’ll walk you through the tool options, the exact step-by-step process, the panel-specific tricks that nobody talks about, and the troubleshooting tips that save you from ruining a sheet of expensive aluminum. By the end, you’ll know exactly how to get a strong, vibration-resistant joint on the first try.
Table of Contents
What Is a Rivet Gun and How Do Blind Rivets Work?
A rivet gun is a hand or power tool that pulls the metal stem (called a mandrel) of a blind rivet through the rivet body, which expands the back side of the rivet against the underside of your panel. This creates a permanent mechanical joint that you can install from just one side of the work, which is why blind rivets are sometimes called pop rivets.
Rivet vs Blind Rivet: The Key Difference
A solid rivet is a single piece of metal with a head on one end. To install one, you need access to both sides of the joint because the tool has to deform the tail end with a hammer or rivet set. A blind rivet solves the access problem by using two parts: a hollow body and a separate mandrel that pulls through the body to do the deforming for you.
Once the rivet is fully set, the mandrel snaps off at a pre-scored break point and leaves the rivet body locked in place. That single-sided installation is the entire reason blind rivets exist, and it’s why they’re the standard fastener for automotive body panels, HVAC ducts, gutter work, and anywhere you can’t reach behind the material.
The Anatomy of a Blind Rivet
Every blind rivet has the same five parts, and knowing them helps you pick the right one and diagnose problems later. The head is the visible flange on the front side after installation. The body is the hollow tube that does the actual clamping. Inside the body sits the mandrel, which is the part the tool grabs and pulls.
The break point, also called the notch or score line, is where the mandrel snaps off when setting force peaks. Finally, the grip range tells you the total thickness of material the rivet can clamp, and getting this number right is the difference between a tight joint and a loose flop.
How a Rivet Gun Creates a Permanent Joint
Here’s the short version of what happens when you squeeze the trigger. The rivet gun’s jaws grip the mandrel at the very tip. As you actuate the tool, the jaws pull the mandrel backward into the rivet body. That pulling force mushrooms the back of the rivet body outward, clamping your two panels together between the head on the front and the deformed flange on the back.
Once the rivet body reaches maximum deformation, the pulling force exceeds the strength of the pre-scored notch in the mandrel. The mandrel snaps at the break point and the tool ejects it into a collection cup. What’s left in your panel is a tight, vibration-resistant fastener that won’t back out.
Types of Rivet Guns and Which One Suits Panel Work
There are three main categories of rivet tools, and each one fits a different kind of work. Picking the wrong one is the most common reason beginners struggle, so let me break them down honestly.
Manual Hand Rivet Tools
Manual rivet guns look like long pliers with a nosepiece on the end and a collection bottle on the handle. You load a rivet, push the nosepiece against the rivet head, and squeeze the handles as hard as you can. The tool uses your hand force to pull the mandrel.
They’re cheap, lightweight, and need no power source, which makes them perfect for the occasional repair, a single fender patch, or working in the field. The downside is hand fatigue, especially with stainless steel rivets or anything larger than 1/8 inch. For occasional panel work, a decent manual tool from a name brand will absolutely do the job.
Pneumatic Rivet Guns
Pneumatic rivet guns run on compressed air, usually from a shop compressor. They generate thousands of pounds of pulling force with a simple pull of the trigger, which means you can set large aluminum and steel rivets all day without breaking a sweat. Most pros reach for pneumatic tools when they’re doing volume work on a vehicle restoration or production job.
The trade-off is portability. You’re tethered to an air hose, and if you don’t have a compressor, the upfront cost climbs quickly. That said, a basic 1/4 inch pneumatic riveter from a tool brand like Astro or Marson handles 90% of automotive panel work without complaint.
Cordless Battery Rivet Guns
Cordless rivet guns are the newest option and the one I’d reach for today if I were buying fresh. They run on 18V or 20V lithium batteries, deliver pulling force similar to a pneumatic tool, and go anywhere without a hose. For one-off panel jobs, restoration work in a home garage, or mobile repair, they’re a no-brainer.
Battery tools cost more upfront than a manual riveter, and you’ll want a spare battery on hand for longer jobs. They also weigh a bit more than a manual tool because of the motor and battery, but for the typical DIYer doing occasional automotive work, that weight is a fair trade for the time you save.
Comparison Table: Pros, Cons, and Best Use Cases
Here is a quick side-by-side look at the three tool types for panel work specifically. Use this to match the tool to your project rather than buying the most expensive one.
| Tool Type | Pulling Force | Best For | Watch Out For |
|---|---|---|---|
| Manual hand riveter | Limited to your grip strength | Occasional repairs, small aluminum panels, budget builds | Struggles with 1/4 inch or stainless rivets |
| Pneumatic rivet gun | 2,000 to 4,000+ lbs | Volume panel work, restoration shops, body shops | Needs a compressor and air hose |
| Cordless rivet gun | 2,000 to 3,500 lbs | DIYers, mobile repair, occasional to moderate volume | Battery cost and weight |
Tools and Materials You Need Before You Start
Pulling together your kit before you start drilling holes saves trips to the store and a lot of frustration. Here’s what I keep within arm’s reach every time I set up for panel riveting.
Essential Tools Checklist
Start with a drill and a sharp step bit or twist bit matched to your rivet diameter. You need a deburring tool or a larger drill bit to clean up the exit side of every hole. A center punch and a marker help you lay out consistent hole locations, especially across multiple rivets on a single panel.
Add a pair of safety glasses because flying mandrels and metal chips will absolutely find your eyes if you skip them. Hearing protection matters for pneumatic and cordless tools because they’re louder than you’d think. I also keep a small brush and some isopropyl alcohol nearby to clean panels before drilling, and a clamp or two to hold panels in position while I work.
Choosing the Right Blind Rivets for Panel Work
Most automotive panel work calls for aluminum blind rivets because the body panels themselves are typically steel or aluminum. Matching the rivet material to the panel material prevents galvanic corrosion down the road, which is the slow, ugly rust you see around fasteners years later.
For body panels, sheet metal, and patch work, 1/8 inch (3.2mm) and 5/32 inch (4.0mm) rivets are the everyday sizes. Reach for 3/16 inch (4.8mm) when you need a stronger joint on structural brackets or thicker assemblies. Stainless steel rivets give you corrosion resistance but require more force to set, which is why a hand tool often can’t drive them.
Understanding Grip Range and Hole Size
Grip range is the total thickness of material the rivet can clamp and still set correctly. If your grip range is too small, the rivet deforms before it pulls the panels tight. If it’s too large, the rivet sets before the panels make contact and you’ll get a sloppy joint.
To pick the right rivet, add up the thickness of every layer you’re joining, then pick a rivet whose grip range covers that total. Most packaging lists the grip range in inches or millimeters right on the bag, and it’s worth the extra minute to check.
Hole size is just as important. The hole needs to be slightly larger than the rivet body diameter so the rivet slides in without forcing. For a 1/8 inch rivet, drill a 1/8 inch hole or one size over like 9/64 inch for a slightly looser fit. The manufacturer usually lists the exact drill size on the packaging or their website.
How to Use a Rivet Gun and Blind Rivets for Panel Work: Step-by-Step?
This is the core of the process, and it’s the section worth bookmarking. I’m going to walk through each step the way I actually do it on a real job, including the small habits that make a big difference in the finished joint.
Step 1: Prepare the Work Area and Panels
Set up on a flat, stable surface with good lighting. Lay your panels out in the position they’ll be in once installed, and clamp them together at the corners so they don’t shift while you work. If the panel is already mounted on the vehicle, use a helper or a clamp to hold the loose piece in position while you mark holes.
Wipe down both sides of the joint area with a clean rag and some isopropyl alcohol to remove oil, wax, and dirt. Contamination around the hole weakens the grip and can cause the rivet to spin in the hole during installation.
Step 2: Mark and Drill the Pilot Hole
Measure and mark each hole location with a marker or scribe. For patch panels and repairs, space rivets every 1.5 to 2 inches along the seam, and keep the holes at least 3 to 4 rivet-diameters away from the edge of the panel to prevent edge cracking.
Use a center punch on each mark to give your drill bit a starting point. Without the punch, the bit will walk across the panel and you’ll end up drilling in the wrong spot. Drill slowly with steady pressure, and stop as soon as the bit punches through to avoid snagging the back panel.
Step 3: Deburr and Clean the Hole
Every drilled hole leaves a burr on the exit side, and that burr will hold the panels apart just enough to weaken the joint. Run a deburring tool or a slightly larger twist bit through each hole from the back side to knock off the burr.
Blow out the metal chips with compressed air or wipe them out with a clean rag. Loose chips trapped under the rivet head will slowly work their way out and loosen the joint over time.
Step 4: Select the Correct Nosepiece
Your rivet gun came with a set of nosepieces, and each one is matched to a specific rivet diameter. Using the wrong nosepiece is one of the most common beginner mistakes, because the rivet either won’t load or the jaws won’t grip the mandrel properly.
Match the nosepiece to the rivet size stamped on the packaging. Most quality rivet tools ship with three or four nosepieces covering 3/32 inch up to 3/16 inch. If you set larger rivets frequently, you’ll want a tool with a swappable nosepiece for each size.
Step 5: Insert the Blind Rivet
Slide the rivet into the drilled hole from the accessible side of the panel. The head of the rivet should sit flush against the front surface. If the rivet wiggles loosely in the hole, the hole is too big. If you have to force it, the hole is too small, and you’ll need to drill it out slightly before continuing.
Push the nosepiece of the rivet gun firmly onto the mandrel sticking out of the rivet head. The gun should sit perpendicular to the panel surface. Tilting the gun causes uneven setting force, which leads to a crooked joint and a premature mandrel break.
Step 6: Set the Rivet With the Rivet Gun
Squeeze the trigger (or the handles on a manual tool) with steady, even pressure. Don’t pump or jerk. The tool will pull the mandrel through the rivet body in a smooth motion. You’ll feel the resistance build as the rivet clamps down on the panels.
For a cordless or pneumatic tool, just hold the trigger until the mandrel snaps. For a manual tool, keep squeezing until you feel the snap and see the mandrel fall into the collection cup. Release pressure and pull the gun straight back off the rivet.
Step 7: Inspect the Finished Joint
Look at the rivet head. It should sit flat against the panel with no gap. Run your finger around the edge to feel for any movement. Now check the back side if you have access, the deformed rivet body should form a smooth, even flange with no cracks.
If the head looks proud of the panel, your grip range was too long and the rivet set before clamping. If the head sank into the panel, you may have overtightened on a soft material. Both situations mean drilling out the rivet and starting over with a different size.
For a visual walkthrough of the process, this video from Ace Hardware covers the basic technique with clear camera angles and shows what a properly set blind rivet should look like:
Panel-Specific Techniques for Automotive and Aluminum Work
This is the section most generic rivet guides skip, and it’s the part that will actually make your panel work look professional. Different panel materials and thicknesses demand different approaches, and assuming one technique fits all is the fastest way to ruin a panel.
Working With Thin Aluminum Body Panels
Aluminum body panels on classic cars, race cars, and modern trucks are usually between 0.040 inch and 0.063 inch thick. That’s barely thicker than a soda can, and standard blind rivets can pull straight through if you apply too much force or skip a backing plate.
Use aluminum rivets on aluminum panels. Mixing aluminum rivets with steel panels creates a galvanic reaction that eats the joint from the inside out over a few seasons. Choose 1/8 inch rivets for most thin aluminum applications, and avoid going larger than 5/32 inch unless you have backing support behind the panel.
Set your rivets at low to moderate force on aluminum. The material gives easily, so the joint will tighten before you expect it. If you feel the rivet pulling into the front surface, you’ve already gone too far and need to back off.
Backing Support Techniques to Prevent Pull-Through
Pull-through is the most common failure mode on thin panels. The rivet head pulls through the front of the panel like a paper punch, leaving a ragged hole and no joint at all. The fix is simple but rarely explained: add backing support behind the panel.
For permanent repairs, sandwich a thin piece of aluminum or steel between the two panels you’re joining. The backing plate spreads the clamping load across a wider area and gives the rivet head something solid to press against. A 1.5 inch square of scrap material works fine for most spots.
For one-sided access situations where you can’t add backing, choose rivets with a larger flange head. Countersunk rivets won’t help here because they need material to sink into. Wide-flange rivets, sometimes called button-head or mushroom-head rivets, spread the load across a bigger footprint and resist pull-through on thin sheet.
Spacing and Edge Distance for Strong Joints
Rivet spacing affects joint strength more than most people realize. Rivets placed too close together weaken the material between them because each hole removes a chunk of load-bearing cross-section. Rivets spaced too far apart allow the joint to flex between fasteners, which invites fatigue cracks.
For sheet metal panel work, aim for rivet spacing of 1.5 to 2 inches along straight seams and 1 inch at corners or curves where the joint needs extra rigidity. Edge distance, which is the distance from the rivet centerline to the edge of the panel, should be at least 2 times the rivet diameter. Less than that and the panel cracks out before the rivet even sets.
When to Use Rivets vs Screws vs Welding
No fastener wins everywhere, and choosing the wrong one is a hidden cost most beginners pay twice. Here’s how I think through the decision on panel work specifically.
Rivets are right when you want a permanent joint that won’t vibrate loose, you’re joining thin sheet metal, and access to the back side is limited. They resist vibration far better than screws and install faster than welding on cosmetic panels. The downside is removing a rivet requires drilling it out, so don’t use them where you’ll need to disassemble later.
Self-tapping screws are right when the joint needs to come apart for service, the load is light, and you want a fast install. They loosen under vibration, so skip them on anything that takes road shock, like suspension brackets or motor mounts. Stainless sheet metal screws are the typical choice here.
Welding is right when the joint is structural and load-bearing, when the material is thick enough to weld without distortion, and when you need a fully sealed seam. Welding burns through thin sheet metal and adds heat that warps body panels, so it’s rarely the right call on cosmetic aluminum skin panels. For structural brackets and chassis work, MIG welding beats both rivets and screws.
Common Mistakes and How to Avoid Them
I’ve made most of these mistakes myself, so take my word for it. Each one is easy to prevent once you know what to look for, but every beginner hits at least one of them on their first panel job.
Wrong Hole Size
If the hole is too small, you’ll fight to push the rivet in and end up bending the panels trying to force it. If the hole is too big, the rivet body will deform sideways instead of clamping down on the panels. Match the drill bit to the rivet diameter specified by the manufacturer, and test-fit a rivet in a scrap piece of the same material before drilling your real panel.
Skipping Backing Support
On thin aluminum panels, the rivet head will pull through the panel if there’s nothing solid behind it. Add a backing plate, even a small one, behind every thin-panel joint. The few minutes spent cutting backing material save the cost of a ruined sheet of aluminum skin.
Using the Wrong Nosepiece
If the nosepiece is too small, the mandrel won’t seat properly and the jaws won’t grip. If it’s too large, the rivet falls out of the tool before you can pull the trigger. Match the nosepiece to the rivet diameter and confirm the mandrel seats fully before you set the rivet.
Insufficient Pulling Force
When a manual tool can’t muster enough force for a large stainless rivet, the mandrel snaps before the rivet is fully set. The result is a loose rivet with a head that’s still proud of the panel. Switch to a pneumatic or cordless tool for any rivet larger than 5/32 inch, especially in stainless steel.
Ignoring Material Thickness Limits
Every rivet has a minimum and maximum grip range. Go below the minimum and the rivet sets before clamping. Go above the maximum and the rivet never fully deforms. Always check the packaging and add up your total material thickness before choosing the rivet size.
Troubleshooting Blind Rivet Failures
Even with the right technique, you’ll occasionally hit a failure. Here’s how to diagnose the most common ones and fix them without scrapping the panel.
Mandrel Not Breaking Cleanly
If the mandrel pulls all the way through without snapping, your grip range was too long for the rivet, or the tool isn’t generating enough pulling force. The fix is to drill out the rivet, switch to a shorter grip-range rivet, or upgrade to a more powerful tool.
Rivet Spins in the Hole
A spinning rivet never sets because the jaws can’t grab the mandrel while the rivet body rotates. The hole is too large for the rivet, the wrong rivet type is being used (some specialty rivets require matched-hole tolerances), or the panels are slipping under the clamping force. Drill out, resize the hole, and try again with fresh rivets.
Rivet Body Cracks or Splits
Visible cracks in the rivet body after setting usually mean the rivet material is too brittle for the application or the pulling force was excessive. Replace brittle rivets with softer aluminum versions, or reduce the air pressure on a pneumatic tool until the joint sets without cracking.
Loose Joint After Setting
If you can wiggle the rivet head after setting, the grip range was too long and the rivet set before the panels clamped together. Drill it out and use a rivet with a shorter grip range, or add a washer under the rivet head to take up the extra space.
Rivets Pulling Through Thin Panels
This is the classic thin-aluminum failure. Add a backing plate behind the panel, switch to a wide-flange rivet, or both. If neither option works for your application, consider switching to a different fastener like a nut-and-bolt assembly for that particular joint.
Rivet Gun Safety Precautions You Should Never Skip
Forum users complain when guides skip safety, so I’m putting it front and center. Rivet guns aren’t particularly dangerous, but they do launch small pieces of metal at high speed, and a couple of safety habits will protect you for life.
Eye and Hand Protection
Always wear safety glasses. The mandrel snaps off at high speed, and the collection cup on most tools catches it, but cups fail, cups overflow, and cups get knocked out of alignment. Eye injuries from a rivet mandrel are some of the most common shop injuries, and they’re completely preventable.
Wear gloves when handling freshly drilled sheet metal. The edges are sharp, and a slice across your palm will end your workday fast. Cut-resistant gloves are a worthwhile upgrade for anyone doing regular panel work.
Mandrel Disposal
Mandrels collect in the cup, but you still need to empty the cup regularly. A full cup causes jams, and the tool can shoot the next mandrel straight back at you when the cup overflows. Empty the cup into a metal container at the end of every work session, and never point the tool at another person even when you think it’s empty.
Air Tool Safety for Pneumatic Models
Always disconnect the air hose before changing nosepieces or doing any maintenance on a pneumatic rivet gun. Bleed the air line completely, and never exceed the manufacturer’s recommended PSI. Over-pressurizing a rivet gun can rupture hoses or split tool housings.
Battery and Cordless Tool Safety
For cordless tools, remove the battery before swapping nosepieces or clearing a jam. Lithium-ion batteries store serious energy, and a short circuit while the tool is disassembled can damage the battery or start a fire. Store batteries in a cool, dry place and never let them sit on a concrete floor in cold weather.
Maintaining Your Rivet Gun for Long-Term Reliability
A rivet gun that’s well-maintained will outlast several vehicles’ worth of panel work. A neglected one will fail mid-job and leave you with a half-riveted panel. Five minutes of care after each session is the difference.
Cleaning the Mandrel Collection Cup
Empty the cup after every work session. A quick twist-off, dump, and snap-back-on takes 30 seconds and prevents jams. If the cup gets sticky or oily, wash it with soap and water and let it dry before reinstalling.
Lubricating Pneumatic Tools
Pneumatic rivet guns need a few drops of pneumatic tool oil in the air inlet before each session. The oil keeps the internal seals and jaws lubricated and prevents corrosion inside the tool body. Run the tool briefly after oiling to distribute the lubricant and blow out any excess.
Inspecting Nosepieces and Jaws
Check the nosepieces and jaws for wear every few months. Worn jaws won’t grip the mandrel properly and you’ll see more spinning rivets and partial sets. Most quality rivet tools sell replacement jaw kits, and swapping them out is usually a five-minute job with basic tools.
Storing Your Rivet Gun Properly
Store your rivet gun in a clean, dry location away from solvents and direct sunlight. Hang it on a pegboard or lay it in a toolbox drawer with a desiccant packet to absorb moisture. For cordless tools, remove the battery during long-term storage to preserve battery life.
Frequently Asked Questions
How to rivet a panel?
To rivet a panel, first clamp the two pieces together and mark your hole locations every 1.5 to 2 inches. Drill a pilot hole matched to your rivet diameter, deburr both sides, and clean out any metal chips. Slide the blind rivet into the hole, push the rivet gun’s nosepiece onto the mandrel, and squeeze the trigger until the mandrel snaps. Inspect the joint to confirm the rivet head sits flush and the panels are clamped tight.
How do you use a blind rivet gun step by step?
Load the blind rivet into the prepared hole with the mandrel sticking out toward you. Press the rivet gun’s nosepiece firmly onto the mandrel so it sits perpendicular to the panel. Squeeze the trigger (or the handles on a manual tool) with steady, even pressure. The tool pulls the mandrel through the rivet body, which expands the back side and clamps the panels together. Once you feel the mandrel snap off, release the trigger and pull the gun straight back. Empty the spent mandrel from the collection cup.
What are common rivet gun mistakes to avoid?
The most common rivet gun mistakes are drilling the wrong size hole, using the wrong nosepiece for the rivet diameter, skipping backing support on thin panels, and choosing a grip range that doesn’t match the total material thickness. Beginners also tend to tilt the gun during setting, which causes uneven deformation and premature mandrel breaks. Always match the drill bit, nosepiece, and rivet grip range to your specific panel thickness before you start.
Do you have to drill a hole before using a rivet gun?
Yes, you always have to drill a hole before using a rivet gun for standard blind rivets. The hole needs to be slightly larger than the rivet body diameter so the rivet slides in without forcing. The only exceptions are specialty self-piercing rivets, which have a sharp tip that drills its own hole under high clamping force and require a specialized self-piercing rivet gun.
What size rivets for panel repair?
For most automotive panel repair, 1/8 inch (3.2mm) rivets are the standard choice and work well on thin aluminum and steel sheet metal. Step up to 5/32 inch (4.0mm) for slightly thicker panels or joints that see more vibration. Use 3/16 inch (4.8mm) rivets for structural brackets, thicker assemblies, or anywhere you need maximum joint strength.
What are the common failures with blind rivets?
The most common blind rivet failures are mandrels that don’t break cleanly, rivets spinning in the hole, rivet bodies cracking during setting, loose joints after setting, and rivet heads pulling through thin panels. Each failure usually points to a specific cause: wrong grip range, oversized hole, brittle rivet material, or insufficient backing support behind the panel.
What is the difference between a rivet and a blind rivet?
A solid rivet is a single piece of metal with a head on one end, and installation requires access to both sides of the joint because the tail must be deformed with a hammer or rivet set. A blind rivet is a two-part fastener with a hollow body and a separate mandrel, which lets you install the rivet from just one side. The mandrel is pulled through the body to expand it against the back of the panel, then snaps off at a pre-scored break point to leave a permanent joint.
Final Thoughts on Riveting Panels Like a Pro
Learning how to use a rivet gun and blind rivets for panel work is one of those skills that pays you back every single time you pull a vehicle into the garage. The basics are simple: pick the right tool, match the rivet to the material, drill clean holes, and set the rivets with steady pressure. The details take you from amateur to professional, and those details are what this guide focused on.
Start with a small repair to build confidence. Patch a fender, reattach a loose bracket, or skin a small section of floor pan. Once you’ve set 50 rivets in a row without a failure, you’ll trust the process enough to tackle the bigger jobs. If you hit a failure mode I covered here, work through the troubleshooting steps before drilling out the rivet, and you’ll save yourself a lot of scrap metal.
The bottom line is that blind rivets give you a strong, permanent, vibration-resistant joint from one side of the panel, and once you’ve dialed in your technique, you’ll reach for them on every sheet metal project that comes your way.