
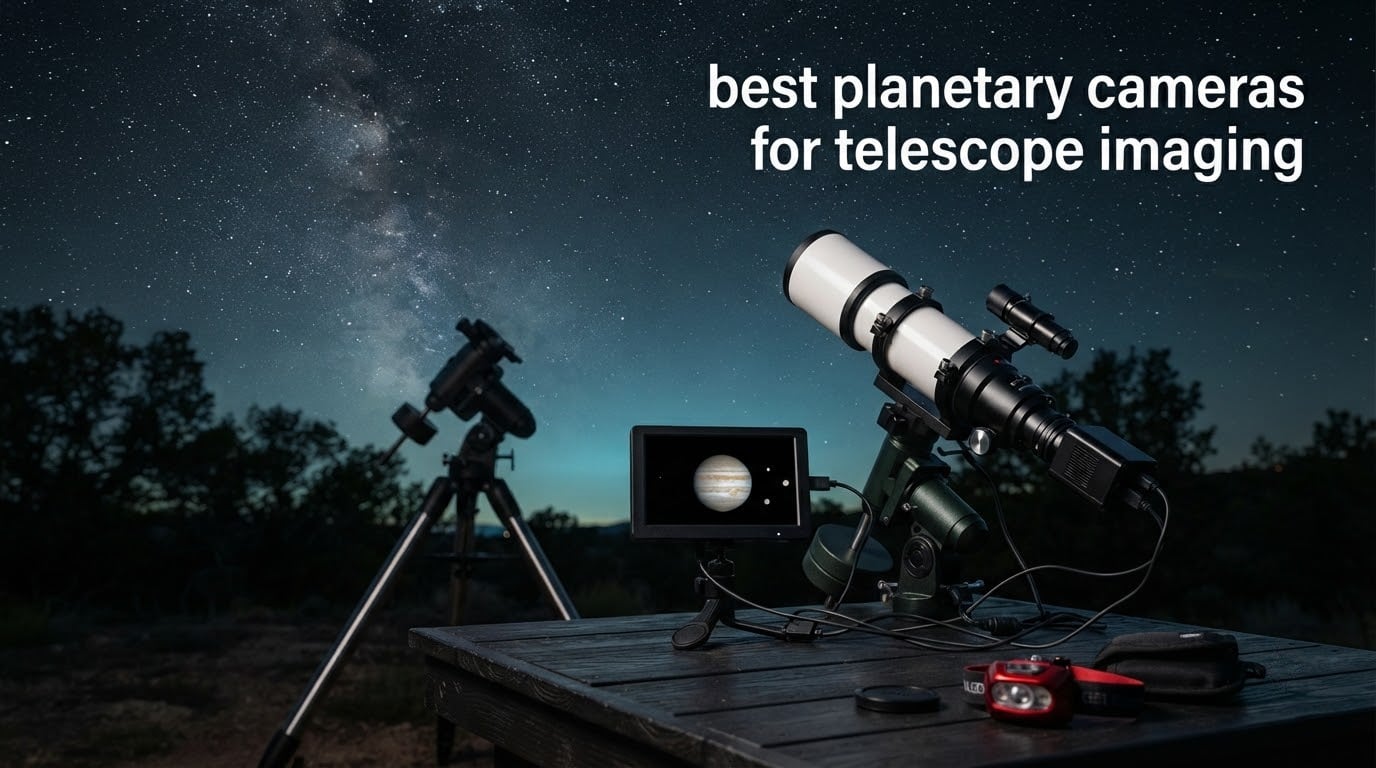
Earth’s atmosphere scrambles the light from a planet before it reaches your telescope, so a single long exposure is almost never sharp. A planetary camera solves this by recording a fast video and letting software keep only the few percent of frames that caught a moment of steady seeing. That is why the best planetary cameras are judged on frame rate and pixel size, not on megapixels.
In this roundup of the best planetary cameras for telescope imaging available in 2026, we rank ten options across ZWO, SVBONY, Celestron and Astromania, from a 107 fps colour CMOS model to a compact monochrome guide-camera body and a catadioptric telescope kit. Every pick carries its real frame rate, pixel size and read noise where the manufacturer publishes them, and we flag clearly where a listing does not.
One correction before we start. If you already shoot with a phone or a DSLR in video mode, you are not starting from zero. We cover how much a dedicated planetary camera actually changes the result, and when your existing gear is genuinely good enough, later in the guide. If you are only after a camera for everyday use rather than for the night sky, our backup camera roundup is the more relevant list. If you would rather read about imaging hardware that is not astronomical, our thermal imaging camera guide covers a completely different category of sensor.
Table of Contents
Top 3 Planetary Camera Picks for 2026

SVBONY SV305C Pro
- IMX662 2MP sensor
- 107 fps at 1920x1080
- 0.7e read noise
- 128MB DDR buffer
- ST4 guiding

ZWO ASI715MC
- IMX715 8.46MP sensor
- 1.45um pixels
- 45.1 fps over USB 3.0
- 80% quantum efficiency
- 1.25 inch nosepiece

ZWO ASI174MM-MINI
- 5.86um mono pixels
- 1936x1216 resolution
- 18.4 fps over USB 2.0
- 60g CNC aluminium body
- 1.25 inch form factor
Best Planetary Cameras at a Glance (October 2026)
| Product | Specs | Action |
|---|---|---|
| SVBONY SV305C Pro |
|
Check Latest Price |
| ZWO ASI715MC |
|
Check Latest Price |
| ZWO ASI174MM-MINI |
|
Check Latest Price |
 Celestron NexImage 20 Celestron NexImage 20 |
|
Check Latest Price |
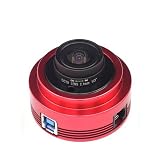 yancinne ASI120MC-S yancinne ASI120MC-S |
|
Check Latest Price |
 Generic 2.07MP USB 3.0 Camera Generic 2.07MP USB 3.0 Camera |
|
Check Latest Price |
 Labetue ASI662MC Labetue ASI662MC |
|
Check Latest Price |
 Astromania Solar System Imager Astromania Solar System Imager |
|
Check Latest Price |
 Astromania Easy Autoguiding Set60 Astromania Easy Autoguiding Set60 |
|
Check Latest Price |
 SVBONY MK105 Planet Kit SVBONY MK105 Planet Kit |
|
Check Latest Price |
1. SVBONY SV305C Pro: The Best All-Round Planetary Camera
SVBONY SV305C Pro Telescope Camera, USB 3.0 High-Speed, 2MP IMX662 Sensor
2MP IMX662 colour sensor
1920x1080 at 107 fps
0.7e read noise
128MB DDR buffer
ST4 guiding
Pros
- 107 fps at 1920x1080
- 0.7e read noise suits low light
- 128MB DDR buffer prevents dropped frames
- ST4 interface works with PHD2 and ASCOM
- Handles planetary imaging and guiding in one body
Cons
- Needs a computer plus capture software
- No iPad support
- Some reviewers report driver instability
- Disk space use is heavy on long runs
The SVBONY SV305C Pro is the camera we keep coming back to, because it does the thing planetary imagers actually need: it puts 1920×1080 frames down the USB 3.0 cable at 107 fps. That is real published throughput rather than a cropped marketing figure, and in a one-minute recording you have thousands of candidates for the stacker to choose from.
The IMX662 sensor underneath is a 2MP back-illuminated colour chip, and the 0.7e readout noise figure is the headline for anyone shooting Jupiter in twilight or the terminator of a Moon that is too bright to be interesting. Reviewers consistently describe the images as sharp and low noise even in poor light.
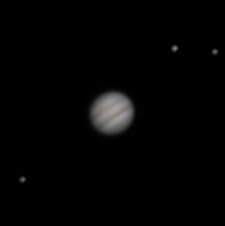
The 128MB DDR buffer is the spec most people overlook. Without buffering, a camera at high frame rate outruns the USB link and drops frames mid-recording, which quietly ruins a capture session. With the buffer in place, frames arrive intact, which is why the SV305C Pro is a common recommendation in forum threads about lucky imaging with long focal lengths.
It also carries an ST4 guiding interface compatible with PHD2 and ASCOM, so one body can do planetary capture and deep-sky guiding. That dual role is what makes it our best overall pick rather than a specialist-only choice.
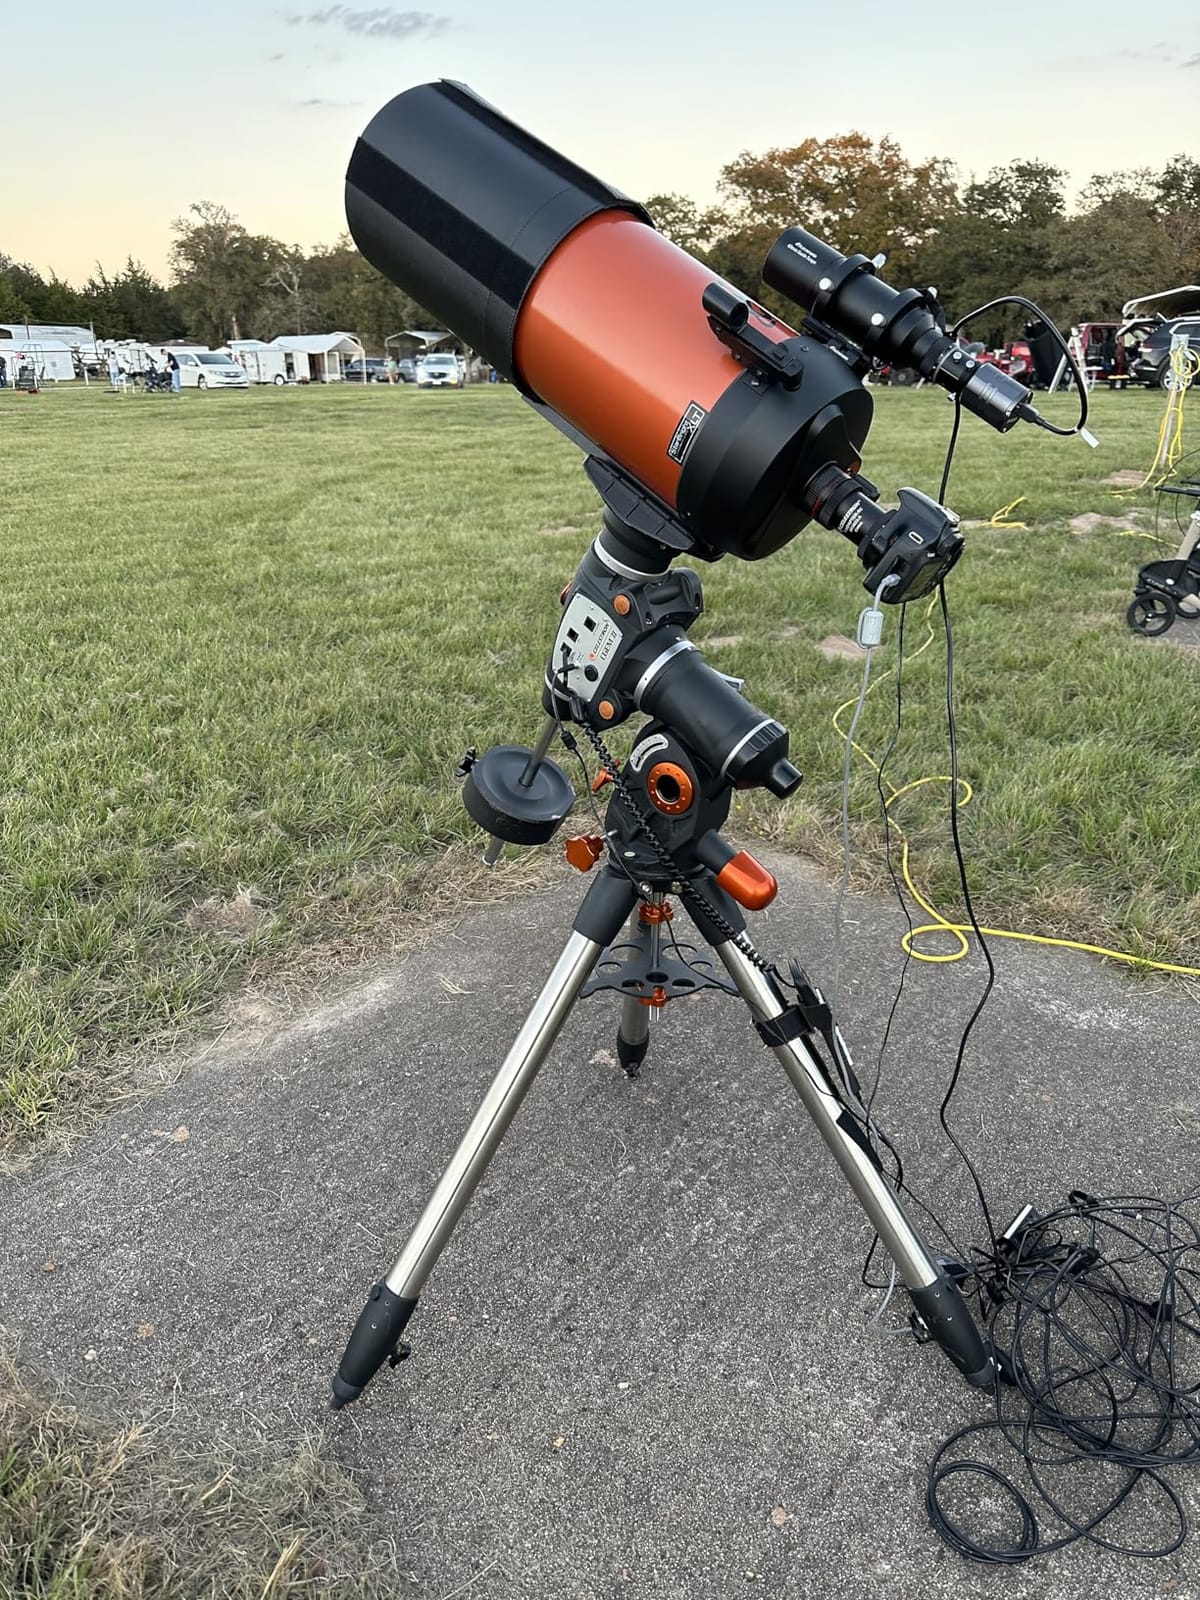
What the SV305C Pro does better than the alternatives
Compare it with the ZWO ASI715MC, which resolves far more detail across the sensor but runs at 45.1 fps. For a single planet at high magnification, more frames beats more pixels, because you crop down to a small region of interest either way. The SV305C Pro gives you roughly double the frame count from the same sensor area.
Compare it with the 2.07MP generic USB 3.0 camera in this list, which matches the frame rate but publishes far less detail about noise and buffering. If a spec sheet is silent on DDR buffer and read noise, that silence is itself information.
Where the SV305C Pro will disappoint you
It needs a computer and free capture software, which is a genuine learning curve if you have never run a video capture tool before. There are also reports of driver instability and lock-ups in third-party software, plus one reviewer noting a high hot-pixel count at moderate gain.
Long high-frame-rate captures fill drives quickly. A ten-minute recording at this rate produces gigabytes of video, so budget storage before you start. If you would rather compare this against a different class of capture hardware, our inspection camera roundup covers USB probe cameras with a very different latency profile.
2. ZWO ASI715MC: Best for Solar and Lunar Work
ZWO ASI715MC 8.46 MP CMOS Color Astronomy Camera with USB 3.0# ASI715MC
1/2.8 inch IMX715 sensor
3864x2192 at 1.45um
45.1 fps over USB 3.0
80% quantum efficiency
0.72e read noise
Pros
- Huge 8.46MP sensor covers the full lunar disc comfortably
- 1.45um pixels suit long focal ratios
- 45.1 fps at full resolution
- 80% peak quantum efficiency
- Kit includes nosepiece ST4 cable and USB 3.0 cable
Cons
- No published customer rating on this listing
- Highest specification in this roundup
- 1.45um pixels need a long focal ratio to fill the frame
The ASI715MC is the camera to buy if your targets are the Moon and the Sun rather than Jupiter. A 1/2.8 inch IMX715 at 3864×2192 gives you a frame wide enough that the whole lunar disc fits in one exposure at moderate focal length, which turns crater fields from a mosaic project into a single capture.
The 1.45 micron pixel size is the interesting part. Multiply it by five to seven and you get a usable focal ratio of roughly f/7 to f/10, which lines up neatly with a long Schmidt-Cassegrain or a short refractor with a Barlow. At the native 8.46MP the camera still manages 45.1 fps over USB 3.0, so you are not trading frame rate for coverage.
Quantum efficiency peaks around 80% with a 12-bit ADC, and the 0.72e read noise is on par with the best in this group. For solar work that is the number that matters, because a solar surface is bright and the H-alpha chromosphere is not.
Where the ASI715MC beats everything else here
Nothing else in this roundup frames a full lunar mosaic in one shot. The 20MP Celestron NexImage 20 covers more, but it runs slower and buyers report driver trouble. For a terminator sequence or a two-panel mosaic of a quarter Moon, the ASI715MC’s field of view is the deciding factor.
The included kit is unusually complete: 1.25 inch nosepiece, camera body, protective cover, ST4 cable, a USB 3.0 cable and a quick guide. That matters if you are buying your first camera and do not want to order a separate nosepiece.
Where the ASI715MC falls short
This listing carries no published customer rating or review history, so our assessment rests entirely on the manufacturer’s specifications. That is a meaningful caveat and we would rather say so than pretend otherwise.
Its 1.45 micron pixels also mean that on a short, fast Newtonian the planet ends up tiny in frame. If your imaging train is below about f/5, you would be cropping heavily or adding a reducer and Barlow to get usable scale. Pair it with a long tube instead.
3. ZWO ASI174MM-MINI: The Premium Monochrome Pick
ZWO ASI174MM-MINI 2.1 MP CMOS Monochrome Astronomy Camera with USB 2.0# ASI174MM-MINI
5.86um mono pixels
1936x1216 native resolution
18.4 fps at full resolution
60g CNC aluminium
USB Type-C powered
Pros
- Every published review is five stars
- Large 5.86um pixels suit short focal ratios
- High QE finds faint guide stars easily
- Only 60g and slips into any 1.25 inch focuser
- Drivers for Windows Mac and Linux
Cons
- USB 2.0 caps frame rate at 18.4 fps
- Monochrome so colour work needs external filters
- Solar imaging needs a filter that is not included
- Colour planetary work is not its strength
The ASI174MM-MINI is the pick if you want a monochrome camera that does one thing exceptionally well. Its 5.86 micron pixels are the largest in this roundup, which makes it the natural partner for a fast Newtonian or a short refractor where you would otherwise be wasting resolution on empty magnification.
All thirteen published reviews are five stars, and the praise is consistent: sensitive low-noise detection of faint guide stars, a compact red anodised CNC aluminium body weighing 60 grams, and painless compatibility with standard Windows, Mac and Linux capture software.
The larger chip area also gives it a wider field, which community imagers point to when using it off-axis for guiding. That is a practical advantage over tiny entry-level mono chips when the sky is bright and guide stars are scarce.
Why the big pixels matter
Five point eight six microns multiplied by six gives f/35 as a theoretical match, but the practical rule is simpler. Large pixels oversample the seeing disc rather than the sensor, so they are forgiving on short focal ratios and short focal lengths. You get usable detail even at 400mm where a 1.45 micron camera would show you a postage stamp.
For guiding in particular, big pixels gather more light per frame, which means you can run short exposures and follow a planet without the guide loop reacting to thermal changes. That is why mono cameras get recommended for both jobs at once.
Where it will frustrate you
USB 2.0 caps it at 18.4 fps at full resolution. You can crop the region of interest to gain speed, and plenty of planetary imagers do exactly that, but the raw headline rate is well below the USB 3.0 cameras in this list.
It is monochrome, so reproducing colour means shooting the same view through red, green and blue filters, and those filters plus a filter wheel are not included. Solar work also requires a proper safe solar filter. If you want one camera for everything and want colour out of the box, this is not it.
4. Celestron NexImage 20: Best for Lunar Mosaics
Celestron NexImage 20 Solar System Imager – Lunar & Planetary Camera, Color
20MP AR2020 BSI sensor
5240x3840 at 1.4um pixels
ROI sub-framing
Built-in autoguiding
USB-C powered
Pros
- 20MP back-illuminated sensor captures fine crater detail
- Region of interest cropping raises frame rate on small targets
- USB-C powered with no separate power supply
- Bundled iCap software and a two-year warranty
- Can double as an autoguider on a guidescope
Cons
- Driver installation problems reported on Windows 11
- Some buyers could not get it running at all
- Manual exposure control only
- Share of one-star reviews reflects setup friction
The NexImage 20 is built by a mainstream optical company, and it behaves like one. It ships with iCap capture software, a two-year US warranty and unlimited US-based support, which matters if you would rather phone someone than read a forum thread at midnight.
The 20MP AR2020 back-illuminated sensor at 5240×3840 with 1.4 micron pixels gives you the widest field in this roundup. For lunar mosaic work and wide terminator sequences that is the whole game, because you are stitching panels of a large target.
Region of interest cropping is a genuine feature rather than a checkbox here. Narrow the capture area around a crater cluster and the frame rate rises, which shortens stacking time on the specific feature you care about.
Best used as a second camera
Its built-in autoguiding support means the NexImage 20 can guide a deep-sky session on a guidescope while another camera handles long exposures. That flexibility is unusual in a camera marketed at planetary imagers, and it extends the value well past first use.
The plug-and-play claim also holds for most buyers: they report connecting it to a telescope and computer without fuss, and it is USB-C powered, so there is no separate power supply to cable up in the field.
The real problem is software, not silicon
A meaningful share of reviews describe driver installation failures, most often on Windows 11, with at least one buyer unable to run the camera at all. The 3.9 average across twenty-one reviews reflects that split: 60 percent five stars, but 13 percent one star.
That is worth weighing against the hardware. The sensor is capable, but budget an afternoon for driver troubleshooting and check compatibility reports for your exact operating system before you buy. Manual exposure control also means more setup work than cameras with auto modes.
5. yancinne ASI120MC-S: A Familiar Model Name, Thin Documentation
1PCS New ASI120MC-S color planetary camera with high speed USB3.0 interface
Colour planetary camera model
USB 3.0 interface claimed
FHD 16:9 frame capture
JPEG stills and MP4 video
Pros
- Carries a widely recognised planetary camera model name
- Claims a high-speed USB 3.0 interface
- Lists compatibility with computers tablets and smartphones
- MP4 video and JPEG stills both supported
Cons
- No customer reviews or rating on this listing
- No published sensor resolution pixel size or frame rate
- Sold under a third-party brand rather than an authorised astronomy maker
- Listed in a home improvement category rather than astronomy
This listing carries the ASI120MC-S model name, which is one of the more established names in planetary imaging, and it claims a high-speed USB 3.0 interface. That is where the good news ends for anyone trying to compare specifications.
There are no published sensor resolution, pixel size or frame rate figures on the page. Without those three numbers you cannot check the pixel match against your focal ratio, and you cannot tell whether the frame rate is native or cropped. That is the single most important distinction when reading any planetary camera spec sheet.
The listing does claim compatibility with computers, tablets and smartphones, which would be genuinely useful if it holds. Manual focus with a 16:9 aspect ratio and MP4 output round out what is stated.
Why the model name is not enough
Forum advice across astronomy communities still centres on older silicon that has been superseded, and that creates a trap: a recognisable model name on a third-party listing can send you toward legacy hardware with no published specs to justify the price.
Community members also recognise when a camera is listed by a brand with no real astronomy support behind it. Manufacturer warranty and driver maintenance matter more than most shoppers expect, because astronomy cameras need firmware that keeps pace with software.
Who this actually suits
If you are buying a complete beginner setup and want something that connects without fuss, the plug-and-play claim is appealing. Verify it works with your capture software before committing to a full imaging train around it.
Check that the seller will confirm native resolution and pixel size in writing. If they will not, we would rather you spent the money on a camera whose numbers you can verify, because those numbers determine whether the camera matches your telescope at all.
6. Generic 2.07MP USB 3.0 Camera: The Raw Frame Rate Leader
3.0 Color Planetary Camera, 2.07mp High-Speed Astronomy Imaging Tool for Telescope, Low Noise & Multi-Platform Support
2.07MP back-illuminated CMOS
Up to 107.6 fps at full resolution
USB 3.0 with DDR3 cache
Plug-and-play on Windows Linux and macOS
Pros
- Up to 107.6 fps at full resolution
- Back-illuminated 2.07MP sensor targets low noise
- DDR3 cache built in for lag-free transfer
- Tool-free installation with no extra drivers
- Native plug-and-play on three operating systems
Cons
- No customer reviews or rating on this listing
- Generic branding with minimal published detail
- ABS housing is less thermally robust than metal
- First available only recently so long-term support is untested
On paper this is the fastest camera in the roundup. Up to 107.6 fps at full resolution over USB 3.0, from a 2.07MP back-illuminated CMOS sensor, with a DDR3 cache handling the data transfer so frames do not back up in the pipeline.
That cache matters more than the headline number suggests. A camera can advertise a high frame rate and still drop frames in practice if the transfer path cannot keep up, which is one of the most common complaints in forum threads about planetary capture. Buffering is the structural fix.
The installation story is also clean: tool-free setup with no additional drivers or accessories, and native plug-and-play support for Windows, Linux and macOS. For a portable kit that moves between machines, that is a real advantage.
Why the frame rate argument matters
Recording for one minute at 100 fps gives you roughly 6000 candidate frames, versus about 1800 at 30 fps. Stacking software keeps only the sharpest few percent, so your sample pool for lucky imaging is several times larger.
That is the arithmetic behind the whole reframe in this guide. Megapixels determine how much of the Moon fits in one frame. Frame rate determines how many chances you get at a moment of steady seeing on a planet. For planets, the second number does more work.
The honesty caveat
This listing has no customer reviews and carries generic branding with minimal published specification detail. The date first available is recent, which means there is no track record of long-term firmware support or driver updates.
The ABS housing is also less thermally robust than a metal body during long sessions, and heat is exactly what you do not want in a camera that will be running continuous video for an hour. Treat the specifications as promising but unproven.
7. Labetue ASI662MC: Built for Packing and Field Use
ASI662MC Portable Astrophotography Camera: Shockproof ABS Frame & Multi-Platform Connectivity for Night Observation Planetary Camera Color
Colour planetary camera
High-strength ABS housing
Tool-less installation
Multi-platform plug-and-play
Field and remote use
Pros
- Impact-resistant housing suits travel and star parties
- Tool-less installation with no extra drivers
- Multi-platform plug-and-play connectivity
- Compact and portable for remote observing
- Also usable for terrestrial photography
Cons
- No customer reviews or rating on this listing
- No published sensor resolution pixel size or frame rate
- Only a 90-day manufacturer warranty
- ABS is less thermally stable than metal for long runs
The Labetue ASI662MC is built around a simple premise: the camera you take to a dark site should survive the car journey. The high-strength ABS housing is impact resistant, and the whole point of the design is that it connects to a telescope without extra drivers or accessories.
Multi-platform plug-and-play connectivity means you can move between a laptop at home and a field setup without reinstalling anything. For imagers who drive to dark sites regularly, that removes a real friction point.
It is also listed as usable for terrestrial photography, which is a small thing but handy for testing focus and dialling in a new rig before you drive anywhere.
What portability buys you
Remote and field observing is where a lighter, simpler camera earns its place. Less to assemble means less to go wrong in the dark, and tool-less installation means you can be capturing rather than hunting for the right adapter.
The same portability argument applies to a battery-powered field setup, where every extra cable and power requirement is friction. A single body that draws power and data from one connection keeps the load-out simple.
What the missing numbers mean for you
There are no published sensor resolution, pixel size or frame rate figures, and no customer reviews. Without pixel size you cannot apply the focal ratio rule, which means you are buying on housing and connectivity rather than on imaging performance.
The 90-day warranty is also much shorter than what the established astronomy brands offer on cameras of this class. Longer sessions can warm an ABS housing more than metal, so thermal stability is the other thing to watch during a long planetary recording.
8. Astromania Solar System Imager: The Lowest-Cost Way In
Astromania Camera Solar System Imager – Photos from the Planets Directly onto Your PC – Multicolour Imaging
Multicolour planetary capture
Sends images directly to a PC
2x zoom ratio
12 ounce body
Infrared noted
Pros
- Lowest entry point in this roundup
- Colour planetary capture from a specialist astronomy brand
- Direct PC connection with no complex setup
- Lightweight at 12 ounces for portable use
- Multicolour output avoids filters and filter wheels
Cons
- No customer reviews or rating on this listing
- No published sensor resolution or frame rate
- Listing bullets appear to describe a dovetail rail rather than the camera
- Older corded-electric design with manual focus only
The Astromania Solar System Imager is the simplest way to find out whether planetary imaging is for you. It sends multicolour images directly to a PC, which means no filter wheel, no IR-cut filter juggling and no colour reconstruction workflow.
At 12 ounces it is the lightest body here, and it plugs straight into a personal computer. Manual focus with a 2x zoom ratio is the entire feature list, and an infrared capability is noted in the specification.
That simplicity is the point. Many people buy an expensive camera, discover that the hard part is stacking software rather than hardware, and give up. This one lets you learn the workflow at low cost.
Best used as a learning camera
Threads across astronomy forums repeatedly describe beginners stalling at the capture step, and the fix is usually practising on something cheap. Understanding frame scoring, lucky imaging and stacking is worth doing before you invest in a faster sensor and longer cables.
Colour out of the box also avoids the common trap where beginners buy a monochrome camera and only later discover they need a filter wheel and a set of colour filters to get colour back.
What you give up to get it
There is no published sensor resolution or frame rate, and no customer review history, so we cannot tell you what the capture performance actually is. The design is also older: corded electric, manual focus only, no modern USB 3.0 claim.
One practical warning. The listing’s feature bullets appear to describe an included Vixen-style dovetail rail rather than camera capabilities, so treat the marketing copy with suspicion. Ask the seller for native resolution and pixel size before you commit.
9. Astromania Easy Autoguiding Set60: Camera and Guide Scope in One Box
Astromania Camera Easy Autoguiding Set60 – The Key to Successful Planetary Photos
1280x960 CMOS planetary chip
60mm guide scope
Worm-gear focuser
Synta-style mounting plate
Accepts any 1.25 inch eyepiece
Pros
- Pairs a guide scope and a sensitive CMOS camera in one purchase
- Worm-gear focuser focuses without rotating the camera
- 1280x960 chip has more area than typical entry cameras
- Attaches like a finder so you need less equipment
- Finder-style mounting keeps the guide star near the main field
Cons
- 60mm guide scope limits useful focal range to about 500-2000mm
- Manual focus only
- Guide scope is optimised for guiding rather than as a primary imaging train
The Set60 answers a problem most roundups ignore. If your telescope is not guided, a planetary camera on its own will not fix tracking error, and a separate guide scope plus guide camera is a second purchase. This bundle includes a 60mm guide scope and a sensitive low-noise CMOS planetary camera together.
Reviewers like the worm-gear focuser, which lets you focus rapidly without rotating the camera or the eyepiece, and the milled, knurled focusing ring on the black anodised aluminium housing for fine adjustment once you are close.
Attaching to the telescope like a finder keeps the guide star near the main field, which means smaller, cheaper guide corrections. The 61 percent five-star share across fifteen reviews reflects that convenience.
When the all-in-one approach pays off
If you are imaging with a Dobsonian or a short refractor that cannot carry a guide scope on the back, this is the tidy answer. It includes matching tube clamps and a Synta-style mounting plate, so it fits scopes that take standard finder hardware.
The 1280×960 chip has more area than typical entry-level cameras, which gives a wider field for finding a guide star in bright suburban skies.
Where the bundled scope limits you
The 60mm guide scope caps useful focal length at roughly 500 to 2000mm. Beyond that range the field of view becomes too narrow to reliably find and hold a guide star, so it is not a solution for long-focal-ratio planetary rigs.
It is a guide scope, not a second imaging train, and focus is manual only. Buy this for guiding; buy a dedicated camera like the SV305C Pro if the planetary imaging itself is the priority.
10. SVBONY MK105 Planet Photography Kit: A Telescope That Does Not Bend Light
SVBONY MK105 Planet Photography Kit
Catadioptric MK105 optical tube
Reflective principle avoids chromatic aberration
Compact metal mirror body
Usable with OTAs within 700mm
Pros
- Reflective design eliminates chromatic aberration completely
- Compact tube about half the length of an equal refractor
- Metal mirror body holds alignment during transport
- Fully multi-coated achromatic optical glass
- Suited to planetary visual work and binary stars
Cons
- No customer reviews or rating on this listing
- Limited to focal lengths within 700mm
- Included camera is not itemised in the listing specification
- Highest priced kit relative to its published detail
The MK105 is the odd one out in this roundup because it is a telescope rather than a camera, but it answers a question that camera lists never do. If you do not own a planetary-capable optical tube, no camera in this guide will help you.
Its reflective catadioptric design means there is no chromatic aberration and no light dispersion, which matters on the Moon and on bright planets where colour fringing around a limb is the first thing you notice on a cheap refractor.
The tube is compact at roughly half the length of a refractor of equal focal length, and the metal mirror body holds optical alignment during transport, which is the reason metal beats plastic in a bag in a car.
Who should pair a camera with this kit
Because the MK105 is compatible with optical tubes within 700mm focal length, it works as a short-focal-ratio platform. That means it pairs naturally with a camera carrying large pixels, such as the 5.86 micron ASI174MM-MINI, rather than with a fine-pixel camera you would have to crop hard.
It is also genuinely usable for visual planetary and binary star work, so it earns its place even on nights when the seeing is too poor for imaging.
The gap in the listing
No customer reviews are available, and the included camera is not itemised in the specification, so we cannot tell you what imaging hardware arrives with it. Confirm the contents before ordering.
The 700mm focal length limit is the other constraint. Anything faster than that and you are into empty magnification, which is the classic beginner trap where you magnify past the point where the atmosphere supports it.
What Pixel Size Do You Need?
Multiply the camera’s pixel size in microns by about 5 to 7 to get your usable focal ratio, and 6 is the standard rule. A 2.9 micron sensor works well at f/15 to f/20, while a 1.45 micron sensor suits a long f/10 Schmidt-Cassegrain with no Barlow at all.
Why this rule exists is sampling theory. Planetary detail lives in roughly 1 arcsecond, and you want at least two pixels across that scale to resolve it. When pixels are much smaller than the seeing disc, you are spending resolution on empty space between samples.
Here is how it maps in practice using cameras from this roundup:
At 1.4 to 1.45 microns, the ZWO ASI715MC and Celestron NexImage 20 are natural partners for a long f/8 to f/10 telescope, or a fast refractor with a Barlow. At 5.86 microns, the ASI174MM-MINI is deliberately oversized, so it belongs on a short and fast tube. At around 2.9 microns you would sit near f/17, which is why that size tends to appear on long-focal-ratio solar and lunar rigs.
One important nuance. The rule describes focal ratio, not focal length. A fast wide-field refractor at f/5 behaves like a slow long tube at the same focal ratio for sampling purposes, which is why small pixels underperform there even though the image looks impressive at high magnification.
Frame Rate: The Spec That Actually Matters
Aim for at least 30 fps at your chosen recording resolution, and 60 fps or more if you can afford it. Recording Jupiter for one minute at 100 fps gives you 6000 candidate frames, versus only 1800 at 30 fps, and stacking software keeps just the sharpest few percent.
That is the whole ROI reframe in one line. Because you record a small region of interest around the planet rather than the full sensor, megapixel count above a couple of megapixels does very little work. Resolution you never record cannot sharpen anything.
The arithmetic runs the other way too. Ten seconds at 30 fps produces 300 frames, which is usually plenty on a steady night. The frame rate ceiling matters most on a marginal night, when the proportion of sharp frames is low and you need volume to get a usable sample.
Two practical checks before you record. Verify your real delivered frame rate in your capture software rather than trusting the spec sheet, because a slow USB cable, a laptop without genuine USB 3.0 bandwidth, or a Wi-Fi adapter can all halve what you actually get. And confirm the camera has a DDR buffer, because that is what stops dropped frames at high rate.
Mono vs Color: Which Should You Buy First?
Buy colour first unless you already know you want to filter. A colour sensor uses a Bayer matrix, which means it discards roughly two thirds of the incoming light to build one colour channel at a time. Mono cameras keep every photon and are correspondingly more sensitive.
The catch is that mono cameras cannot produce colour on their own. To get a natural-colour planet you need to shoot the same view through red, green and blue filters and combine them in processing, which means buying a filter wheel and a set of filters. Beginners regularly discover this cost after they have already bought the camera.
There is a third reason to want mono even if you shoot colour. A monochrome camera is also the better guiding camera, so one body can handle planetary capture and deep-sky guiding. If you own or plan a deep-sky rig, that dual role often justifies the mono choice on its own.
Note also that a UV and IR cut filter is mandatory on any planetary camera, mono or colour, because infrared light focuses differently from visible light and will soften the image. Mono cameras need the additional colour filters; colour cameras have the Bayer filter built in.
Match Your Camera to Your Telescope
Aperture matters more than focal length for planetary detail. An 8-inch Dobsonian or a Schmidt-Cassegrain around f/10 is the practical sweet spot, and roughly 8 inches of aperture is where you stop paying for empty magnification on a typical night.
With an 80 to 100mm refractor, you are usually running fast, so pair it with a fine-pixel camera and a Barlow to reach the right focal ratio. The ASI715MC and NexImage 20 both sit in that 1.4 micron range and fit this use well.
With an 8-inch Dobsonian at around 1200mm, forum imagers report consistent success imaging Jupiter, and aperture plus ROI cropping is what makes it work rather than megapixel count. The SV305C Pro at 107 fps is a natural match because a Dobsonian tracks poorly and you need many frames to average out the errors.
With a long Schmidt-Cassegrain at f/10, a fine-pixel sensor gives you scale without a Barlow. Adding a Barlow to an already long scope pushes you into empty magnification, which is the most common expensive mistake in this hobby.
For the Sun, a safe solar filter is non-negotiable and none of the cameras here include one. Solar imaging also rewards large sensors, because framing the whole disc is a field-of-view problem, and mono wins again when H-alpha work is the goal.
What You Need Besides the Camera
Nobody’s roundup covers this, and it is the most common practical blocker in forum threads. You need capture software, a correct USB 3.0 cable, and somewhere to put the data.
For capture, SharpCap, FireCapture and NINA all work with mainstream USB 3.0 astronomy cameras, and dedicated vendors bundle their own tools such as iCap. For processing, AutoStakkert or WinJupos handles frame scoring and stacking, with Registrax for alignment on Jupiter and Mars.
For the cable, this is where setup quietly goes wrong. A charge-only USB cable transfers no data, and many cheap USB 3.0 cables advertise the standard without the wiring to carry 5Gbps. That produces exactly the dropped-frame and slow-frame-rate behaviour users blame on the camera.
For storage, do the arithmetic before a long session. High-frame-rate video generates gigabytes quickly, and multiple forum threads describe drives filling faster than expected. A fast SSD with tens of gigabytes free saves a ruined evening.
What you do not need is cooling. A Peltier cooler is a deep-sky feature for long exposures where sensor heat builds across minutes; planetary frames are milliseconds long, so uncooled is the correct and cheaper choice. Our picks above are all uncooled for that reason.
If you would rather not drive a laptop into the field, an ASIAir or similar smart hub removes the computer entirely. Community consensus is strongly ZWO-favourable for that workflow, which is worth factoring into your brand choice if a hub is part of your plan.
Frequently Asked Questions
What is the recommended pixel size for planetary imaging?
Multiply the camera’s pixel size in microns by about 5 to 7 to get your usable focal ratio, and 6 is the standard rule. A 2.9 micron sensor works well at f/15 to f/20, while a 1.45 micron sensor suits a long f/10 Schmidt-Cassegrain with no Barlow at all.
Which planetary camera is considered the best?
The best planetary camera depends on your telescope, but for most imagers a colour camera with a fast Sony sensor and a high native frame rate is the sweet spot. Our top pick, the SVBONY SV305C Pro, leads this roundup on its 107 fps throughput, 0.7e read noise and 128MB frame buffer.
What is the best astronomy camera for a telescope?
For planets, the Moon and the Sun you want a fast, uncooled, high-frame-rate USB 3.0 camera with pixels matched to your focal ratio. For galaxies and nebulae you want the opposite: a cooled, low-read-noise, high-resolution camera. Cooling is not needed for planetary work at all.
How much difference does a planetary camera make?
More than most people expect, but only if capture is the bottleneck. A phone or DSLR in video mode can produce a sharp frame if it is roughly focused, but a dedicated camera gives you many more frames per minute, lower noise and steadier transfer. If your existing video is soft because of tracking or focus, a new camera will not fix it.
Do I need a mono or colour planetary camera?
Buy colour first unless you already know you want to filter. A colour sensor uses a Bayer matrix and discards roughly two thirds of the light, but it works out of the box. Mono keeps every photon and captures more detail, but needs red, green and blue filters plus a filter wheel to reproduce colour, and it is also the better guiding camera.
What frame rate do I need for planetary imaging?
At least 30 fps at your chosen recording resolution, and 60 fps or more if you can afford it. Recording for one minute at 100 fps gives 6000 candidate frames versus 1800 at 30 fps, and stacking keeps only the sharpest few percent. Check your real delivered rate, because cables and ports can cut it sharply.
Final Verdict: Which Planetary Camera Should You Buy?
If you want one camera that handles planets, guiding and lunar work without a learning curve on hardware, the SVBONY SV305C Pro is the pick. Its 107 fps at 1920×1080, 0.7e read noise and 128MB frame buffer make it the most complete single purchase in this roundup, and it guides through ST4 when you switch to deep sky.
For the Moon and the Sun, the ZWO ASI715MC wins on field of view, with a 1.45 micron pixel size that suits a long focal ratio without a Barlow. For monochrome work and off-axis guiding, the ZWO ASI174MM-MINI is the specialist choice, though USB 2.0 limits its frame rate.
Match pixel size to focal ratio before anything else, buy uncooled, and check the software and cable situation early. Those three decisions explain more about your final images than any megapixel figure on a spec sheet.